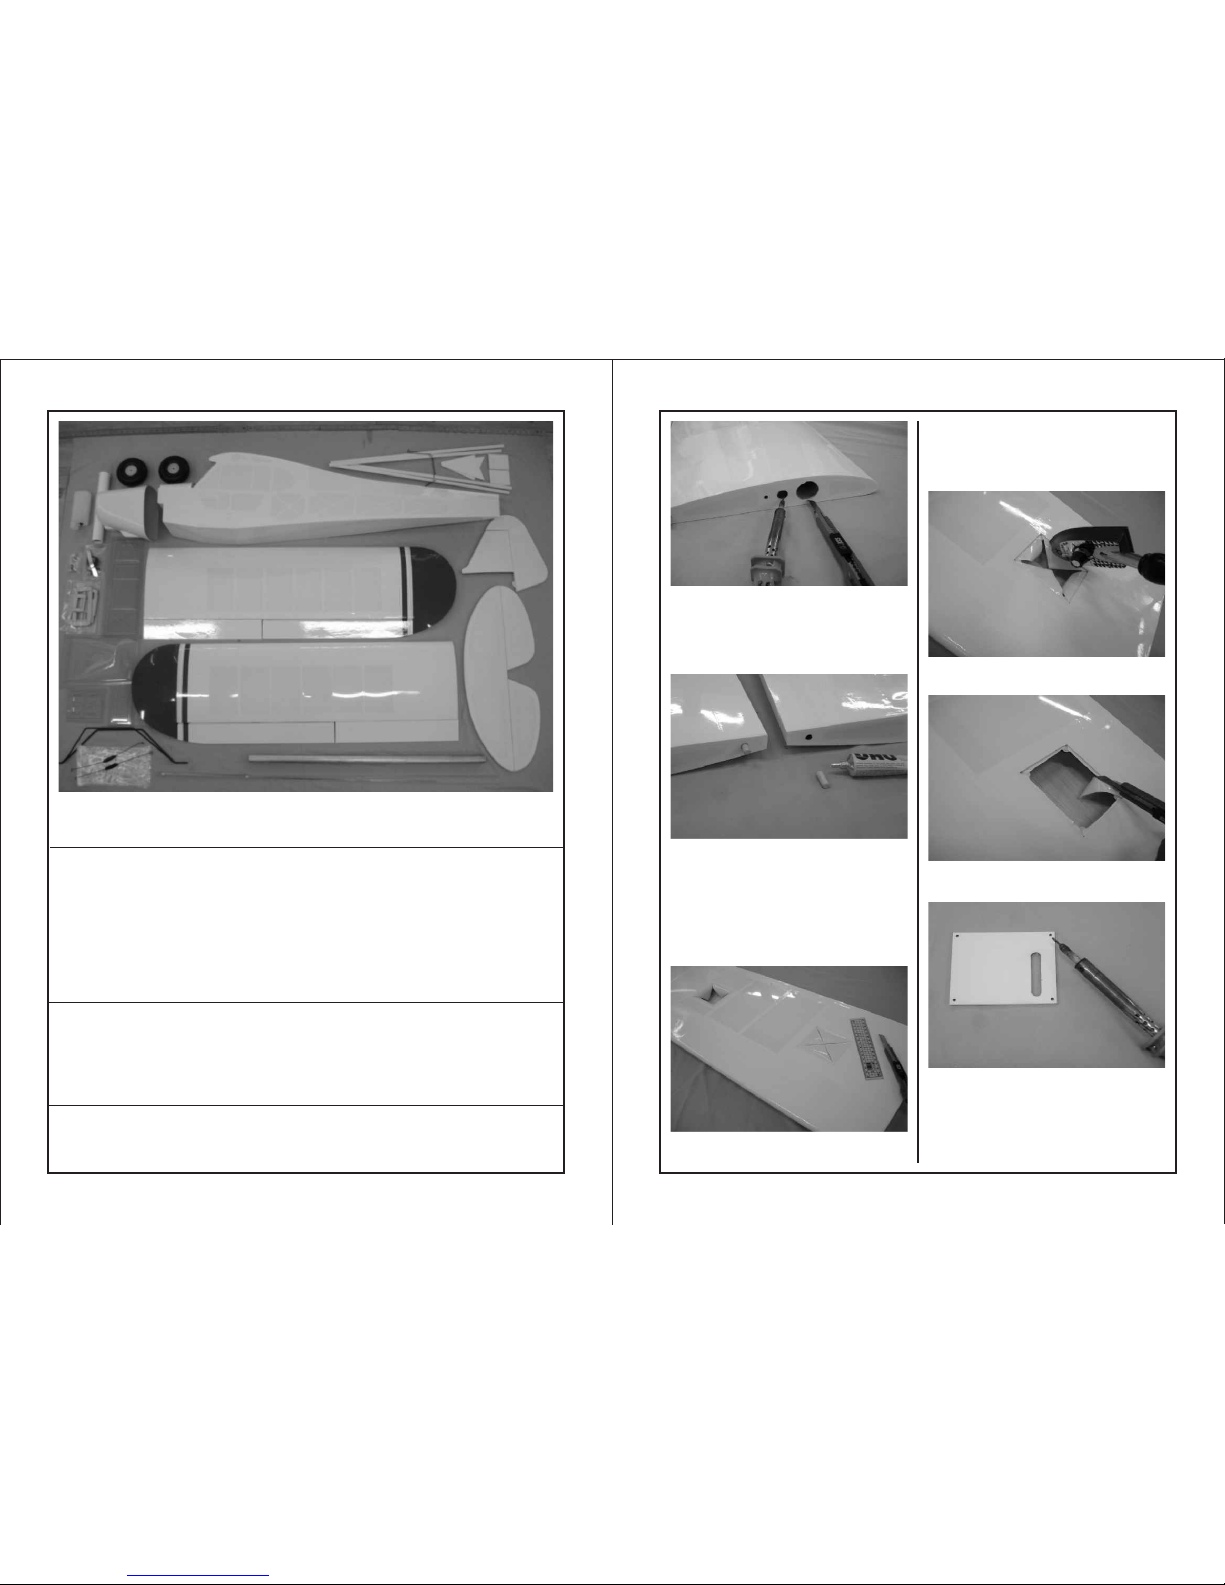
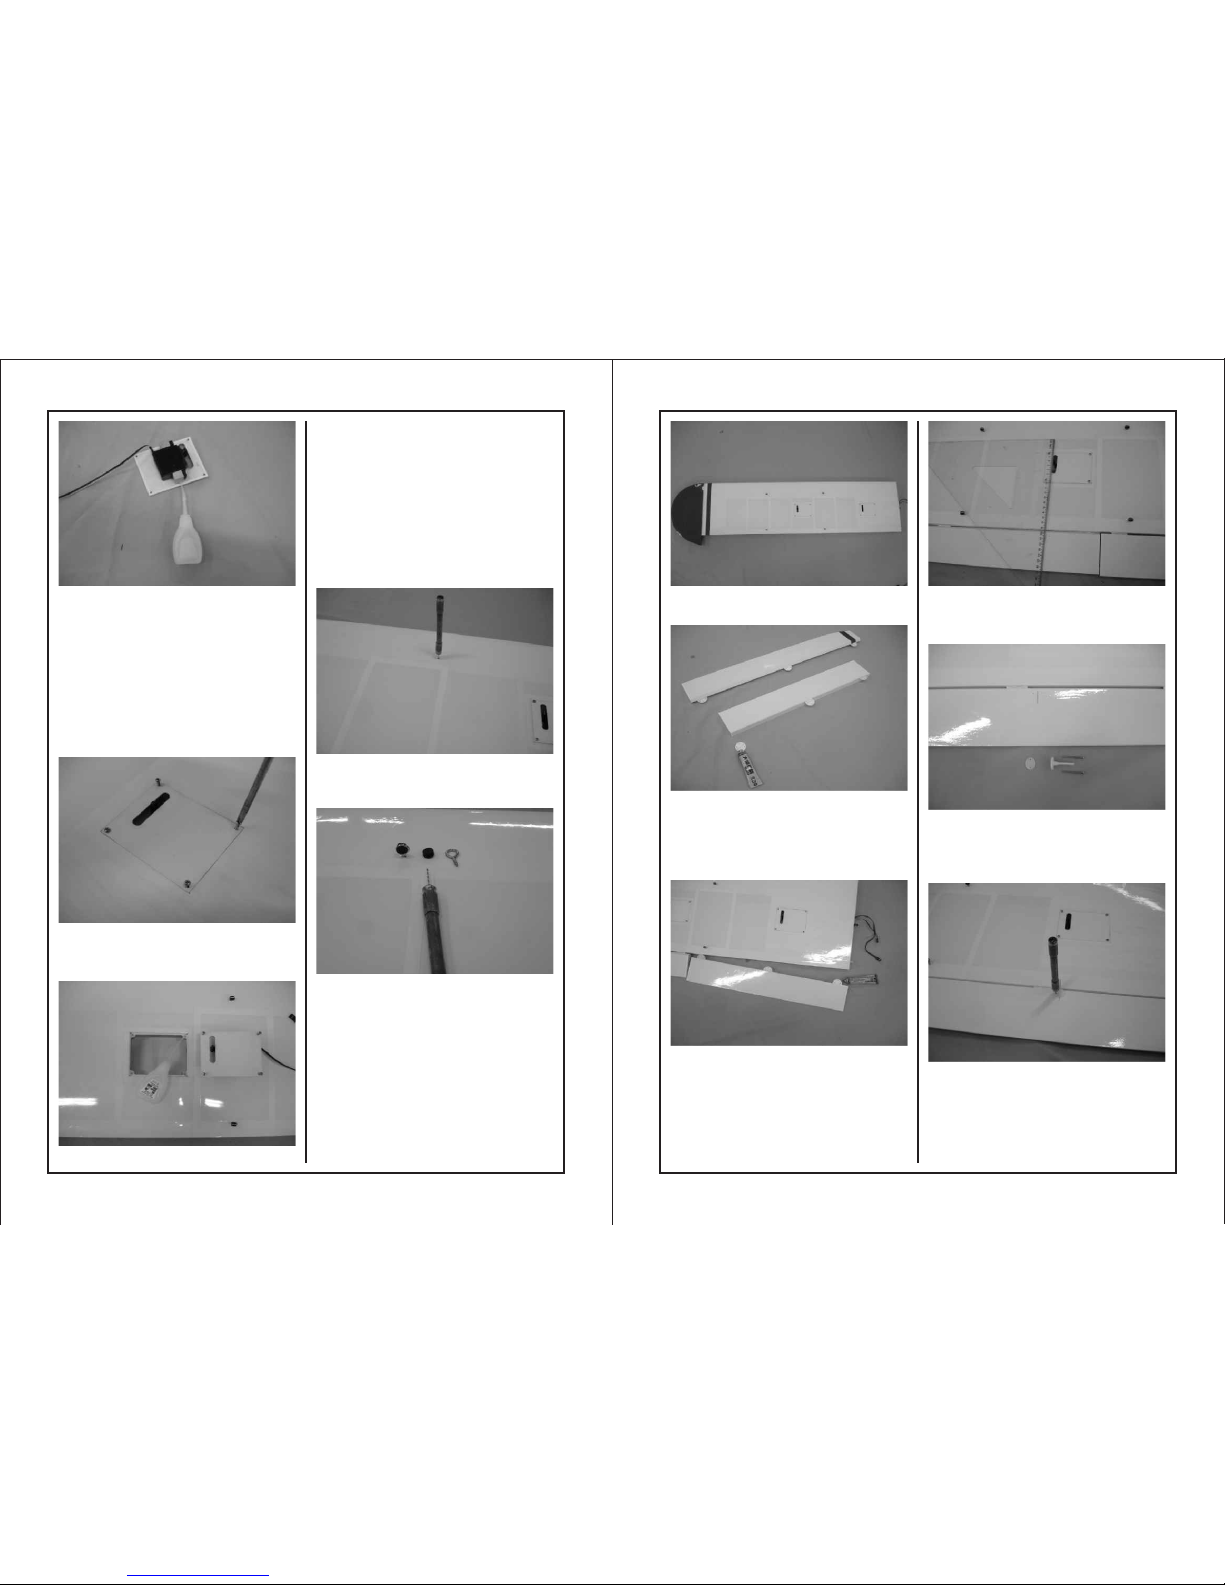
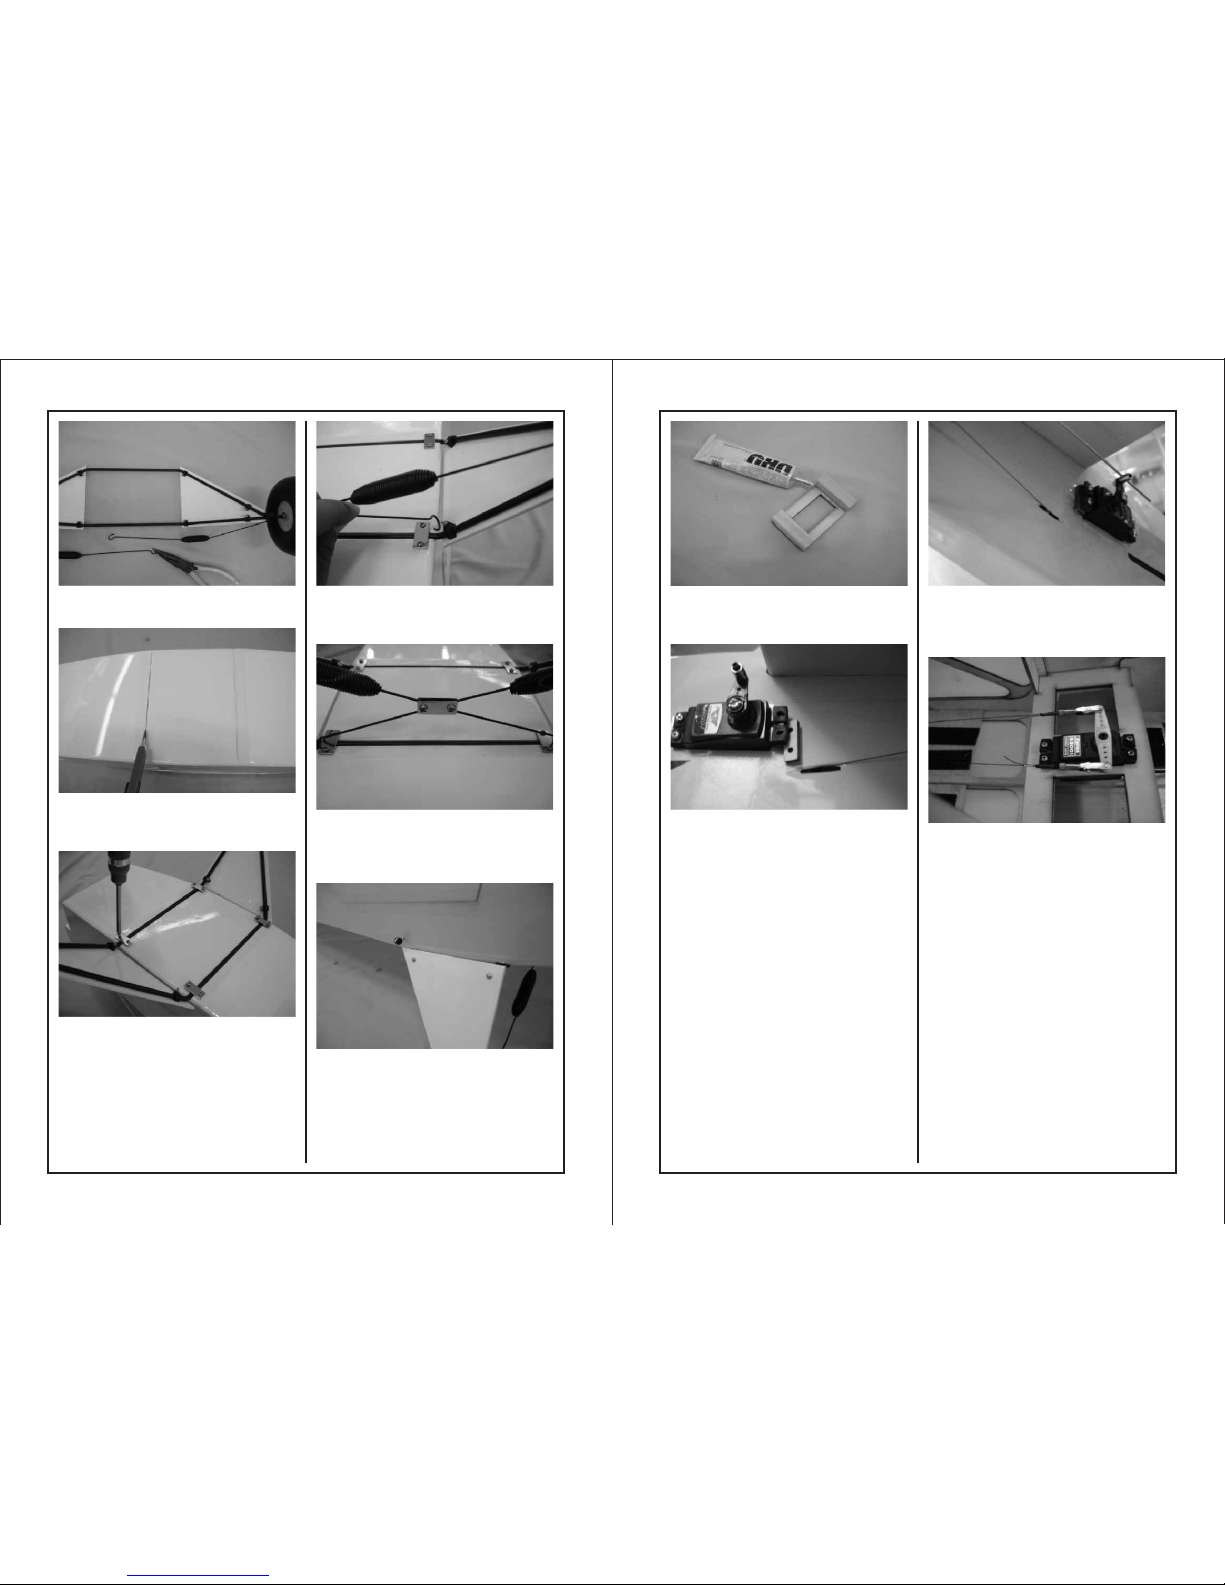
Super Flying Model 8709 User manual
Other Super Flying Model Toy manuals

Super Flying Model
Super Flying Model EP-46K User manual

Super Flying Model
Super Flying Model PIPER CUB J-3 GP/EP User manual

Super Flying Model
Super Flying Model Sbach 342 Thunderblot User manual

Super Flying Model
Super Flying Model Fournier RF-4D User manual

Super Flying Model
Super Flying Model PIPER CUB J-3 GP/EP User manual

Super Flying Model
Super Flying Model TRI-40 II GP/EP User manual

Super Flying Model
Super Flying Model P-51D Mustang User manual

Super Flying Model
Super Flying Model SE5a User manual

Super Flying Model
Super Flying Model P-51D Mustang User manual

Super Flying Model
Super Flying Model Sbach 342 Thunderblot User manual


Popular Toy manuals by other brands

FUTABA
FUTABA GY470 instruction manual

LEGO
LEGO 41116 manual

Fisher-Price
Fisher-Price ColorMe Flowerz Bouquet Maker P9692 instruction sheet

Little Tikes
Little Tikes LITTLE HANDIWORKER 0920 Assembly instructions

Eduard
Eduard EF-2000 Two-seater exterior Assembly instructions

USA Trains
USA Trains EXTENDED VISION CABOOSE instructions