Superabrasive InovaCrete System manual

®
Page 1of 8
SECTION 03 35 43 Updated April 6, 2011
SECTION 03 35 43 - POLISHED CONCRETE FINISHING
InovaCrete® Polished Concrete Floor Finish
(GUIDE SPEC)
PART 1 GENERAL
1.01 SUMMARY
This Section includes information about:
A. Polished concrete finish in accordance with InovaCrete® concept for
polishing concrete.
B. All labor, material, equipment and services necessary for the diamond
grinding and polishing of concrete floors in accordance with the InovaCrete®
concept.
C. Applying densifying impregnator/sealer and polishing to specified sheen
level and aggregate exposure.
1.02 REFERENCES
A. American Concrete Institute (ACI):
1. ACI 117 - Standard Specifications for Tolerances for Concrete
Construction and Materials; American Concrete Institute.
2. ACI 301 – Specifications for Structural Concrete for Buildings; American
Concrete Institute.
3. ACI 302.1R – Guide for Concrete Floor and Slab Construction; American
Concrete Institute.
B. American Society for Testing and Materials (ASTM):
1. ASTM C 779 - Standard Test Method for Abrasion Resistance of
Horizontal Concrete Surfaces, procedure A.
2. ASTM E 1155 - Standard Test Method for Determining F (F) Floor
Flatness and F(L) Floor Levelness Numbers; 1996.
3. ASTM 1028 – Coefficient of Friction.
4. ASTM C 805 – Impact Strength.
5. ASTM G 23-81 – Ultraviolet Light & Water Spray.
6. ASTM C 150 – Type I, II Portland Cement Conformity, depending on soil
conditions.
7. ASTM C 33 – Aggregate Conformity.

®
Page 2of 8
SECTION 03 35 43 Updated April 6, 2011
C. Other Tests:
1. Reflectivity.
1.03 SUBMITTALS
A. Prior to commencement of work submit all product data sheets for
concrete densifiers/hardeners, grinding equipment, vacuum systems, joint
fillers and diamond tooling to be used.
B. Installation contractor’s qualification history/data.
C. Manufacturer’s Certification – Provide a letter of certification from
product manufacturer(s) stating that the installer is a Lavina SPS System
certified applicator and is familiar with the proper procedures, surface
preparations and installation requirements recommended by the
manufacturer(s).
D. Samples: Prior to commencement of work provide 10’ x 10’ finished
samples for the Owner’s review. See 1.06 Mock-Up.
E. Provide maintenance procedures for the polished concrete floor to the
Owner’s Representative.
1.04 QUALITY ASSURANCE
A. Installer Qualifications: Installer shall be an InovaCrete®certified applicator
regularly engaged in the installation of polished concrete floor system.
B. Single Source Responsibility: All required materials and installation personnel
to be provided by the installing contractor.
C. Pre-pour Meeting: The contractor shall conduct an onsite meeting before the
pour/placement of the concrete slab related to this section with the Owners
Representative, concrete finishing contractor and concrete polishing
contractor to review requirements necessary for a successful polished floor
surface.

®
Page 3of 8
SECTION 03 35 43 Updated April 6, 2011
D. Pre-installation Meeting: The Contractor shall conduct an onsite pre-
installation meeting with the Owner in which the written floor finishing plan
is reviewed. Pre-installation meeting shall include a walk down of the floor to
review the condition of the floor and to determine surface preparation
requirements. Additional topics of discussion shall include:
1. Floor surface preparation, cleaning, and protection.
2. Previous products applied to concrete floors, including curing compounds.
3. Application means and methods, including equipment to be used.
4. Sequence of installation.
5. Location of sample finished area.
6. Desired sheen and appearance of the finished floor.
7. Acceptability of finished slab and/or deficiencies of finished slab and
associated remedies.
1.05 PROJECT/SITE CONDITIONS
A. Floor areas to be polished are to be free and clear of all obstacles including
racking, fixtures and temporary equipment and materials in order to provide
an open and uninhibited concrete slab.
B. Any anchoring bolts, cut off conduit and other associated items removed in a
demolition process need to be removed or recessed a minimum of ¼” below
lowest surrounding point of the concrete floor surface.
C. All previous flooring materials such as tile, carpet and wood flooring and
associated adhesives are to be removed prior to the installation of the polished
concrete flooring. Caution needs to be taken to ensure that no damage to the
concrete floor takes place since the slab will be the finish product.
D. A minimum of 28 days of cure on new concrete should be provided before
system installation is initiated.
E. Protection: General Contractor shall protect areas to receive polished concrete
finish at all times during construction to prevent oils, dirt, metal, excessive
water and other potentially damaging materials from affecting the finished
concrete surface. Protection measures listed below shall begin immediately
after the concrete slab is poured:
1. Protect from all petroleum stains during construction.
2. Diaper all hydraulic powered equipment.
3. Do not park vehicles on inside slab.
4. No pipe cutting machines will be used on inside floor slab.
®
Page 4of 8
SECTION 03 35 43 Updated April 6, 2011
5. Do not place reinforcing steel on interior slab, to avoid rust stains.
6. Do not use acids or acidic detergents on slab.
7. Inform all trades that the slab is to be protected at all times.
8. No skids are to remain in contact with floor surface for an extended
period of time.
F. Ensure that adequate lighting has been installed to support surface preparation
and polishing application. A minimum of half the illumination of an open
facility is required.
1.06 MOCK-UP
A. Install a completed 10’x 10’ sample of the proposed system at location
determined by the Owner’s Representative. If approved by owner or owner’s
representative, the mock-up may be incorporated into the work. If a special
concrete slab is placed for installation of sample, it must meet the same
specification as the project’s flatwork requirements for the polished concrete
floor areas.
B. Equipment, tooling and products used are to be the same specified in Section
2.02 and the same that will be used for the entire project.
1.07 WARRANTY
C. The installer shall furnish a SINGLE SOURCE warranty for their system for a
period of one year minimum.
1.08 ENVIRONMENTAL LIMITATIONS
A. Comply with manufacturers’ written instructions for substrate temperature and
moisture content, ambient temperature and humidity, ventilation and other
conditions affecting chemical performance.
B. Flatness and levelness:
1. Finish Concrete shall have a minimum Floor Flatness rating of at least 40.
2. Finish Concrete shall have a minimum Floor Levelness rating of at least 30.
3. Finish Concrete shall be cured a minimum of 28 days or at which point
equipment can be put on the slab and does not displace aggregate.

®
Page 5of 8
SECTION 03 35 43 Updated April 6, 2011
C. Application of finish system shall take place a minimum of 21 days prior to
fixture and trim installation and/or substantial completion.
D. Finish Concrete area shall be closed to traffic during finish floor application
and after application, for the time as recommended by manufacturer.
1.09 CONCRETE MIX DESIGN
Note to specifier:
1. Minimum concrete compressive strength should be 3,500 psi.
2. Normal Weight concrete, No light weight aggregate.
3. Non-Air entrained.
4. Natural Concrete slump of 4 ½ to 5”, Admixtures may be used.
5. Flatness requirements:
a. Overall Ff 40
b. Local Ff 20
c. Overall FL not required
d. Local FL not required
2. Tight Hard Troweled (three passes) concrete. No burn marks.
Reference ACI 302.1R, class 5 or class 6 floor.
3. Curing: Options:
a. ASTM C 309 Membrane forming curing
compound
i. No acrylic curing and sealing
compounds.
b. ASTM C 171 Sheet membrane
c. Damp curing, seven-day cure.
PART 2 PRODUCTS AND MANUFACTURERS
2.01 ACCEPTABLE PRODUCTS AND MANUFACTURERS
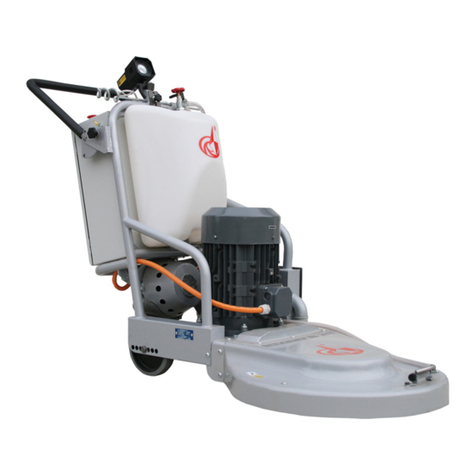
A. 3 or 6 head planetary rotating InovaCrete®approved floor grinder with at least
300 pounds of down pressure. For example: Lavina 25 Pro, Lavina 25N Pro,
Lavina 32 Pro by Superabrasive, Inc.
B. Dust extraction system for above grinders incorporating HEPA filter(s)
capable of containing airborne dust.
C. Hand or edge grinders with dust extraction or dust suppression attachment.

®
Page 6of 8
SECTION 03 35 43 Updated April 6, 2011
D. Grinding tools by Superabrasive, Inc.
1. Quick Change Metal bonded diamonds: 30, 50, 70, 120 grits
2. Calibra Ceramic bonded diamonds: 30, 50, 100, 200 grits
3. V-Harr®Resin bonded diamonds: 120, 220, 400, 800, 1800, 3500, 8500
grits
E. High speed burnisher – minimum 27 inch head generating 2,200 rpm or
greater.
F. V-Harr®Diamond impregnated burnishing pads by Superabrasive, Inc.
G. Penetrating liquid hardener/densifiers such as Prosoco LS/CS Lithium
Densifier/Lavina SPS Premium Densifier by Prosoco.
H. SL/85 polyurea polymer, semi-rigid joint filler by VersaFlex.
I. SLX 100 Oil repellent sealer by Prosoco.
J. Ameripolish Decorative Dyes by American Decorative Concrete.
K. Prosoco LS Guard/Lavina SPS Floor Glow by Prosoco.
PART 3 EXECUTION
3.01 EXAMINATION
A. Verification of Conditions: Examine surfaces scheduled to receive the work of
this section for defects that will adversely affect the execution and quality of
the work. Do not proceed until unsatisfactory conditions are corrected.
Provide in writing to Owner a list of the conditions.
B. New Concrete: Confirm that a minimum of 28 days has elapsed before
installation can begin. Also confirm if curing agents or hardening agents have
been applied.
3.02 PREPARATION
A. Cleaning and preparation:
1. Remove paint droppings by scraping, solvent stripper, and damp cloth.
Do not use stripper with acidic pH.

®
Page 7of 8
SECTION 03 35 43 Updated April 6, 2011
2. Remove oil spots with emulsifier and oil absorbent material followed by
detail scrub with high pH detergent.
3. Scrub floor with automatic scrubber capable equipped with soft brushes or
pads. Use proper dilution of pH neutral detergent.
4. Clean the floor completely of materials and debris.
5. Protect adjacent surfaces as required to prevent damage by the concrete
polishing procedure.
6. Set up grinding machine, dust extraction system, tooling and, if necessary,
generator.
3.03 POLISHING
A. Follow the polishing guidelines as listed in the project specification. The floor
finish and process steps will vary depending on customer requirements and
expectations. Below is a general guideline for a light salt and pepper concrete
floor application. If exposed aggregates are desired by the owner, metal bond
Quick Change tooling will be used in a 30 grit, 70 grit and 120 grit sequence.
1. Repair and fill any surface cracks as necessary.
2. Thoroughly clean the floor surface as specified in Section 3.02.
3. Start the process with a 50 grit Calibra Ceramic bonded diamond until a
uniform scratch pattern is achieved. Vacuum the floor thoroughly using
squeegee vacuum attachment.
4. Continue the process with 100 grit Calibra Ceramic bonded diamond until
a uniform scratch pattern is achieved. Vacuum the floor thoroughly using
squeegee vacuum attachment.
5. Install penetrating densifier as per manufacturer’s recommendation.
6. Continue the process with 220 grit V-Harr®Resin bonded diamond tools.
Vacuum the floor thoroughly using squeegee vacuum attachment.
7. Continue polishing with 400 grit V-Harr®Resin bonded diamond tools.
Vacuum the floor thoroughly using squeegee vacuum attachment.
8. Continue polishing in succession with each resin diamond pass as listed
below to progressively polish the floor slab to the desired level. Vacuum
the floor thoroughly using squeegee vacuum attachment between each
step.
a) 800 grit V-Harr®Resin bonded diamonds – low gloss.
b) 1800 grit V-Harr®Resin bonded diamonds – medium gloss.
c) 3500 grit V-Harr®Resin bonded diamonds – high gloss.
9. Apply Prosoco LS Guard/Lavina Glow by Prosoco surface treatment. Use
of pump up air sprayer with a fine conical tip and microfiber applicator
required.
10. High speed burnish with a V-Harr®Buff diamond impregnated burnishing
pad to complete the floor finish.

®
Page 8of 8
SECTION 03 35 43 Updated April 6, 2011
11. Polished floor surface finish edges by stationary objects including interior
partition walls need to be addressed in accordance with the specified notes
on the finish schedule.
3.04 CLEANUP
A. Dispose of used materials in accordance with local regulations. Concrete dust
collected from the installation of the system shall be the responsibility of the
originator of the work.
3.05 PROTECTION
A. Keep premises clean and free of debris.
B. Protect adjoining surfaces from damage, dust and spatter related to the work
of this section.
1. Repair damage caused by the work of this section.
2. Clean dust and spatter from adjoining surfaces.
C. Advise all contractors, vendors and others working in the areas completed that
the concrete slab surface is the finished floor and is to be protected
accordingly as in Section 1.05 F.
D. Protect floors from damage until Grand Opening. Use of plastic sheeting is
not permitted.
E. Follow system manufacturer’s instruction for cleaning to ensure proper
protection from dirt and debris.
3.06 INSPECTION
A.Request acceptance by Owner’s Representative for the finished floor.
B. Correct all unacceptable work to the satisfaction of the Owner’s
Representative.
END OF SECTION
Table of contents
Other Superabrasive Sander manuals

Superabrasive
Superabrasive LAVINA 20N-S-OE User manual

Superabrasive
Superabrasive LAVINA 38GR -X User manual

Superabrasive
Superabrasive LAVINA 20N-S User manual

Superabrasive
Superabrasive LAVINA B21-E User manual

Superabrasive
Superabrasive Lavina 21 Series User manual

Superabrasive
Superabrasive LAVINA 20-S-E User manual

Superabrasive
Superabrasive LAVINA 30L-X User manual

Superabrasive
Superabrasive Lavina Elite L20EU User manual

Superabrasive
Superabrasive LAVINA 30G-X User manual