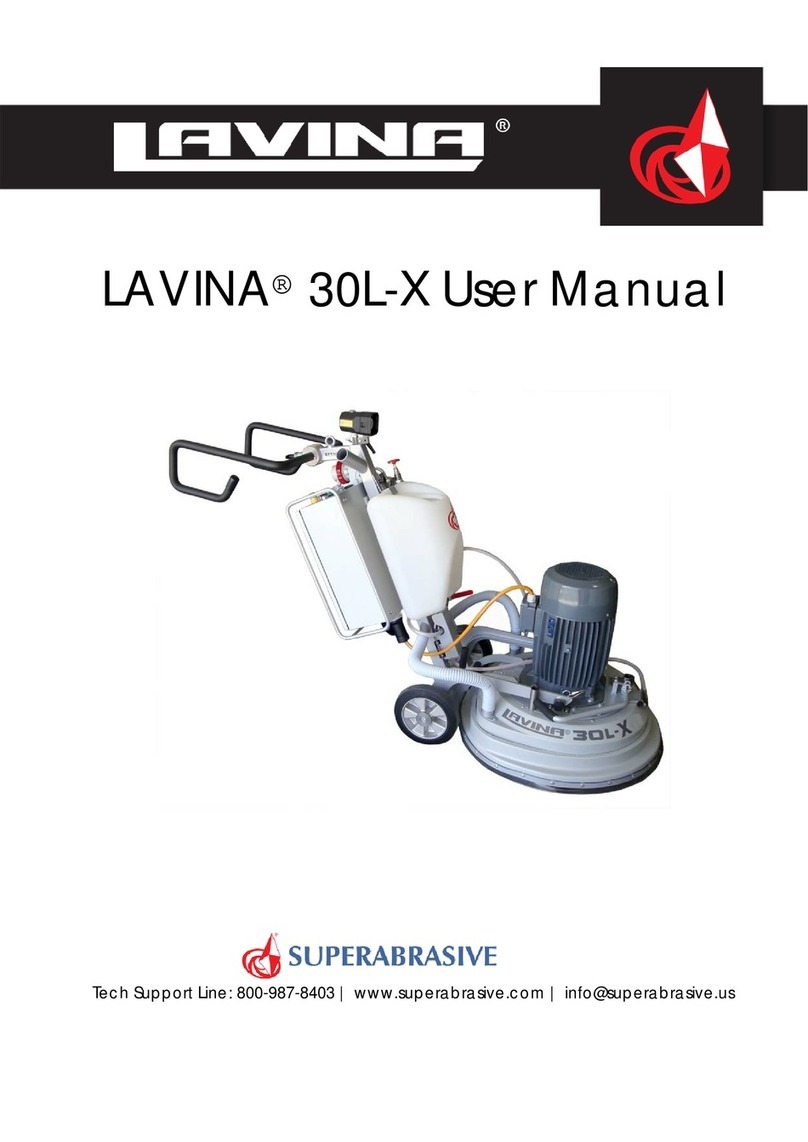
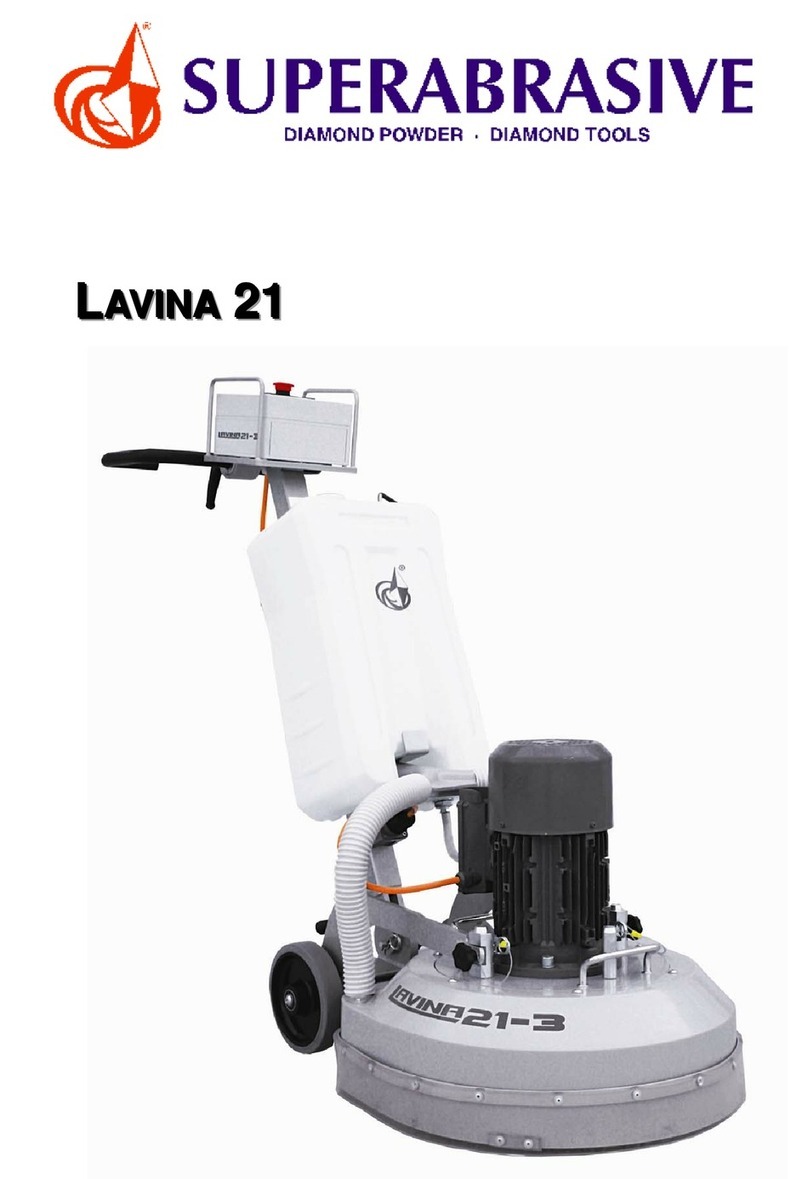
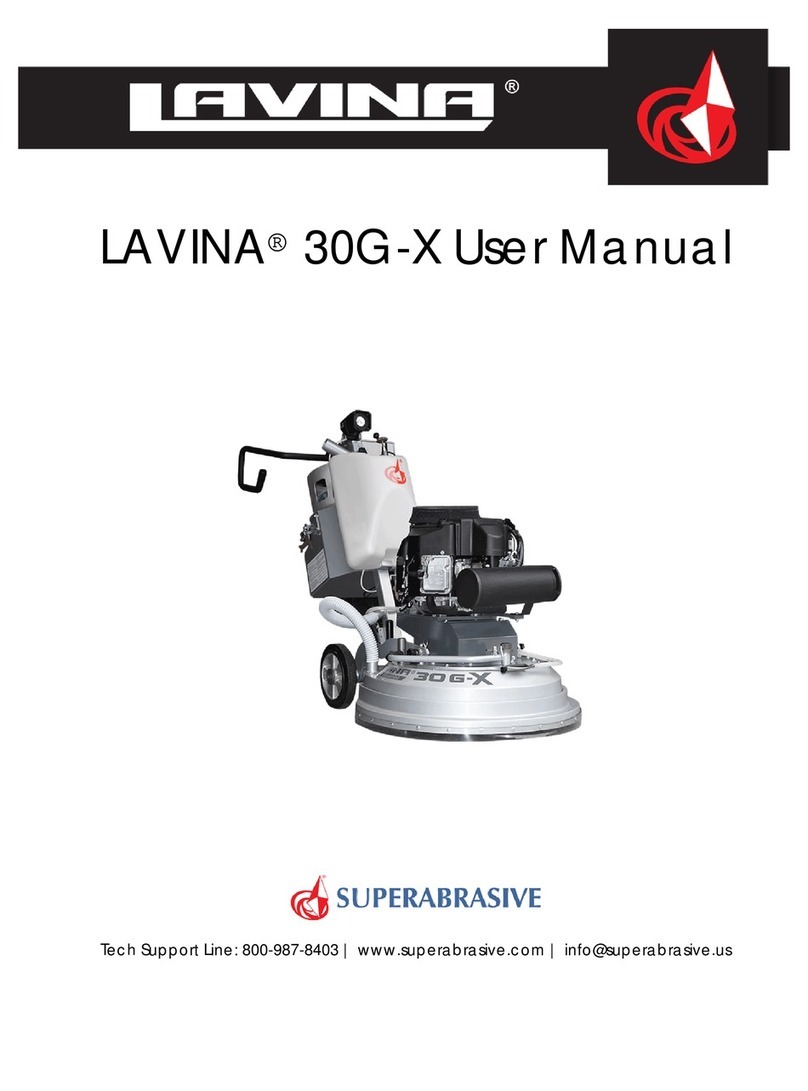
Superabrasive LAVINA 20N-S User manual

LAVINA®20N-S User Manual

Superabrasive UserManual OriginalLanguageLavina®20N‐S/Lavina®20N‐S‐HV 8/2014
2

Superabrasive UserManual OriginalLanguageLavina®20N‐S/Lavina®20N‐S‐HV 8/2014
3
WARRANTY AND RETURNS
WARRANTY POLICY FOR LAVINA® S MACHINES
A warranty card must be submitted to Superabrasive within 30 days of purchase in order for the foregoing warranty to
apply.
You can either mail a hard copy of the warranty card or submit it electronically - see page 2.
Superabrasive warrants, from the time of delivery and receipt by the original customer, new and unused products
sold by
Superabrasive or Superabrasive-appointed distributors or dealers. Goods shall be free from defects in
materials and
workmanship. Superabrasive or a Superabrasive-appointed repair facility shall either replace or
repair any defects in the
Goods resulting from faulty design, materials, or workmanship. Products repaired or
replaced during the warranty period
shall be covered by the foregoing warranty for the remainder of the original
warranty period, or ninety (90) days from date
of the repair or shipment of the replacement, whichever is longer.
Spare parts for repair will be either new or equivalent to
new.
Warranty period shall be 2 years from the time of delivery and receipt by the original customer, or 600 operating
hours on
the machine - whichever occurs first. Superabrasive will cover the shipping charges for the transportation
of the machine to
Superabrasive (or an approved repair facility) and back to the customer (within the contiguous 48
United States) in the event
that the damage occurs and is reported within the first 90 days or 200 operating hours -
whichever occurs first. Shipping
charges, if covered by Superabrasive, must be agreed upon in advance and
approved by Superabrasive. Thereafter, the
customer will have to cover the shipping charges to Superabrasive and
back. Superabrasive will not warranty Goods after a
period of 2 years from the time of delivery and receipt by the
original customer, or 600 operating hours on the machine -
whichever occurs first.
Superabrasive shall not be liable for any defects that are caused by circumstances that occur after the Goods
have been
delivered and whilst the Goods are in the possession of the purchaser. Furthermore, the warranty
does not include normal
wear and tear or deterioration. Wear parts are not warranted. Superabrasive is not liable
for defects arising out of use of
non-OEM parts.
The Warranty is void if the purchaser has not followed the maintenance plan stipulated by the machine’s manual
and
warranty card. The warranty is void if the purchaser repairs said Goods himself, or if repairs are conducted by a
repair facility
that is not approved by Superabrasive. Superabrasive’s liability does not cover defects which are
caused by faulty
maintenance, incorrect operation, faulty repair by the purchaser, or by alterations conducted
without Superabrasive’s prior
written consent. The same applies to any alterations of the Goods or services
performed by another party other than
Superabrasive, a Superabrasive-appointed distributor, or a Superabrasive-
approved repair facility. The warranty is not
applicable on a defect that arises due to tools or parts that are not
original to Superabrasive. Replaced defective parts shall
be placed at Superabrasive’s disposal and shall become
property of Superabrasive. If such defective parts are replaced
within the warranty period, the shipping charges will be covered by Superabrasive. In warranty complaint cases,
when no
defects are found for which Superabrasive is liable, Superabrasive shall be entitled to compensation for
the labor, material
cost, and shipping charges, incurred by Superabrasive as as a result of the complaint.
The warranty herein is non-transferable, and only applies to the original owner or purchaser of the machine.
RETURN POLICY FOR LAVINA® S MACHINES
The Lavina® S machines may be returned, subject to the following terms:
In no case, a machine is to be returned to Superabrasive Inc. for credit or repair without prior authorization.
Please contact
Superabrasive Inc. or your local distributor for an authorization and issuance of a return
authorization number. This number
along with the serial number of the machine must be included on all packages
and correspondence. Machines returned
without prior authorization will remain property of the sender and
Superabrasive Inc. will not be responsible for them. No
machines will be credited after 90 days from the date of
invoice.
All returns must be shipped freight prepaid. Returned machines may be exchanged for other equipment or parts of
equal
dollar value. If machines are not exchanged, they are subject to a fifteen percent (15%) restocking fee.

Superabrasive UserManual OriginalLanguageLavina®20N‐S/Lavina®20N‐S‐HV 8/2014
4
Contents
WARRANTYANDRETURNS.........................................................3
1.GENERALINFORMATION..............................................................5
MACHINECHARACTERISTICS......................................................5
MAINDESIGN.............................................................................5
VACUUMCONNECTION..............................................................6
TECHNICALDATA........................................................................6
VIBRATIONS................................................................................6
2.SAFETYINSTRUCTIONS.................................................................6
RECOMMENDEDUSE..................................................................6
PROHIBITEDUSE.........................................................................6
PREPARATIONFORWORK..........................................................6
ARRESTFUNCTIONS....................................................................7
SAFEUSE.....................................................................................7
RESIDUALRISKS..........................................................................7
BEFOREYOUBEGIN....................................................................7
3.HANDLINGANDTRANSPORTATION.............................................8
PREPARINGTHEMACHINEFORTRANSPORTATION...................8
STORAGE....................................................................................8
4.OPERATION..................................................................................8
PRELIMINARYCONTROLS...........................................................8
WATERFLOWCONTROLUNIT....................................................8
THECONTROLBOARD................................................................9
STARTINGTHEMACHINE............................................................9
5.TOOLSANDACCESSORIES..........................................................10
WEIGHTS..................................................................................10
TOOLHOLDERKEY....................................................................10
FOAMPLATE.............................................................................10
SECURITYPLATEFORQUICKCHANGEPADS..............................10
6.POPULARTOOLS........................................................................10
7.EXPLODEDVIEW.........................................................................11
GENERALEXPLODEDVIEW(FIG.7.1).........................................11
MAINHEADEXPLODEDVIEW(FIG.7.2).....................................11
TOPCOVEREXPLODEDVIEW1(FIG.7.3)..................................11
TOPCOVEREXPLODEDVIEW2(FIG.7.4)..................................11
BOTTOMCOVEREXPLODEDVIEW1(FIG.7.5)..........................12
PLANETARYDRIVEEXPLODEDVIEW(FIG.7.6)...........................12
BOTTOMCOVEREXPLODEDVIEW2(FIG.7.7)..........................12
PULLEYUNITSEXPLODEDVIEW(FIG.7.8).................................12
CARRIAGEEXPLODEDVIEW(FIG.7.9).......................................12
TOOLHOLDEREXPLODEDVIEW(FIG.7.10)...............................12
8.MAINTENANCEANDINSPECTION...............................................13
CLEANING.......................................................................................13
ELECTRICALSYSTEM..................................................................13
SINGLEPHASEORTHREEPHASECONNECTION........................14
LAVINA®20N‐SELECTRICAL......................................................15
SCHEMESWITHYASKAWAINVERTER200‐240VOLT................15
LAVINA®20N‐S‐HVELECTRICALSCHEMESWITHYASKAWA
INVERTER380‐480VOLT............................................................16
9.TROUBLESHOOTING....................................................................17
INDEXOFPROBLEMSANDSOLUTIONS.....................................17
9.1REPLACINGPOWERCORDANDPLUGS...............................17
9.2DISMOUNTINGANDMOUNTINGTOOLHOLDERTOCHANGE
BUFFERSANDSPIDERS,CHANGINGV‐RINGSANDFELTRINGS..17
9.3TENSIONINGANDREPLACETHEPLANETARYBELT.............18
9.4TENSIONINGUSEDPLANETARYBELT..................................18
9.5MOUNTINGANDTENSIONINGANEWPLANETARYBELT....18
9.6REPLACINGPULLEYUNITS...................................................19
9.7MOUNTINGTHEBELT.........................................................21
9.8CHECKINGTHETENSIONOFTHEBELT................................22
9.9MOTORCONNECTION.........................................................22
9.10FAULTDIAGNOSISINVERTERYASKAWAV1000................23
10.DISPOSAL............................................................................25
11.MANUFACTURER’SCONTACTS............................................25
12.SPAREPARTS............................................................................26
1.LAVINA®20N‐SGENERALPARTS/FORMACHINES
PRODUCEDBEFOREJAN.12014/............................................26
1.LAVINA®20N‐SGENERALPARTS/FORMACHINES
PRODUCEDAFRTER...................................................................26
JAN.12014/.............................................................................26
2.LAVINA®20N‐STOPCOVERPARTS1....................................27
3.LAVINA®20N‐SGUARDPARTS..............................................27
4.LAVINA®20N‐STOPCOVERPARTS2....................................27
5.LAVINA®20N‐STOPCOVERPARTS3....................................28
7.LAVINA®20N‐SPLANETARYDRIVEPARTS............................28
6.LAVINA®20N‐SBOTTOMCOVERPARTS1............................28
8.LAVINA®20N‐SBOTTOMCOVERPARTS2............................29
10LAVINA®20N‐STOOLHOLDERPARTS..................................30
11.LAVINA®20N‐SWATERSUPPLYPARTS/FORMACHINES
PRODUCEDBEFOREJAN.12014/............................................30
11.LAVINA®20N‐SWATERTANKPARTS..................................30
FORMACHINESPRODUCEDAFTERJAN.12014/....................30
12.LAVINA®20N‐SCARRIAGEPARTS/FORMACHINES
PRODUCEDBEFOREJAN.12014/.............................................31
12.LAVINA®20N‐SCARRIAGEPARTS/FORMACHINES
PRODUCEDAFTERJAN.12014/...............................................32
13.1LAVINA®20N‐SCONTROLBOXPARTS200‐240VOLT.....33
13.2LAVINA®20N‐S‐HVCONTROLBOXPARTS380‐480VOLT34

Superabrasive UserManual OriginalLanguageLavina®20N‐S/Lavina®20N‐S‐HV 8/2014
5
1.GENERALINFORMATION
Thisowner’smanualisintendedfortheoperatoroftheLavina®Smachine,theservicingtechnicianaswellasforanyone
involvedwithoperatingorservicingthemachine.Werecommendthatyoureadtheinstructionsverycarefullyandfollowthem
strictly.
Themanualincludesinformationaboutassembling,using,handling,adjustingandmaintainingyourLavina®Sfloorgrinding
andpolishingmachine.
MANUFACTURER
Superabrasivewasfoundedin1987,asamanufacturerofhighqualitydiamondtoolsforthestoneandconcreteindustry.Today,
Superabrasiveisoneoftheworld’sleadingcompaniesintheproductionofdiamondtoolsandfloorgrindingmachinery.At
Superabrasive,westrivetodelivertheverybestsolutionstoourcustomers,andenablethemtoworkmoreefficiently.
GENERALDESCRIPTION
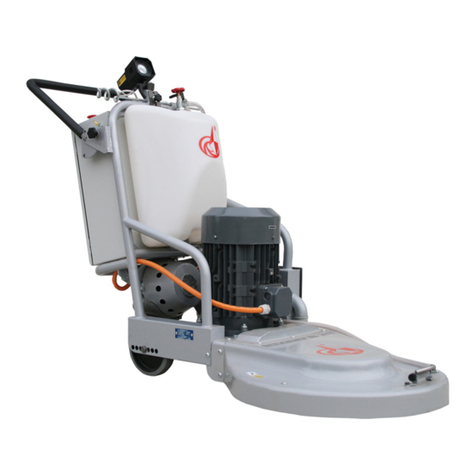
TheLavina®Smachineisintendedforgrinding,polishingandbuffingconcrete,marble,granite,limestoneandterrazzosurfaces
withdiamondtools.
TheLavina®Smachineisathree‐discmachine,whichcanbeuseddryaswellaswet.
Forbestresults,useonlytoolsmanufacturedorrecommendedbySuperabrasiveanditsdistributors.Additionally,themachine
couldbeusedforgrindingwoodfloorsurfaces.
TheLavina®Smachineismanufacturedandfittedfortheabove‐
mentionedapplicationsonly!Everyotherusemaycauseriskstothepersonsinvolved.
MACHINECHARACTERISTICS
TheLavina®Smachineismadeoftwomaincomponentsections:
MAINDESIGN
Thetwomaincomponentsectionsarethecarriageandmainhead.
Thehandle(Fig.1.2)ontheframeisadjustableinheightandallowstheoperatortowork
inacorrectandsafeworkingposture.
Thehalogenspotlight(Fig.1.2)enablestheoperatortoworkindarkerareas.
Existinglightingsystemdoesnotreplaceadequateoverhead
lighting.
Theframe
Thecontrolsarepositionedontopoftheelectricalbox(fig.1.3)
Theelectricalbox(fig.1.3)containstheelectricswitchingdevicesandthe
inverter.Themainfeedingcableisconnectedwithaplugandsocketontop.Themotor
feedingcableispluggedintothesocketlocatedonthebottomofthebox.Thetankison
theoppositesideoftheframe,sothattheweightofthewaterhasnoinfluenceonthe
operationofthemachine.Theframeweight,ontheotherhand,isfullyabsorbedbythe
drivingwheels.Anelectricpumpspraysthewaterthroughafrontsprayerorinternal.The
motorismountedonthebaseplateandisdrivingthethreeheadswithabeltsystem.The
planetaryheadisdrivenbyasecondflatbelt.
ENVIRONMENTALCONDITIONS
ThetemperaturerangeforoperatingtheLavina®Smachineoutdoorsisbetween41°Fand
86°For5°Cand30°C.NeverusetheLavina®Smachineduringrainorsnowwhenworking
outdoors.Whenworkingindoors,alwaysoperatethemachineinwell‐ventilatedareas.
ELECTRICALCONNECTION
Thevoltage(Volt)andpower(Ampere)aredisplayedonalabelontheelectricalcontrol
boxtoavoidanyincorrectconnection.Refertothesebeforeconnectingthepower.To
avoidelectricalshocks,makesurethegroundpowersupplyisfunctioningproperly.
Figure 1.3
Fi
g
ure 1.1
Figure 1.2

Superabrasive UserManual OriginalLanguageLavina®20N‐S/Lavina®20N‐S‐HV 8/2014
6
VACUUMCONNECTION
Aconnectionforavacuumdustextractorislocatedonthecarriage.TheLavina®Smachinedoesnotincludeavacuumdust
extractor.Thecustomermustpurchasethevacuumdustextractorseparately.ThehoseofthevacuumextractormustbeØ
50.8mmandcanbeglidedoverthepipe.Thevacuumdustextractormustbeadaptedforfloorgrindersandhavea
minimumairdisplacementof320m3/hwithanegativevacuumof21kPa.
TECHNICALDATA
Lavina®20N‐SLavina®20N‐S‐HV
Voltage/Hz1or3phx200‐240V50‐60Hz 3phx380‐480V50‐60Hz
AmperageMax30 Amps Max15Amps
Power5,5kW7,5HP 5,5kW7,5HP
Toolholderrpm300‐1100rpm 300‐1100rpm
Workingwidth510mm20” 510mm20”
Tooldiameter(QCPlate)3x225mm3x9” 3x225mm3x9”
Weight167kg368lbs 167 kg368lbs
Grindingpressure80kg177 lbs 80 kg177 lbs
Additionalweightmax2x22kgmax2x48 lbs max2x22kgmax2x48 lbs
Applicationwetanddry wetanddry
VacuumhoseportYes Yes
Watertankcapacity20l5.2gal 20 l5.2gal
Waterfeedwithpump(peripheralandfront) withpump(peripheralandfront)
Cablelength17.4m57ft 17.4m57ft
MachineLxWxH1350x540x1100mm 53.1”x21.3”x43.3” 1350x540x1100mm53.1”x21.3”x43.3”
PackingLxWxH1150x730x1155mm 45.2”x28.7”x45.5” 1150x730x1155mm45.2”x28.7”x45.5”
VIBRATIONS
ThevibrationsofthemachinearewithinthelimitsofdirectivesandharmonizedstandardsfromtheEuropeanUnionwhen
theLavina®Sisoperatedwiththerecommendedtoolsandinnormalconditions.
SONOROUSEMISSIONS
ThesonorousemissionsarewithinthelimitsofdirectivesandharmonizedstandardsfromtheEuropeanUnionwhenthe
Lavina®Sisoperatedwiththerecommendedtoolsandinnormalconditions.However,aspreviouslystated,theoperator
mustwearearprotectors.
LABELDATA
ThedataonthelabelprovidesthecorrectVoltageandkW(neededforoperationalpurposes);
Weight(neededfortransportationpurposes);productionyearandserialnumber(neededformaintenancepurposes).
CUSTOMERSERVICE
ForcustomerassistanceandtechnicalsupportcallyourlocaldistributororcallSuperabrasiveInc.at
1‐800‐987‐8403orvisitusat:www.superabrasive.com,whereyoucandownloadacopyofthismanual.
2.SAFETYINSTRUCTIONS
RECOMMENDEDUSE
TheLavina®Smachineis
designedandmanufacturedtogrindandpolishconcrete,
terrazzo,andnaturalstonefloors.Itcanbeusedforrenovations
aswellasforpolishing.Themachineisdesignedfordryorwet
use.Whenusingitdry,useavacuumofappropriatesize.For
moreinformation,pleaserefertothechapteronhandlingthe
vacuumconnection.
PROHIBITEDUSE
ThemachineMUSTNOTbeused:
ForapplicationsdifferentfromtheonesstatedintheGeneral
Descriptionchapter.
Fornot‐suitablematerials.
Inenvironmentswhich:Possessrisksofexplosion
Possesshighconcentrationofpowdersoroilsubstancesintheair
Possessrisksoffire
Featureinclementconditions.Possesselectromagneticradiation.
PREPARATIONFORWORK
MakesurethatYouhaveclosed
theworkarea,sothatnopersonunfamiliarwithoperatingthe
machinecanenterthearea.Thetoolplateandtoolsareadjustedto
themachineproperly.Therearenomissingpartsofthemachine.
Themachineisinuprightworkingposition.Theprotectiondevices
areworkingproperly.Theelectricalcableisfreemoveandfollow
themachineeasily.Inordertokeeptheelectricalcablefrombeing

Superabrasive UserManual OriginalLanguageLavina®20N‐S/Lavina®20N‐S‐HV 8/2014
7
damaged,novehicleshouldcrossthezonewhereelectrical
cablesaresituated.
PROTECTIONDEVICES
Themachineisequippedwith
severalprotectiondevicesincludingthefollowing:
Anemergencystopbutton
Aprotectionskirtandhoodforprotectingthetoolplates.
Thesedevicesprotecttheoperatorand/orotherpersonsfrom
potentialinjuries.Donotremovethem.Oncontrary,before
usingthemachine,pleaseensurethatallprotectiondevicesare
mountedandfunctionproperly.TheSecurityplatepreventsthe
QuickChangepadsfromlooseningduringuse.
ARRESTFUNCTIONS
Functionsofarrestingthe
machinearefollowing:Buttontostopthemotor
(category1)
Emergencybutton(category1)
SAFEUSE
TheLavina®Sisdesignedto
eliminateallriskscorrelatedwithitsuse.However,itisnot
possibletoeliminatetherisksofaneventualaccidentwiththe
machine.Unskilledoruninstructedoperatormaycause
correlatedresidualrisks.Suchrisksare:
PositionRisksduetooperator’sincorrectworkingposition
TanglingupRisksduetowearinginappropriateworkingclothes
TrainingRisksduetolackofoperationaltraining
NOTE:Inordertoreduceallconsequencesoftheabove‐
mentionedrisks,weadvisethatmachineoperatorsfollowthe
instructionsinthemanualatalltimes.
RESIDUALRISKS
Duringthenormaloperating
andmaintenancecycles,theoperatorisexposedtofewresidual
risks,whichcannotbeeliminatedduetothenatureofthe
operations.
BEFOREYOUBEGIN
Workingareamustbeclear
fromanydebrisorobjects.
Afirst‐timeoperatormustalwaysreadthemanualandpay
attentiontoallsafetyinstructions.
Allelectricconnectionsandcablesmustbeinspectedfor
potentialdamages.
Groundwiresystemofthepowersupplymustbealsoinspected.
Performgeneraldailyinspectionsofthemachineandinspect
themachinebeforeeachuse.
Alwaysinspectthesafetydevices:MounttheSecurityplatefor
theQuickchangepads.
Theemergencybreakmustbeclearandworking
Thetoolprotectormustbeworking
Themachinemustbeclean
Neveroperatethemachineintherain!
Confirmthattherearenomissingpartsespeciallyafter
transportation,repair,ormaintenance.
Beforefillingthewatertankwithwatermakesurethemachineis
notworkingandthemainswitchisturnedoff.
Beforeturningonthemachinemakesurethatthebaseisplacedon
thefloor,themachineMUSTNOTbeinanupright
positionwhenturnedon!
OPERATINGMACHINE
WhenoperatingtheLavina®S,makecertainthatthereisno
one,butyouaroundthemachine.
Neverleavethemachineunattendedwhileworking.
Theelectricalcablemustmovefreelyandmustbedamage‐free.
Thewaterhosemustmovefreelyandmustbedamage‐free.
Checktheflooryouwillworkontomakesureitisnottoouneven.
Ifthisisthecase,itmaydamagethemachine.
AFTERWORKISCOMPLETED
Cleanthemachineandits
surroundingsproperly
Emptyandcleanthewatertank
Unplugthemachineandwinduptheelectricalcable
Storethemachineinasafeplace
THEWORKAREA
Makecertainthatpeopleor
vehiclesdonotentertheworkarea.
Avoidcablesandhosesbeingintheway.
Alwayscheckthefloorfordebris
PERSONALPROTECTIVE
EQUIPMENT(PPE)
Alwayswearsafetyshoeswhenworkingwiththemachine.
Alwayswearearprotectors
whenworkingwiththe
machine.
Allpersonnelintheimmediateworkareamustwearsafety
glasseswithsideshields.
Alwayswearsafetygloveswhenchangingthetools.Always
wearclothessuitablefortheworkenvironment.
OPERATOR
TheLavina®Smachine.
Theoperatormustknowthemachine’sworkenvironment.
Onlyoneoperatoratatimecanworkwiththemachine.The
operatormustbeproperlytrainedandwellinstructedprior
operatingthemachine.
Theoperatormustunderstandalltheinstructionsinthis
manual.
Theoperatormustunderstandandinterpretallthedrawings
anddesignsinmanual.
Theoperatormustknowallsanitationandsafetyregulations
pertainingtotheoperationofthemachine.
Theoperatormusthavefloorgrindingexperience.
Theoperatormustknowwhattodoincaseofemergency.
Theoperatormusthaveanadequatetechnicalknowledgeand
preparation.

Superabrasive UserManual OriginalLanguageLavina®20N‐S/Lavina®20N‐S‐HV 8/2014
8
3.HANDLINGANDTRANSPORTATION
PREPARINGTHEMACHINEFORTRANSPORTATION
Unplugthemotorcableplugfromthecontrolbox(Fig.3.1)anddisconnectthewaterhosefromthemainheadbypullingitout
(Fig.3.2).Windtheelectricalcableonthecarriage.Releasethepinsets(Fig.3.3)whichattachtheheadtothecarriage.
Pulloutthevacuumhoses,anddismountthehead
fromthecarriage(Fig.3.4).
TheheadoftheLavina®Smachinehasone
barandasupportusedashandlesintendedforeasy
movingandtransportation(Fig.3.4).TheLavina®S
machineisengineeredwitheasytransportationin
mind.Theabilityto
dismantlethemachineintwopartsallows
convenient
transportationandstorage(Fig.3.4,Fig.3.5).
STORAGE
AlwaysstoreandtransporttheLavina®Smachineinadryplace.NevertransporttheLavina®Smachineunprotected;itmaybe
damagediftransportedunprotectedduringrainorsnow.
Whenstoringthemachinethetemperaturemayfalltoorlessthan32F(0oC),therefore,youshouldemptythewaterfromthe
systemusingfollowingsteps:
‐ Pulloutthehoseofthetank(Fig.3.6)
‐ Usingcompressedairblowoutthewaterfromthesystemforthetwopositionsoftheturn‐cock(Fig.3.7,Fig.3.8).
4.OPERATION
PRELIMINARYCONTROLS
Inspecttheworkingareaasexplainedinthesafetyinstructions.
Forwetuse,fillinthewatertankwhentheelectricalcableis
disconnected.Connectthevacuumextractorandensurethatthe
vacuumhoseisclearanditwillfollowthemachineeasily.Plugin
themachineandmakesurethatthepowercordisfreetofollow
theworkingdirectionoftheLavina®Smachine.
WATERFLOWCONTROLUNIT
Theoperatorcanchoosethewaterspraysinthefront(Fig.4.1)whenthelevelofthetapisinthehorizontalposition(Fig.4.2),when
thelevelisintheverticalposition(Fig.4.2)waterwillsprayundercoverofthemachine.
Theflowregulatingvalvelocatedonthetank(Fig.4.2.1)isincreasingorreducingthewaterflowtotheworkingarea–infrontofthe
machineorunderthemainheadcoverofthemachine/onlyformachinesproducedafterJan.12014/.
Fi
g
ure 3.4 Fi
g
ure 3.5
Fi
g
ure 3.1 Figure 3.3
Fi
g
ure 3.2
Figure 3.6 Figure 3.7 Figure 3.8
Fi
g
ure 4.2.1
Figure 4.1 Figure 4.2

Superabrasive UserManual OriginalLanguageLavina®20N‐S/Lavina®20N‐S‐HV 8/2014
9
ADJUSTINGANDMOUNTINGTOOLS
Mountthetoolsonlyafterensuringthatthereisenoughdiamondbondmaterialleft.Besurethattheplatesarealwaysclean
beforemounting.(Fig.4.3)
WARNING:Alwayssecurethe“Quickchange”padswiththesecurityplate(Fig.4.4),andlockwiththetoolholderkey
(Fig.5.4).DiamondtoolswithVelcroareattachedonthree9inchfoamplates.Thefoamplatesaremountedonthekeylock
(butterfly).Alwaysusethetoolholderkey(Fig.5.4).
THECONTROLBOARD
1. Powercableplug
2. DigitalRPMindicatorIndicatestherevolutionperminute
ofthegrindingplates(nottherevolutionperminuteof
theentireunit).
3. Lampcablegland
4. InverteralarmledLightsbluewhentheinvertergoes
intoalarmmode.
5. WaterpumpswitchLightsorangewhenthewaterpump
isworking.
6. Powerledlightsgreenwhenthepowerison
7. Forward/Reverseswitchchooseforwardforclockwise
rotationofthegrindingplatesorreverseforanti‐
clockwiserotationofthegrindingplates
8. PotentiometerchangestheRPMofthegrindingplates
from300‐1100rpm
9. Resetbuttonresetsthealarmoftheinverter
10. OFFbuttonstopsthemotor
11. ONbuttonstartsthemotor
12. EmergencybuttonusedinEmergencysituationsfor
stoppingthemotor
STARTINGTHEMACHINE
First,followthedirectionsinchapterSafetyDevicesandSafetyInstructions.Next,pulltheemergencystop(12)toensurethatthe
machineisinworkingcondition.Checkthepotentiometer(8)andensurethatitissetattheworkingspeed.Ifworkingwet,add
watertothefloorsurface.Ifworkingdry,omitthisstep,andinstead,switchonthevacuumunit.Finally,holdthemachinefirmlyand
pushthestartbutton(11).
OPERATINGTHEMACHINE
Guidethemachineinstraightlinesacrossthefloor,andwitheachnewlineoverlapalittlebitofthepreviouslycompletedsurface.
Workataconstantspeedallowingthetoolstimetoworkataspeedappropriateforthetools’gritsize.Avoidvibrations.Donotstop
theLavina®Smachineinonespotwhilethetoolsarestillworkingbecausetheywillleavemarksonthefloorsurface.Whenworking
wet,firstchoosethewatertapposition(Fig4.2)forwaterfeedandperiodicallystartthepumptoreleasewaterontothefloor’s
surface(Fig.4.6Pos.5).Whenworkingdry,checkthefloorsurfaceperiodicallytoensurethatdustisnotaccumulatingonthesurface,
alsocheckregularlyifyourvacuumworksproperly.
STOPPINGTHEMACHINE
Thestoppingofthemachinemustbedonegraduallyuntilthemotorstops.Donotstopmovingthemachinebeforearrestingthe
motorasthetoolscoulddamagethesurface.Tostoppushtheoffbutton(10).UsetheEmergencybutton(13)onlyinemergencyor
useittoswitchthepowertotallyoff.Remembernottoholdthemachineinonespotbeforeturningoffthemotor.
ALARM
TheAlarmlight(4)willlightincaseinvertergoesinalarmmode.Themostcommonfailureismotorinoverload.Toresetthemode
pushresetbutton(9).
Figure 4.3 Figure 4.5
Fi
g
ure 4.4
Figure 4.6
1234567
89101112

Superabrasive UserManual OriginalLanguageLavina®20N‐S/Lavina®20N‐S‐HV 8/2014
10
5.TOOLSANDACCESSORIES
WEIGHTS
Superabrasiveoffersadditionalweightsforincreasingtheproductivityofthemachine(Fig.5.1).
Eachadditionalweightweighsabout48lbsor22kg.Eachindividualapplication,typeand
conditionofsurface,powercapacityoftheoutlet,etc.willdeterminethenumberofweights
youcanusewithout
trippingabreaker.Theweightstacksontothreepostsaroundtheouterbowl(Fig.5.2).
Theadditionalweightsdependonthetools;itisnotalwayspossibletoaddweights.Some
toolsworktooaggressivelyandthemachinecanstop.Theweightcanbeorderedwithitem
numberA07.00.00.00.
TOOLHOLDERKEY
Thetoolholderkey(Fig.5.3)isusedforadjusting,mountinganddismountingofthefoam
plates.Alwaysusethekeyfor
mounting.ItemnumberisA03.00.00.00
FOAMPLATE
DiamondtoolswithVelcroaremountedonthefoamplate9“(Fig.5.4).Thefoamplate
ismountedonthe“QuickChange”System.
ItemnumberisLV‐9‐FP‐S
SECURITYPLATEFORQUICKCHANGEPADS
Plateusedtoensurethe“Quickchange”pads.
ItemnumberisA38.00.01
Fi
g
ure 5.3
Figure 5.1
Fi
g
ure 5.2
Figure 5.4
Figure 5.5

Superabrasive UserManual OriginalLanguageLavina®20N‐S/Lavina®20N‐S‐HV 8/2014
10
6.POPULARTOOLS
RECOMMENDEDTOOLS
QuickChangeSystemandToolingfeatureextremelyfastandconvenienttoolchanges,andalongtool
life,providingforgreatlong‐termcostsavings.TheQuickChangepadsareproducedinfourdifferent
bondsforsuperhard,hard,mediumandsoftconcrete,inavarietyofgritsizes.Theyareofferedwith
1or2buttonsorrectangularsegments,whichallowsyoutocustomizetheaggressivenessofthecut.
Calibragrindingdiscs:ourpopularceramicbonddiscsaredesignedfortheremovalofdifficultscratches
andtheysaveyouvaluabletimebyeliminatingtheneedformultiplepasseswithmetaltools.Theycanbe
used
wetordry,andarebestforhardconcreteapplications.
Theyare3‐inch,withincludedVelcrobackattachment.
NATO®polishingdiscsfeatureaspecialresinformuladesignedforbothwetanddryapplicationsandauniquedesignwith
widechannelsallowingforworkonacleanersurfaceandensuringaqualitypolish.Availablein3and4insizes.Theyarewith
includedVelcroattachment.
V‐HARR®PremiumPolishingPadsaredesignedformechanicallypolishingandrestoringconcrete;alsoidealforterrazzoand
hardstonefloors.V‐HARR®padsareofferedinawidevarietyofdiametersandgritsizestoaccommodatemanyapplications.
Dryuseisstronglyrecommended.
ShinePro®arehighqualitydiamond‐impregnatedpadsforfloormaintenance.Availableinavarietyofsizes,andaregreatfor
dailyuse.Whenusedwet,theyrequireonlywater(nowaxorchemicalsneeded)andareaveryenvironmentallyfriendlysolution
formaintainingfloors.
UseonlySuperabrasive’srecommendedtools.Formoretoolingoptions,visitwww.superabrasive.com

Superabrasive UserManual OriginalLanguageLavina®20N‐S/Lavina®20N‐S‐HV 8/2014
11
7.EXPLODEDVIEW
GENERALEXPLODEDVIEW(FIG.7.1)
MAINHEADEXPLODEDVIEW(FIG.7.2)
TOPCOVEREXPLODEDVIEW1(FIG.7.3)
TOPCOVEREXPLODEDVIEW2(FIG.7.4)
Figure 7.3
Figure 7.4
Figure 7.1 Figure 7.2

Superabrasive UserManual OriginalLanguageLavina®20N‐S/Lavina®20N‐S‐HV 8/2014
12
BOTTOMCOVEREXPLODEDVIEW1(FIG.7.5)
PLANETARYDRIVEEXPLODEDVIEW(FIG.7.6)
BOTTOMCOVEREXPLODEDVIEW2(FIG.7.7)
PULLEYUNITSEXPLODEDVIEW(FIG.7.8)
CARRIAGEEXPLODEDVIEW(FIG.7.9)
TOOLHOLDEREXPLODEDVIEW(FIG.7.10)
Figure 7.9
Figure 7.8
Figure 7.10
Figure 7.6
Figure 7.7
Figure 7.5

Superabrasive UserManual OriginalLanguageLavina®20N‐S/Lavina®20N‐S‐HV 8/2014
13
8.MAINTENANCEANDINSPECTION
Cleaning
Keepyourmachineclean.Cleaningthemachineonaregularbasiswillhelpdetectandsolvepotentialproblemsbeforetheycause
damagetothemachine.Mostimportantly,checkandcleanthetoolplateconnections,powercordandplugs,vacuumhosesand
watertank.
Figure 8.1
CHECKDAILY
AfteroperatingtheLavina®Smachine,theoperatorshouldconductavisualinspectionof
themachine.Anydefectshouldbesolvedimmediately.Payattentiontopowercords,
plugsandvacuumhoses,looseboltorscrews.
Toolholders:Buffersandspidersareconsumablesandmustbevisuallycheckeddailyand
replacedifneeded.Seethatflangesordiscsaremountedandlockedwellinplace.The
keylockholders(butterflies)shouldbealsochecked.
Checktherubberbuffersandfixingoftheholders.Theflangeholdingthebuffers(Fig.8.1
1)hastobefirmlyfixedtotheunit.Agapseentheremeansthatthereareloosescrews
fixingtheholder.Thescrewshavetobetightenedimmediatelyforsafeoperation.
Workingwithloosescrewsontheholdercouldalsocausebaddamagesonthemachine.
Tighteningforceofthescrewshastobe25...30N.m(18...22ft/lbs).
Itisveryimportanttoregularlycheckthescrews(Fig.8.12)thatfixthe
"Quickchange"holdertothesafetypart,sothattheholderwillnotflyawayifthebuffers
getdamaged.
“Quickchange”shouldbeclean.Thetensionoftheplanetarybeltcanbecheckeddailybymovingthemainheadandfeelingthe
resistanceofthemovingpulleys,ifthebeltslipstensionimmediately,seethechapterTroubleshooting.
CHECKANDREPLACEAFTERTHEFIRST15WORKINGHOURS
Checkthebelttensionafter15hoursworkingwiththemachine.
Thebottomcoverhasacontrolcover(Fig.8.2)thatallowsfastandeasycontrolandcorrection
ofthebelt.Itisrecommendedtocheckthetensionofthebeltafterthefirst15hoursandto
tightenifnecessary.Forthecorrecttension,seeTROUBLESHOOTING“mountingthebelt”.
Everytimeyouopenthecontrolcover,mountbackallthescrews.
CHECKEVERY200WORKINGHOURS
Every200workinghours,theoperatorshouldinspectallpartsofthemachinecarefully.Most
importantly,inspectandcleanthetoolplateconnections,powercordandplugs,vacuumhoses
andwatertank,andfilter.Also,checkthewaterflowofthepump.Checktheguard
Figure 8.2
assembly.Makecertainthewheelsarecleanandrotateproperly.Inspectthecontrolbuttons.Iftherearedefectivecontrolparts,
theyshouldbereplacedimmediately.Replacewornvacuum‐andwaterhoses.Checkthetensionofthebeltandtotightenif
necessary.Forthecorrecttension,seeTROUBLESHOOTING.
Dismountthetoolholders(SeeTroubleshooting)replaceallparts(Spider,buffers,sealercaps,“O”rings)withtheslightest
damageorconsume.
Opentheinspectioncoveronthemotorbasetochecktheplanetarydrivingbelt,bymovingthemainheadthebeltshouldnotslipon
theplanetarypulleyanddrivethepulleys.
CHECKEVERY400WORKINGHOURS
Besidesthechecksof200workinghours,replacesealerandV‐ringslikedescribedinchapter“TROUBLESHOOTINGREPLACING
BELTANDPULLEYUNITS”.Checkifbeltsandbearingsareingoodcondition,changeifneeded.
VACUUM
Asstatedpreviously,frequentlycheckhosesandotherpartsforclogging.
WATERLEAKS
Replaceanyleakingpartsimmediatelyasthewatercoulddamageyourmachine
MECHANICALPARTS
Partssuchasthebelts,sealrings,caprings,spidersandbuffersandguardassemblyaresubjecttowearandshouldbereplacedas
needed.
ELECTRICALSYSTEM
Dustshouldnotenterthecontrolbox,asitwilldestroythecontacts.Remove(blowout)anydustpresent.
TheLavina®20N‐S200‐240Voltwillautomaticallydetectiftheconnectionisbasedonsingle(L1,L2)orthreephase(L1,L2,L3)

Superabrasive UserManual OriginalLanguageLavina®20N‐S/Lavina®20N‐S‐HV 8/2014
14
208‐240Volt.Theoperatordoesnothavetoswitchthemachine;onlyconnecttotwophasesorthreephases.Forconvenience,
SINGLEPHASEORTHREEPHASECONNECTION
OnlyLavina®20N‐S
Themachineisdeliveredwith2differentpigtailssee(fig.8.2),eachismarked.Pleasemountyourownlocalplug,ratedfor30
Ampsonit.Notice,theyellow/greencableistheground(neverattachthistoaphase);grey,brownandblackarephases,
see(fig.8.3)thepigtailforsinglephaseconnectionand(fig.8.4)thepigtailforthree
phaseconnection.
Figure 8.2 Figure 8.3 Figure 8.4

Superabrasive UserManual OriginalLanguageLavina®20N‐S/Lavina®20N‐S‐HV 8/2014
15
LAVINA®20N‐SELECTRICAL
SCHEMESWITHYASKAWAINVERTER200‐240VOLT
200‐240Volt
Figure 8.6
Figure 8.7
Themotorisconnectedin“Delta”
(triangle)230Volt,
reminderforthewireconnectionof
themotor.

Superabrasive UserManual OriginalLanguageLavina®20N‐S/Lavina®20N‐S‐HV 8/2014
16
LAVINA®20N‐S‐HVELECTRICALSCHEMESWITHYASKAWAINVERTER380‐480VOLT
380‐480Volt
LAVINA® 20N-S-HV ELECTRICAL SCHEMES YASKAWA CONNECTION MAIN
CIRCUIT TERMINALS
Figure 8.11
Figure 8.10
Themotorisconnectedin
“Star”380Volt,
reminderforthewire
connectionofthemotor
Figure 8.11

Superabrasive UserManual OriginalLanguageLavina®20N‐S/Lavina®20N‐S‐HV 8/2014
17
Figure 9.2.7 Figure 9.2.8 Figure 9.2.9 Figure 9.2.10
Figure 9.2.11
9.TROUBLESHOOTI NG
INDEXOFPROBLEMSANDSOLUTIONS
9.1REPLACINGPOWERCORDANDPLUGS
Whenreplacingthepowercordorplugsalwaysusecordsandplugswithspecificationsastheoriginalones.
Neveruselowerqualityordifferenttypecordandplugs.
Inaddition,takeintoconsiderationthedistanceoftheappliancefromtheelectricalsource.Thegreaterthedistance,thegreater
theresistanceandthelesscurrentthatwillbeavailableattheotherend;therewillbeavoltagedropandtheinverterwillsign
alarmmode.Thiscanalsohappenifseveralmachinesareworkingonthesamelineorwhenthegeneratorisunderrated.Ingeneral
ourstandardpowercablecanbedoubledinlength;iflongerlengthsareneededyouhavetoreplaceallthecableswithbiggergage
ratedcablesforthelengthandamperage.
9.2DISMOUNTINGANDMOUNTINGTOOLHOLDERTOCHANGEBUFFERSANDSPIDERS,CHANGINGV‐RINGSANDFELTRINGS
Tocheckorreplacethebuffersandthespiders,thetoolholdershavetobedismounted.Removethecountersunkscrewsontopof
thebuffer(Fig.9.2.1).Takethediscoff(Fig.9.2.2),thespidercanberemovedorreplaced(Fig.9.2.3).BylooseningfourHexcap
bolts(Fig.9.2.4),thedisccomesloose(Fig.9.2.5)andthebufferscanbereplaced(Fig.9.2.6).Attention,bymountingusealwaysthe
“blue”threadlockingadhesive,exceptontheboltstolockthebuffers(Fig.9.2.5).Alwaysusetheoriginalbolts.
Dependingonthenumber(3,4or6)ofbuffers,theholdercanbemoreflexibleorrigid.
Whenthetoolholderisdismounted,youcanchangethesealers(V‐RingandFelt‐Ring).
TakeoutFelt‐Ring,AdaptorandV‐Ring.Beforemountingcheckonwhichsidetheadaptoris
fitting,rememberthecorrectside.MounttheV‐RingwiththesmallestlipoftheVtoinside
(Fig.9.2.7)justpushtheV‐ringsothetopisonthesamelevelasthepulleytop(Fig.9.2.8).Then
taketheadaptorinthecorrectwayandpushtheV‐Ringdownwiththeadaptor(Fig.9.2.9).The
lowestlipoftheV‐Ringshouldonlybarelytouchitsglidingsurface;alsoneverpushtheV‐Ring
downwithfingers.MountnowtheFelt‐ringontop(Fig.9.2.10).Closethesealerswiththecap
(Fig.9.2.11).
Figure 9.2.1 Figure 9.2.2 Figure 9.2.3
Figure 9.2.4 Figure 9.2.5 Figure 9.2.6

Superabrasive UserManual OriginalLanguageLavina®20N‐S/Lavina®20N‐S‐HV 8/2014
18
9.3 TENSIONINGANDREPLACETHEPLANETARYBELT
Ifthebeltslipsorisbrokenseparatethecarriagefrommainhead,pulloutmotorplug(Fig.9.3.1),water‐(Fig.9.3.2)(Fig.9.3.3)
andvacuumtubes.Takeoffhandles,forksandweightholderssoyoucandismountthetopcover(Fig.9.3.4)(Fig.9.3.5)
9.4TENSIONINGUSEDPLANETARYBELT
Noticingspeedlostinplanetarymovementitispossibletotensionthebeltforplanetarymovementasdescribedin
9.5Mountingandtensioninganewplanetarybelt.
9.5MOUNTINGANDTENSIONINGANEWPLANETARYBELT
Figure 9.3.1 Figure 9.3.2 Figure 9.3.3 Figure 9.3.4 Figure 9.3.5
Figure 9.4.1 Figure 9.4.2
Figure 9.5.1 Figure 9.5.2 Figure 9.5.3
Figure 9.5.6
Figure 9.5.4 Figure 9.5.5
Figure 9.5.7 Figure 9.5.8 Figure 9.5.9

Superabrasive UserManual OriginalLanguageLavina®20N‐S/Lavina®20N‐S‐HV 8/2014
19
Completelydismountthetensioningdevice(Fig.9.5.1).Make2signsonthedismountedbelt
exactly10cmoutofeachother(beltwithouttension)(Fig.9.5.2).Thepurposeistomeasure10.2
cmonthebeltintensionwhatisatensionof2%.,amaximumof2.5%isallowed.
ATTENTION:NEVER“OVER”TENSIONTHEBELT,THEBELTWILLBEDAMAGEDANDITWILL
NEVERRECOVERITSORIGINALTENSION
Mountthebeltbackaroundtheplanetarypulley;seethatthebeltisbehindthedrivingpulley
(Fig.9.5.3).Putthebeltaroundtheleftrollerofthetensioningdevice(Fig.9.5.4).Putthe
tensioningdevicebackinplaceandpullthebeltfromtherollerontherightside(Fig.9.5.5).Put
thebeltaroundthedrivingpulley(Fig.9.5.6).Begintotensionuntilthemeasureof10cmbetweenthemarksbecomes10.2cm
(Fig.9.5.7)(Fig.9.5.8).Tightenthetensioningdevicewhileturningtheboltmovetheplanetaryheadsothebeltcanslide.(Fig.
9.5.8).Donotforgettolockthetensioningdevice(Fig.9.5.9).
9.6REPLACINGPULLEYUNITS
Seepreviouschapterstotakeofthetoolholdersandtopcover.Unscrewthescrewsofthebottomcover(Fig.9.6.1).
Setthebottomcoverassemblyaside(Fig.9.6.2).RemovetheO‐ringstoavoidlosingthem(Fig.9.6.3).
Onlythetwoloose(non‐driving)pulleyscanberemovewithoutremovingontopthemotorbasediscandmotor.Loosethenuton
topofthepulley(Fig.9.6.4).Carefullypullouttheunitwithcrowbars,butdonotuseexcessiveforce(Fig.9.6.5)(Fig.9.6.6).
Ifallthepulleyunitshavetobereplaced,dismountmotorbasediscandmotor.Beforeremovingthebeltunscrewthecentral
pulley(soitdoesnotturnwhileunlocking)(Fig.9.6.7)(Fig.9.6.8).Pullthecentralpulleyoff(Fig.9.6.9).
Figure 9.5.10
Figure 9.6.1 Figure 9.6.3Figure 9.6.2
Figure 9.6.4 Figure 9.6.6Figure 9.6.5
Figure 9.6.7 Figure 9.6.9Figure 9.6.8
Table of contents
Other Superabrasive Sander manuals

Superabrasive
Superabrasive LAVINA B21-E User manual

Superabrasive
Superabrasive Lavina 21 Series User manual

Superabrasive
Superabrasive LAVINA 30G-X User manual

Superabrasive
Superabrasive LAVINA 20N-S-OE User manual

Superabrasive
Superabrasive InovaCrete System manual

Superabrasive
Superabrasive LAVINA 30L-X User manual

Superabrasive
Superabrasive Lavina Elite L20EU User manual

Superabrasive
Superabrasive LAVINA 20-S-E User manual

Superabrasive
Superabrasive LAVINA 38GR -X User manual