manuals.online logo
Brands
  1. Home
  2. •
  3. Brands
  4. •
  5. Supermicro
  6. •
  7. Switch
  8. •
  9. Supermicro L2 User manual

Supermicro L2 User manual

L2 / L3 Switches
Protocol Independent Multicast
(PIM)
Configuration Guide
Revision 1.0
PIM Configuration Guide
Supermicro L2/L3 Switches Configuration Guide
2
The information in this USER’S M NU L has been carefully reviewed and is believed to be accurate. The vendor
assumes no responsibility for any inaccuracies that may be contained in this document, makes no commitment to
update or to keep current the information in this manual, or to notify any person organization of the updates.
Please Note: For the most up-to-date version of this manual, please see our web site at www.supermicro.com.
Super Micro Computer, Inc. (“Supermicro”) reserves the right to make changes to the product described in this
manual at any time and without notice. This product, including software, if any, and documentation may not, in
whole or in part, be copied, photocopied, reproduced, translated or reduced to any medium or machine without
prior written consent.
IN NO EVENT WILL SUPERMICRO BE LI BLE FOR DIRECT, INDIRECT, SPECI L, INCIDENT L, SPECUL TIVE OR
CONSEQUENTI L D M GES RISING FROM THE USE OR IN BILITY TO USETHIS PRODUCT OR DOCUMENT TION,
EVEN IF DVISED OF THE POSSIBILITY OF SUCHD M GES. IN P RTICUL R, SUPERMICRO SH LL NOT H VE
LI BILITY FOR NY H RDW RE,SOFTW RE, OR D T STORED OR USED WITH THE PRODUCT, INCLUDING THE
COSTS OFREP IRING, REPL CING, INTEGR TING, INST LLING OR RECOVERING SUCH H RDW RE,SOFTW RE, OR
D T .
ny disputes arising between manufacturer and customer shall be governed by the laws of Santa Clara County in
the State of California, US . The State of California, County of Santa Clara shall be the exclusive venue for the
resolution of any such disputes. Super Micro's total liability for all claims will not exceed the price paid for the
hardware product.
FCC Statement: This equipment has been tested and found to comply with the limits for a Class digital device
pursuant to Part 15 of the FCC Rules. These limits are designed to provide reasonable protection against harmful
interference when the equipment is operated in a commercial environment. This equipment generates, uses, and
can radiate radio frequency energy and, if not installed and used in accordance with the manufacturer’s instruction
manual, may cause harmful interference with radio communications. Operation of this equipment in a residential
area is likely to cause harmful interference, in which case you will be required to correct the interference at your
own expense.
California Best Management Practices Regulations for Perchlorate Materials: This Perchlorate warning applies only
to products containing CR (Manganese Dioxide) Lithium coin cells. Perchlorate Material-special handling may
apply. See http://www.dtsc.ca.gov/hazardouswaste/perchlorate/ for further details.
Manual Revision 1.0
Release Date: July 18, 2013
Unless you request and receive written permission from Super Micro Computer, Inc., you may not copy any part of
this document.
Information in this document is subject to change without notice. Other products and companies referred to
herein are trademarks or registered trademarks of their respective companies or mark holders.
Copyright © 2013 by Super Micro Computer, Inc.
ll rights reserved.
Printed in the United States of merica
PIM Configuration Guide
Supermicro L2/L3 Switches Configuration Guide
3
Contents
1. PIM Configuration Guide ...................................................................................................................... 4
1.1 IP Multicast Overview ................................................................................................................... 4
1.2 PIM ................................................................................................................................................ 6
1.2.1 PIM-SM Basics ....................................................................................................................... 6
1.2.2 PIM-DM Basics ...................................................................................................................... 7
1.3 PIM Support .................................................................................................................................. 8
1.4 PIM Defaults .................................................................................................................................. 8
1.5 Enabling PIM ................................................................................................................................. 9
1.6 PIM Component and Interface.................................................................................................... 10
1.7 PIM Mode.................................................................................................................................... 12
1.8 PIM neighbor ............................................................................................................................... 13
1.8.1 DR Priority ........................................................................................................................... 13
1.8.2 Hello interval ....................................................................................................................... 15
1.8.3 Hold time ............................................................................................................................. 17
1.9 Multicast Routing Table .............................................................................................................. 19
1.10 PMBR ........................................................................................................................................... 20
1.11 Disabling PIM .............................................................................................................................. 21
1.12 PIM-SM Specific Configuration ................................................................................................... 21
1.12.1 PIM Join/Prune .................................................................................................................... 21
1.12.2 Shared Tree (RPT)................................................................................................................ 28
1.12.3 Shortest Path Tree (SPT) ..................................................................................................... 33
1.13 PIM Configuration example ........................................................................................................ 38
PIM Configuration Guide
Supermicro L2/L3 Switches Configuration Guide
4
1. PIM Configuration Guide
This document describes the PIM feature supported in Supermicro Layer 2 / Layer 3 switch products.
The PIM configurations for the Supermicro switch listed below products are covered.
The majority of this document applies to the Supermicro switch products listed above. In any particular
sub section however, the contents might vary across these switch product models. In those sections the
differences are clearly identified with reference to particular switch product models. If any particular
switch product model is not referenced, the reader can safely assume that the content is applicable to
all the above listed models.
Throughout this document, the common term “switch” refers to any of the above listed
Supermicro switch product models unless a particular model is noted.
1.1 IP Multicast Overview
IP communication may be one of three types:
•Unicast: Host sends packets to a single host.
•Broadcast: Host sends packets to all hosts.
•Multicast: Host sends packets to a subset of hosts simultaneously.
IP Multicast Routing enables efficient use of network resources for bandwidth intensive services
including video and audio. multicast group is a set of receivers that want to receive a particular data
stream. n IP Multicast Group Address in the 224.0.0.0 to 239.0.0.0 is range selected for the receivers of
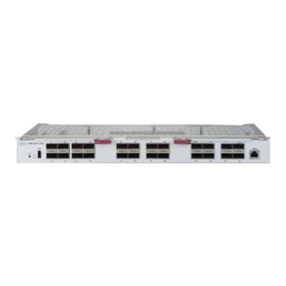
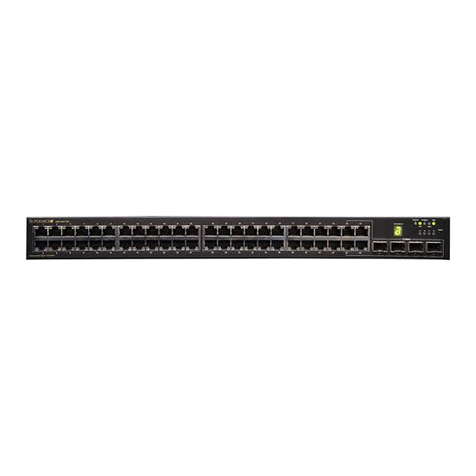
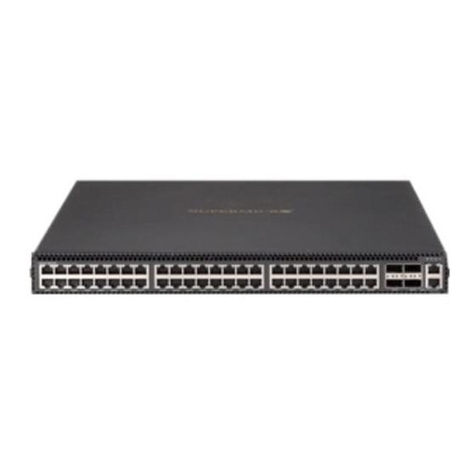
Top of Rack Switches
• SSE-G24-TG4
• SSE-G48-TG4
• SSE-X24S
• SSE-X3348S
• SSE-X3348T
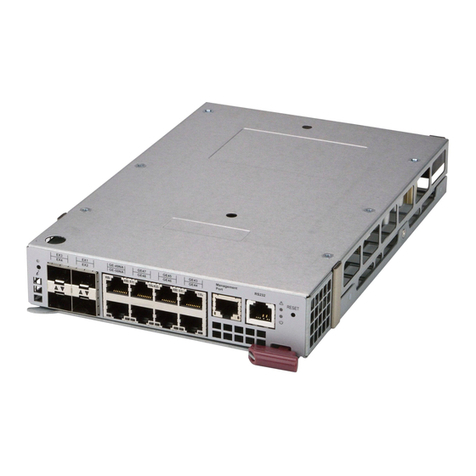
Blade Switches
• SBM-GEM-X2C
• SBM-GEM-X2C+
• SBM-GEM-X3S+
• SBM-XEM-X10SM
PIM Configuration Guide
Supermicro L2/L3 Switches Configuration Guide
5
a multicast group. Senders transmit IP data using the multicast group address as the destination address
to multicast to all group members. Receivers interested in receiving data meant for a particular group
must join the group by signaling a router/switch on their subnet. IGMP is used as the signaling protocol
for communicating group membership. Network devices that are present on the path between the
source and the receivers forward data only on ports leading to the receivers rather than flooding all
ports.
Membership in a multicast group is dynamic, as hosts can join and leave at any time. There is no
restriction on the location or number of members in a multicast group. host can be a member of more
than one multicast group at a time.
Supermicro switches can send and receive multicast traffic by supporting the following multicast
features:
•IGMP at the access end of the network that processes hosts announcing their participation in a
multicast group(s).
•Multicast Routing Protocols (MRPs) at the enterprise and core of the network for maintaining
the senders/receivers database and forwarding data from senders to receivers.
Figure PIM-1: IP Multicast Routing
Switch B
Switch A
Hosts
IGMP MRP
Internet
Backbone
MRP
PIM Configuration Guide
Supermicro L2/L3 Switches Configuration Guide
6
1.2 PIM
Protocol Independent Multicast (PIM) is a Multicast Routing Protocol (MRP) used to maintain the
Multicast distribution tree and to forward multicast data across the tree. PIM is protocol independent
since it works with any unicast routing protocols like RIP, OSPF, etc. to get route information towards RP
and source.
PIM neighbors are established by exchanging periodic Hello messages. Designated Router (DR) is
chosen in the subnet connected to the receivers and this is the Last-hop DR. DR is chosen in the
subnet connected to the source, this is the First-hop DR.
The path from receivers to the source or RP is referred to as upstream. The path from the source or RP
towards the receivers is referred to as downstream-.
There are two PIM modes: Sparse (PIM-SM) and Dense (PIM-DM).
1.2.1 PIM-SM Basics
PIM Sparse mode operates on the basis that very few (or sparse) receivers intend to receive multicast
data from each source. In PIM-SM, multicast data is forwarded only on branches with at least one
interested receiver.
Figure PIM-2: Multicast Forwarding with PIM- M
PIM-SM uses unicast routing protocol like OSPF, RIP, etc. to perform a reverse-path orwarding (RPF)
check to determine upstream neighbors to source and/or RP. n RPF check helps to eliminate loops in
Last Hop DR
VL N 10
RP
Receivers Intermediate Router
First Hop DR
Source
Shared tree
(*,G)
Shared tree
(*,G)
Source tree
(S,G)
PIM Configuration Guide
Supermicro L2/L3 Switches Configuration Guide
7
multicast tree formations wherein the forwarding decision for a received packet is done based on the
source address in the packet rather than destination address. (If a router has a route entry to the source
address in the packet, i.e. an upstream router, the packet is forwarded as an RPF check passes.
Otherwise the packet is dropped as an RPF check failure.
PIM Sparse mode builds a shared tree or RPT with a root called a Rendezvous Point (RP). Candidate RP
(CRP) is then configured for every group by using a Bootstrap Router (BSR) mechanism. CRP is populated
as a RP-set across the domain. fter receiving the RP set, every router performs a uniform hashing to
elect one RP from the RP-set for every group.
Receivers interested in particular multicast group data from any source send a (*, G) join to the
upstream neighbor towards the router that was elected as the RP for the particular group. The last-hop
DR can choose to receive multicast data directly from each source for that group instead of from the RP.
In this case, the last-hop DR sends (S, G) join to upstream towards the source. This is called Source-
Speci ic Tree or Shortest Path Tree (SPT). PIM-SM is typically used in W N environments.
1.2.2 PIM-DM Basics
PIM Dense mode operates on the basis that almost all possible subnets have at least one interested
receiver. Hence in PIM-DM, multicast data is flooded on all possible branches and then pruning those
branches that do not want multicast data from a particular group and/or source. PIM-DM is typically
used in L N environments.
Figure PIM-3: Multicast Forwarding with PIM-DM
VL N 10
Receivers
Source
Join
Prune
PIM Configuration Guide
Supermicro L2/L3 Switches Configuration Guide
8
1.3 PIM Su ort
Supermicro switches support both PIM-SM and PIM-DM.
n IP multicast routing table can hold 2550 entries, which includes 255 groups and 10 sources per
group.
PIM requires a unicast routing protocol such as RIP or OSPF to learn the routes to
a s
ource,
CRP, and CBSR. PIM uses this information for RPF checks.
1.4 PIM Defaults
Parameter Default Value
PIM
-
SM global status
Disabled
Component
i
dentifier
1
Static RP status
Disabled
PMBR status
Disabled
Shortest Path Tree (SPT)
threshold
0 packets
RP threshold
0 packets
Shortest Path Tree (SPT)
switchover
period
0 seconds
RP switchover period
0 seconds
Register stop
r
ate limit period
5
seconds
PIM Component Defaults
Parameter Default Value
PIM Component Mode
Sparse
CRP
hold time
70 seconds
CRP priority
192
Static RP
None
PIM Interface Defaults
Parameter Default Value
Hello hold time
30 sec
onds
DR priority
1
Override interval
0
L N
p
rune
d
elay
status
Enabled
L N
p
rune
d
elay
0
Hello
interval
30 seconds
PIM Configuration Guide
Supermicro L2/L3 Switches Configuration Guide
9
CBSR
preference
-
1
Hello
interval
6
0 seconds
1.5 Enabling PIM
PIM is disabled by default in Supermicro switches.
PIM needs to be enabled globally for IP multicast operations. Follow the steps below to enable PIM.
tep Command Description
Step 1
configure terminal
Enters the configuration mode.
Step 2
set
ip
pim
enable
Enables
PIM
globally.
PIM creates the
default PIM Component Identifier 1,
once PIM is enabled.
Step 3
end
Exits the configuration mode.
Step 4
show ip
pim
component
Displays the
PIM
information.
Step 5
write startup
-
config
Optional step
–
saves this
PIM
configuration to be part of the startup
configuration.
If PIM is enabled globally, all PIM components are also automatically PIM enabled.
ll PIM
configuration and display commands operate only when PIM is enabled.
The example below shows the commands used to enable PIM.
SMIS# configure terminal
SMIS(config)# set ip pim enable
SMIS(config)# end
SMIS# show ip pim component
PIM Component Information
---------------------------
Component-Id: 1
PIM Mode: sparse, PIM Version: 2
Elected BSR: 0.0.0.0
Candidate RP Holdtime: 0
PIM Configuration Guide
Supermicro L2/L3 Switches Configuration Guide
10
1.6 PIM Com onents and Interface
Supermicro switches provide multiple instances of PIM in a router. The PIM instances are referred to as
PIM components. Every component can be associated with one or more layer3 VL N interface(s) and is
identified by a component identi ier.
Follow the steps below to create a PIM component(s).
tep Command Description
Step 1
configure terminal
Enters the configuration mode.
Step 2
ip pim component <
ComponentId (1
-
255)>
Creates the PIM component and enters
the Component mode.
The Component Identifier value can be
any number from 1-255. Default is 1.
Step
3
interface
<
interface
-
type
>
<
interface
-
id
>
or
interface range <interface-type> <interface-id> ….
Enters the interface configuration
mode.
interface-type – may be any of the
following:
gigabit ethernet – gi
extreme-ethernet – ex
qx-ethernet – qx
vlan
interface-id is in slot/port format for all
physical interfaces. It may be the VL N
identifier for VL N interfaces.
To configure multiple interfaces, use
the “interface range …” command. To
provide a range use a hyphen (-)
between the start and end interface
numbers. E.g.: int range gi 0/1-10
To provide multiple interfaces or
ranges, separate with a comma (,).
E.g.: int range gi 0/1-10, gi 0/20
If multiple interfaces are provided, the
next step will perform the particular
PIM configuration on all these
interfaces.
Note: While configuring PIM on
physical interfaces (gi, ex, qx), make
sure those interfaces are configured as
PIM Configuration Guide
Supermicro L2/L3 Switches Configuration Guide
11
layer 3 interfaces using
the
“no
switchport” command in interface
configuration mode.
Step
4
ip pim componentId <value(1
-
255)>
Configures
the
Interface
Component
Identifier value.
The Component Identifier value can be
any number from 1-255. Default is 1.
Step 5
end
Exits the configuration mode.
Step 6
show ip pim interface [{ Vlan <vlan
-
id> |
<interface-type> <interface-id> | detail }]
show ip pim component [ComponentId <1-255>]
Displays the
component
information for
the given interface.
Step 7
write startup
-
config
Optional step
–
saves this PIM
configuration to be part of the startup
configuration.
Component
s
can be created only if PIM is enabled. n interface can be associated with
a
Component Identifier, only if a Component Identifier has already been created.
The ‘no ip pim component <ComponentId>’ command deletes the component and its
associated details.
The example below shows the commands used to configure a PIM component.
SMIS# configure terminal
SMIS(config)# ip pim component 50
SMIS(pim-comp)# end
SMIS# configure terminal
SMIS(config)# vlan 100
SMIS(config-vlan)# ports Gi 0/22 untagged
SMIS(config-vlan)# end
SMIS# configure terminal
SMIS(config)# interface vlan 100
SMIS(config-if)# ip address 100.100.100.1 255.0.0.0
SMIS(config-if)# ip pim componentId 50
SMIS(config-if)# end
SMIS# show ip pim component
PIM Component Information
---------------------------
PIM Configuration Guide
Supermicro L2/L3 Switches Configuration Guide
12
Component-Id: 1
PIM Mode: sparse, PIM Version: 2
Elected BSR: 0.0.0.0
Candidate RP Holdtime: 0
Component-Id: 50
PIM Mode: sparse, PIM Version: 2
Elected BSR: 0.0.0.0
Candidate RP Holdtime: 0
SMIS# show ip pim interface detail
vlan100 504 is up
Internet address is 100.100.100.1
Muticast Switching: Enabled
PIM: Enabled
PIMv6: Disabled
PIM version: 2, mode: Sparse
PIM DR : 100.100.100.1
PIM DR Priority: 1
PIM Neighbour Count: 0
PIM Hello/Query Interval: 30
PIM Message Interval: 60
PIM Override Interval: 0
PIM Lan Delay: 0
PIM Lan-Prune-Delay: Disabled
PIM Component Id : 50
PIM domain border: disabled
1.7 PIM Mode
PIM operates in sparse mode by default in Supermicro switches. PIM mode can be changed at anytime
for any component. ll routers in a PIM domain must have the same PIM mode.
Follow the steps below to set PIM mode in components.
tep Command Description
Step 1
configure
terminal
Enters the configuration mode.
Step 2
ip pim component <ComponentId (1
-
255)>
Enters the PIM component
configuration mode.
Component Identifier may be any value
from 1 to 255. Default is 1.
Step 3
set mode {sparse | dense}
Configures Sparse or
dense PIM mode
for the component.
Step 4
end
Exits the configuration mode.
PIM Configuration Guide
Supermicro L2/L3 Switches Configuration Guide
13
Step 5
show ip pim component [ComponentId <1
-
255>]
Displays the
PIM mode for the given
component.
Step 6
write startup
-
config
Optional step
–
saves this PIM
configuration to be part of the startup
configuration.
The example below shows the commands to configure PIM mode.
SMIS# configure terminal
SMIS(config)# ip pim component 50
SMIS(pim-comp)# set mode dense
SMIS(pim-comp)# end
SMIS# show ip pim component
PIM Component Information
---------------------------
Component-Id: 1
PIM Mode: sparse, PIM Version: 2
Elected BSR: 0.0.0.0
Candidate RP Holdtime: 0
Component-Id: 50
PIM Mode: dense, PIM Version: 2
Graft Retry Count: 1
1.8 PIM Neighbor
PIM routers exchange periodic Hello messages with routers that are directly connected. These directly
connected routers are the PIM neighbors. PIM Hello messages contain different configurable options.
1.8.1 DR Priority
DR priority is used to determine the Designated Router in the subnet. The Designated Router in the
subnet is the router with highest DR priority. s a last-hop router, the DR is responsible for forwarding
joins to the upstream. s a first-hop router, the DR is responsible for forwarding data to the
downstream.
The default DR priority is 1.
Supermicro switches provide flexibility for users to configure the DR priority for individual interfaces.
Users can configure a different DR priority on different interfaces.
Follow the steps below to change the Hello interval on any interface.
tep Command Description
PIM Configuration Guide
Supermicro L2/L3 Switches Configuration Guide
14
Step 1
configure terminal
Enters the configuration mode.
Step 2
interface
<
interface
-
type
>
<
interface
-
id
>
or
interface range <interface-type> <interface-id> ….
Enters the interface configuration
mode.
interface-type – may be any of the
following:
gigabit ethernet – gi
extreme-ethernet – ex
qx-ethernet – qx
vlan
interface-id is in slot/port format for all
physical interfaces. It may be the VL N
identifier for VL N interfaces.
To configure multiple interfaces, use
the “interface range …” command. To
provide a range use a hyphen (-)
between the start and end interface
numbers. E.g.: int range gi 0/1-10
To provide multiple interfaces or
ranges, separate with a comma (,).
E.g.: int range gi 0/1-10, gi 0/20
If multiple interfaces are provided, the
next step will perform the particular
PIM configuration on all these
interfaces.
Note: While configuring PIM on
physical interfaces (gi, ex, qx), make
sure those interfaces are configured as
layer 3 interfaces using the “no
switchport” command in interface
configuration mode.
Step 3
ip pim dr
-
priority <priority(1
-
65535)>
Configures
the
PIM DR priority
value.
The DR priority value can be any
number from 1-65535. Default is 1.
Step
4
end
Exits
the configuration mode.
Step
5
show ip pim interface [{ Vlan <vlan
-
id> |
<interface-type> <interface-id> | detail }]
Displays the
DR priority
information for
the given interface.
Step
6
write startup
-
config
Optional step
–
saves this
PIM
configuration to be part of the startup
configuration.
PIM Configuration Guide
Supermicro L2/L3 Switches Configuration Guide
15
The ‘
no ip pim
dr
-
priority
’ command resets the DR priority to its default value of 1.
The example below shows the commands used to configure the PIM DR priority.
Configure PIM DR priority for layer3 VLAN 100
SMIS# configure terminal
SMIS(config)# interface vlan 100
SMIS(config-if)# ip pim dr-priority 500
SMIS(config-if)# end
SMIS# show ip pim interface detail
vlan100 504 is up
Internet address is 100.100.100.1
Muticast Switching: Enabled
PIM: Enabled
PIMv6: Disabled
PIM version: 2, mode: Sparse
PIM DR: 100.100.100.1
PIM DR Priority: 500
PIM Neighbour Count: 0
PIM Hello/Query Interval: 30
PIM Message Interval: 60
PIM Override Interval: 0
PIM Lan Delay: 0
PIM Lan-Prune-Delay: Disabled
PIM Component Id: 50
PIM domain border: disabled
1.8.2 Hello Interval
The PIM router sends Hello messages periodically to all its neighbors to maintain information about
directly connected upstream router(s) towards source(s) or RP(s) and downstream routers towards
receivers. This periodic time interval is called the Hello Interval.
The default Hello interval is 30 seconds.
Supermicro switches provide flexibility for users to configure a different Hello interval for individual
interfaces.
Follow the steps below to change the Hello interval on any interface.
tep Command Description
Step 1
configure terminal
Enters the
configuration mode.
PIM Configuration Guide
Supermicro L2/L3 Switches Configuration Guide
16
Step 2
interface
<
interface
-
type
>
<
interface
-
id
>
or
interface range <interface-type> <interface-id> ….
Enters the interface configuration
mode.
interface-type – may be any of the
following:
gigabit ethernet – gi
extreme-ethernet – ex
qx-ethernet – qx
vlan
interface-id is in slot/port format for all
physical interfaces. It may be the VL N
identifier for VL N interfaces.
To configure multiple interfaces, use
the “interface range …” command. To
provide a range use a hyphen (-)
between the start and end interface
numbers. E.g.: int range gi 0/1-10
To provide multiple interfaces or
ranges, separate with a comma (,).
E.g.: int range gi 0/1-10, gi 0/20
If multiple interfaces are provided, the
next step will perform the particular
PIM configuration on all these
interfaces.
Note: While configuring PIM on
physical interfaces (gi, ex, qx), make
sure those interfaces are configured as
layer 3 interfaces using “no switchport”
command in interface configuration
mode.
Step 3
i
p pim query
-
interval <Interval (0
-
65535)secs
Configures PIM
Hello interval
value.
The Hello interval value can be any
number from 0-65535. Default is 30
seconds.
Step
4
end
Exits the configuration mode.
Step
5
show ip pim interface [{ Vlan <vlan
-
id> |
<interface-type> <interface-id> | detail }]
Displays the
Hello interval
information
for the given interface.
Step
6
write startup
-
config
Optional step
–
saves this PIM
configuration to be part of the startup
configuration.
PIM Configuration Guide
Supermicro L2/L3 Switches Configuration Guide
17
The ‘
no ip pim
query
-
interval
’ command resets the query interval to its default value of 30.
The example below shows the commands used to configure the PIM query-interval.
Configure the PIM query-interval for a layer3 VLAN 100 switch
SMIS# configure terminal
SMIS(config)# interface vlan 100
SMIS(config-if)# ip pim query-interval 75
SMIS(config-if)# end
SMIS# show ip pim interface detail
vlan100 504 is up
Internet address is 100.100.100.1
Muticast Switching: Enabled
PIM: Enabled
PIMv6: Disabled
PIM version: 2, mode: Sparse
PIM DR: 100.100.100.1
PIM DR Priority: 1
PIM Neighbour Count: 0
PIM Hello/Query Interval: 75
PIM Message Interval: 60
PIM Override Interval: 0
PIM Lan Delay: 0
PIM Lan-Prune-Delay: Disabled
PIM Component Id: 50
PIM domain border: disabled
1.8.3 Hold Time
Hold time is the neighbor timeout set for every neighbor on a PIM interface. If a PIM Hello message is
not received from a neighbor router for the period of the hold time, then the neighbor will be deleted
from the list of neighbors. Hold time value is sent as an option in the PIM Hello message to neighbors.
The default hold time is 30 seconds.
Supermicro switches provide flexibility for users to configure different hold times on different interfaces.
Follow the steps below to change the hold time on any interface.
tep Command Description
Step 1
configure terminal
Enters the configuration mode.
PIM Configuration Guide
Supermicro L2/L3 Switches Configuration Guide
18
Step 2
interface
<
interface
-
type
>
<
interface
-
id
>
or
interface range <interface-type> <interface-id> ….
Enters the interface configuration
mode.
interface-type – may be any of the
following:
gigabit ethernet – gi
extreme-ethernet – ex
qx-ethernet – qx
vlan
interface-id is in slot/port format for all
physical interfaces. It may be the VL N
identifier for VL N interfaces.
To configure multiple interfaces, use
the “interface range …” command. To
provide a range use a hyphen (-)
between the start and end interface
numbers. E.g.: int range gi 0/1-10
To provide multiple interfaces or
ranges, separate with a comma (,).
E.g.: int range gi 0/1-10, gi 0/20
If multiple interfaces are provided, the
next step will perform the particular
PIM configuration on all these
interfaces.
Note: While configuring PIM on
physical interfaces (gi, ex, qx), make
sure those interfaces are configured as
layer 3 interfaces using the “no
switchport” command in interface
configuration mode.
Step
3
ip pim hello
-
holdtime <holdtime(1
-
65535)>
Configures
Hello hold
time
value.
The Hello hold time value can be any
number from 1-65535. Default is 30
seconds.
Step
4
end
Exits the configuration mode.
Step
5
show ip pim interface [{ Vlan <vlan
-
id> |
<interface-type> <interface-id> | detail }]
Displays the
Hello hold time
information for the given interface.
Step
6
write startup
-
config
Optional step
–
saves this PIM
configuration to be part of the startup
configuration.
PIM Configuration Guide
Supermicro L2/L3 Switches Configuration Guide
19
The ‘
no ip pim
hello
-
holdtim
e
’ command resets the hold time to its default value of 30.
The example below shows the commands used to configure the PIM Hello hold time.
Configure the PIM Hello hold time for layer3 VLAN 100
SMIS# configure terminal
SMIS(config)# interface vlan 100
SMIS(config-if)# ip pim hello-holdtime 90
SMIS(config-if)# end
1.9 Multicast Routing Table
The multicast routing table contains information about active multicast trees. This table lists both
forwarding and non-forwarding entries, i.e. multicast entries which have data flow and entries which do
not have data flow.
Every entry in the multicast routing table has one Incoming Interface (IIF) and one or more Outgoing
Interfaces (OIF). The entry can be (*.G) or (S,G). (*,G) entries have the W and R bit set, while (S,G)
entries have the Shortest Path Tree (SPT) bit set. The RP and RPF neighbors are also listed.
The route to
the
BSR, RP and Source must be reachable via any unicast protocol. Otherwise
the multicast routing table is not formed due to an RPF check failure.
The example below shows a PIM multicast routing table display output.
SMIS# show ip pim mroute
IP Multicast Routing Table
--------------------------
Route Flags S: SPT Bit W: Wild Card Bit R: RPT Bit
Timers: Uptime/Expires
Interface State: Interface, State/Mode
PIM Multicast Routing Table For Component 50
(*, 225.1.1.1) ,00:00:02/--- ,RP : 100.100.100.1
Incoming Interface: vlan100 ,RPF nbr : NULL ,Route Flags : WR
Outgoing InterfaceList:
vlan100, Forwarding/Sparse ,00:00:02/---
PIM Configuration Guide
Supermicro L2/L3 Switches Configuration Guide
20
1.10 PMBR
PIM Multicast Border Router (PMBR) is the border between two or more PIM domains running
different MRP’s such as PIM-SM, PIM-DM or DVMRP. PMBRs connect each PIM domain to the rest of the
Internet. The PMBR forwards multicast packets across different domains, hence receivers in one domain
receive packets from sources in another domain. In a PMBR, different interfaces can be configured as
DVMRP, PIM-SM or PIM-DM interfaces.
PMBR is disabled by default in Supermicro switches.
Follow the steps below to enable PMBR.
tep Command Description
Step 1
configure terminal
Enters the configuration mode.
Step 2
set ip pim pmbr enable
Enables or disables
PMBR.
Step 3
end
Exits the configuration mode.
Step 4
write startup
-
config
Optional step
–
saves this PIM
configuration to be part of the startup
configuration.
The
‘set ip pim pmbr disable’
command
disable
s
PMBR functionality.
The example below shows the commands used to configure PIM PMBR.
SMIS# configure terminal
SMIS(config)# set ip pim pmbr enable
SMIS(config)# end
SMIS# show ip pim interface detail
vlan100 504 is up
Internet address is 100.100.100.1
Muticast Switching: Enabled
PIM: Enabled
PIMv6: Disabled
PIM version: 2, mode: Sparse
PIM DR: 100.100.100.1
PIM DR Priority: 1
PIM Neighbour Count: 0
PIM Hello/Query Interval: 30
PIM Message Interval: 60
PIM Override Interval: 0

Other manuals for L2

10

This manual suits for next models

1

Other Supermicro Switch manuals

Supermicro SSH-C48Q User manual

Supermicro

Supermicro SSH-C48Q User manual

Supermicro SSE-G3648B User manual

Supermicro

Supermicro SSE-G3648B User manual

Supermicro L2 User manual

Supermicro

Supermicro L2 User manual

Supermicro SSE-G3632S User manual

Supermicro

Supermicro SSE-G3632S User manual

Supermicro SuperBlade SBM-GEM-X2C User manual

Supermicro

Supermicro SuperBlade SBM-GEM-X2C User manual

Supermicro SSE-G2252 User manual

Supermicro

Supermicro SSE-G2252 User manual

Supermicro SuperBlade HDR 200G User manual

Supermicro

Supermicro SuperBlade HDR 200G User manual

Supermicro SSE-X3348T User manual

Supermicro

Supermicro SSE-X3348T User manual

Supermicro L2 User manual

Supermicro

Supermicro L2 User manual

Supermicro SSE-G24-TG4 User manual

Supermicro

Supermicro SSE-G24-TG4 User manual

Supermicro L2 User manual

Supermicro

Supermicro L2 User manual

Supermicro SSE-G48-TG4 User manual

Supermicro

Supermicro SSE-G48-TG4 User manual

Supermicro SSE-F3548S User manual

Supermicro

Supermicro SSE-F3548S User manual

Supermicro SSE-G24-TG4 User manual

Supermicro

Supermicro SSE-G24-TG4 User manual

Supermicro SuperBlade SBM-GEM-X2C+ User manual

Supermicro

Supermicro SuperBlade SBM-GEM-X2C+ User manual

Supermicro SSE-X3348S User manual

Supermicro

Supermicro SSE-X3348S User manual

Supermicro L2 User manual

Supermicro

Supermicro L2 User manual

Supermicro SSE-G48-TG4 User manual

Supermicro

Supermicro SSE-G48-TG4 User manual

Supermicro SuperBlade MBM-XEM-002 User manual

Supermicro

Supermicro SuperBlade MBM-XEM-002 User manual

Supermicro SSH-C48Q User manual

Supermicro

Supermicro SSH-C48Q User manual

Supermicro SSE-F3548SR User manual

Supermicro

Supermicro SSE-F3548SR User manual

Supermicro SSE-G24-TG4 User manual

Supermicro

Supermicro SSE-G24-TG4 User manual

Supermicro Intelligent Switch User manual

Supermicro

Supermicro Intelligent Switch User manual

Supermicro L2 User manual

Supermicro

Supermicro L2 User manual

Popular Switch manuals by other brands

TESmart HKS0402A2U user manual

TESmart

TESmart HKS0402A2U user manual

Pilz PSEN ma1.3b-25 operating instructions

Pilz

Pilz PSEN ma1.3b-25 operating instructions

Lindy 38043 installation guide

Lindy

Lindy 38043 installation guide

IntelliCam RX-440 user guide

IntelliCam

IntelliCam RX-440 user guide

Allied Telesis AT-x550-18XTQ installation guide

Allied Telesis

Allied Telesis AT-x550-18XTQ installation guide

hager 04011 User instructions

hager

hager 04011 User instructions

Renkforce 410R P3 operating instructions

Renkforce

Renkforce 410R P3 operating instructions

H3C S12500 Series manual

H3C

H3C S12500 Series manual

D-Link DES-105 Quick installation guide

D-Link

D-Link DES-105 Quick installation guide

Edge-Core AS4610-30T quick start guide

Edge-Core

Edge-Core AS4610-30T quick start guide

steute ZS 73 SR Mounting and wiring instructions

steute

steute ZS 73 SR Mounting and wiring instructions

Videosec PS08FE+1GE+1SFP user guide

Videosec

Videosec PS08FE+1GE+1SFP user guide

Ruijie RG-ES05 Series Quick installation guide

Ruijie

Ruijie RG-ES05 Series Quick installation guide

Kramer VP-730 user manual

Kramer

Kramer VP-730 user manual

Axis T86 Series installation guide

Axis

Axis T86 Series installation guide

Aube Technologies TI073 user guide

Aube Technologies

Aube Technologies TI073 user guide

StarTech.com MSTDP124DP Quick install guide

StarTech.com

StarTech.com MSTDP124DP Quick install guide

Kramer VIA CONNECT PRO user manual

Kramer

Kramer VIA CONNECT PRO user manual

manuals.online logo
manuals.online logoBrands
  • About & Mission
  • Contact us
  • Privacy Policy
  • Terms and Conditions

Copyright 2025 Manuals.Online. All Rights Reserved.