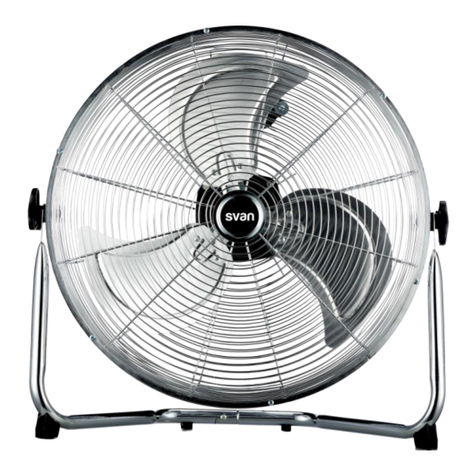
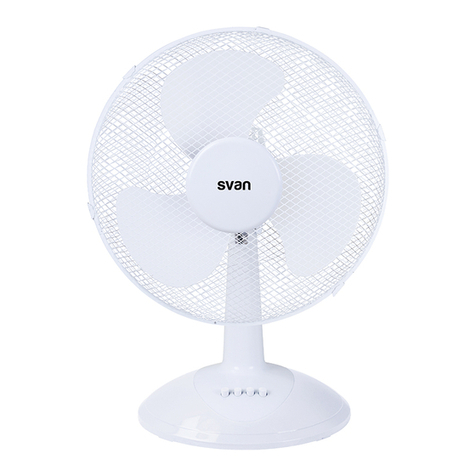
Svan SVVE16WT User manual

ESPAÑOL
Ventilador Nebulizador/Humificador
INSTRUCCIONES
Por favor lea estas instrucciones antes de usar el producto
INSTRUCCIONES GENERALES DE SEGURIDAD
Lea detenidamente este manual de instrucciones antes de utilizar el aparato
por primera vez.
1. Para evitar el riesgo de descargas eléctricas, no sumerja el cable, el
enchufe ni cualquier parte de esta unidad en agua u otros líquidos.
2. Es necesario vigilar de cerca la unidad cuando se utiliza cerca de niños.
3. Desenchufe la unidad de la fuente de alimentación cuando no la vaya a
utilizar y antes de limpiarla.
4. No lo utilice si el cable o el enchufe están dañado, o después de que
haya presentado mal funcionamiento, se haya caído o presente algún
tipo de daño. Lleve la unidad al servicio técnico autorizado más cercano
para que lo examinen, reparen o ajusten, según sea necesario.
5. El uso de accesorios no recomendados por el fabricante puede causar
lesiones a las personas.
6. Conecte siempre el enchufe a la unidad y después a la fuente de
alimentación. Para desconectar, coloque los controles en posición
"apagado" y desenchufe la unidad de la fuente de alimentación.
7. No utilice la unidad para ningún fin que no sea el previsto.
8. Nunca utilice la unidad con el cable de alimentación dañado. Si se daña
el cable de alimentación, debe ser sustituido por el fabricante o su
agente de servicio o una persona igualmente calificada para evitar un
peligro.
9. No intente reparar la unidad por su cuenta. Póngase en contacto con
nuestro servicio técnico para que le cambien o le reparen la unidad.

Los aparatos de ventilación no deben ser utilizados por niños o
personas con capacidades físicas, sensoriales o mentales
reducidas, o con falta de experiencia y conocimientos, a menos que
hayan recibido instrucciones o supervisión por parte de un adulto
responsable.
Los menores de 8 años y las personas con capacidades físicas,
sensoriales o mentales reducidas, o las personas sin experiencia o
conocimientos no deberán utilizar la unidad sin supervisión de un
adulto ni sin haber recibido las instrucciones apropiadas con
respecto al uso de la unidad y deben de entender los riesgos
implícitos a la utilización de este. No deje que los niños jueguen
con la unidad. Los niños no deben limpiar ni realizar tareas de
mantenimiento sin la supervisión de un adulto y siempre y cuando
tengan más de 8 años.
Mantenga el aparato y el cable fuera del alcance de los niños.
No introduzca los dedos ni ningún otro elemento a través de la rejilla
protectora mientras el ventilador se encuentra funcionando ya que las aspas
podrían causarle daños severos.
CONSERVE ESTAS INSTRUCCIONES.

DESCRIPCIÓN DE LAS PARTES
1.Protector frontal.
2. Tornillo de fijación de las aspas
3.Aspas
4.Aro de sujeción de los protectores frontal y trasero.
5. Tuerca de fijación de las aspas.
6.Protector trasero
7.Tapa del motor
8.Tubo del motor
9.Tornillo de fijación
10.Tubo de soporte
11.Cubierta de la base
12.Base

INSTRUCCIONES DEL NEBULIZADOR/HUMIFICADOR
El nebulizador/humidificador se usa en la parte inferior del ventilador, también
se puede usar independientemente del ventilador.
Instalación e instrucciones de nebulizador/humidificador:
1. Abra el embalaje para verificar que todos los componentes del producto
están bien, si falta algún objeto o existe alguna rotura, en este caso, por favor
vuelva a empaquetarlo y devuélvalo.
2.Instale firmemente las piezas del ventilador principal y coloque el
humidificador en el fondo de la base del ventilador, no debe colocarse cerca
de la luz solar y en lugares demasiado húmedos.
3.Tome el tanque de agua del humidificador y dele la vuelta, siga la flecha de
“Agregar agua “para abrir la tapa en sentido contrario a las agujas del reloj,
agregue agua.(Se recomienda el uso de agua destilada).
4. Apriete la tapa del tanque de agua en el sentido de las agujas del reloj
después de llenarlo, limpie las gotitas restantes de agua e instale bien el
tanque de agua.
5. Inserte el enchufe del humidificador en el enchufe de la parte posterior del
ventilador, conecte el ventilador a la red eléctrica, encienda el interruptor de
pulverización, la luz del humidificador se vuelve verde 2~5 segundos más tarde
y el humidificador comienza a funcionar.
6. El volumen de nebulización se puede ajustar y el volumen máximo es de

200 ml/h, puede ajustarse según el nivel de humedad de su habitación.
7. Cuando no hay agua en el tanque, el dispositivo de seguridad en el interior
apaga el circuito de atomización automáticamente, y no pulverizará. Cuando el
nivel del agua este bajo, la luz indicadora de agua se ilumina (roja), si va a
continuar usándolo, por favor desconéctelo de la corriente y vuelva a llenar
con agua el tanque de agua.
8. Es normal que haya una pequeña neblina que se desborde a los pocos
minutos de usar el humificador.
CONTROLES DEL VENTILADOR
Este ventilador utiliza un conmutador táctil electrónico y un temporizador.
Además de mantener las funciones del ventilador normal tradicional.
Tipos de controles:
Al conectar a la red eléctrica, la luz indicadora de encendido se ilumina, ahora
puede controlar el ventilador con los botones en el panel del ventilador y
usando el control remoto. (Coloque dos pilas en el control remoto antes de
usar)
1.“OFF”: presione este botón para cortar la energía cuando el ventilador está
funcionando, la luz del ventilador se detiene y el ventilador deja de funcionar.
2."ON/VELOCIDAD: Encienda el ventilador y seleccione la velocidad del
ventilador: baja-media-alta. Selección cíclica. Cuando el ventilador se apaga
con el botón "DESACTIVADO", presione ENCENDER / VELOCIDAD, el ventilador
funcionará como el modo de memoria.
3.“MODE”: Escoja flujo de aire: Normal, Natural, Dormir, Selección cíclica.
1) Aire normal: la unidad funcionará a velocidad baja-media-alta.
2) Aire natural: la unidad funcionará en estado irregular según el programa
preestablecido, la velocidad del flujo de aire puede seleccionarse Baja-Media-
Alta.
3) Aire para dormir: la velocidad del aire se puede seleccionar Baja-Media-Alta.
El flujo de aire disminuirá lentamente a medida que disminuya la temperatura
ambiente.

Regular el ventilador de alguna de estas formas:
* Velocidad alta: la unidad trabajará durante media hora a alta velocidad,
después de media hora trabajará a velocidad baja.
* Velocidad media: la unidad funcionará durante media hora a velocidad
media, media hora más tarde, funcionará a velocidad baja.
* Velocidad baja: la unidad trabajará a velocidad baja.
4. TEMPORIZADOR: el temporizador se puede configurar para 0.5H,1H,1.5H,
2H,2.5H,3H,3.5H,4H,4.5H,5H,5.5H,6H,6.5H,7H,7.5H.
Cuando el ventilador esté funcionando, el LED mostrará el tiempo restante
para saber cuánto tiempo funcionará el ventilador.
5. OSCILACIÓN: cuando el ventilador está funcionando, presione este botón
para activar la opción oscilación.
6. NEBULIZADOR: Este botón puede controlar el interruptor del humidificador
sin interferir el ventilador cuando este está funcionando. Puede usarse sólo
cuando se conecta la fuente de alimentación
INSTRUCCIONES PARA EL ENSAMBLAJE
1.Abra el ventilador del embalaje para examinar la integridad de las piezas,
tal y cómo aparece en el diagrama.
2. Primero, coloque la junta en los tubos de soporte, y luego insértelos en los
agujeros correspondientes de la base, (tal y cómo aparece en la sección A
sobre la instalación de la base) use el tornillo con una arandela para apretar

los tubos de soporte.
Finalmente, las cuatro ruedas deben instalarse en los orificios de alineación en
la base, apretando con una llave especial, y luego poniendo la cubierta de la
base.
3. Saque el cabezal del ventilador (esta parte se ha instalado antes de salir de
fábrica), desatornille los dos botones de ajuste para colocarlo en el tubo de
soporte instalado.
4. Saque el tornillo de fijación del protector y apriete la protección trasera en el
sentido de las agujas del reloj en la cabeza del ventilador.
5. Tome las aspas y apriételas con el tornillo de sujeción de las aspas en el
sentido contrario las agujas del reloj en el eje del motor;
6. Apriete la protección delantera, aflojando un poco el tornillo del aro, alinee y
coloque el protector frontal y la protección trasera, luego ajuste el tornillo.
Diagrama sobre cómo usar el tanque de agua:
MANTENIMIENTO DEL NEBULIZADOR/HUMIFICADOR
Desenchufe la unidad antes de limpiarla.
Limpie el tanque de agua (una vez a la semana)
Si hay suciedad en el tanque de agua, límpielo con detergente y enjuáguelo
con agua limpia.
Limpieza del nebulizador/humidificador:
Límpielo con un paño suave y húmedo, despejando la suciedad de la cubierta.
Debe limpiarse cuidadosamente.
Consejos a la hora de limpiarlo:
1) No lo toque con herramientas afiladas, sólo límpielo con un paño suave y
húmedo.
2) No utilizar el paño con disolventes químicos, gasolina, queroseno, polvo
pulido.
3) No utilice detergente, agua limpia es suficiente. Evite que el agua entre

dentro ya que provocaría un mal funcionamiento del aparato.
4) Por favor, no desarme el fuselaje o los componentes de la unidad.
Mantenimiento del humidificador:
Cuando la unidad no se use durante un tiempo prolongado, límpiela y
colóquela en el embalaje y manténgala en un lugar seco.
MANTENIMIENTO Y LIMPIEZA
Desenchufe el ventilador antes de limpiarlo.
Cualquier suciedad grasienta en el ventilador debe limpiarse con detergente y
con un paño suave.
Antes de usarlo, ponga algo de aceite de motor entre el eje del motor y el
cojinete.
Primero, desmonte el ventilador tal y cómo aparece en el Diagrama 2.
Limpie la suciedad del ventilador
Limpiar con detergente y con un paño suave.
Evite enjuagarlo directamente con agua.
Evite limpiarlo con diluyente, ácido, queroseno, aceites esenciales, químicos.
DATOS TÉCNICOS
220V 75W 50HZ

NORMAS DE PROTECCIÓN DEL MEDIO AMBIENTE
Este aparato no se debe desechar con los residuos domésticos
cuando finalice su durabilidad, sino que se debe ofrecer a un centro
de reciclaje de aparatos eléctricos y electrónicos domésticos. Este
símbolo en el aparato, manual de instrucciones y embalaje le avisa de este
aspecto importante. Los materiales utilizados en este aparato se pueden
reciclar. Mediante el reciclaje de electrodomésticos, usted contribuye a
fomentar la protección del medioambiente. Consulte a sus autoridades locales
para obtener información acerca del punto de recogida.

ENGLISH
Mist Fan
INSTRUCTION
Before using, please read the instruction carefully.
GENERAL SAFETY INSRTUCTIONS
Read this instruction manual very carefully before operating the fan for the first
time.
1. To protect against electric shock do not immerse cord, plugs, or in water or
other liquid.
2. Close supervision is necessary when any fan is used by or near children.
3. Unplug from outlet when not in use and before cleaning. Allow to cool
before putting on or taking off parts, and before cleaning the fan.
4. Do not operate any fan with a damaged cord or plug or after the appliance
malfunctions, or has been damaged in any manner. Return appliance to
the nearest authorized service facility for examination, repair or
adjustment.
5. The use of accessory attachments not recommended by the manufacturer
may cause injuries.
6. Always attach plug to appliance first, then plug cord into the wall outlet. To
disconnect, turn any control to “off”, then remove plug from wall outlet
7. Do not use appliance for other than intended use
8. Never use the fan if the supply cord is damaged, it must be replaced by the
manufacturer, its service agent or similarly persons in order to avoid a
hazard.
9. Do not try to repair the fan on your own. Always contact our service agent
to repaired or changed appliance
The fan not to be used by children or persons with reduced
physical, sensory or mental capabilities, or lack of experience and
knowledge, unless they have been given supervision or instruction

This fan can be used by children aged from 8 years and above and
persons with reduced physical, sensory or mental capabilities or
lack of experience and knowledge if they have been given
supervision or instruction concerning use of the appliance in a safe
way and understand the hazards involved. Children shall not play
with the appliance. Cleaning and user maintenance shall not be
made by children unless they are old than 8 and supervised.
Keep the fan and its cord out of reach of children less than 8 years.
Dot not touch the blades with hand or hard object before the fan comes to a
standstill, in case of accidents happen.
SAVE THIS INSTRUCTIONS.
PARTS DESCRIPTIONS

1.Front Guard.
2. Blade Fastening Screw
3.Fan blade
4.Grill Strap
5.Guard Fastening Screw
6.Rear Guard
7.Motor cover
8.Motor tube
9.Fastening Screw
10.Stand tube
11.Base cover
12.Base
INSTRUCTIONS OF COOL HUMIDIFIER
This Humidifier is mainly used on the bottom of the fan, also used separately.
Installation and Instructions of Humidifier
1. Open the packaging to check if the product components、appearance、
power cable are damaged or if there are any missing object or breakage,
please re-pack and send to your local service agent or the place you
purchased it at.
2.Put the Fan Main fuselage steadily and put the Humidifier on the Fan bottom

plate, it should be not placed near direct sunlight and too damp places.
3.Take the Humidifier Water Tank and turn over, follow the “Adding water”
arrow to open the cover on Counterclockwise, add clean water. (Pure water be
advised).
4.Tighten the Water Tank Cover by Clockwise after filling with water, wipe the
water droplets surrounded by water tank and install the Water Tank well.
5.Insert Humidifier plug into the socket on the back of Fan main fuselage
connect the Fan to the AC 220V/50Hz Power Supply, turn on the Spray switch,
Humidifier light turns green, 2~5 seconds later, mist will be sprayed from the
mist nozzle, Humidifier starts to work.
6. Mist volume can be adjusted and maximum mist volume is 200ml/h, it can
be set by your room's dry level.
7.When there is no water in the water tank, the safe device inside
turns off the atomization circuit automatically, then no mist sprays out,When
the water level drops, the water indicator light illuminate (red), if you continue
to use, please cut off the power and fill with water in the water tank again.
8.It is normal that there is a little mist overflowing around within
several minutes of using the humidifier.
CONTROL OPERATION OF REMOTE-CONTROL FAN
This Fan is utilizes Electronic Touch Switch and Timer, replacing traditional
switch and timer.
Operation Methods:
When connecting power supply, power indicator light illuminate,
fan is under standby mode. Now controlling the fan with the control buttons
on fan panel and using remote controller. (Put two batteries in the remote
controller before using)
1.“OFF”: press this button to cut off the power when the fan is working,
fan working indicator light stops, fan stops working and controlling electric
circuit recover to status mode and remembers the working mode before
shutdown.
2. ON/SPEED”: Switch ON the fan and select fan speed:Low-Medium-High……
Cyclic selection.When the fan is turn off by “OFF” button, Press ON/SPEED,fan
will work as the memory mode (Timer and sleeping wind can't be remembered)
3.“MODE”: Choose airflow, such as Normal Nature Sleep ……Cyclic selection.

1)Normal wind: Unit will work at Low-Medium-High speed.
2)Nature wind: Unit will operate under irregular status according to pre-set
program, airflow speed can be selected Low-Medium-High.It is more
comfortable and mild under nature mode.
3).Sleeping wind: airflow speed can be selected Low-Medium-High;
Motor is controlled by computer program so airflow volume will decline slowly
as body temperature declines.
Regular as follows
Settled at high speed: unit will work for half an hour at high speed of Nature
wind and then turn to medium speed of Nature wind, and after half an hour
turn to low speed of Nature wind.
Settled at medium speed: unit will work for half an hour at medium speed of
Nature wind, then turn to low speed of Nature wind.
Settled at low speed: unit will work at low speed of Nature wind.
4. TIMER”: Setting working time, Timer is 0.5H,1H,1.5H,2H,2.5H,3H,3.5H,4H,
4.5H,5H,5.5H,6H,6.5H,7H,7.5H. When fan is working on timer, LED will show the
time left for knowing how long the fan will work.
5.“SWING”: When fan is working, press the button to engage auto swing.
It is out of work when fan is turned off.
6. MIST”: The button can control humidifier switch and its action does not
interfere with fan when it is in working condition. It can be used on its own
when connecting the power supply.

INSTRUCTIONS OF ASSEMBLY METHOD
1.Open the fan of the packaging to examine the integrity of parts, as above
diagram;
2. First, put the two gaskets into the support tubes, and then insert into the
corresponding holes of the base, (such as the A section of installing the base
components shown) use the screw with a screw meson to tighten the support
tubes. Finally the four casters should be installed to the alignment holes at the
base, tightening with a special wrench,and then put on the decorative base
cover
3.Take out of the Fan Head (this part has been installed before leaving the
factory),unscrewethe two tightening button to put it into the installed support
tube.
4.Take out of the Guard Fastening Screw and tighten the Rear Guard on
Clockwise in Fan Head;
5.Take the blade and tighten it with the Blade Fastening Screw by
Counterclockwise on the motor shaft;
6. Finally tighten the Front Guard, first unscrewe the screw of Hoop Net a little,
align and hoop the Front Guard and Rear Guard then tighten the screw,
Fan components are assembled completely.
Using of Water Tank Diagram as follows:
MAINTENANCE OF COOL HUMIDIFIER
Unplug the unit before cleaning.
Cleaning of water tank (once a week)
If there is dirt in the water tank, clean it with detergent and flush it with clean
water.
Cleaning of Humidifier outside:

Clean with soft damp cloth,, clear the dirt, the mist cover must be cleaned
carefully.
Notices of cleaning:
1) Do not touch the transducer with sharp tools,only clean with soft wet cloth.
2) Don't use the cloth with chemical solvents、gasoline、kerosene、polishing
powder to o not touch the transducer with sharp tools,only clean with soft wet
cloth wipe the fan appearance.
3)Don't use detergent randomly, clear water is perfect. Avoid the water going in
to cause malfunction.
4) Please don't disassemble the unit fuselage or components randomly.
Keeping of Humidifier:
When the unit is not used for a long time, clean it and put it in the packaging
and keep it in the dry place.
CLEANING AND MAINTENACE
Unplug the unit before cleaning.
Any greasy dirt on the fan and fan blade should be cleaned with
clean and mild detergent and soft cloth.
Before using every time, put some Engine oil between motor shaft and
bearing.
First, disassemble the fan as per diagram 2
Clean the greasy dirt on the fan so as not to change the colour or cause
damages.
Clean with detergent and soft cloth
Avoid flushing with water directly.
Avoid cleaning with thinner,toluene,acidity,kerosene, essential oils,chemistry

cloth so as not to change the colour or cause damages. After cleaning, pack
them in order. Keep it in the dry place.
TECHNICAL DATA:
220V 75W 50Hz
GUIDELINES FOR PROTECTION OF THE ENVIRONMENT
This appliance should not be put into the domestic garbage at the
end of its durability, but must be offered at a central point for the
recycling of electric and electronic domestic appliances. This symbol
on the appliance, instruction manual and packaging puts your
attention to this important issue.
The materials used in this appliance can be recycled. By recycling of used
domestic appliances you contribute an important push to the protection of our
environment. Ask your local authorities for information regarding the point of
recollection.
Table of contents
Languages:
Other Svan Fan manuals
Popular Fan manuals by other brands

Mitsubishi Electric
Mitsubishi Electric Lossnay LGH-15RX5-E installation instructions

Maico
Maico PP 45 O operating instructions

Craftmade
Craftmade OPXL52 installation manual

Hyundai
Hyundai H-SF16-RC03 instruction manual

Three Sixty
Three Sixty Kute DC KUT44 Series owner's manual

Rosenberg
Rosenberg SupraBox 1900D Operating instruction

aerauliqa
aerauliqa QR100M installation manual

FläktGroup
FläktGroup CENTRIFLOW 3D PLUG FAN GMEC operating instructions

vanEE
vanEE 6LC Installation, operation and service instructions

Bayside
Bayside CALYPSO Installation, operation, maintenance & warranty information

Progress Lighting
Progress Lighting AirPro P2542 installation manual

Worx
Worx WX095 manual