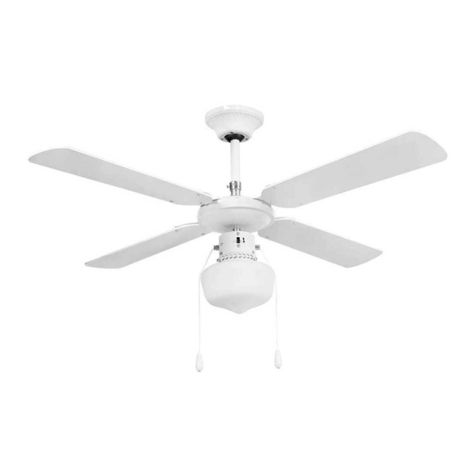
Svan SVVE52TM User manual

Lea detenidamente este manual y guárdelo para futuras referencias.
SVVE52TM
MANUAL USUARIO
VENTILADOR TECHO

CONTENIDO
INFORMACIÓN DE SEGURIDAD ................................................................................................. 2
LIMPIEZA ................................................................................................................................... 3
POSICIONAMIENTO................................................................................................................... 3
CONTROL INVERSO.................................................................................................................... 3
CONTENIDOS DEL PAQUETE...................................................................................................... 4
INSTRUCCIONES DE INSTALACIÓN ............................................................................................ 4
TABLA DE ERRORES ................................................................................................................... 8
DISPOSAL OF PACKAGING AND PRODUCT ................................................................................ 9

INFORMACIÓN DE SEGURIDAD
IMPORTANTE: lea atentamente y guárdelo para leerlo en el futuro.
Su producto se fabrica de acuerdo con
todas las normas de seguridad relevantes
relacionadas con los aparatos eléctricos. Si
tiene dudas sobre la instalación de este
producto, consulte a un electricista
calificado.
Si tiene dificultades para instalar su
ventilador de techo, comuníquese con
nuestro centro de servicio al cliente.
IMPORTANTE: este producto ha sido
diseñado para uso doméstico únicamente,
no profesional.
IMPORTANTE - Desembale con cuidado y
examine el producto en busca de daños. Si
cree que hay un defecto, no utilice el
producto y póngase en contacto con
nuestro cliente.
IMPORTANTE - Deseche todo el embalaje
de manera correcta y responsable y de
acuerdo con todas las leyes y regulaciones
locales. No deje nunca los componentes
del embalaje al alcance de los niños, ya que
pueden ser una fuente de peligro.
IMPORTANTE - La instalación de este
producto debe ser realizada por un
electricista calificado.
IMPORTANTE - Antes de insertar o
reemplazar las bombillas, asegúrese de que
la energía esté apagada, las bombillas se
hayan enfriado y las aspas del ventilador se
hayan detenido por completo.
ADVERTENCIA: desconecte siempre la
alimentación del circuito antes de
comenzar el trabajo de instalación.
ADVERTENCIA: las piezas accesibles se
vuelven hoy día durante el uso, los niños
pequeños deben mantenerse alejados.
ADVERTENCIA: no modifique ni altere
ningún producto antes o después de la
instalación. Esto puede hacer que el
producto no sea seguro.
ADVERTENCIA: este producto no está
diseñado para que lo utilicen personas
(incluidos niños) con capacidades físicas,
sensoriales y mentales reducidas, o con
falta de experiencia y conocimientos, a
menos que hayan recibido supervisión o
instrucciones sobre el uso del producto por
parte de las personas responsables de su
uso. la seguridad.
ADVERTENCIA: los niños deben ser
supervisados para asegurarse de que no
jueguen con el producto.
ADVERTENCIA: no instale este accesorio en
una atmósfera húmeda. Por ejemplo, un
baño.
ADVERTENCIA: no use este ventilador y
aparatos de calefacción de gas abiertos en
la misma habitación al mismo tiempo.
ADVERTENCIA: asegúrese de que la placa
de montaje esté colocada en un soporte de
techo adecuado que pueda soportar el
peso del ventilador en movimiento,
ADVERTENCIA: no inserte nada en las aspas
del ventilador mientras estén girando.
ADVERTENCIA - No use un regulador de
intensidad con este ventilador, esto puede
dañar el regulador y el ventilador.
ADVERTENCIA: no utilice este ventilador
con ningún dispositivo de control de
velocidad del mercado de accesorios, ya
que podría representar un riesgo de
incendio.
ADVERTENCIA: asegúrese de que el
ventilador esté apagado antes de cambiar
entre los modos de avance y retroceso.

ADVERTENCIA: no intente reparar esta
unidad usted mismo. Todas las
reparaciones deben ser realizadas por una
persona de servicio calificada.
ADVERTENCIA: asegúrese de que el
ventilador esté instalado a un mínimo de
2,3 m del suelo a un techo que tenga un
mínimo de 2,6 m de altura y que haya al
menos 500 m desde la punta de la pala y
cualquier pared o mobiliario.
LIMPIEZA
-Limpiar con un paño suave seco o un cepillo suave para eliminar el polvo, no utilizar
ningún material de limpieza abrasivo.
-No use agua para limpiar el ventilador.
-Asegúrese de no aplicar demasiada presión al limpiar las aspas del ventilador.
POSICIONAMIENTO
Al elegir una ubicación para el ventilador, asegúrese de que haya suficiente espacio para la
rotación de las aspas y de que no haya obstáculos en su camino.
El techo debe tener un mínimo de 2.6 metros (8.5 pies) de altura.
La distancia desde las aspas del ventilador y el piso debe ser de un mínimo de 2,3 metros (7,5
pies).
CONTROL INVERSO
Asegúrese de que el ventilador esté apagado antes de cambiar el modo.
Modo REVERSE: ajuste de invierno, crea una suave corriente ascendente para forzar el aire
caliente del techo hacia abajo.
Modo AVANCE: ajuste de verano, crea una corriente descendente para dirigir el aire frío hacia
abajo.

CONTENIDOS DEL PAQUETE
Retire el ventilador de techo de la caja y verifique el contenido a continuación.
INSTRUCCIONES DE INSTALACIÓN
IMPORTANTE: La fuente de alimentación debe apagarse antes de cualquier contacto con
cables eléctricos. Se recomienda contratar a un electricista autorizado para instalar su
ventilador de techo.
1. Compruebe que las aspas estén al menos a 0,76 m de
cualquier obstrucción. Compruebe la longitud de la
varilla hacia abajo para asegurarse de que las aspas
estén al menos a 2,1 m sobre el suelo. Para techos
más altos, es posible que desee utilizar una barra de
extensión y un cable de seguridad. Se necesitará una
varilla de extensión más larga para asegurar la
separación adecuada de la hoja.
2. Instale el soporte de montaje en la caja de
conexiones.
NOTA: la caja de conexiones debe ser especial para el
tipo de ventilador de techo. Si usa el soporte
existente, asegúrese de que el soporte esté bien
sujeto a la estructura del edificio y pueda soportar
todo el peso del ventilador.

3. Coloque con cuidado la primera aspa en el conjunto
del motor de manera que la brida de montaje grande
con tres hales se alinee con los tres orificios
correspondientes del motor. Instale los tres tornillos
en los orificios de las aspas y sujételos sin apretar al
motor con un destornillador. Repita para las otras
dos hojas.
4. Quite uno de los tres tornillos del cubo del motor,
conserve el tornillo para uso futuro. Afloje los dos
tornillos restantes. Coloque las ranuras del ojo de la
cerradura de la caja del interruptor en las dos
cabezas de los tornillos aflojadas. Gírelo en el sentido
de las agujas del reloj para acoplar los dos tornillos.
Vuelva a instalar el tornillo que quitó anteriormente.
Vuelva a apretar los tres tornillos para fijar
firmemente la caja del interruptor al conjunto del
motor.
5. Quite uno de los tres tornillos en la caja del
interruptor y afloje los dos tornillos restantes.
Enganche los conectores de cables del motor del
ventilador en el conector de cables del conjunto del
juego de luces. La conexión se completa cuando se
escucha un clic suave.
Coloque las ranuras de ojo de cerradura del conjunto
del juego de luces en las dos cabezas de tornillos
aflojadas. Gire el conjunto del juego de luces en el
sentido de las agujas del reloj para acoplar los dos
tornillos.
Vuelva a instalar los tres tornillos.
6. Sujete el motor por el adaptador del juego de luces y
el motor superior, dé vuelta con cuidado el ventilador
de techo parcialmente ensamblado y colóquelo
directamente sobre la espuma. Apriete la carcasa
superior con los tornillos.

7. Coloque la cubierta del techo y la cubierta del
acoplamiento sobre la varilla inferior.
8. Alinee los orificios de los pasadores de horquilla en la
varilla inferior con los orificios del acoplador del
motor. Instale el pasador de horquilla y asegúrelo con
la horquilla. El pasador de horquilla debe atravesar
los orificios del acoplador del motor. Es fundamental
que el pasador de horquilla en el acoplador del motor
esté instalado correctamente y apretado firmemente.
Vuelva a apretar uniformemente los dos tornillos de
fijación de la cabeza para asegurar la varilla
descendente al acoplamiento del motor en posición
vertical.
9. Levante con cuidado el ventilador de techo
parcialmente ensamblado y asiente el conjunto de
bola de suspensión / varilla descendente en el
soporte de suspensión. Asegúrese de que la ranura
de la bola esté acoplada con la lengüeta antirrotación
del soporte de suspensión.
10. Inserte el receptor en el soporte de montaje y
cablee. Si cree que no tiene suficiente conocimiento
o experiencia en cableado eléctrico, haga que un
electricista autorizado le instale el ventilador.

11.Coloque la persiana en la abertura del adaptador del
kit de luz, alineando las tres áreas planas en el borde
superior de la persiana con los tres hoyuelos elevados
en el kit y gire la persiana en el sentido de las agujas
del reloj hasta que se detenga.
CONECTANDO EL CONTROL REMOTO
Conecte los cables Fan Live (ROJO), Light Live (Marrón) y Neutro (Azul) del ventilador a los
cables correspondientes de la unidad receptora usando los clips.

PROBANDO SU VENTILADOR
ADVERTENCIA: Asegúrese de que la conexión del cableado sea correcta antes de encender el
interruptor principal.
Ventilador con mando a distancia
Para usar el ventilador, presione la velocidad deseada del ventilador en el control remoto y
debe funcionar en velocidad baja, media y alta. Si no puede utilizar esta función, consulte el
procedimiento de solución de problemas a continuación.
Presione el botón OFF para apagar el ventilador y recuerde siempre apagar el interruptor
principal para ahorrar energía. Para usar la luz (solo para el modelo con luz), presione el botón
de control de luz ENCENDIDO y la luz debería encenderse. Si no puede utilizar esta función,
consulte el procedimiento de solución de problemas a continuación.
TABLA DE ERRORES
Los problemas menores a menudo se pueden solucionar sin un electricista. Antes de realizar
cualquier trabajo, apague la fuente de alimentación para evitar descargas eléctricas.
PROBLEMA
CAUSA
SOLUCION
No funciona
La energía está apagada o el
fusible está quemado
Encienda la alimentación o
compruebe el fusible
Mala conexión de cables
Apague la energía. Capota
suelta, verifique todas las
conexiones
Ubicación inconsistente del
interruptor DIP
Configure el interruptor DIP
para que sea el mismo que el
del transmisor y el receptor
La energía de la batería está
apagada
Use una batería nueva
No se puede controlar la
velocidad o la luz
Mala conexión de cables
Apague la energía y verifique
que el cableado del receptor
sea correcto
La luz esta apagada
Verifique que la bombilla no
esté quemada

DISPOSAL OF PACKAGING AND PRODUCT
Deseche el material de embalaje del aparato correctamente. Todos los
materiales de embalaje pueden ser reciclados. Las piezas de plástico están
marcadas con las abreviaturas internacionales estándar: (por ejemplo, PS
para poliestireno, material de relleno) Este aparato está identificado de
acuerdo con la directriz europea 2012/19 / UE sobre residuos de equipos
eléctricos y electrónicos -WEEE. La guía especifica el marco para una
devolución y reutilización válidas en toda la UE de aparatos viejos.
¡Advertencia! ¡El material de embalaje podría ser peligroso para los niños! Para desechar el
paquete y el aparato, diríjase a un centro de reciclaje. Corte el cable de alimentación y deje el
dispositivo de cierre de la puerta inutilizable. El embalaje de cartón se fabrica con papel
reciclado y debe desecharse en el contenedor adecuado para su reciclaje. Al asegurarse de que
este producto se elimina correctamente, ayudará a evitar posibles consecuencias negativas
para el medio ambiente y la salud humana, que de otro modo podrían ser causadas por el uso
inadecuado de los desechos de este producto. Para obtener información más detallada sobre
el reciclaje de este producto, comuníquese con la oficina local de su ciudad y con el servicio de
eliminación de desechos de su hogar.
SVAN TRADING S.L.
C/Ciudad de Cartagena, 20. Paterna (46988). SPAIN.
96060034

Read this manual carefully and keep it for future reference.
SVVE52TM
USER MANUAL
CEILING FAN

CONTENTS
SAFETY INFORMATION............................................................................................................ 11
CLEANING................................................................................................................................ 12
LOCATION................................................................................................................................ 12
REVERSE CONTROL.................................................................................................................. 12
PACKAGE CONTENTS............................................................................................................... 12
FAN INSTALLATION INSTRUCTIONS......................................................................................... 13
TESTING YOUR FAN ................................................................................................................. 17
TROUBLE SHOOTING GUIDE.................................................................................................... 17
DISPOSAL OF PACKAGING AND PRODUCT .............................................................................. 17

SAFETY INFORMATION
IMPORTANT - Please read carefully and save it for future reading.
Your product is produced in conformity
with all relevant safety regulations relating
to electrical appliances. If in doubt about
fitting this product, please consult a
qualified electrician.
If you have difficulty installing your ceiling
fan, please contact our customer service
centre.
IMPORTANT –This product has been
designed for no-professional, domestic use
only.
IMPORTANT –Carefully unpack and
examine the product for any damage. If
you think there is a defect, do not use the
product and contact our customer.
IMPORTANT –Dispose of all packaging
correctly and responsibly and in
accordance with all local laws and
regulations. Never leave packaging
components within reach of children as
they can be a source of danger.
IMPORTANT –Installation of this product
must be carried out by a qualified
electrician.
IMPORTANT –Before inserting or replacing
bulb(s) ensure the power is switched off,
the bulb(s) have cooled down and the fan
blades have come to a complete stop.
WARNING –Always shut off power to the
circuit before starting installation work.
WARNING –Accessible parts become hoy
during use, young children must be kept
away.
WARNING –Do not modify or alter any
product before or after installation. This
may render the product un-safe.
WARNING –This product is not intended
for use by persons (including children) with
reduced physical, sensory, and mental
capabilities, or lack of experience and
knowledge, unless they have been given
supervision or instruction concerning use
of the product by persons responsible for
they safety.
WARNING –Children should be supervised
to ensure that they do not play with the
product.
WARNING –Do not mount this fitting in a
damp atmosphere. For example, a
bathroom.
WARNING –Do not use this fan and open
gas heating appliances in the same room at
the same time.
WARNING –Ensure the mounting plate is
fitted to and adequate ceiling support that
can hold the weight of the moving fan,
WARNING –Do not insert anything into the
fan blades whilst they are rotating.
WARNING –Do not use a dimmer switch
wit this fan, this can damage the dimmer
and fan.
WARNING –Do not use this fan with any
aftermarket speed control device as it
could be a fire risk.
WARNING - Ensure the fan is switched off
before changing between reverse and
forward modes.
WARNING –Do not attempt to repair this
unit yourself. All repairs must be carried
out by a qualified service person.
WARNING –Ensure the fan is fitted a
minimum of 2.3m from the floor to a
ceiling that is a minimum of 2.6m high and
that there is at least 500m from the blade
tip and any wall or furnishings.

CLEANING
-Wipe with a soft dry cloth or soft brush to remove dust, do not use any abrasive
cleaning materials.
-Do not use water to clean the fan.
-Ensure you do not apply too much pressure when cleaning the fan blades.
LOCATION
When choosing a location for the fan, ensure there is plenty of room for the rotation of the
blades and that no obstacles are likely to get in their way.
The ceiling must be a minimum of 2.6 meters (8.5 fts) in height.
The distance from the fan blades and the floor should be a minimum of 2.3 meters (7.5 fts).
REVERSE CONTROL
Ensure the fan is switched off before changing the mode.
REVERSE mode –Winter setting, creates a gentle updraft to force warm air from the ceiling
downwards.
FORWARD mode –Summer setting, creates a downdraft to direct cool air downwards.
PACKAGE CONTENTS
Remove the ceiling fan from the carton and check the contents below.

FAN INSTALLATION INSTRUCTIONS
IMPORTANT: Power supply must be switched off prior to any contact with electrical wires. It is
recommended to get a licensed electrician to install your ceiling fan.
12.Check to make sure blades are at least 0,76m from
any obstruction. Check down rod length to ensure
blades are at least 2.1m above the floor. For higher
ceilings you may want to use an extension rod and
safety cable. A longer extension rod will be needed to
ensure proper blade clearance.
13.Install the mounting bracket to the junction box.
NOTE: the junction box must special for ceiling fan
type. If using the existing bracket, make sure the
bracket is securely attached to the building structure
and can support the full weight of the fan.
14.Carefully place the first blade onto the motor
assembly such that the large mounting flange with
three hales aligns with the three matching holes of
the motor. Install the three screws into the blade
holes and loosely fasten to the motor with a
screwdriver. Repeat for the other two blades.
15.Remove one of the three screws form the motor hub,
retain the screw for future use. Loosen the remaining
two screws. Position the switch housing keyhole slots
onto the two loosened screw heads. Rotate it
clockwise to engage the two screws. Reinstall the
previously removed screw. Retighten all three screws
to securely attach the switch housing to the motor
assembly.

16.Remove one of the three screws in the switch
housing and loosen the remaining two screws.
Engage the fan motor wire connectors into the wire
connector of the light kit assembly. The connection is
complete when you hear a soft click.
Position the light kit assembly keyhole slots onto the
two loosened screw heads. Rotate the light kit
assembly clockwise to engage the two screws.
Reinstall the three screws.
17.Grasp the motor by the light kit adapter and upper
motor over, and carefully turn the partially
assembled ceiling fan over and place directly on top
of the foam. Tighten the upper housing with the
screws.
18.Place the ceiling cover and coupling cover over the
down rod.
19.Align the clevis pin holes in the down rod with the
holes in the motor coupler. Install the clevis pin and
secure with the hairpin clip. The clevis pin must go
through the holes in the motor coupler. It is critical
that the clevis pin in the motor coupler is properly
installed and securely tightened. Evenly retighten the
two head setscrews to secure the down rod to the
motor coupling in a vertical position.

20.Carefully lift the partially assembled ceiling fan and
seat the hanger ball/ down rod assembly into the
hanger bracket. Be sure the groove in the ball is
engaged with the anti-rotation tab on the hanger
bracket.
21. Insert the receiver to the mounting bracket and wire.
If you feel that you do not have enough electrical
wiring knowledge or experience, have your fan
installed by a licensed electrician.
22.Place the shade into the opening of the Light Kit
Adapter, aligning the three flat areas on the top edge
of the shade with the three raised dimples on the kit
and turn the shade clockwise until it stops.

WIRING UP THE REMOTE
Connect the Fan Live (RED), Light live (Brown) and Neutral (Blue) wires from the fan to the
corresponding wires from the receiver unit using the clips.

TESTING YOUR FAN
WARNING: Make sure wiring connection is correct before turning ON the main switch.
Fan with remote control
To use fan, press desire fan speed on remote control set and it should operate on Low, Med
and Hi speed. If you cannot operate this function, refer to the troubleshooting procedure
below.
Press OFF button to turn off the fan and always remember to switch off the main switch to
save energy. To use light (for model with light only), press light control button ON and light
should light up. If you cannot operate this function, refer to the troubleshooting procedure
below.
TROUBLE SHOOTING GUIDE
Minor problems often can be fixed without an electrician. Before doing any work, shut off
power supply to avoid electrical shock.
PROBLEM
CAUSE
SOLUTION
Fail to operate
Power is off or fuse is blown
Turn power on or check fuse
Bad wire connection
Turn power off. Loose
canopy, check all
connections
Inconsistent location for dip
switch
Set the dip switch to be the
same of transmitter and
receiver
Battery power is off
Use a new battery
Cannot control speed or light
Bad wire connection
Turn power off and check
the receiver wiring is correct
Light is off
Check the bulb is not burnt
DISPOSAL OF PACKAGING AND PRODUCT
Dispose of packaging in an environmentally-friendly manner.
This appliance is labelled in accordance with European Directive 2012/19/EU
concerning used electrical and electronic appliances (waste electrical and
electronic equipment - WEEE). The guideline determines the frame work for
the return and recycling of used appliances as applicable throughout to the EU.
PACKAGE INFORMATION: Packaging materials of the product are manufactured from
recyclable materials in accordance with our National Environment Regulations. Do not dispose
of the packaging materials together with the domestic or other wastes. Take them to the
packaging material collection points designated by the local authorities.
SVAN TRADING S.L.
C/Ciudad de Cartagena, 20. Paterna (46988). SPAIN.
96060034
This manual suits for next models
1
Table of contents
Languages:
Other Svan Fan manuals