Svive SVIVERL01 User manual

Included Accessories
MANUAL
Sirius Ring Light
& Tripod stand
Warnings and Notes
1. Keep the environment dry and ventilated when using the light.
2. Do not expose the product to water or moisture to avoid circuit
problems.
3. Do not use the light with a voltage above its design limit.
4. This product may produce some heat when in use.
5. Do not place the light close to flammable or evaporative substances,
such as gasoline and alcohol.
6. Avoid any damage to the light during the transportation and installation
process.
7. Avoid looking directly into the light source when in use.
8. To clean the light, use a soft dry cloth.
9. Keep the product out of reach from younger children.
10. Do not disassemble the equipment to avoid potential injury. In the event
of a malfunction, the product should be repaired by a qualified
technician.
11. Unplug the product from electricity if it is not in use for long periods
of time.
1x power cable
1x 1/4” screw mount
1x phone holder
1x user manual
1x remote control
1x carry bag

D
C
POWER
COLOR
DIMMER
CHANNEL
Product Information Product Information
Thank you for choosing Svive!
This product features 360 bi-color LEDs. They produce less heat, which
increases their lifespan. The Sirius Ring Light maintains even lighting and
eliminates shadows. Additionally, its diffusion layer helps create a vibrant but
gentle glow.
The light’s shell is made of sturdy and durable ABS. This material is
lightweight, making the Sirius Light easy to carry.
The output power of this product is 40W.
Model
Output power
Luminous flux
LED quantity
Color temperature
Light source
Color rendering index
Dimmer
Remote control
Remote control distance
DC power input AC100-240V 50/60Hz
>30M
99 channels 2.4G wireless remote control
10%-100%
85
0.2W high brightness smd LED
3200K-5600K
360 PCS
4000 LM
40W
SVIVERL01
Size Outer diameter 355mm, inner diameter 230mm, thickness 45mm
Turn the knob to set the desired brightness.
Press and hold for 2 seconds. Choose the desired channel (01-99) by turning the knob. To
confirm, press and hold for 2 seconds again. To use the remote control, its channel must match
the light’s channel.
Press and hold for 2 seconds to turn the light on/off.
Turn the knob to change the color temperature of the light.
Make sure this switch is on (“I”) to use the light.
Vents
Brightness dimmer
Channel knob
On/Off button
LED display
Power cord socket
Main power switch
Color temperature adjustment

2.4g Wireless
Remote Control
Adjusting the color temperature with the remote control
- To activate the remote control, press the “ON/OFF” button.
- Press the “function” button until the middle orange LED lights up on
the LED display of the remote control. By pressing this button, you
can switch between settings for brightness (red LED light), color
temperature (orange LED light) and channel (no LED light).
- The color temperature currently set is shown in a shortened form on
the display of the remote control. For example: 32 means 3200 K
and 44 means 4400 K.
- Set the desired color temperature by pressing the plus “+” and
minus “-“ buttons on the remote control.
- The color temperature can be set in steps of 100 Kelvin from 3200
to 5500 Kelvin.
- The selected values are applied and saved by the device immediately.
MANUAL

Functions overview:
- Red status LED – brightness setting
- Orange status LED – color temperature setting (for bi-color models only)
- Red and orange status LEDs both on – 4400K intensity mode
- No status LED – channel setting
- Green status LED – lights up when “+” and “-“ buttons are pressed
Switching the light on/off with remote control
- Turn the light on by pressing the “ON/OFF” button on the remote control. Make sure that the
main power button of the light is on, otherwise you will not be able to use the remote control.
- Turn the light off by pressing and holding the “ON/OFF” button on the remote control for 2-3
seconds.
- The display of the remote control has an automatic switch off function. To reactivate the display,
press the “ON/OFF” button.
Setting brightness with remote control
- Activate the remote control’s display by pressing the “ON/OFF” button.
- By pressing the “function” button you can switch between settings for brightness (red LED light),
color temperature (orange LED light) and channel (no LED light).
- When the brightness setting is selected, you will see the red LED light shine on the display.
- Set the desired brightness by pressing the plus “+” and minus “-“ buttons on the remote control.
- The brightness can be adjusted in steps of 1% from 10 to 99%.
- The selected values are applied and saved by the device immediately.
Select between single color, bi-color and 4400K instensity
- The remote control can switch between single color, bi-color and 4400K intensity modes. Before
selecting any of them, please check if your light has these modes available.
- Activate the remote control’s display by pressing the “ON/OFF” button.
- By pressing the “function” button, you can switch between modes:
1. When red status LED light is on, the mode for a single color is selected. In this mode, you can
only set the light’s brightness.
2. When the orange status LED is on, the mode for bi-color is selected. In this mode, you can only
set the color temperature of the light.
- By pressing and holding the “function” button, you can select the 4400K intensity mode (red and
orange status LEDs are both on).
Selecting the channel / pair the light and remote control
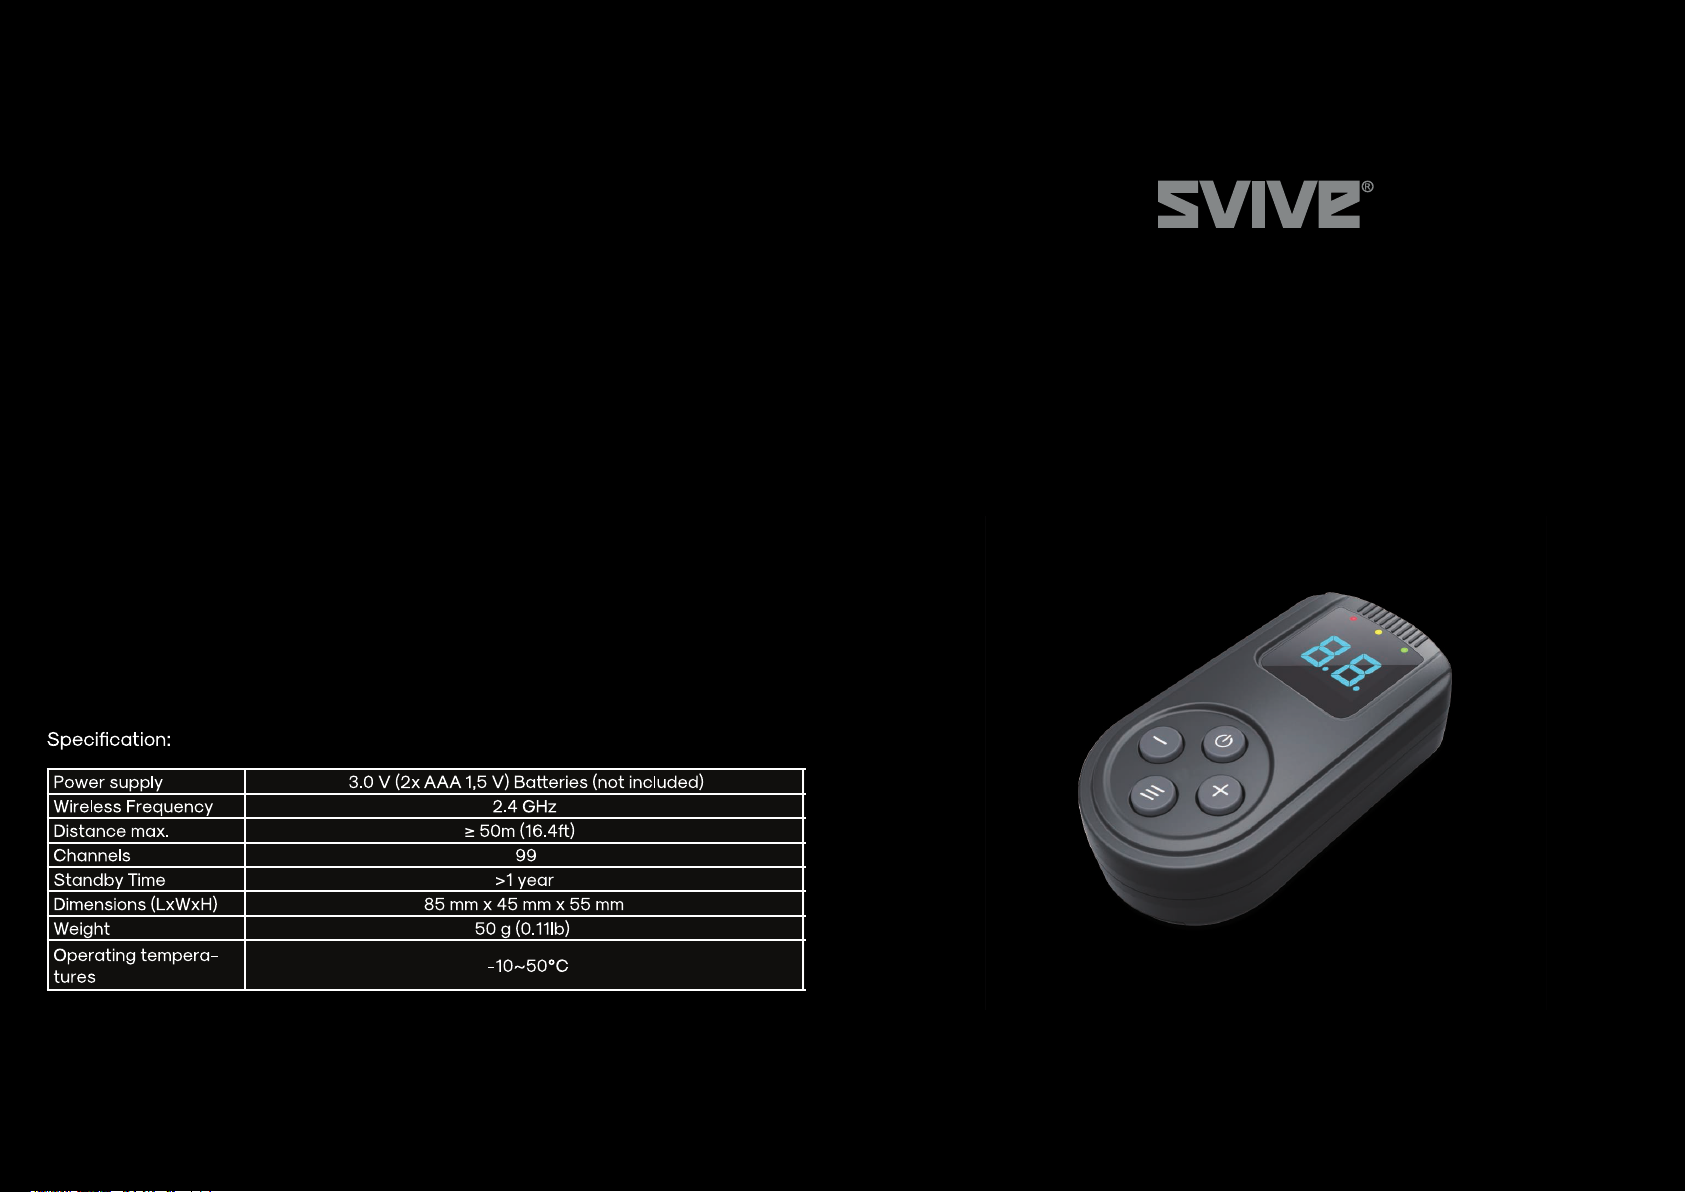
- Insert 2x AAA 1.5V batteries in the remote control before first use.
- Turn the light on by pressing the “ON/OFF” button. Make sure that the main power button of the
light is on, otherwise you will not be able to use the remote control.
- Press the “ON/OFF” button of the remote control to active the LED display.
- Make sure that the selected channel of the remote control matches the channel of the light.
- If the channels are not set correctly, press the “function” button. By pressing this button, you can
switch between settings for brightness (red LED light), color temperature (orange LED light) and
channel (no LED light).
- When there is no LED light shining on the display above the number, the currently set channel is
displayed.
- You can set the desired channel by pressing plus “+” and minus “-“ button on the remote control.
- Press the “function” button again to confirm the channel selection. By doing so, you return to the
brightness settings (red LED light).
- Check whether the selected information on the remote control matches the light’s. If necessary,
correct the values on the light.
- You can now operate the light with the remote control.
- The display of the remote control has an automatic switch off function. To reactivate the display,
press the “ON/OFF” button.
- If your remote control channel is set to “00”, it can control all devices at any channel between
01 and 99 at the same time.
Popular Lighting Equipment manuals by other brands

MQ Multiquip
MQ Multiquip GB43SC Operation and parts manual

American DJ
American DJ Vizi Roller Beam 2R User instructions

Saber Compact
Saber Compact ATD-80052 operating instructions

Vision-EL
Vision-EL 7884 instructions

American DJ
American DJ ColorPod 250 User instruction

Lumena
Lumena Radiata PACAMAN instruction manual