1-2 n
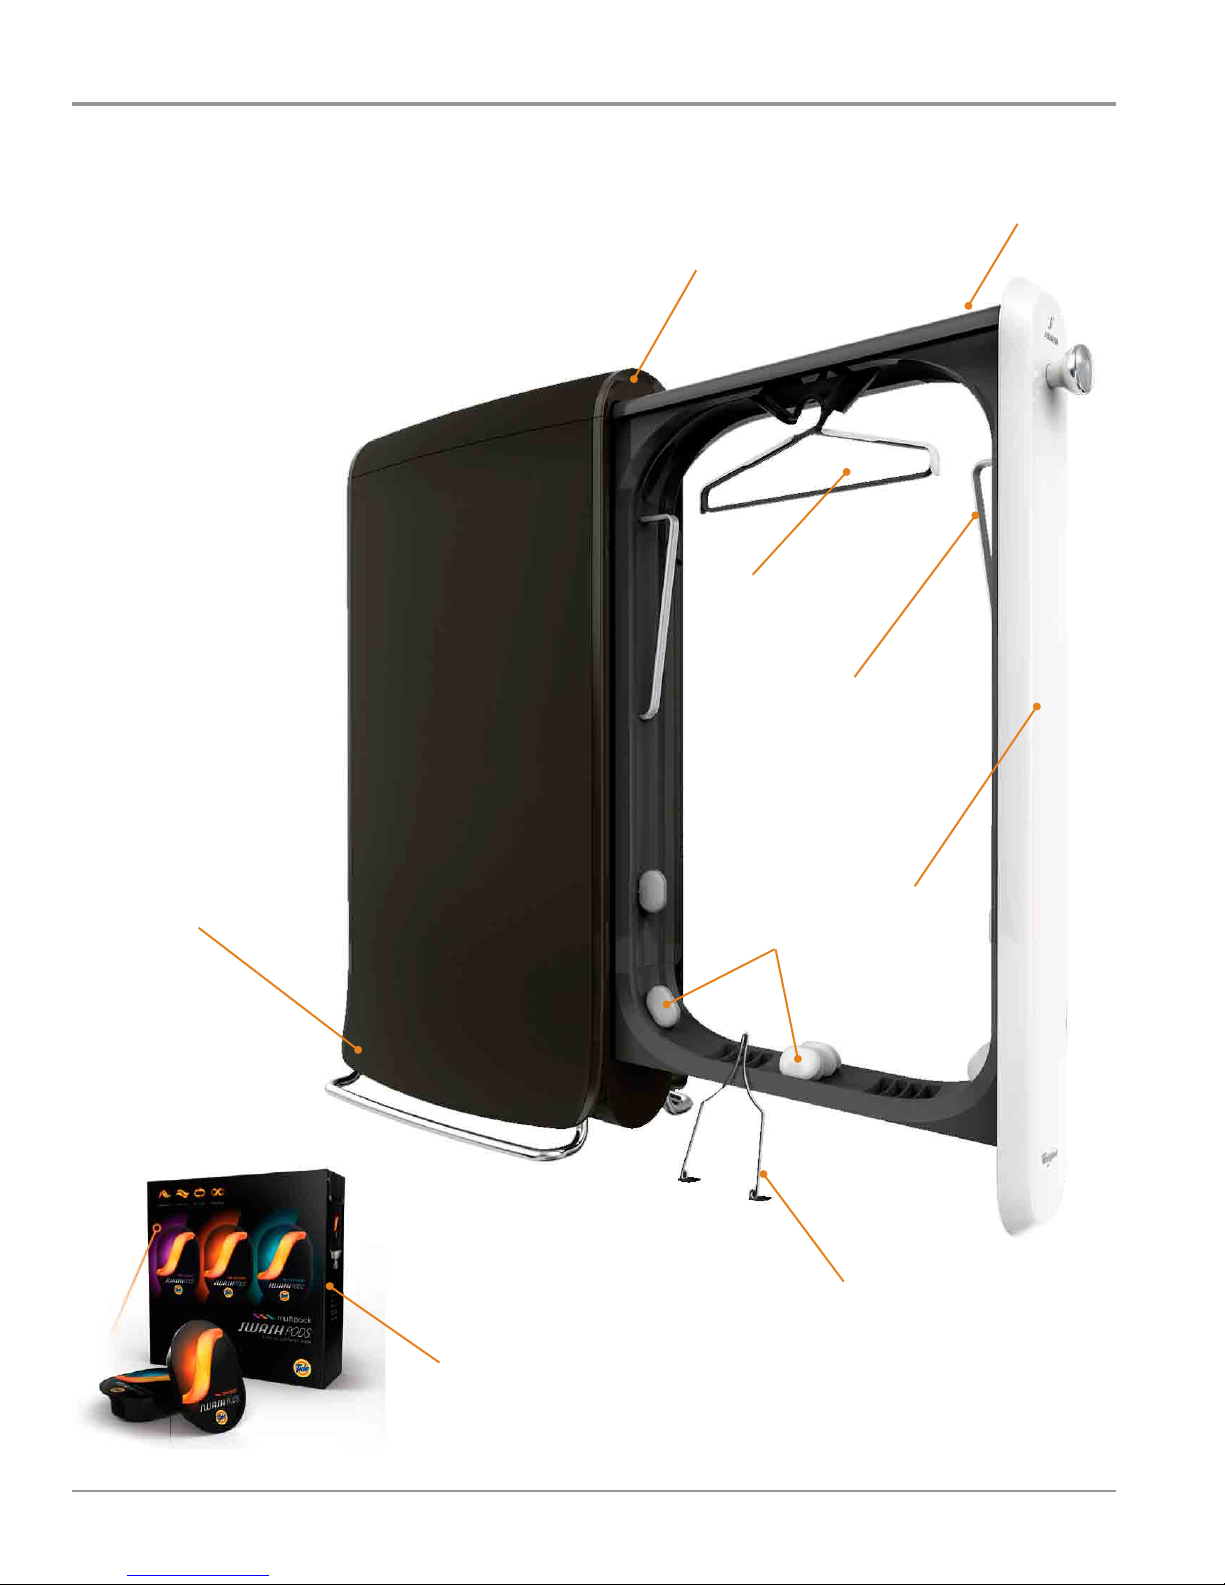
SWASH™ Clothing Care System
GENERAL INFORMATION
SWASH™ System Safety
You can be killed or seriously injured if you don't immediately
You can be killed or seriously injured if you don't follow
All safety messages will tell you what the potential hazard is, tell you how to reduce the chance of injury, and tell you what can
happen if the instructions are not followed.
Your safety and the safety of others are very important.
We have provided many important safety messages in this manual and on your appliance. Always read and obey all safety
messages.
This is the safety alert symbol.
This symbol alerts you to potential hazards that can kill or hurt you and others.
All safety messages will follow the safety alert symbol and either the word “DANGER” or “WARNING.”
These words mean:
follow instructions.
instructions.
DANGER
WARNING
IMPORTANT SAFETY INSTRUCTIONS
WARNING: To reduce the risk of re, electric shock, or injury to persons when using the SWASH™ system, follow basic
precauons, including the following:
nRead all instrucons before using the SWASH™ system.
nUse the SWASH™ system only for its intended use.
nTo reduce the risk of electric shock, do not immerse any
part of SWASH™ system in water or other liquids.
nNever yank cord to disconnect from outlet; instead, grasp
plug and pull to disconnect.
nDo not allow cord to touch hot surfaces. Let SWASH™
system cool completely before pung away. Loop cord
loosely around SWASH™ system when storing.
nAlways disconnect SWASH™ system from electrical outlet
when not in use, or when cleaning SWASH™ system.
nDo not operate SWASH™ system with a damaged cord, or
if it has been dropped or damaged. To reduce the risk of
electric shock, do not disassemble or aempt to repair
SWASH™ system. Contact a qualied service person for
examinaon and repair. Incorrect reassembly or repair
could cause a risk of re, electric shock, or injury to
persons when SWASH™ system is used.
nClose supervision is necessary for any appliance being
used near children.
nUse care when interrupng a cycle; interior surfaces may
be hot if SWASH™ system is opened when in use.
nTo reduce the likelihood of circuit overload, do not
operate other high-waage hardware (i.e. refrigeraon,
air condioner, etc) on the same circuit.
nThe SWASH™ system is intended for household use only.
Do not use outdoors.
nDo not use in garages or near any ammable liquids.
nDo not use an extension cord.
nThe use of accessories other than those supplied with
the SWASH™ system is not recommended and may cause
injury.
nUse and store SWASH™ system out of regularly traveled
paths to reduce the possibility of p-over.
nKeep the area clear around the base of SWASH™ system
to make sure venlaon openings in the boom of
SWASH™ system are not blocked.
nDo not modify SWASH PODS™ cups or use any alternate
formulas. The SWASH™ system was designed to work
safely using only the unique SWASH PODS™ cups. Any
modicaons could reduce user safety.
nBurns could occur from touching hot metal parts.
SAVE THESE INSTRUCTIONS
STATE OF CALIFORNIA PROPOSITION 65 WARNINGS:
WARNING: This product contains one of more chemicals known to the State of California to cause cancer.
WARNING: This product contains one or more chemicals know to the State of California to cause birth defects or other
reproducve harm.