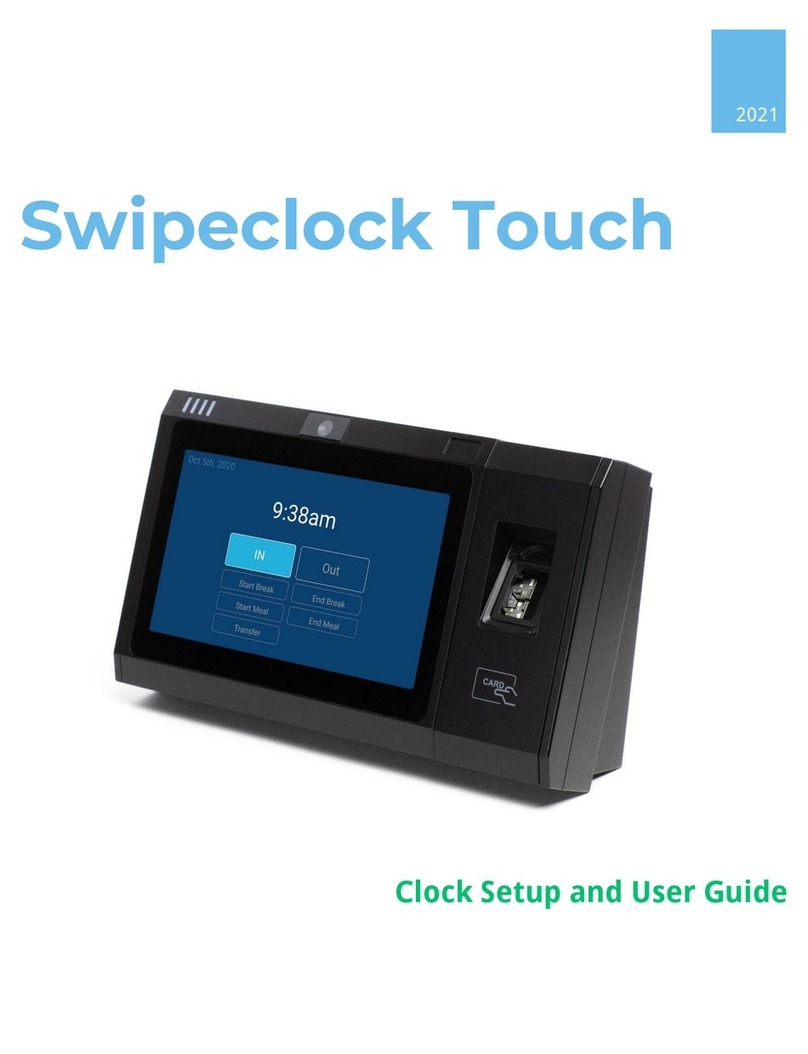
Swipeclock Vision Safety guide

Swipeclock
Vision/Vision+
Clock Setup and User Guide
2021

Swipeclock Vision/Vision+
User Guide v2.2 1 July 26, 2021
Swipeclock Vision/Vision+ Setup ............................................................................. 2
1. Before You Start........................................................................................... 2
2. Connect to the Network .............................................................................. 3
3. Clock Registration ........................................................................................ 8
4. Set the Time Zone ........................................................................................ 9
5. Trusted PIN Option.................................................................................... 11
Facial Clock Use ...................................................................................................... 13
6. Facial Registration...................................................................................... 13
7. Employee Instructions............................................................................... 16
8. Vision FAQ .................................................................................................. 17
9. Vision+ Thermal Scan ................................................................................ 18
Additional Clock Settings........................................................................................ 20
10. "Never Sleep" Mode................................................................................... 20
11. Change Ethernet from Static IP to DHCP.................................................. 21
12. Offline Mode .............................................................................................. 21
13. Kiosk Mode................................................................................................. 21
Troubleshooting and Technical Info ..................................................................... 25

Swipeclock Vision/Vision+
User Guide v2.2 2 July 26, 2021
Swipeclock Vision/Vision+ Setup
Swipeclock Vision and Vision+ are designed to be wall mounted. Access to the
mounting screws and various device connections is gained by opening the front
cover of the clock. To help guide you through this process, a diagram of how to
open the clock is located at the end of this manual. The Swipeclock Vision
Installation Guide also includes full physical setup instructions. Once installed,
connect the clock to your network using the instructions in this guide. The
following
Before You Start
section is designed to self-document the required
network and account information needed to connect to the internet.
Vision vs Vision+ Terminology Usage
In this manual, when the term "Vision" is used, it is assumed that the
instructions
also apply to Vision+
. However, if the instructions
only apply to
Vision+
, then the term "Vision+" is used.
1. Before You Start
Before you can use Swipeclock Touch, it needs to connect to the internet and be
linked to your timekeeping account. Review and fill in the following items
needed for registration:
1. Connectivity Method (Ethernet or Wi-Fi) –The default connection type
for Swipeclock Vision is to use the Ethernet connection and acquire an IP
address through DHCP. If that applies to your network, then no additional
network configuration is required. However, if your network requires a
static IP
, or you are connecting via Wi-Fi, fill in the following fields for
reference:
•For Ethernet with a static IP, ask your network administrator for the
following information:
Static IP: _______________________________________________________
Gateway: _______________________________________________________
DNS: _______________________________________________________

Swipeclock Vision/Vision+
User Guide v2.2 3 July 26, 2021
•For Wi-Fi,have your network’s name and password:
Wi-Fi ID: _________________________________________________
Wi-Fi Password: _________________________________________________
2. Timekeeping Login and Password –In addition to network information,
you also need your login and password to the timekeeping system.
Throughout this manual, when you are asked to enter your login and
password, it always refers to the timekeeping credentials. In most cases,
any user with Administrator-level (or higher) access to the timekeeping
system can register the clock. If you are unsure of your level of access or
have problems registering the clock, please contact your provider for
assistance.
3. Battery Installation - If you purchased a backup battery or your clock
came with a battery, follow the installation instructions in the Installation
Guide, which includes connecting the battery to the connector within the
clock housing.
2. Connect to the Network
To connect to your network, follow the instructions that correspond to your
network setup: Ethernet or Wi-Fi.
Ethernet Setup
If you are connecting the clock to your network via Ethernet, then registration
may be possible without any additional network configuration. It depends on
whether your network uses DHCP for assigning devices an IP address or
requires each device to have a static IP.
If your network uses DHCP, then once the clock has power and is connected
to you network with the supplied RJ-45 cable, it automatically connects to the
internet within moment of powering up. Proceed to
section 3, Clock
Registration
.

Swipeclock Vision/Vision+
User Guide v2.2 4 July 26, 2021
If your network requires a static IP, then follow these configuration steps:
1. Tap the gear icon near the top right corner of the login screen.
2. Tap UPDATE WIRED SETTINGS on the
CLOCK SETTINGS
tab.
3. Confirm you want to leave the Swipeclock Vision app.
2.1 Access CLOCK SETTINGS with the gear icon on the initial registration page
2.2 Configure a static IP with UPDATE WIRED SETTINGS

Swipeclock Vision/Vision+
User Guide v2.2 5 July 26, 2021
4. Tap Ethernet configuration on the Ethernet settings screen.
5. Under
Connection Type
, tap Static IP.
6. Enter the IP, Gateway, and DNS information provided by your network
administrator. Netmask normally does not need to be changed, but if it is
needed, your network administrator can provide that information.
7. Tap Save.
8. Tap the Home button near the bottom of the screen.
2.4 "Home" button on the device system screens
Changes are saved upon exit and you will be returned to the initial login
screen.
You can proceed to section 3,
Clock Registration
.
2.3 Tap "Ethernet configuration" on the device's Ethernet Manager app screen to alter the network
configuration

Swipeclock Vision/Vision+
User Guide v2.2 6 July 26, 2021
Wi-Fi Setup
To connect your clock to Wi-Fi, follow these configuration steps:
1. Tap the gear icon near the top right corner of the initial login screen to
access the Clock Settings page.
2. Tap UPDATE WIFI SETTINGS on the
CLOCK SETTINGS
tab.
2.6 Configure the Wi-Fi with UPDATE WIFI SETTINGS
3. Confirm that you want to leave the Swipeclock Vision app.
2.5 Use the gear icon on the initial clock registration screen to set up Wi-Fi connectivity

Swipeclock Vision/Vision+
User Guide v2.2 7 July 26, 2021
4. Set the Wi-Fi toggle to ON.
5. Select your network from the list.
6. Enter your Wi-Fi network password.
7. Tap the Home button.
Changes are saved upon exit and you will be returned to the initial login
screen.
You can proceed to section 3,
Clock Registration
.
Wi-Fi Signal Strength
Wi-Fi networks are more susceptible to signal interruptions; an Ethernet
connection is generally more reliable than Wi-Fi. To check the strength of your
Wi-Fi, use the indicator. If it is 50% or less, we recommend you boost your Wi-Fi
signal or use an Ethernet connection.
2.7 Enable Wi-Fi for the device and select your network from the list

Swipeclock Vision/Vision+
User Guide v2.2 8 July 26, 2021
3. Clock Registration
Registration associates the clock with your timekeeping system. Before
registering the clock, make sure you have connected to your network and have
access to the internet. See section 2,
Connect to the Network
, for instructions
on this process.
1. From the clock's initial registration screen
(see figure 2.1),
enter your
login and password.
2. On the
Register clock
screen, tap the Assign Clock to dropdown and
select your timekeeping account by name (it may be preselected for you).
You do not need to enter the clock's serial number; it is filled in
automatically.
3. The following fields are optional when registering the clock and are visible
on the timekeeping system's Clock Status page:
a. Clock name labels the clock. This is helpful when you have
multiple clocks and are checking clock status in the timekeeping
system.
b. Clock location is used in conjunction with a Location Stamp which
automatically records the clock's location on the time card. Contact
your timekeeping provider for assistance with location stamps.
c. Note is for any additional data, like “Date in service”.
4. Tap Register Clock.
3.1 The clock registration screen is where you assign the clock to your timekeeping account

Swipeclock Vision/Vision+
User Guide v2.2 9 July 26, 2021
The clock confirms registration with a green confirmation screen. You can either
tap Got It or wait for the clock to advance on its own.
Once registration is complete, you will see the clock entry screen. You can
proceed to section 4,
Set the Time Zone
.
"Update Downloading"
After a few moments of inactivity, the clock checks for any updates to the
Swipeclock Vision app. If an update is available, it automatically downloads it
and "update downloading" appears on the screen. This process is followed by a
restart and should only take a few minutes. You can check the version of your
clock's software, as well as force it to check for an update, on the Clock Info tab.
4. Set the Time Zone
To set the time zone:
1. Tap the gear icon on the top right of the clock entry screen.
2. Enter your login and password.
3. Tap the Clock Settings tab.
3.2 Confirmation that the clock is registered

Swipeclock Vision/Vision+
User Guide v2.2 10 July 26, 2021
4. Tap UPDATE TIME AND TIMEZONE from the
CLOCK SETTINGS
tab.
5. Confirm that you want to leave the Swipeclock Vision app.
6. Automatic date & time does not actually affect the time zone of the clock;
instead, manually set the time zone by tapping Select time zone
1
.
1
Setting the time zone on Swipeclock Vision only affects the time
displayed
on the clock. Punches
collected and sent to our servers will use the time zone designated in the timekeeping application.
4.1 Set the clock's time zone from the CLOCK SETTINGS screen with UPDATE TIME AND
TIMEZONE
4.2 "Date & time" in the device's Android settings is where the time zone is set

Swipeclock Vision/Vision+
User Guide v2.2 11 July 26, 2021
7. Scroll through the list and select your time zone.
8. Exit the page with the Home button at the bottom of the screen.
Changes will be saved automatically upon exit.
5. Trusted PIN Option
Vision has an option for select employees to use a PIN to identify themselves
instead of having their face scanned. When enabled, this option appears as a
button on the touchscreen. If an employee that has
not
been given a Trusted
PIN tries to use this button, their punch will not be recognized.
This feature is not enabled by default and requires additional configuration in
your timekeeping system.
To enable the PIN button that allows select employees to clock in with a PIN:
1. From the clock entry screen, click the gear icon in the top right corner.
2. Enter your login and password.

Swipeclock Vision/Vision+
User Guide v2.2 12 July 26, 2021
3. Tap the Clock Settings tab and enable Show PIN Button.
4. Any changes are saved upon exit. Tap the X at the top right of the screen
For more on setting employees up with Trusted PINs, see your timekeeping
system's online knowledge base.
5.1 Show PIN Button enables employees to clock in if their face is not recognized

Swipeclock Vision/Vision+
User Guide v2.2 13 July 26, 2021
Facial Clock Use
The Vision clock is designed to eliminate buddy punching. An employee simply
stands in front of the clock, and the clock looks for a match from its database. If
a match is found, the employee completes their punch by selecting IN, OUT or
another punch type.
This section explains the process of registering faces and other items related to
this feature.
6. Facial Registration
An employee's face must be registered on Swipeclock Vision before they can
clock in and out. Registration converts facial features into an algorithm which is
subsequently stored on the clock and the timekeeping system's servers.
Before registering an employee, they must be entered in the timekeeping
system. See your timekeeping system's online knowledge base for more
information on adding employees.
IMPORTANT:
The clock must be connected to the internet for facial
registration.
Access Facial Registration and Select Employee
1. From the clock entry screen, access the Settings tabs by tapping the
gear icon.
2. Enter your username and password.
3. Choose the Face Record tab. This may be the only tab you see.

Swipeclock Vision/Vision+
User Guide v2.2 14 July 26, 2021
4. Tap Add employee face record.
5. Search and select the employee by name. You can narrow the results by
typing the first or last name with the onscreen keyboard.
If the employee already has a face record enrolled, it is indicated
underneath their name. Employees can only have one face record
enrolled on Swipeclock Vision.
6.1 Face Record registration is done from the FACE RECORD tab
6.2 If an employee already has a face record enrolled, it will be indicated on the selection screen

Swipeclock Vision/Vision+
User Guide v2.2 15 July 26, 2021
If you see a message explaining the employee already has a face
registered, you can tap Nevermind to keep the record and return to the
clock entry screen. If you would like to
replace
the enrolled record,
continue to the next step.
6. Tap Continue and proceed with the Registration Process, which is
detailed in the next section.
Register the Face Record
Once you have reached the Add Employee Face Record screen, have the
employee position their face in the white box and hold still.
6.3 The clock prompts the employee to align their face in the white box
Once the employee is ready, tap CONTINUE on the touchscreen to start the
capture process. This may take a take a few seconds as the clock records the
landmarks on the employee's face.
Once registered, the screen displays Face Capture Successful.

Swipeclock Vision/Vision+
User Guide v2.2 16 July 26, 2021
6.4 A successful Face Record registration
Tap OK to return to the Settings screen.
Tips for Successful Facial Scans and Matches
When registering face records and using the clock, employees should make sure
that nothing is blocking their face, such as hair, sunglasses, or a hat. Clear
glasses do not hinder the scan process. They should also try to position their
face in the center of the box (taller employees may need to bend their knees
slightly), keep their chin slightly up, and hold still.
Lighting in the area of the clock can also affect its ability to match faces. Dark
locations make matching difficult, and areas that are
too
bright can wash out
facial features. Consistency of the lighting also plays a role. If there is a light
source, like a window, that creates a "hot zone" on one side of the employee's
face, they should try shielding that side of their face with their hand.
7. Employee Instructions
To use Vision to clock in and out, an employee walks up to the clock and stands
between 1 to 3 feet away from the clock. The touch screen displays the
camera's view with a white frame. As the employee moves to position their face
within the frame, Vision captures the employee's face, indicated by a green
frame around the face. Taller employees may need to crouch slightly to get
their face within the field of view.

Swipeclock Vision/Vision+
User Guide v2.2 17 July 26, 2021
7.1 When clocking in and out, an employee aligns their face in the white frame
Once the face is recognized, the screen advances to the clock entry screen and
the employee can use the touchscreen to select their punch type.
8. Vision FAQ
I have multiple Swipeclock Vision clocks, do I need to enroll
employees on each clock?
No, an employee enrolled on
one
clock will be enrolled on
all
clocks. Face
records are saved both locally on the clock, as well as on the timekeeping
system's servers. The clocks sync with the servers daily, but if you would like to
force a sync, return to the Face Record tab (steps 1-3 of the registration process)
and tap Sync face record data
(see figure 6.1)
. Then repeat on all clocks
connected to your account.
Who can register face records?
The ability to register face records can be done by administrators as well as
those with manager or supervisor-level access to the timekeeping system.
Does the clock save an image of the employee’s face?
No, an image of the employee's biometric data is never stored on the clock or
our servers. Instead, the data is stored as a biometric template that can only be
read by the clock's proprietary software.

Swipeclock Vision/Vision+
User Guide v2.2 18 July 26, 2021
How do I know which employees are already registered?
If you attempt to register an employee who already has a face record in the
system, the clock will notify you and you can either re-register the face or cancel
the process.
9. Vision+ Thermal Scan
Vision+ uses the same facial recognition process as Vision but also includes a
thermal scan. This thermal scan checks an employee's temperature each time
they use the clock.
9.1 Vision+ includes a thermal scanner for checking an employee's temperature
This thermal scan uses a default temperature threshold of 102° F. If the
employee's temperature is above that threshold (not equal to), the punch
process is interrupted, they are instructed to contact their manager, and their
punch is not recorded. The thermal scan occurs every time an employee uses
the clock, including when they clock out.
DISCLAIMER
The Vision+ thermal module is not a medical device and is not intended for use
in diagnosing disease or other conditions, or in the cure, mitigation, treatment,
or disease prevention, and is not FDA-approved or cleared for such use.
The Vision+ thermal sensor, when properly installed and configured, quickly
returns a reading of an individual’s skin surface temperature. A body
temperature reading should be confirmed by a secondary evaluation method

Swipeclock Vision/Vision+
User Guide v2.2 19 July 26, 2021
(e.g., an NCIT or clinical grade contact thermometer) and should not be solely
or primarily relied upon to diagnose or identify a diagnosis of COVID-19 or any
other disease.
Please note that it is the sole responsibility of any organization or employer that
requires its employees to use the Vision+ device and features, such as the
thermal module, to determine and comply with all applicable employee and
health information protection laws and regulations and any other law or
regulation that may apply to the use of the thermal modules or any other
Vision+ function.
Temperature Threshold Settings
The Vision+ temperature threshold has a default setting of 102° F but can be
adjusted to any temperature between 98.6° and 102° F.
To change the temperature threshold:
1. Log into the timekeeping system.
2. Access the Clock Status page from the
Settings Menu
.
3. Choose a Vision+ clock by clicking the serial number.
4. Locate
Vision+ Temperature Threshold
on the
Clock Detail
page and
select Change/Disable.
5. Enter the new threshold.
6. Click Save Changes.
9.2 The temperature threshold can be adjusted in the timekeeping system
The new threshold is now applied. If you have multiple Vision+ clocks assigned
to your timekeeping account, changing the threshold on one clock automatically
applies it to
all clocks
; you do not need to set the threshold on each individual
clock.
To disable the thermal scan entirely:
1. Follow steps 1-4 for changing the temperature threshold.
2. Check Disable Temperature Scanning.
This manual suits for next models
1
Table of contents
Other Swipeclock Clock manuals