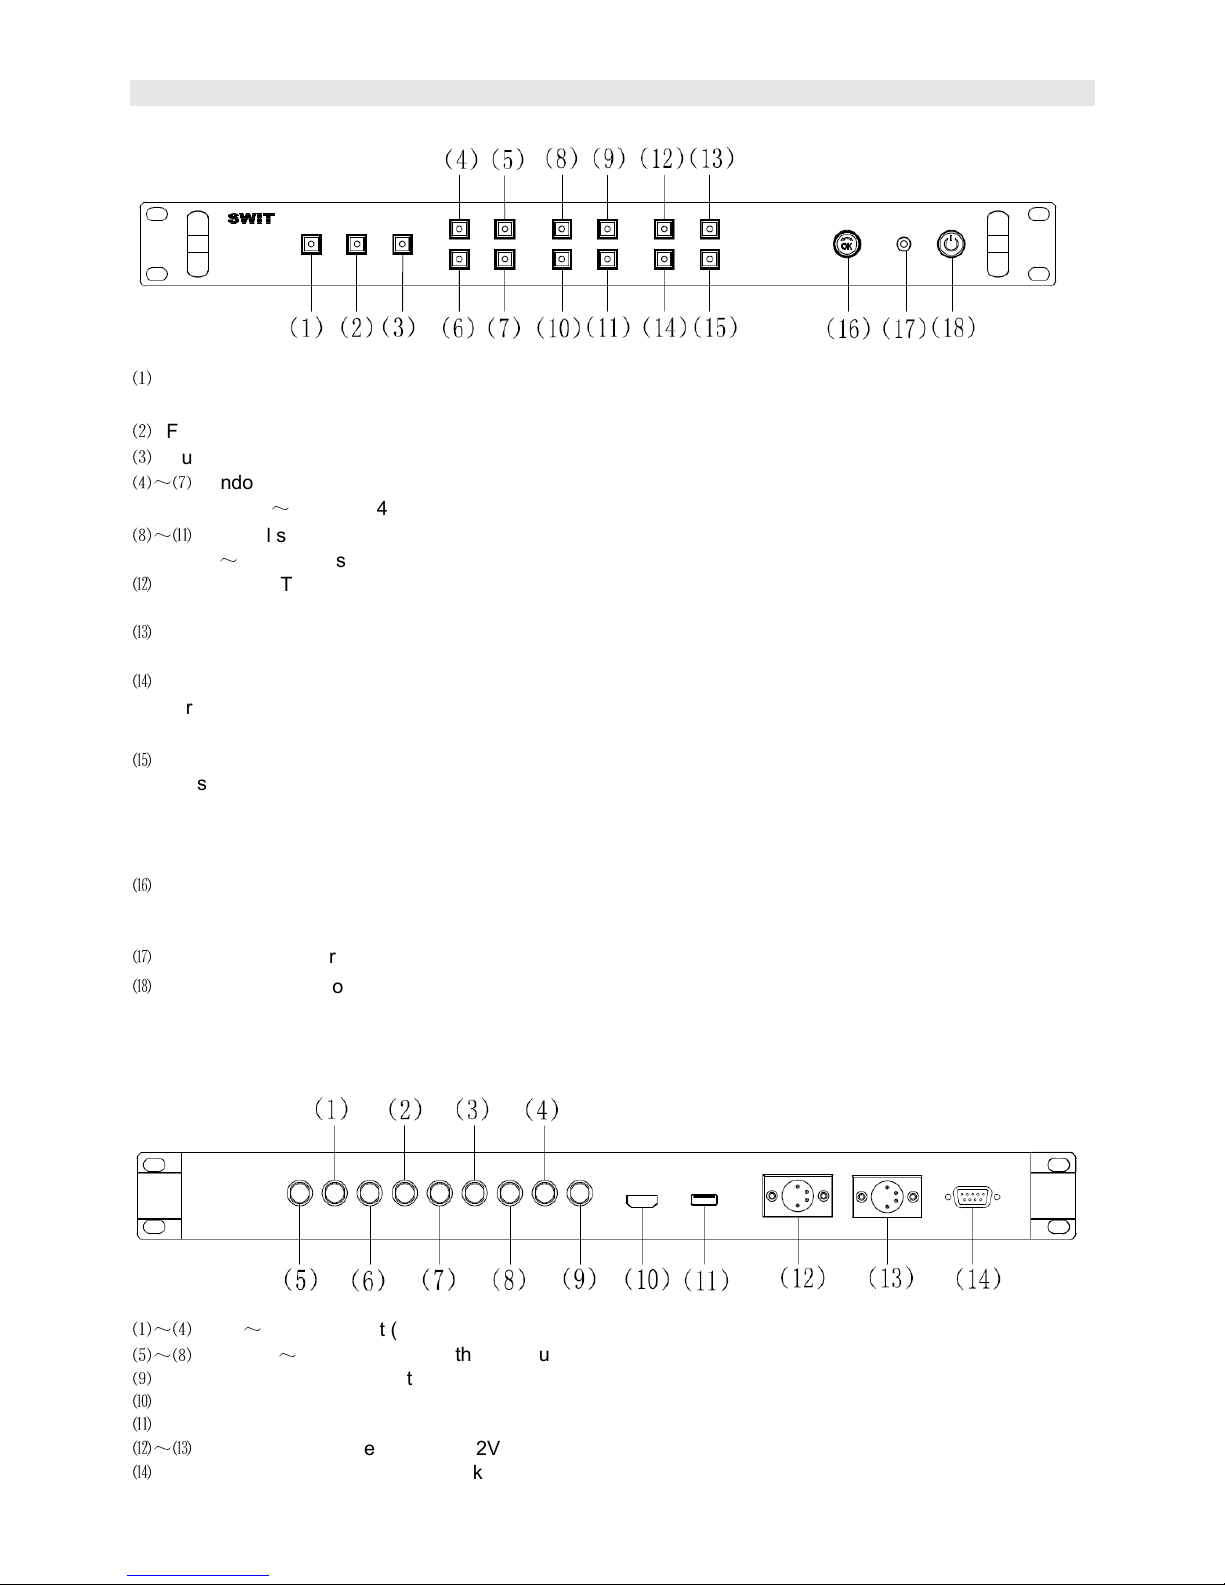
3. roduct view
Front view
⑴
ALARM: signal alarm unction
Press “ALARM” to enable video/audio abnormal alarm, press again to switch o .
⑵
Full screen display the current channel
⑶
Quad split display all the 4 channels
⑷
~
⑺
Window select:
WINDOW1
~
WINDOW4: Press to select the window1/2/3/4 as the current window.
⑻
~
⑾
Channel select:
CH-1
~
CH-4: Press to select the channel1/2/3/4 as the current channel.
⑿
MARK/SD-RATIO:
Press “MARK/SD-RATIO” to display the 4:3 Marker on HD image, and stretch to 16:9 or SD image.
⒀
TIME-CODE:
Press “TIME-CODE” to switch on SDI timecode display or each input video, press again to switch o .
⒁
AUDIO-BAR:
Press “AUDIO-BAR” to switch on the 2-ch SDI embedded audio meter or each input video, press again to
switch o .
⒂
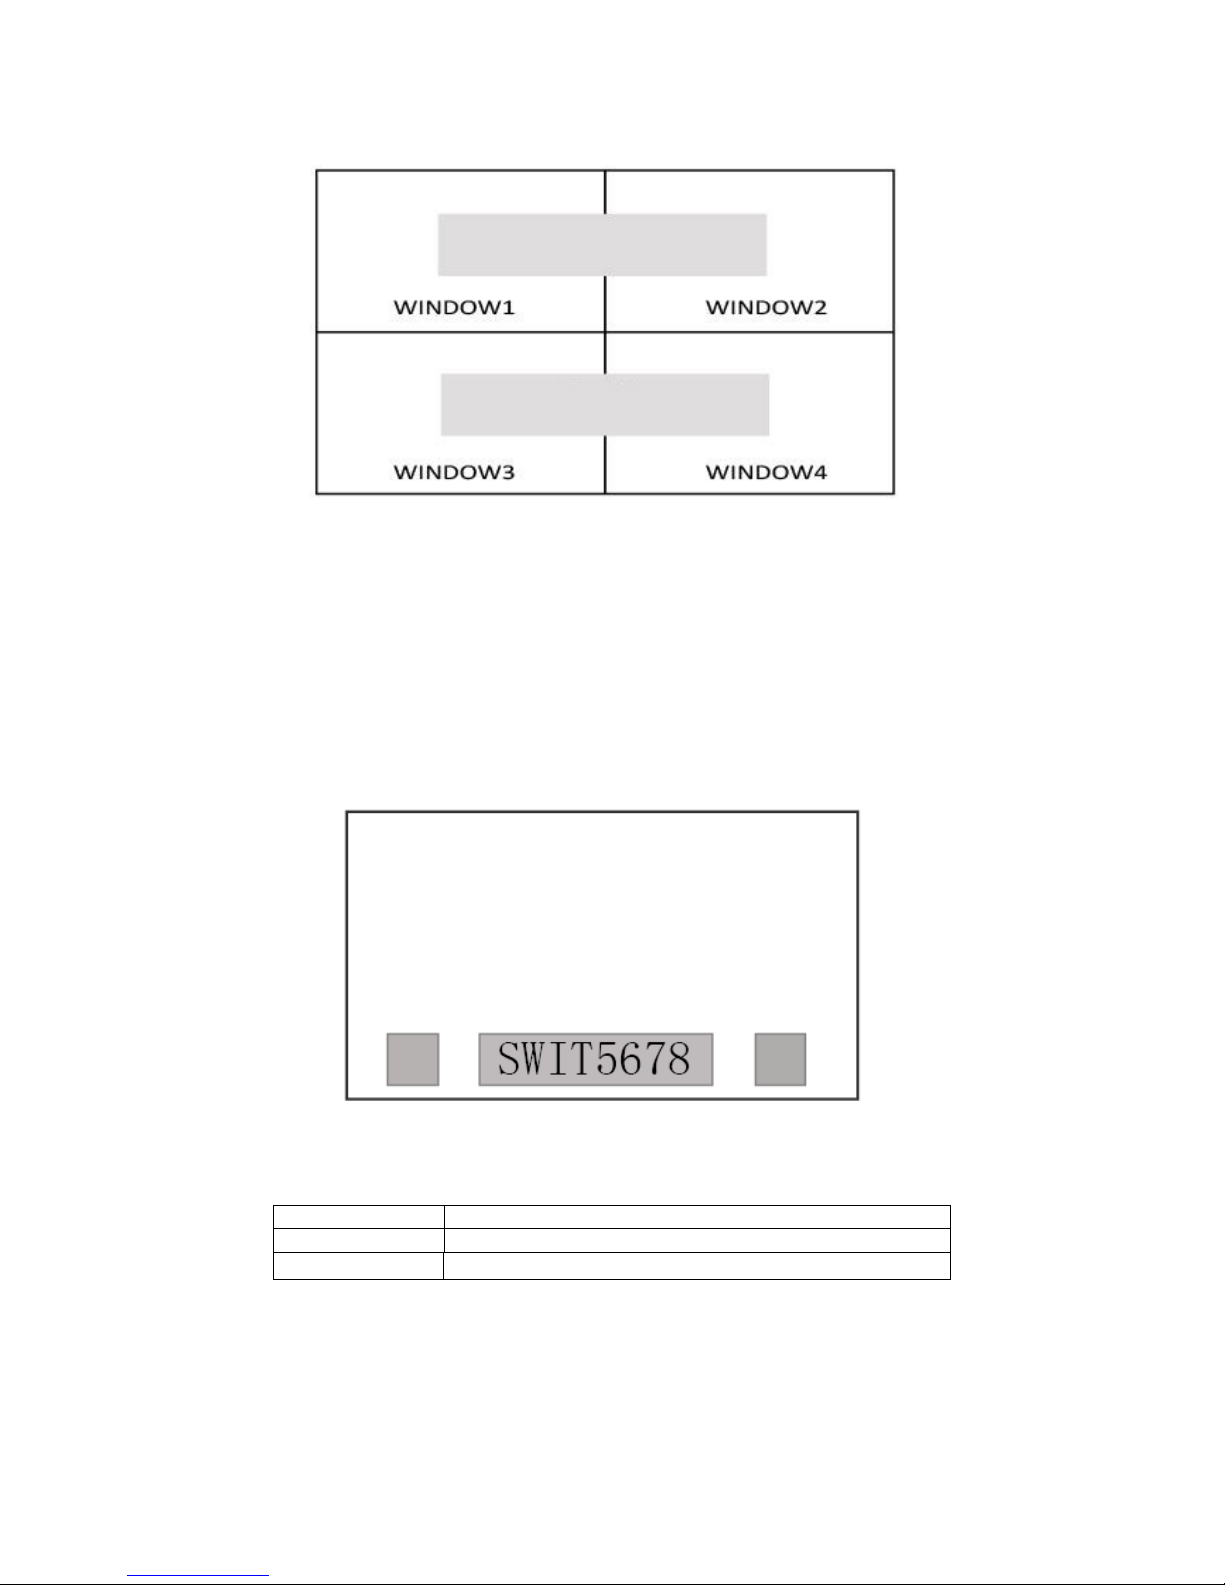
LOGO-SET:
Press “LOGO-SET” and the letter menu will pop up. Revolve “OK” to select corresponding letter and press
“OK” to con irm. Press “LOGO-SET” again to complete the video title setting.
Note: The LOGO-SET will not be available when UMD is input. And will be enabled when UMD is
disconnected and reboot the product.
⒃
OK:
Revolve OK to adjust the volume o 3.5mm audio output,
and under video title setting menu, revolve OK to select letters and press to apply.
⒄
PHONE: 3.5mm Earphone socket, or current channel embedded audio monitoring
⒅
POWER: Power on/o
Connect with power cable, press the “POWER” to switch on the S-9104+. Press again to switch o .
Rear view
⑴
~
⑷
IN4
~
IN1: SDI input (BNC)
⑸
~
⑻
LOOP4
~
LOOP1: SDI loop through output (BNC)
⑼
SDI-OUT: SDI Quad view output (BNC)
HDMI
⑽
-OUT: HDMI Quad view output (HDMI-A)
USB
⑾
: Reserved
⑿
~
⒀
DC 12V IN: Connect with DC12V 4-pin XLR power adapter (Pin 1: Negative, Pin 4: Positive)
⒁
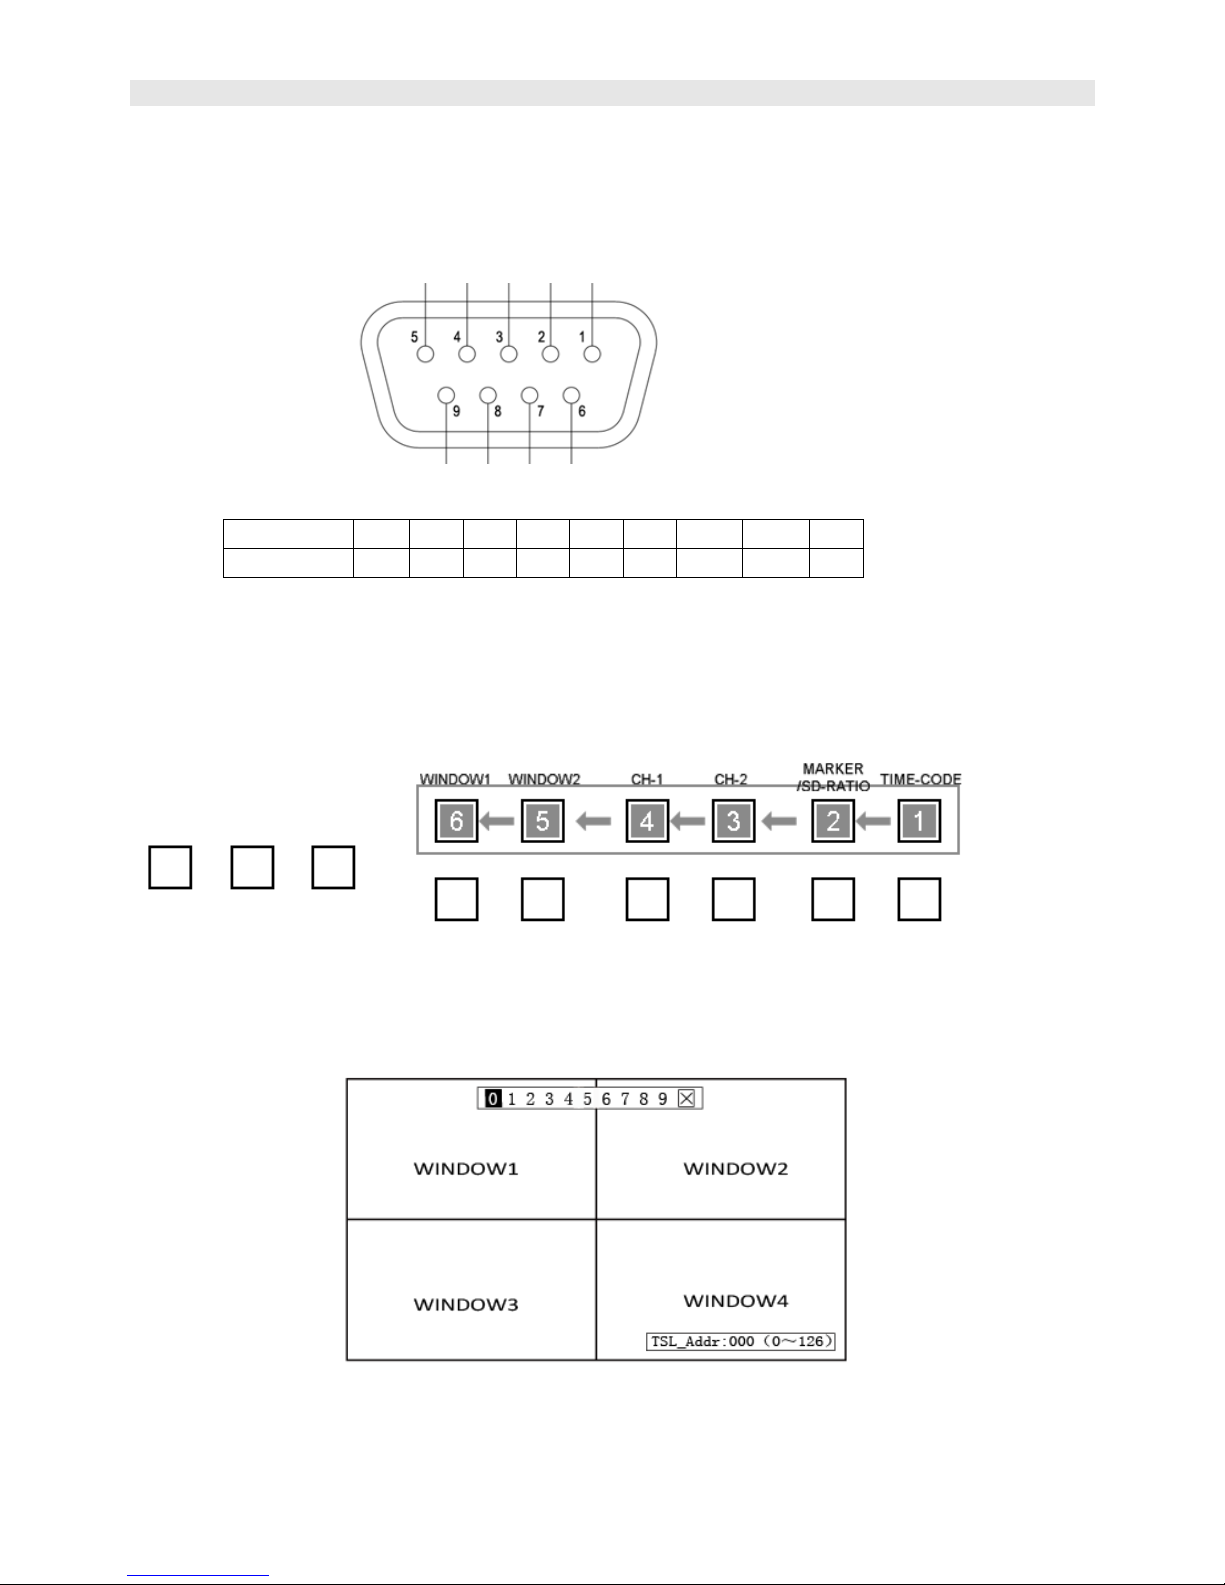
REMOTE:
TSL protocol, RS485 socket