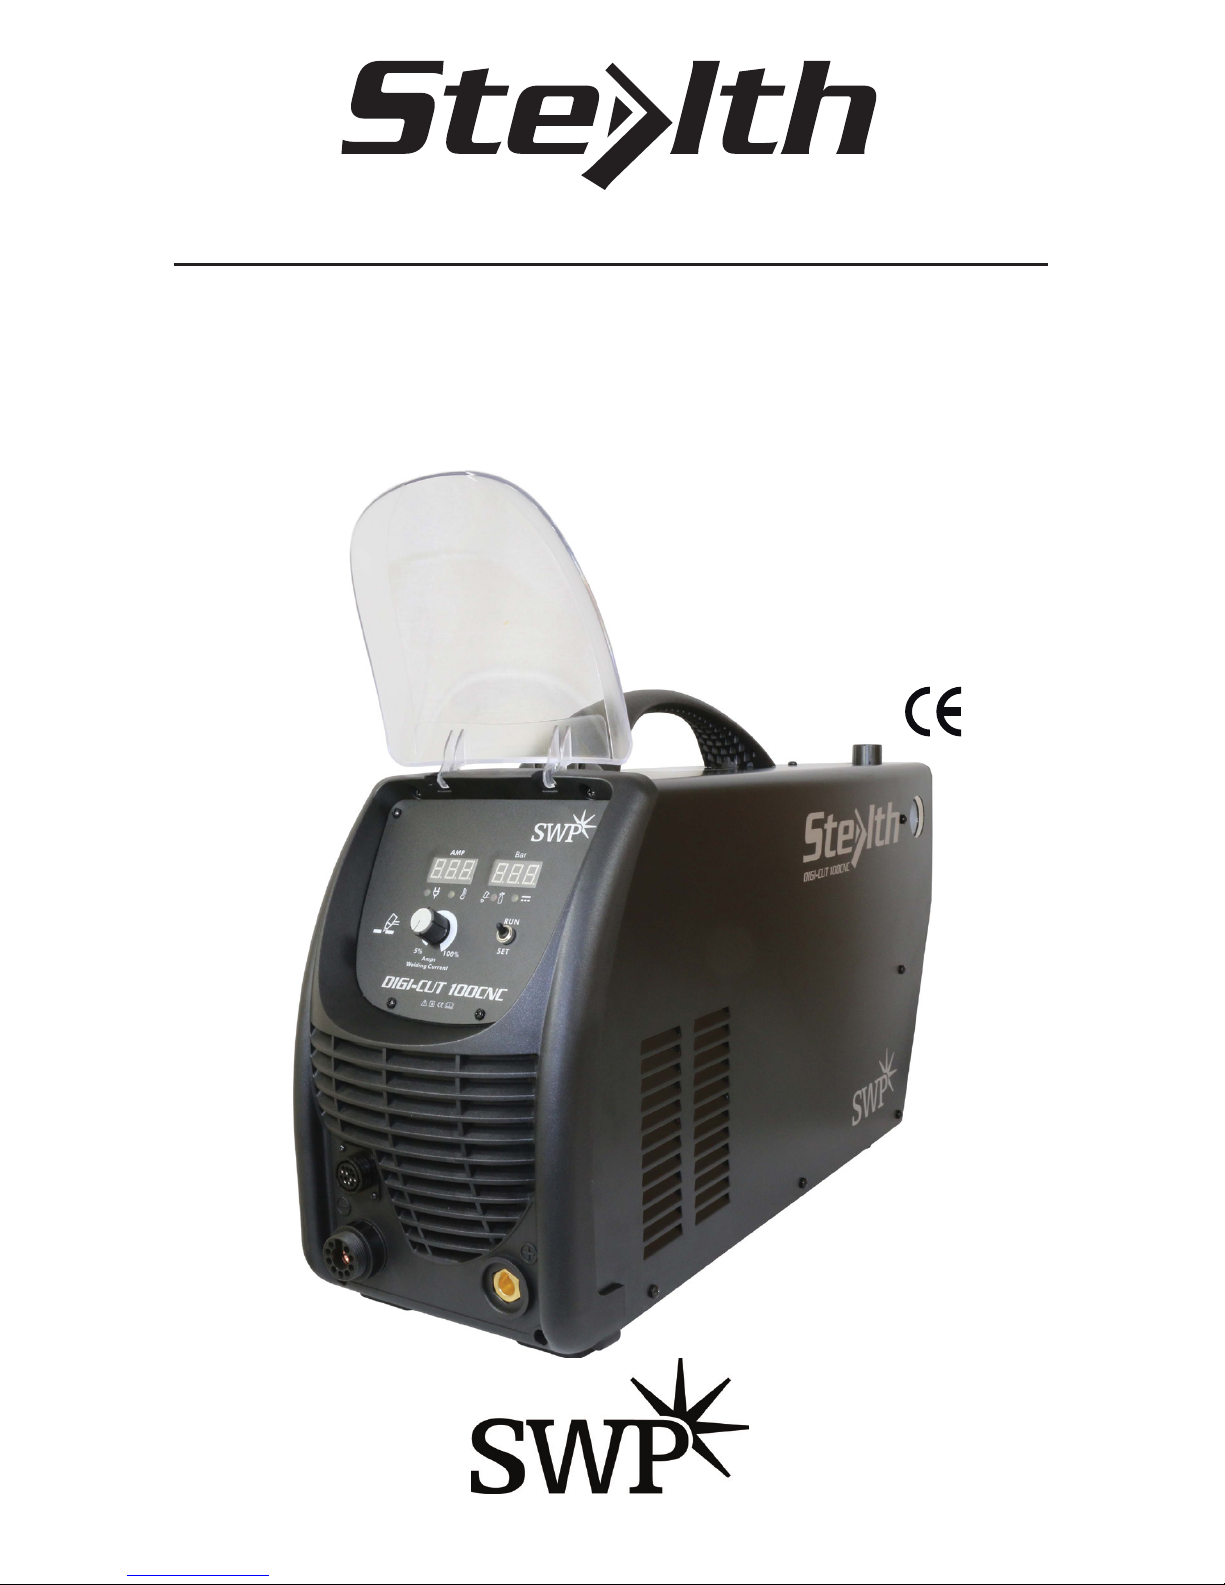
STEALTH DIGI-CUT 100 CNC
5
• Disconnect power source before performing any service or repairs.
• Read and follow all the instructions in the Operating Manual.
FIRE AND EXPLOSION
Fire and explosion can be caused by hot slag, sparks, or the plasma arc.
• Be sure there is no combustible or flammable material in the workplace. Any
material that cannot be removed must be protected.
• Ventilate all flammable or explosive vapours from the workplace.
• Do not cut or weld on containers that may have held combustibles.
• Provide a fire extinguisher when working in an area where fire hazards may exist.
• Hydrogen gas may be formed and trapped under aluminium workpieces when they
are cut underwater or while using a water table. DO NOT cut aluminum alloys under-
water or on a water table unless the hydrogen gas can be eliminated or dissipated.
Trapped hydrogen gas that is ignited will cause an explosion.
NOISE
Noise can cause permanent hearing loss. Plasma arc processes can cause noise levels
to exceed safe limits.
You must protect your ears from loud noise to prevent permanent loss of hearing.
• To protect your hearing from loud noise, wear protective ear plugs and/or ear muffs.
Protect others in the workplace.
• Noise levels should be measured to be sure the decibels (sound) do not exceed safe
levels.
PLASMA ARC RAYS
Plasma Arc Rays can injure your eyes and burn your skin. The plasma arc process
produces very bright ultra violet and infra red light. These arc rays will damage your
eyes and burn your skin if you are not properly protected.
• To protect your eyes, always wear a cutting helmet or shield. Also always wear safety
glasses with side shields, goggles or other protective eye wear.
• Wear cutting gloves and suitable clothing to protect your skin from the arc rays and
sparks.
• Keep helmet and safety glasses in good condition. Replace lenses when cracked,
chipped or dirty.
• Protect others in the work area from the arc rays. Use protective booths, screens or
shields.
• Wear dry gloves and clothing. Insulate yourself from the work piece or other parts of the cutting circuit.
• Repair or replace all worn or damaged parts.
• Extra care must be taken when the workplace is moist or damp.
• Disconnect power source before performing any service or repairs.
• Read and follow all the instructions in the Operating Manual.
FIRE AND EXPLOSION
Fire and explosion can be caused by hot slag, sparks, or the plasma arc.
• Be sure there is no combustible or flammable material in the workplace. Any material that cannot be removed
must be protected.
• Ventilate all flammable or explosive vapors from the workplace.
• Do not cut or weld on containers that may have held combustibles.
• Provide a fire watch when working in an area where fire hazards may exist.
• Hydrogen gas may be formed and trapped under aluminum workpieces when they are cut underwater or while
using a water table. DO NOT cut aluminum alloys underwater or on a water table unless the hydrogen gas can be
eliminated or dissipated. Trapped hydrogen gas that is ignited will cause an explosion.
NOISE
Noise can cause permanent hearing loss. Plasma arc processes can cause noise levels to exceed safe limits.
You must protect your ears from loud noise to prevent permanent loss of hearing.
• To protect your hearing from loud noise, wear protective ear plugs and/or ear muffs. Protect others in the
workplace.
• Noise levels should be measured to be sure the decibels (sound) do not exceed safe levels.
PLASMA ARC RAYS
Plasma Arc Rays can injure your eyes and burn your skin. The plasma arc process produces very bright ultra
violet and infra red light. These arc rays will damage your eyes and burn your skin if you are not properly protected.
• To protect your eyes, always wear a cutting helmet or shield. Also always wear safety glasses with side
shields, goggles or other protective eye wear.
• Wear cutting gloves and suitable clothing to protect your skin from the arc rays and sparks.
• Keep helmet and safety glasses in good condition. Replace lenses when cracked, chipped or dirty.
• Protect others in the work area from the arc rays. Use protective booths, screens or shields.