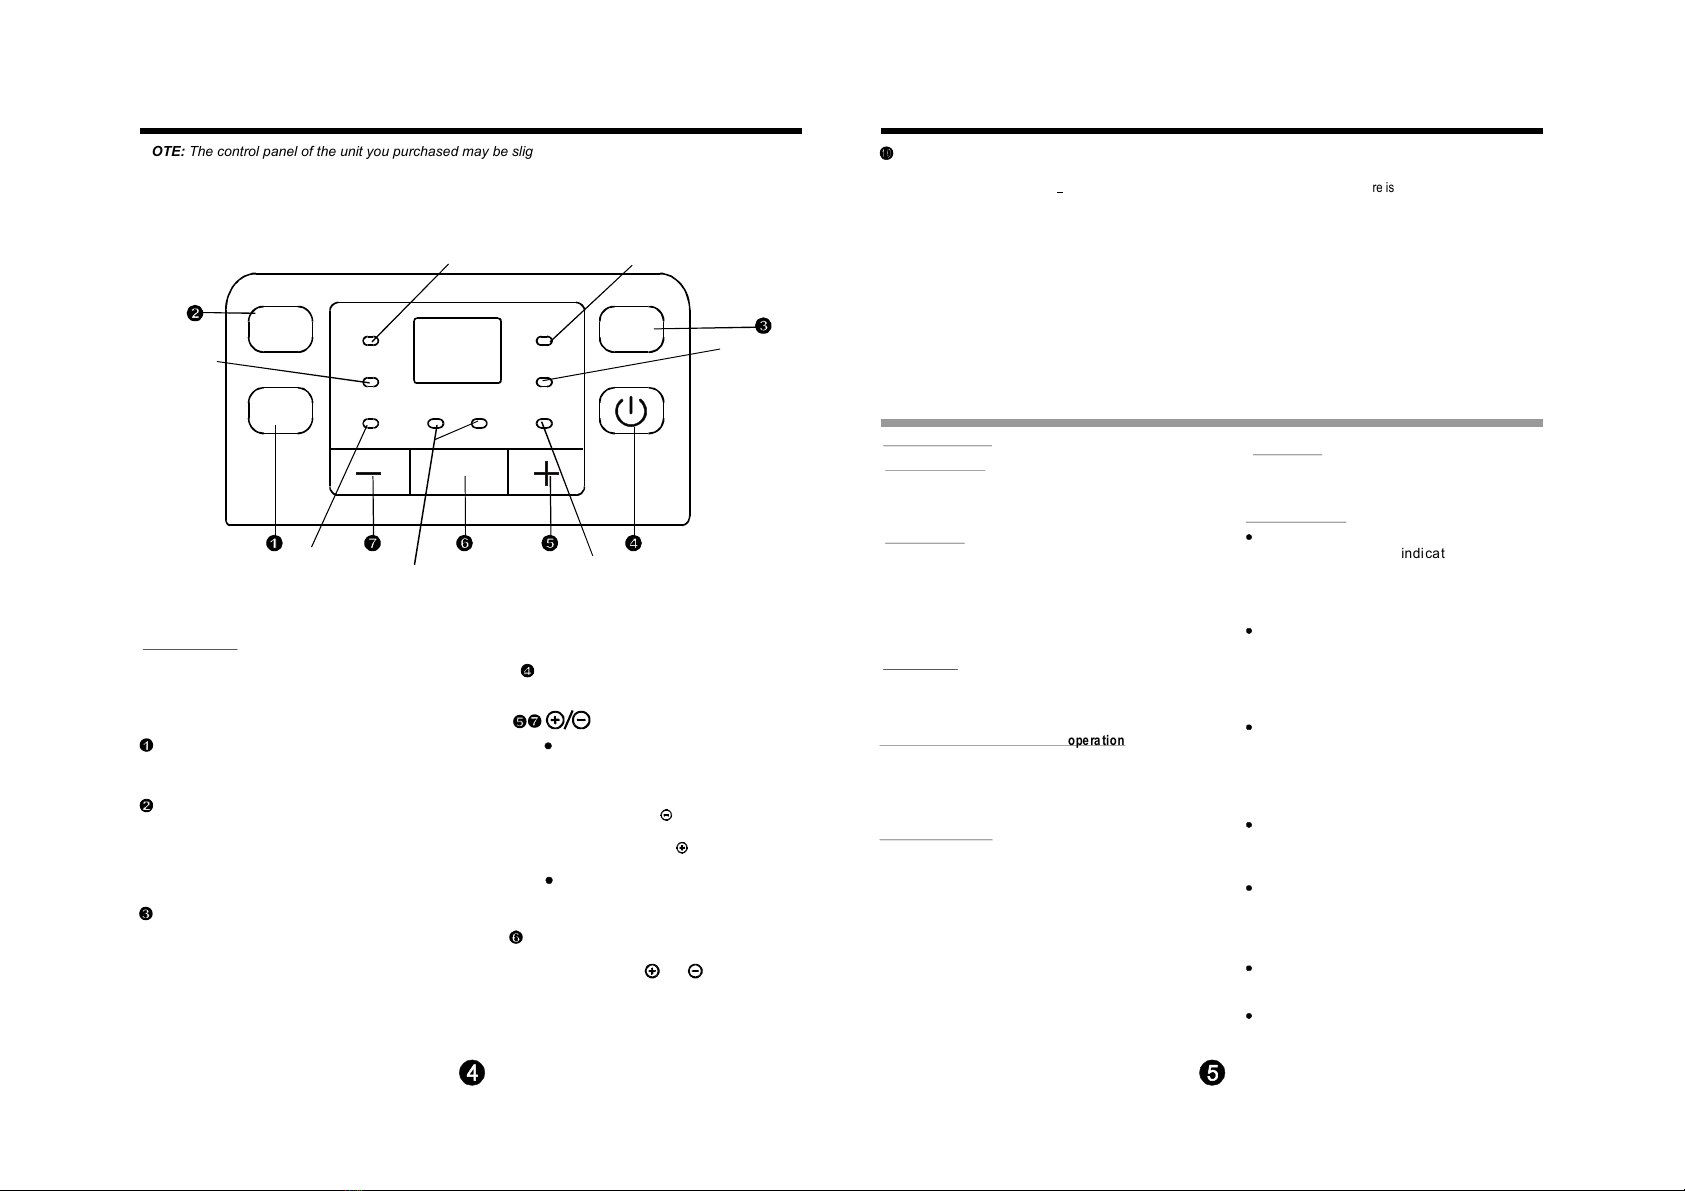
CONTROL PADS ON THE DEHUMIDIFIER
Control pads
When yo u push th e butt o n to ch ange
op eratio n mo des, the u nit wi ll mak e
abeep s ound to in dicat e that it is
ch an gin g mo des.
Fig.1
Fan Pad
Con trol the fan speed. Press to select e ither High
or Normal fan speed. Set t he fan co ntro l to H igh for
maximum moisture removal. When the humidity has
been reduced and qu ie t ope rati on is preferred, set
th e fan cont ro l to Norm al.
Filter Pad
The check filter feature is a reminder to clean the
Air Filter fo r more effici ent ope rat ion. The Fi lt er
light(Clean fil ter l ight) will illuminate after 250 hours
of operation. To reset after cleaning the filter, press
the Filter pad and the light will go o ff.
Humidity Set Contr ol Pa ds
: D o wn/ Up Pa d s
TIMER Set Control Pads
Use the Up/Down pads to set the Auto
start and Auto stop time from 0.0 to 24.
The humidity level can be set within a range of
35%RH(Relative Humidity) to 85%RH(Relative
Humidity) in 5% increments.
For drier air, press the pad and set to a lower
percent value(%).
For damper air, press the pad and set a higher
percent value(%).
CONTROL PADS ON THE DEHUMIDIFIER
Other features
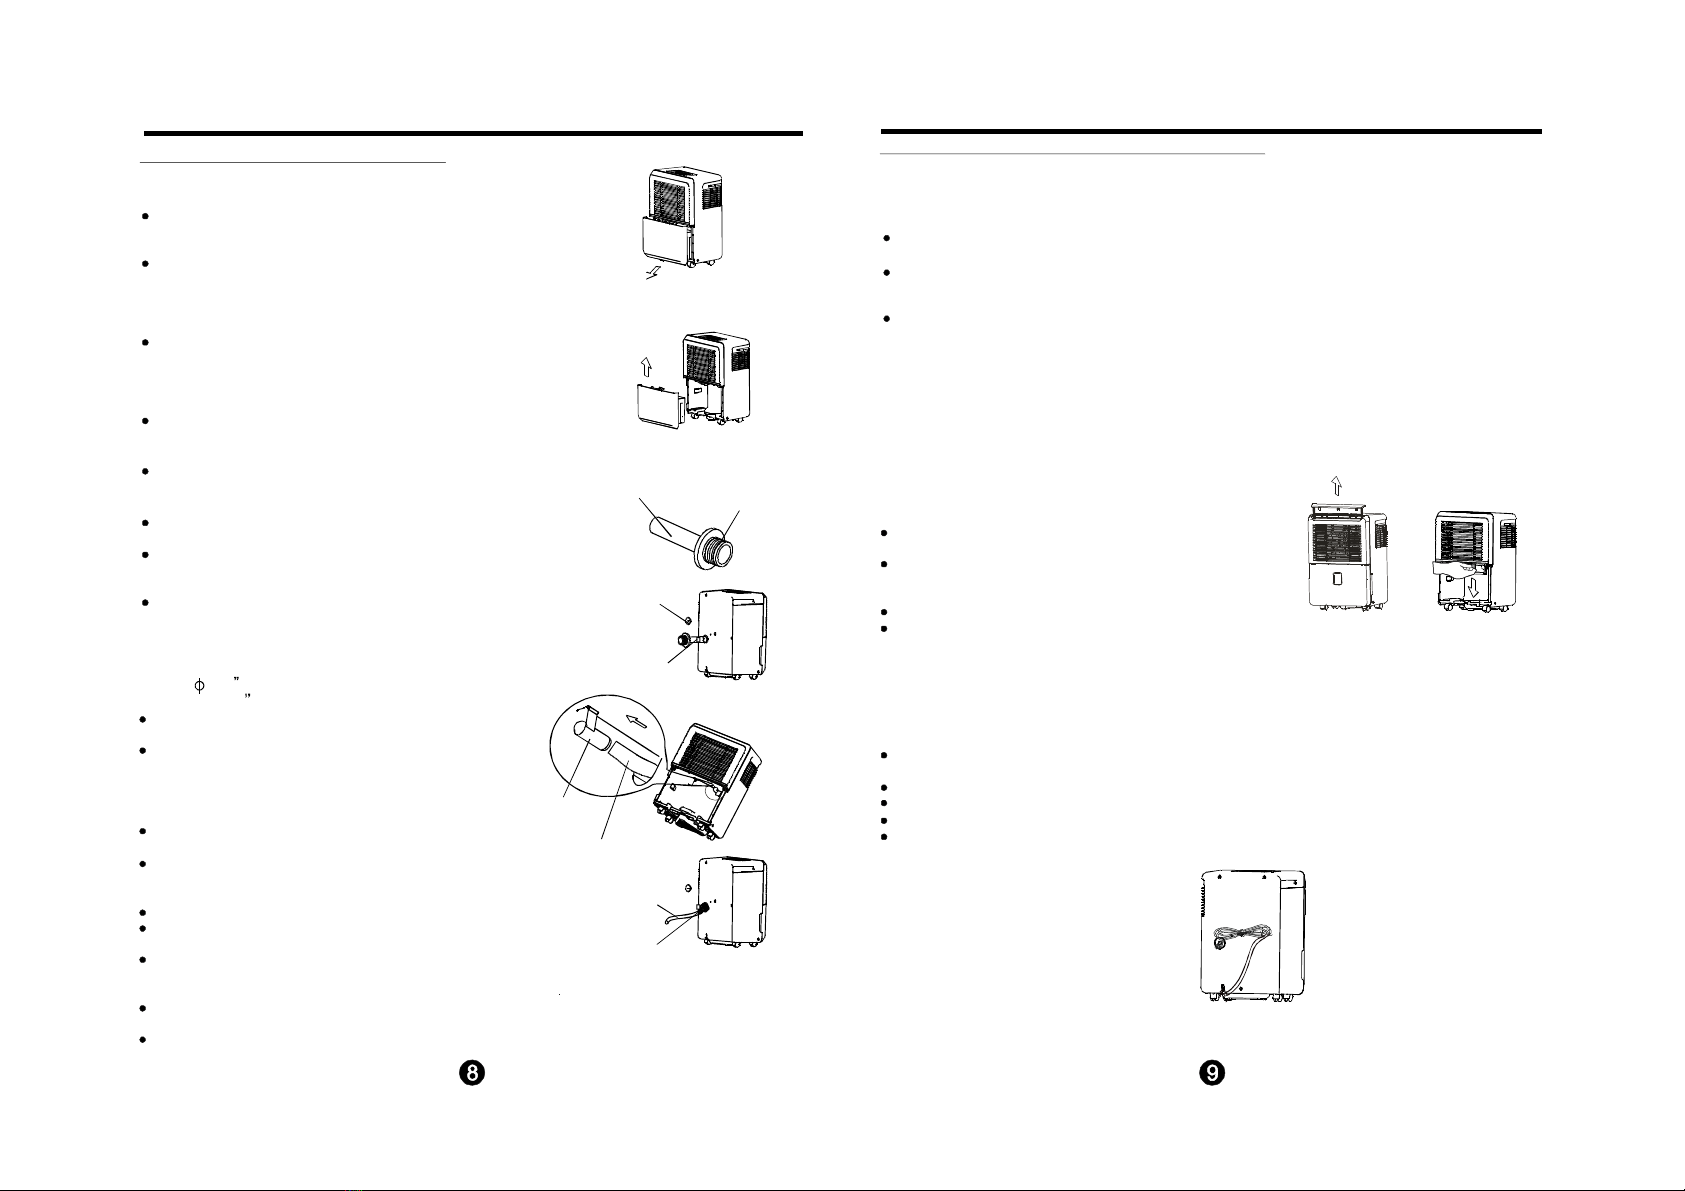
Bucket Full Light
Glo ws when the b ucket i s rea dy to b e
em ptied, or wh en th e buc ket is removed
or n ot rep la ced i n th e proper positi on.
When fr ost builds up on the evaporator coils, the
co mpr ess or will cycle off a nd the fan wi ll c ontinue
to run unti l the fr ost d isapp ears.
Auto De frost
Wait 3 minutes before re suming opera tion
After th e un it ha s sto pp ed, i t can not be r estar t
Ope rta tion i n the first 3 min ute s. Th is i s to protect
the u nit. Op era tio n w ill au to matical ly st ar t a fter
3 minu tes.
Setting the Timer
When th e unit is on, fi rst press t he Timer
button, the Timer Off indicator l ig ht
i llumin ate s. It ind ica tes t he Auto St op
progra m i s initiated. Press i t again the
Tim e On indica tor light ill um in ates .I t
i ndi cates the Auto S tar t i s initi at ed.
Pr ess or hold the UP or DOWN pa d to
change the Auto time by 0.5 hou r inc re-
ment s, up to 10 hours, then at 1 ho ur
i ncreme nts up t o 24 hours . The contro l
will count dow n the t ime remaini ng until
start.
The se lec ted t ime will r egi ster in5seconds
and the system wil l automatically revert
bac k to di spl ay the p re vioushumi dity
setting.
When the Au to start & Auto stop ti me s are
set, within th e same p rogr am sequence ,
TIMER ON OFF indicator lights ill um ina te
ide ntifying bo th ON and OFF t imes ar e
now programmed.
Turning the unit ON or OFF at any time or
adjusting the t imer sett ing to 0.0 will cancel
the Auto Start/Stop function.
Wh en LED dis pla y win dow di spl ays t he
cod e o f P2 , th e Au to Sta rt /St op fu nc tion
will also be c ancelled.
When th e unit is of f, fi rst press t he Timer
but to n, t he TIMER ON indic ato r lig ht
i llumin ate s. It ind ica tes t he Auto St art
progra m i s initiated. Press i t again the
Tim e Off ind eca tor li ght i llumin ates .I t
i ndi cates the Auto S top i s init iated.
Check filt er fe ature
The system starts to c o unt the time onc e the fan
motor oper ate s. The check filter feature can be
onl y activate d when the ac cum ulate d op era tio n
time ac hieve s 250 h ou rs or mor e. The Reset
li g ht(Cl ean filter ind icator li ght) fla she s at on e time
per secon d, after fini shing clea n the ai r filte r, pre ss
the Fi lter p ad a nd th e Reset l igh t(Cle an fi lter i n dica tor
lig ht) goes o ff.
Display
Shows the set % humidity level from 35% to 85% or auto
start/stop time (0~24) while setting, then shows the actual
( 5% accuracy) room % humidity level in a range of
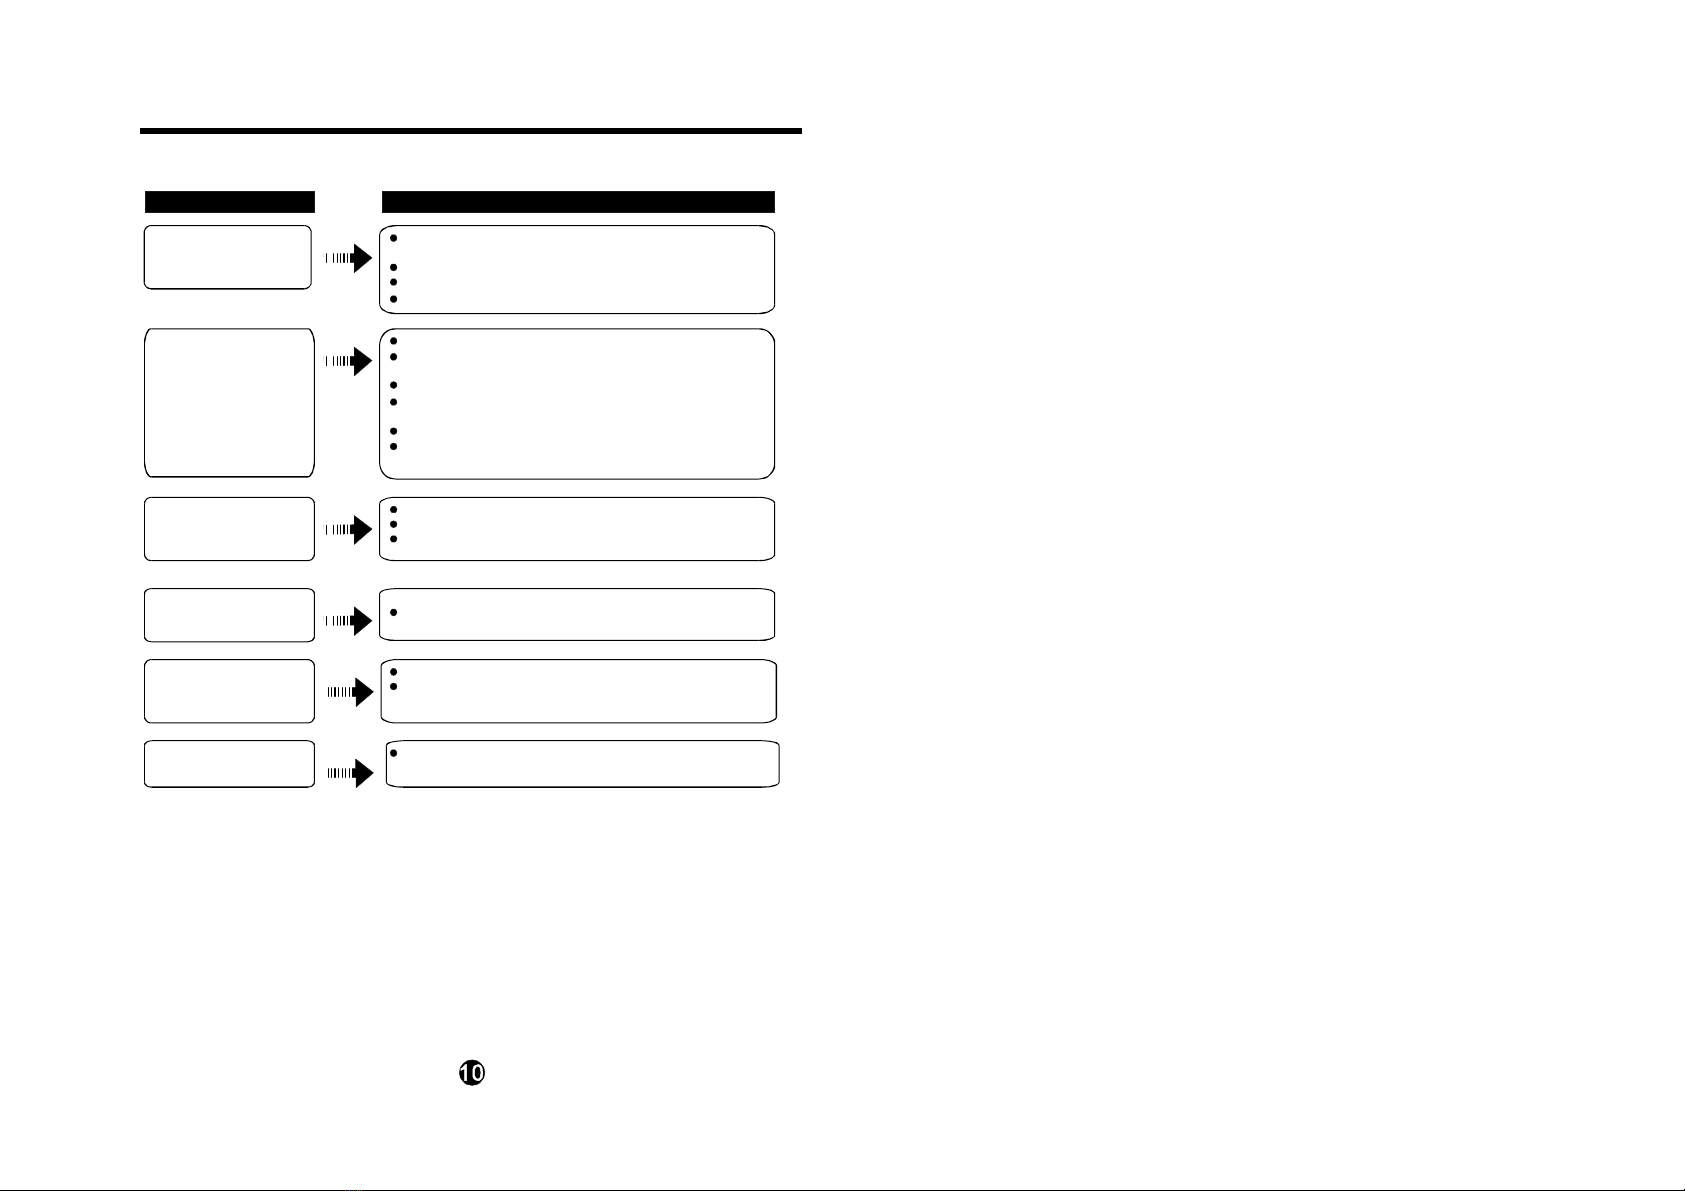
- Humidity sensor error--Unplug the unit and plug it back
in. If error repeats, call for service.
- Temperature sensor error-- Unplug the unit and plug it
back in. If error repeats, call for service.
- Bucket is full or bucket is not in right position-- Empty
the bucket and replace it in the right position.
±30%
RH(Relative Humidity) to 90%RH(Relative Humidity).
Error Codes and Protection Code:
AS
ES
P2
Timer Pad
Press to i nitiate the Auto start and Auto stop featu re,
in conjuction with the and key pads.
Auto Shut Off
The shuts off aft er 30 secon ds wh en
the bucke t i s ful l, or wh en th e bu ck et is remov ed
or n ot repla ced in th e pr oper p ositi on.When the
se tting h umidity is re ache d, the un i t wi ll be shut
off automatic ally. F or so me models ,the fan m ot or
will con tin ue operatin g.
dehum id ifie r
Auto-Restart
If the uni t breaks off une xpectedly due to the power c ut,
it will restart with the previous function setting automa-
tical ly when the power resumes.
Low fan
indicato r li ght
Auto defrost op erat ion o n
indic ator li ght
High fan
indic ator light
Filter
Cont.
Fan
Timer
Filter
Full
Cont. On Off
Turbo
Normal
Auto defrost
Clean fil ter
indicator light
Bucket full
in dicator li ght
Continuous
operati on on
indicator lightTimer on/off
indicator light
Continue Pad
Press to activate the continuous dehum idifying
operation.
Power Pad
Press to tu rn the dehumidifier on and off.
EC
for
temperature in the manual or not.If not,please operate
the unit under the stated temperature.If the enviroment
temperature is suitable for the stated temperature,please
call service.
NOTE: The control panel of the unit you purchased may be slightly different depending on the model.
-
Unit malfunction -- Please make sure whether the
environment temperature is suitable
for the stated