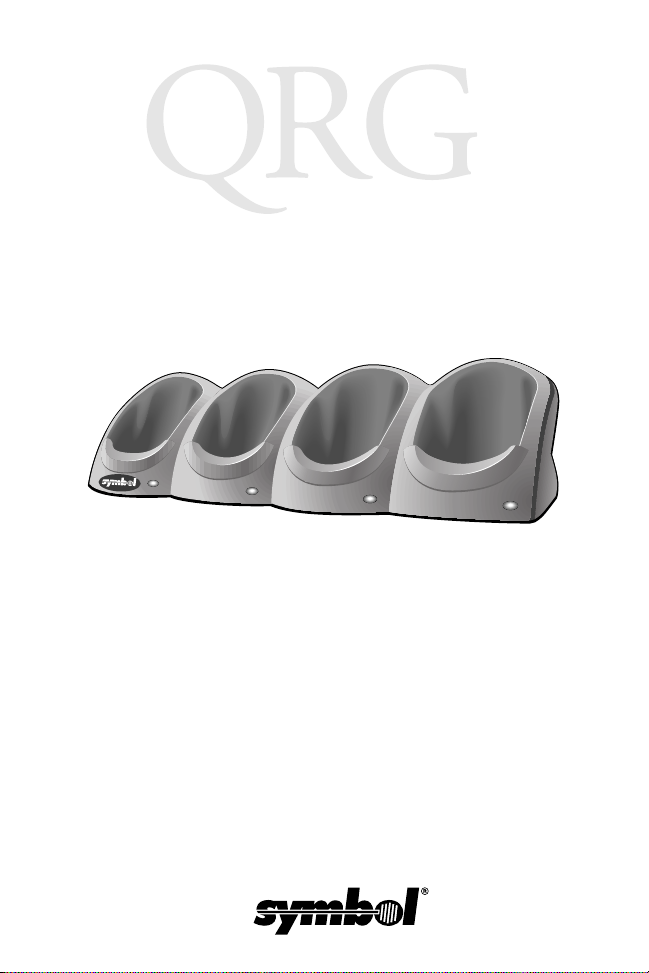
Symbol CRD 2700-4000E User manual

CRD 2700-4000E
Ethernet Cradle

CRD 2700-4000E
Ethernet Crdadle
2001 SYMBOL TECHNOLOGIES, INC. All rights reserved.
Symbol reserves the right to make changes to any product to improve reliability,
function, or design.
Symbol does not assume any product liability arising out of, or in connection with, the
application or use of any product, circuit, or application described herein.
No license is granted, either expressly or by implication, estoppel, or otherwise under
any patent right or patent, covering or relating to any combination, system,
apparatus, machine, material, method, or process in which Symbol products might
be used. An implied license only exists for equipment, circuits, and subsystems
contained in Symbol products.
Symbol and the Symbol logo are registered trademarks of Symbol Technologies, Inc.
Other product names mentioned in this manual may be trademarks or registered
trademarks of their respective companies and are hereby acknowledged.
Symbol Technologies, Inc.
One Symbol Plaza
Holtsville,N.Y.11742-1300
http://www.symbol.com
Patents
This product is covered by one or more of the following U.S. and foreign Patents:
U.S. Patent No. 4,460,120; 4,496,831; 4,593,186; 4,603,262; 4,607,156; 4,652,750;
4,673,805; 4,736,095; 4,758,717; 4,816,660; 4,845,350; 4,896,026; 4,897,532; 4,923,281;
4,933,538; 4,992,717; 5,015,833; 5,017,765; 5,021,641; 5,029,183; 5,047,617; 5,103,461;
5,113,445; 5,130,520; 5,140,144; 5,142,550; 5,149,950; 5,157,687; 5,168,148; 5,168,149;
5,180,904; 5,216,232; 5,229,591; 5,230,088; 5,235,167; 5,243,655; 5,247,162; 5,250,791;
5,250,792; 5,260,553; 5,262,627; 5,262,628; 5,266,787; 5,278,398; 5,280,162; 5,280,163;
5,280,164; 5,280,498; 5,304,786; 5,304,788; 5,306,900; 5,321,246; 5,324,924; 5,337,361;
5,367,151; 5,373,148; 5,378,882; 5,396,053; 5,396,055; 5,399,846; 5,408,081; 5,410,139;
5,410,140; 5,412,198; 5,418,812; 5,420,411; 5,436,440; 5,444,231; 5,449,891; 5,449,893;
5,468,949; 5,471,042; 5,478,998; 5,479,000; 5,479,002; 5,479,441; 5,504,322; 5,519,577;
5,528,621; 5,532,469; 5,543,610; 5,545,889; 5,552,592; 5,557,093; 5,578,810; 5,581,070;
5,589,679; 5,589,680; 5,608,202; 5,612,531; 5,619,028; 5,627,359; 5,637,852; 5,664,229;
5,668,803; 5,675,139; 5,693,929; 5,698,835; 5,705,800; 5,714,746; 5,723,851; 5,734,152;
5,734,153; 5,742,043; 5,745,794; 5,754,587; 5,762,516; 5,763,863; 5,767,500; 5,789,728;
5,789,731; 5,808,287; 5,811,785; 5,811,787; 5,815,811; 5,821,519; 5,821,520; 5,823,812;
5,828,050; 5,850,078; 5,861,615; 5,874,720; 5,875,415; 5,900,617; 5,902,989; 5,907,146;
5,912,450; 5,914,478; 5,917,173; 5,920,059; 5,923,025; 5,929,420; 5,945,658; 5,945,659;
5,946,194; 5,959,285; 6,002,918; 6,021,947; 6,047,892; 6,050,491; 6,053,413; 6,056,200;
6,065,678; 6,067,297; 6,068,190; 6,082,621; 6,084,528; 6,088,482; 6,092,725; 6,101,483;
6,102,293; 6,104,620; 6,114,712; 6,115,678; 6,119,944; 6,123,265; 6,131,814; 6,138,180;
6,142,379; D305,885; D341,584; D344,501; D359,483; D362,453; D363,700; D363,918;
D370,478; D383,124; D391,250; D405,077; D406,581; D414,171; D414,172, D418,500;
D419,548; D423,468; D424,035 D431,158; D430,159; D431,562.
Invention No. 55,358; 62,539; 69,060; 69,187 (Taiwan); No. 1,601,796; 1,907,875;
1,955,269 (Japan).
European Patent 367,299; 414,281; 367,300; 367,298; UK 2,072,832; France 81/03938;
Italy 1,138,713.
rev. 09/00

1
Quick Reference
Introduction
The CRD2700-4000E 4-slot Ethernet cradle enables up to 4 SPT
1700 or PPT 2700 terminals to simultaneously communicate with
their associated host computers connected to a network. Up to 4
terminals may be seated in the cradle. Additionally, up to 4
CRD1700-4000S serial cradles may be daisy-chained with this
unit, providing a total of 20 slots available for host
communications.
Theory of Operation
Palm HotSync Manager software supports one HotSync at a time
between a single terminal and a single PC. If the application
requires multiple devices to communicate simultaneously with a
single host, then synchronization server software such as Scout
MTSTM or AVANTGOTM is required. This software may be
purchased from Symbol. Contact your Symbol sales
representative for information.
About This Guide
This guide provides instruction on setting up and using the
CRD2700-4000E 4-slot Ethernet cradle, as well as setting up an
SPT 1700orPPT2700 terminalforuse withtheCRD2700-4000E.
Specifically, the following topics are discussed:
•SetUponpage 2
•Connecting Power onpage 2
•SettingUp forNetwork Communicationson page 4
•Inter-ConnectingCradlesonpage 10
•Software Configurationonpage 11
•Configuring the SPT1700 onpage11
•Configuring the PPT2700 onpage15
•Battery Charging onpage 17
•Indicator Lightson page18
•Troubleshooting onpage18.

2
CRD 2700-4000E
Ethernet Cradle
Set Up
Setting up the cradle includes unpacking, placing the cradle on a
table top and connecting the power and network communication
cables.
If using the cradle with an SPT 1700, make sure that SPT 1500/
1700 Desktop Software (p/n SW-35138-xx) is installed and
running on the host computer, as well as properly configured
Network HotSync software on the SPT 1700 terminal. If using a
PPT 2700, make sure ActiveSync is installed on your host
computer. See the terminal’s Product Reference Guide for
instructions on installing the software.
Unpacking the Cradle
The shipping box includes the following:
• One 4-slot cradle (p/n CRD2700-4000E)
• This Quick Reference Guide (p/n 72-50357-xx).
No Ethernet cable is shipped with the cradle, but is required to
connect the cradle to an Ethernet hub.
Youwillalsoneed:
• 8Volt, 5Ampere power supply (p/n 50-14000-109).
• AC line cord
If any parts are missing or damaged, contact your authorized
Customer Support Representative immediately. See the back of
this manual for contact information. Save the shipping box for
storing or shipping.
Connecting Power
Note: Use only a Symbol-approved power supply, output rat-
ed 8Vdc and minimum 5A. The power supply is certi-
fied to EN60950 with SELV outputs.

3
Quick Reference
Hinweis: Benutzen Sie nur eine Symbol Technologies geneh-
migt Stromversorgung in den Ausgabe: 8 Vdc und
minimum 5 Ampere. Die Stromversorgung ist bes-
cheinigt nach EN60950 mit SELV Ausgaben.
To connect power to the cradle:
1. Connect the power supply cable plug to the Power Connec-
tor on the back of the cradle, as shown in the following illus-
tration.
2. Connect one end of a standard 10 Base-T network cable to
the connector labelled Host on the back of the CRD2700-
4000E. Connect the other end of the cable to a hub which is
connected to your subnet.
3. Connect the Power Supply AC plug to a standard electrical
outlet.
Note: International customers must use a separate AC line
cord appropriate for their respective country.
4. The LED oneach slotblinks red, then greenwhile the cradle
attemptstoobtain its IPaddressfromtheDHCPserver.Ifthe
cradle is successful, theLEDs turnoff. If the cradle is unable
to obtain its IP address, the LEDs flash red, and the cradle
retriesin10minutes.
HUB
Power Host Expansion

4
CRD 2700-4000E
Ethernet Cradle
Setting Up for Network Communications
The CRD2700-4000E cradle allows communication between
terminals and their associated host computers connected to an
Ethernet network. The CRD2700-4000E must be connected to an
Ethernet network which is connected to the same network as the
host computers, or an Ethernet network connected to the larger
Internet via an Internet gateway. There are two methods to
accomplish this: DHCP mode and Static mode.
DHCP Mode
1 DHCP Address Mode
When using DHCP mode, the cradle acquires its IP address
dynamically from the server. There must be a DHCP server or a
DHCPrelayagentonthesamesubnetastheCRD2700-4000Efor
the unit to be automatically configured with IP addresses, a
gateway IP address, 2 DNS addresses, at least one WINS server
address, and a subnet mask. The cradle acquires 6 IP addresses
from the DHCP server. These addresses are allocated as follows:
one for the cradle, one for the expansion port, and one for each
slot (4).
Caution: For the cradle to work properly in DHCP mode, it must
acquire 6 addresses from the DHCP server by request-
ing addresses with different requestor IDs. Some
DHCP servers will not use this, and will use the MAC
address. In this case the cradle only receives one ad-
dress and will not operate, which has happened on
some Novell servers. In this case, use static mode.
To set up for network communications:
1. Ensure there is a DHCP server accessible to the CRD2700-
4000E on the subnet.

5
Quick Reference
2. Connect one end of a standard 10 Base-T network cable to
the connector labelled Host on the back of the CRD2700-
4000E. Connect the other end of the cable to a hub which is
connected to your subnet.
3. Power up the cradle; the CRD2700-4000E performs a pow-
er-up sequence, then attempts to collect all its network pa-
rameters from the DHCP server. While collecting network
parameters, all LEDs flash green. Once configuration com-
pletes, all LEDs shut off.
If configuration of the unit from the DHCP server fails, all LEDs
flash red. The unit retries the DHCP request every 10 minutes.
6 DHCP Address Mode
This is the default mode of the cradle. When using the 6 DHCP
address mode, the cradle acquires 6 IP addresses dynamically
from the DHCP server: one for the cradle, one for each of the 4
slots, and one for the expansion slot. This feature is not enabled
when using NAPT translation. To perform this configuration, run
theEFlasherutility from thedebugmonitor. Followsteps 1 through
6inStatic Mode to access the Current Cradle Globals: menu.
1. Select option 1 for Static mode. Set both Static Mode and
NAPT Mode to 0to acquire 6 IP addresses from the DHCP
server.
2. Type Fto write these values to Flash memory.
3. Type Qto quit the program and exit to E86mon.
Cycle power to the cradle to effect the latest changes.
In this mode, each slot has its own IP address and may be directly
accessed by the network. On power-up, the 6 IP addresses are
acquired. Periodically, the lease times are checked and renewed
as required. If the renewal request is NAKed by the server, the
cradle enters Panic mode and re-boots. If the cradle receives no
response from the server and is unable to re-bind, it also Panics
and re-boots.

6
CRD 2700-4000E
Ethernet Cradle
Static Mode
If there is no DHCP server on your network, the cradle must be
manually configured with IP addresses and other network-related
information. This configuration is performed from the debug
monitor(i.e.,E86MON)byrunning theEFlasherutility. Toenterthe
debug monitor:
1. Connect a null modem cable to a CRD1700-4000S hostcon-
nector cable (p/n 70245-001). The null modem end should
be connected to a COM port onthe PC, and should be set to
run at 115200 bps, 8N1, with XON/XOFF flow control and
ASCII file transfer protocol, using a terminal emulator soft-
ware, such as ProCommTM or HyperterminalTM.
2. Connect the modular end to the expansion port of the
CRD2700-4000E.
3. Power up the CRD2700-4000E. Before the power up LED
sequence begins, type ‘a’ fromthe terminal program to enter
the E86Mon. The following screen displays:
4. Next,loadtheEFlasherutilityintothecradle’sRAMbytyping
l2. Press Enter. The following screen displays:
Welcome to EtherCradle Monitor version x.xx! (?<Enter> for help)
er86mon:
er86mon:l2
er86mon:

7
Quick Reference
5. Type ‘g’ and press Enter to run the EFlasher utility. The fol-
lowing screen displays:
6. Select ‘P’ to program the cradle’s global variables. The fol-
lowing screen displays:
7. Select Option 1 to set the public network settings. The follow-
ing screen displays:
Note: Network parameters are used in Static mode only.
8. Select option 1, and update the Static mode setting to 1.
EFlasher asks for the Cradle IP Address. If your network
er86mon:g
Cradle Utilities Version x.xx
I) Flash Info
P) Program Cradle Globals
Q) Quit
1) Public network settings
2) Advanced settings
3) PPP network settings
4) Private network settings
Public Network:
1) Static mode: 1
2) NAPT Mode: 0
The following settings are only used when Static mode
3) Cradle IP Address: 10.0.3.1
4) Router (Gateway) IP Address: 10.0.0.1
5) 1st DNS IP Address: 10.0.1.1
6) 2nd DNS IP Address: 0.0.0.0
7) 1st WINS IP Address: 10.0.2.118
8) 2nd WINS IP Address: 10.0.1.1
9) Subnet mask: 255.0.0.0
The following settings are only used when NAPT mode
A) Terminal 1 IP Address: 10.0.3.2
B) Terminal 2 IP Address: 10.0.3.3
C) Terminal 3 IP Address: 10.0.3.4
D) Terminal 4 IP Address: 10.0.3.5
E) Terminal 5 IP Address: 10.0.3.6

8
CRD 2700-4000E
Ethernet Cradle
uses a DHCP server, this IP address must be reserved for
this CRD2700-4000E. See your network administrator for
assistance. If you are not using NAPT,you are askedto input
the Static addresses for the 4 slots and the expansion slot.
Note: To configure the cradle for DHCP use, the static mode
settingmustbe‘0’.
Note: NAPT mode must be off for Active Sync to function.
9. Select option 3, and update the cradle IP address. If your
network uses a DHCP server, this IP address must be re-
served for this CRD2700-4000E. See your network adminis-
trator for assistance.
10.Select option 4, and update the Router IP address. This ad-
dress should be set to the IP address of your internet gate-
way.
11. Select option 5 and 6, and set the DNS IP addresses for
DNS1 and DNS 2.
12.Selectoption7and8tosettheWINSaddresses.Thisisre-
quired for Active Sync to function properly.
13.Select option 9, and enter the correct subnet mask for your
subnet.
Note: When diagnostic mode is enabled (i.e., set to ‘1’), the
CRD2700-4000E’s expansion serial port does not
communicate with a CRD2700-1000S serial cradle. In-
stead, the CRD2700-4000E transmits diagnostic infor-
mation at 115,200 bps, 8N1, using the expansion port.

9
Quick Reference
14.Once all values are set correctly, type ‘F’ to write these val-
ues into flash memory. The terminal displays the following
screen:
15. Type ‘Q’ to quit the program and exit back to E86mon. The
following screen displays.
16. Cycle power to the CRD2700-4000E so that the latest
changes take affect.
Network Address Translation (NAPT)
In both DHCP and static mode, the cradle assigns private IP
addresses to each terminal and performs Network Address
Translation (NAPT) on all TCP/IP and UDP/IP packets as they
transmit through the cradle between the outside network and the
cradle’s private network. The terminals are assigned private
addresses specified in options A-E in the Public network menu
above.
The cradle modifies one IPaddress andport number pair inside a
TCP/IP and UDP/IP packet header. Those packets going to the
outside network have their source address translated to the IP
address of the cradle and their source port changed to a unique
port number associated with the cradle slot it came from.
Conversely, packets designated to the cradle’s private network
have their destination IP address and port number mapped to the
equivalent private network IP address and port number. The
differences in the port numbers distinguish between packets for
differentslots in thecradle. Thebenefitof bothIPaddressandport
Erasing flash sector at E0000...
Cradle Utilities Version x.xx
I) Flash Info
P) Program Cradle Globals
Q) Quit
Program terminated with result code ‘00’
er86mon

10
CRD 2700-4000E
Ethernet Cradle
translation is that multiple slots can simultaneously share the one
network IP address of the cradle.
Accessing theoutsidenetworkwiththeCRD2700-4000Eisnotthe
same as a direct connection to the outside network. When using
NAPT, many network services do not function at all. Since NAPT
modifies addresses in TCP/IP and UDP/IP headers, it is
insufficient for network services that embed IP addresses inside
packet data. Also, the CRD2700-4000E assumes that a Palm
client sending data with one TCP or UDP source port expects to
receive replies on the same port number, but some network
servicesmay reply with dataover a range of ports. These network
services are unusable with the CRD2700-4000E. Also, some
services listen to incoming requests from the network. Since port
numbers are usually fixed for a given service, no Palm terminals
can be set up as listeners.
Inter-Connecting Cradles
Up to four 4-slot CRD1700-4000S serial cradles may be inter-
connected (daisy-chained) with the CRD2700-4000E using an RJ-
45/10 to RJ-45/10 inter-cradle cable (p/n 70349-001). This cable
is required for each cradle to be connected.
WARNING
Each cradle must have its own power supply. Any other
method of power hookup is unsafe.
To inter-connect cradles:
1. Connect the power supply to the second 4-slot cradle as de-
scribedintheConnecting Power section.
Note: You must use a 8V. 5A. power supply on the serial cra-
dle being connected to the ethernet cradle.

11
Quick Reference
2. Plug one end of the inter-cradle cable into the Expansion
Connector modular jack labeled EXP on the back of the first
cradle.
3. Plug the other end of the inter-cradle cable into the modular
jack labeled Host on the back of the second serial cradle.
4. Repeat these steps for any additional 4-slot serial cradles
you want to connect.
Note: This onlyworks withtheCRD1700-4000S4-SlotSerial
Cradle. It does not work with the single-slot cradle.
Software Configuration
The CRD2700-4000E appears to SPT 1700 and PPT 2700
terminals inserted into the cradle as a direct-connect PPP service.
Therefore, just as you would set up any remote client to connect
toan InternetServiceProvider(ISP)likeCompuserveorEarthlink,
the terminals must be configured for use with the cradle. The
following sections describe the steps necessary to configure the
SPT 1700 and PPT 2700 terminals.
Configuring the SPT 1700
Configuring NetSync Options
NetSync must be configured for use with the CRD2700-4000E.
From the HotSync panel on your SPT 1700, select each of the
option panels available from the Options menu (accessed by
tapping the Menu icon) and configure them as follows:
1. To configure the Modem Sync Preferences:
Serial Cradle Ethernet Cradle
Inter-Cradle Cable

12
CRD 2700-4000E
Ethernet Cradle
a. Select the HotSync application from the main application
screen.
b. Select the menu icon to display the options menu.
c. Select Modem Sync Prefs.
d. Select Network and tap OK.
2. To configure the Primary PC host Setup:
Note: This panel is very important! It tells the SPT 1700 ter-
minal which machine to synchronize with on the net-
work.
a. Select HotSync from the main application screen.
b. Select the menu icon to display the options menu.
c. Select Primary PC host Setup.
d. Using the PC you will synchronize with most often, right
clickon the HotSync Managerin the Windows trayon the
host PC. Left click on Setup,clickontheNetwork tab,
then click on the TCP/IP Settings button. Note the Pri-
mary PC Name, Primary PC address, and the Subnet
mask, and enter that information manually on your SPT
1700.
Note: IftheSubnetMaskboxon yourPCisempty,youdonot
need to enter anything in that section on your SPT
1700.Also,NetworkHotSyncsetupmustberunonthis
PC before the Network tab is available.
3. To configure the Conduit Setup:
a. Select the HotSync application from the main application
screen.
b. SelectthemenuicontodisplaytheOptions menu.
c. Select Conduit Setup.

13
Quick Reference
d. Check any items that you want synchronized and un-
check any items that you don’t want synchronized, then
tap OK.
4. To configure the Connection Setup:
a. Select the HotSync application from the main application
screen.
b. Select the menu icon to display the Options menu.
c. Choose the Name: Direct Serial.
d. Choose Port: Cradle.
e. Choose Speed: 57,600 bps.
f. Choose Flow Ctl: Automatic, Direct
g. Tap “Done.”
Creating a CRD2700-4000E Modem Sync Service
The SPT 1700 terminal communicates with the CRD2700-4000E
via a Modem Sync. The Modem Sync offers many options which
must be configured for use with the CRD2700-4000E.
Create a separate CRD2700-4000E network configuration and
select it as your default Modem Sync service. Use either Graffiti or
the keyboard feature (click in the lower left-hand corner of the
scratch pad on the abc to access the keyboard) to enter the
following information:
1. Select the HotSync application from the main application
screen.
2. Choose the Select Service box under the Modem Sync icon
to create a new CRD2700-4000E service.
3. Select the Earthlink service, click Menu->Duplicate.
4. Change the service name to CRD2700-4000E. Leave the
user name and password blank. Choose the Direct Serial
Connection option.

14
CRD 2700-4000E
Ethernet Cradle
Configuring the Remote Host PC
The remote PC you wish to HotSync the SPT 1700 to must be set
up for Network HotSync and configured to run from the network.
1. Make sure HotSync Manager is installed and running.
2. FromtheHotSyncManager,makesureNetwork ischecked.
Ifyoudon’twantHotSyncManagertouseaserial port,make
sure Local is unchecked.
Note: The PC must be configured for proper TCP/IP network
operation.
The HotSync Process
Once the CRD2700-4000E is properly connected, insert a
terminal in the cradle to automatically HotSync the terminal. All
local slots in the cradle operate simultaneously.
If multiple slots are to be HotSync’d simultaneously, each must
communicate with a different host PC. If the application requires
simultaneous connection to a single host database, additional
software, available from Symbol, is required.
Terminals inserted into daisy-chained cradles are HotSync’d in a
round-robin fashion simultaneously with any HotSyncs from local
slots. Daisy-chained cradles share a logical “fifth slot” on the
CRD2700-4000E, which, while it shares equal priority with the
local slots, allows only one HotSync at a time.
Performing HotSync
Toinitiate communication between
the terminal and the host, gently
insert the SPT1700 terminal into a
local cradle slot, or a slot on an
inter-connected serial cradle.
When properly inserted, the slot’s
LED turns red,then flashes green,
indicating that the host and

15
Quick Reference
terminal are communicating. Removing the terminal from the
cradlewhiletheLEDisflashinggreendisruptscommunicationand
data may be lost.If the terminal is inserted into an inter-connected
serial cradle slot while another terminal on the serial cradle chain
is communicating with a host, the terminal waits (its LED remains
red) until the first terminal finishes communicating, then the slot’s
LED turns solid green until the terminal is removed from the slot.
To remove the terminal, pull it straight up from the slot.
Configuring the PPT 2700
The cradle can be used to synchronize the PPT 2700 usingeither
Active Sync or eConnect. Active Sync only allows one terminal to
connect to a host at a time. eConnect is a control panel applet that
is installed in the terminal, and allows any custom synchronization
application to be launched when the terminal is inserted into the
cradle. eConnect can be set up to start a TCP/IP connection with
the cradle, allowing any IP-based application to communicate
through the cradle.
Configuring the Remote Host PC
For the PPT 2700 terminal to Active Sync with the host computer,
a partnership must first be established with the host PC using a
standard serial connection.
Before you ActiveSync the PPT 2700 terminal with the host PC,
disable the Automatic Synchronization option:
1. Enter the connection settings from the Start menu by select-
ing Settings, then the Connections tab.
2. Tap the PC iconto selectPC options.Deselectthecheckbox
for automatic synchronization.
Configuring the Remote Host PC
The remote PC must be set up for Network ActiveSync and
configured to run from the network.
1. Make sure Active Sync is installed and running.

16
CRD 2700-4000E
Ethernet Cradle
2. From ActiveSync, select the File menu and the Connection
settings item.
3. In the Connection settings dialog box, check the Allow
Network and Remote Access Service (RAS) server con-
nection with this computer option.
4. Click the OK button.
Note: The PC must be configured for proper TCP/IP network
operation.
The Active Sync Process
Once the CRD2700-4000E is properly connected, data
communication between the PPT 2700 terminal and the host
computer can take place.
Note: NAPT mode must be off for Active Sync to function.
Insert the PPT 2700 terminal into the cradle and initiate
ActiveSync:
1. From the Start, menu select Programs.
2. Tap the Connections icon to select the connection options.
3. Tap the ActiveSync icon.
4. In the ActiveSync dialog, select 115200 Default from the
drop-down list.
5. Select the proper host computer in the Connect To box.
Note that in order for a host to appear in this list, a partner-
ship must exist with the host.
6. TaptheConnect button to start the ActiveSync process. The
LED flashes green to indicate it is communicating with the
host. When synchronization is complete, you may terminate
the connection with the host by tapping the Disconnect but-
ton on the terminal or by removing the terminal from the cra-
dle.

17
Quick Reference
Configuring eConnect
To configure eConnect:
1. Tap Start.
2. Tap Settings
3. Select the System tab.
4. Select the eConnect applet.
5. Select the Automatically detect connections option if
you’d like the terminal to detect when it is inserted in the cra-
dle.
a. In the When a connectionis detected group box select
the application to run. Selecting Synchronize with host
performs a standard ActiveSync Connection.
b. Select the Establish TCP/IP connection check box to
have eConnect set up the protocol stack.
c. Set Connect Using Selection to 115200 Default.
Battery Charging
The CRD2700-4000E can also be used to recharge the battery in
the terminal. All fourslots can be used to simultaneouslyrecharge
the batteries on four terminals. To charge the battery, insert the
terminal(s) in the slot(s). The battery begins to charge. It takes
approximately 2 hours to recharge the battery. After two hours,
remove the terminal from the cradle and power it on. The battery
charge indicator should appear to be full.
To verify that the terminal’s battery is charging while seated in the
cradle:
1. Power the terminal on.
2. Tap the icon.
3. Centered on the top of the screen, an indicator displays in
the shape of a lightening bolt. This indicates that the battery
is charging.

18
CRD 2700-4000E
Ethernet Cradle
Indicator Lights
Troubleshooting
Light Indication
Off No terminal is present in the slot.
Solid Red Terminal is present, but communication has not started.
Green Flashing Terminal is in the cradle, and communicating with the
host computer.
Slow Red Flashing Error, communication did not start.
Fast Red Flashing Error, terminal inactivity timeout. The terminal did not fin-
ish HotSyncing in 15 minutes. This timeisprogrammable
in the flash parameters.
Solid Green Terminal is present in the slot, communication is com-
plete.
All LEDs Red Flashing Automatic configuration of the cradle via the local DHCP
service failed. Connect a properly configured DHCP
server or DHCP relay agent to the subnet, and power cy-
cle the CRD2700-4000E, or wait10 minutes for a DHCP
configuration retry. Or: Ethernet link is down. Make sure
the ethernet cable is connected to an active hub.
Symptom Cause Suggested Action
LEDs do not light
when the cradle is
powered on.
Cradle is not receiv-
ing power. Make sure the power supply is se-
curely connected and receiving
power.
LED does not light
when the terminal is
inserted.
Terminal is not seat-
ed firmly in the cra-
dle, or the battery is
notproperlyinstalled
in the terminal.
Make sure the battery is properly
installed in the terminal, and reseat
the terminal in the cradle.
Table of contents