WARNING: This product can expose you to chemicals including lead, which is known to the state
of California to cause cancer, birth defects, or other reproductive harm. For more information, go
to www.P65Warnings.ca.gov.
Symmons Industries, Inc. ■31 Brooks Drive ■Braintree, MA 02184
Phone: (800) 796-6667 ■ Fax: (800) 961-9621
symmons.com ■gethelp@symmons.com
Copyright © 2019 Symmons Industries, Inc. ■ 121319
ZV-3299 REV A
2. MOUNTING BRACKET INSTALLATION
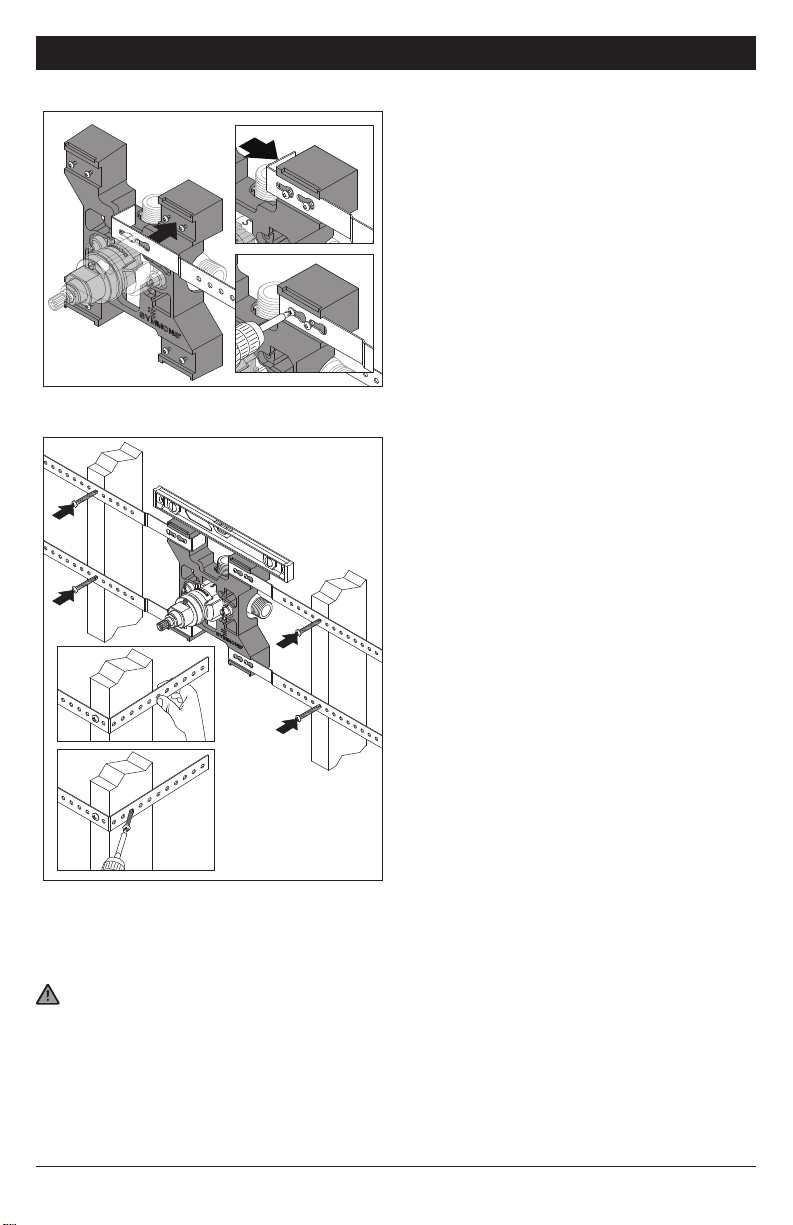
2.1 Metal Straps
Bracket is used to secure valve between wall
studs up to 24 inches, center to center.
Bracket will fit in minimum 2x3 wall cavity.
Bracket will rough valve at 2-7/8" from centerline
of valve ports to front of finished wall.
1. Place metal straps (x4) over screws. Screws
will come preassembled to bracket.
2. Pull metal straps tight against bracket ears.
Screws will protrude through small screw
hole in metal straps.
3. Drive screws into bracket to secure straps.
Use caution not to strip screws.
2.2 Install Bracket
Mounting bracket will locate valve body in wall
cavity at appropriate depth (valve body rough-in
is not required).
1. Confirm valve body and mounting
bracket are level. Drive (x4) wood screws
through metal straps into wood studs (see
FIGURE 2.2)
2. Bend excess strap around wood studs.
(see FIGURE 2.3)
3. Drive (4x) wood screws, at inward angle,
through metal straps into sides of wood
studs (see FIGURE 2.4). Installing wood
screws at inward angle will pull metal straps
tight against wood studs.
FIGURE 2.1
FIGURE 2.2
FIGURE 2.3
FIGURE 2.4


