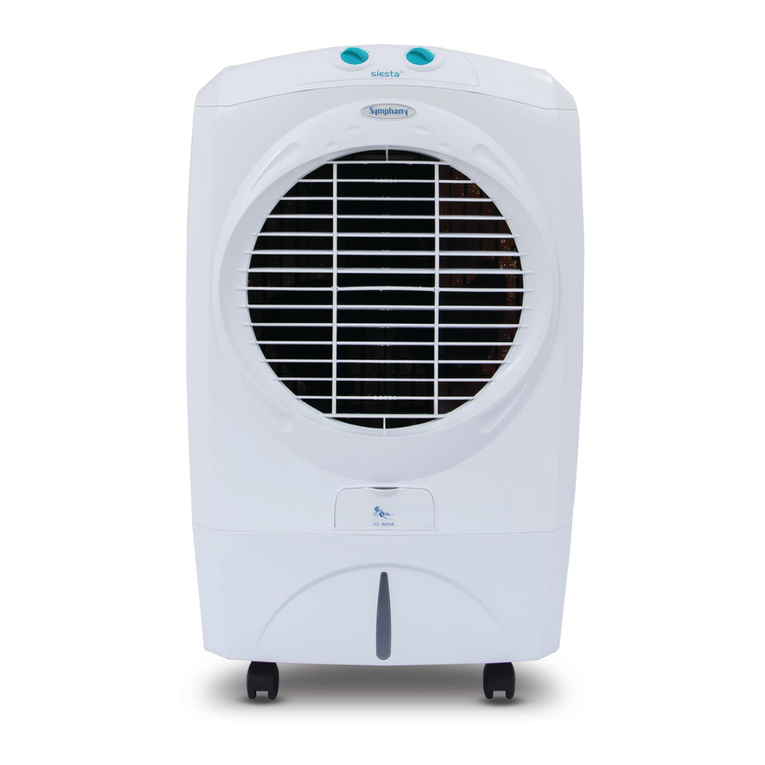
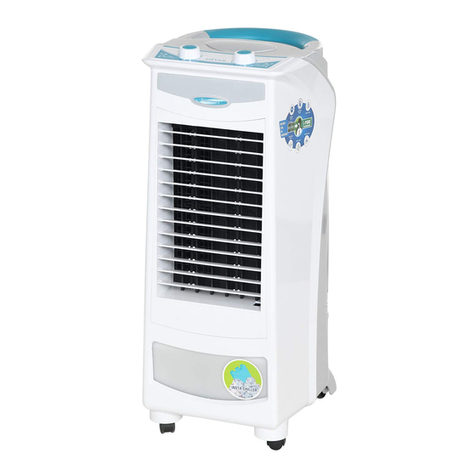
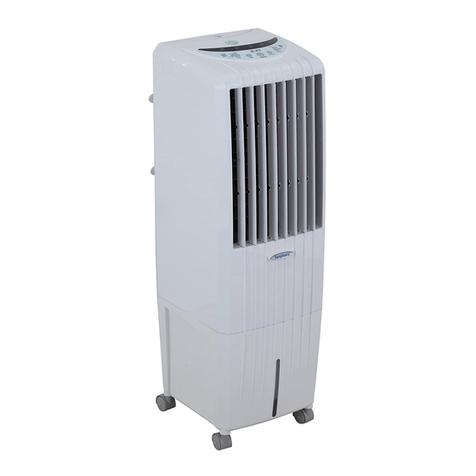
Symphony Diet 8i BU User manual

Original
instructions
READ
AND
SAVE
THESE
INSTRUCTIONS
World
Leader
in
Air
Cooling
Owner's
Manual
&
Warranty
Card
Before
use
of
this
product
please
read
and
preserve
these
important
instructions.
Wmpheny

How
to
install
and
operate
cooler
=P
Take
the
cooler
out
from
carton,
Remove
all
protective
covers.
Place
the
cooler
in
front
of
an
open
window
or
install
in
a
window
for
effective
cooling.
Selected
Models
can
also
be
placed
on
trolleys.
Do
not use
cooler
inaclosed
room.
Ensure
power
supply
is
as
specified
for
the
cooler.
There
should
not
be
any
spikes
in
supply
voltage.
Disconnect
the
power
cord
while
filling
the
water.
As
per the
provision
in
your
model,
pour
water
through
water
inlet
door.
You
may
also
add
ice
cubes
for
faster
cooling.
Water
can
be
poured
up
to
the
highest
point
(or
MAX)
of
the
water
level
indicator.
You
may
keep
a
small
container
below
over flow
hole,
to
avoid
spillage
of
water
on
your
floor/carpet.
For
longer
life
of
pump,
always
operate
it
with
sufficient
water
in
the tank.
FLOAT
VALVE
A
Float
valve
facility
is
available
in
selected
models.
This
feature
makes
provision
for
automatic
water
filling
of
the
cooler.
Ensure
proper
connection
of
water
inlet
pipe
into
the
float
valve
to
avoid
leakage.
Plug
in
to
power
source
and
switch
on.
Keep
the
doors
&
windows
open
for
optimum
cooling
performance.
always
keep
the
cooler
in
front
of
an
open
window.
[2]
Sit
back
and
enjoy.

How
to
operate
Remote
Control
models
-
coo
SWING
POWER
Remote
Control”
Control
Panel”
Remote
Control
&
Control
Panel
may
vary
from
model
to
model
POWER
(ON/OFF)
[
©]:
Press
the
button
to
switch on/off
the
cooler.
Icon
will
glow
with
RED
colour
at
ON
position
and
RED
colour
(Blinking)
at
OFF
position
COOL
|
*#]:
Press
the
button
to
switch
ON/OFF
the
pump.
Cool
Icon
will
glow
when
switched
On.
The
Pump
will
start
only
when
sufficient
water
is
in
the tank,
indicated
by
water
icon
glowing.
Low
water
level
will
be
indicated
by
a
buzzer
for
5
seconds
and
water
icon
willstart
blinking.
FAN
[
¢&
]:
When
started,
the
fan
icon
will
glow.
Press
the
button
for
High,
Medium
and
Low
speeds.
The
selected
speed
will
be
indicated
by
glowing
LED.
SWING[&
]:
Press
button
to
switch
on/off
the
swing
function.
Swing
icon
will
glow
when
switched
ON
TIMER
[
G
]:
Press
the
button
to
set
OFF
timer
from
1-
7
hours
in
intervals
of
1
hr.
Timer
icon
will
glow
when
timer
is
switched
ON
and
the
glowing
LEDs
will
indicate
the
total
OFF
time
set.
*
Shape
and
size
can
vary
as
per
respective
models.
Maintenance
Tips
1)
Disconnect
the
power
cord
before
servicing
or
maintenance.
2)
Do
not
make
wiring
loose
or
use
inferior
material
in
servicing
or
maintenance
to
avoid
fire
hazard.
3)
Please
stop
the
device
and
contact
the
authorized
service
provider
in
case
of
electric
shock found
on
cooler.
4)
Please
disconnect
the
power
supply
before
opening
any
cover
to
avoid
injury
due
to
rotating
part
/
electric
shock
5)
To
clean
the
tank
remove
drain
plug.
Drain
out
all
the
residual
water.
Draining
out
of
stagnant
water
regularly
from
tank
is
necessary
to
keep your
environment
hygienic.
6)To
clean
the
cooling
pad,
unplug
the
cooler; using
a
garden
hose
outside,
apply
low-pressure
water
over
the
cooling
pad.
Depending
on
the
surrounding
environment,
clean
the
pad
at
least
once
or
twice
ina
year,
7)
Under
no
circumstances,
customer
should
open
the
cooler.
8)
Always
use
clean
tap
water.
Cleaning
of
cooler
by
draining
the
water
To
drain
the
left
over
water
from
the
tank
pull
to
remove
the
drain
plug
given
at
the
bottom
side
of
the
tank.
After
draining,
push
to
fix
the
drain
plug
properly.
se
It
is
advisable
to
drain
water
on
regular
basis
for
better
performance
&
longer
A
:
Drain
Plug
life
of
pads.
[3]

Trouble
Shooting
Trouble
Cause
Remed:
Pump
is
switched
OFF
Switch
ON
the
pump
Less
Cooling
No
air
circulation
Ensure
cross
ventilation
Drain
plug
is
displaced
Ensure
that
the
drain
plug
is
positioned
properly
Water
Leakage
Grill
lock
is
disengaged
Relock
the
grill
Cooling
pad
is
sagged
Change
the
cooling
pads
Airflow
switch
is
turned
OFF
Switch
ON
the
fan
by
selecting
the
required
speed
Fan not
Working
Loose
contact
at
socket
Rectify
faulty
wiring
/
Socket
in
the
house
Switch
or
Motor
Malfunction
Call
customer
care
Electrical
Specification
Rated
Supply
:
110-120V~60Hz,
Single
Phase
Ne
Wiring
Diagrams
Tech
Specs
|
Rated
Power|
Rated
Model
(watts)
|
Current
(A)
Diet
8 BU
63
0.58
5
Diet
121
BU
63
0.58
US
Listed
Diet
22i
BU
63
0.58
—
Diet
35i
BU
135
1.25
Intertek
Diet
50i
BU
135
1.25
5016817
Winter
BU
155
140
Conforms
to
UL
Std.507
Winter
80
BU
155
1.40
Cl
Double
Insulation
Symphony
Limited
WS
mpheny
MADE
IN
INDIA
0
U
cM
PUMP
WLI
SENSOR
A
1
A
LOUVER
'
CN2
MOTOR
!
WATER
LEVEL
SENSOR
!
COOL
;
1
sw
'
CN3
'
ACN
U
ACL
|
i
'
Low
t
|
fi
MID
HIGH
t
MOTOR
!
U
U
U
Co
NEUTRAL
=
PHASE
(11)
POWER
CORD
‘SYNCHRONOUS
MOTOR
HIGH
BLACK,
MEDIUM
WHITE
LOW.
RED
L2on
__KE2
|
‘SYNCHRONOUS
MOTOR
_L
TELL
SSS
PHASE
(12)
O
NEUTRAL
POWER
PCB
KEY
BOARD
PCB
'
1
1
1
1
1
1
1
1
1
1
'
PUMP
1
1
1
1
1
1
1
1
1
1
1
1
WATER
LEVEL
SENSOR
CLASS
Il
MODELS:
DIET
8i
BU,
DIET
12i
BU,
DIET
22i
BU
CLASS
II
MODELS:
DIET
35i
BU,
DIET
50i
BU,
WINTER
i
BU,
WINTER
80i
BU
[4]

Installing
remote
control
batteries
1
Remove
the
battery
cover
and
then
lift
the
cover
of
the
remote
control.
2
Insert
two
AAA
batteries
into
the
battery
compartment.
Must
match
the
+
and
-
symbols
on
the
batteries with
the
+
and
-symbols
with
respect
to
battery
compartment
3
Place
the
battery
compartment
cover
again.
A
¢
Batteries
should
not
be
exposed
to
excessive
heat,
such
as
sunshine,
heat
registers,
or
fire.
¢
Battery
chemicals
can
cause
a
rash.
If
the
batteries
leak,
clean
the
battery
compartment
with
a
cloth.
If
chemicals
touch
your
skin,
wash
immediately.
e
Make
sure
that
batteries
are
disposed
of
correctly.
Do
not
burn
or
incinerate.
¢
Keep
batteries
away
from
children.
¢
Children
must
not
add
/
replace
AAA
batteries
of
remote.
Do
not
mix
batteries
of
different
types.
¢
Do
not
mix
old
and
new
batteries.
e
Remove
batteries
when
the
charge
is
depleted.
e
If
the
remote
control
is
not
going
to
be
used
for
an
extended
period
of
time,
remove
the
batteries.
FCC
Instructions
Warning
:
Changes
or
modifications
to
this
unit
not
expressly
approved
by
the
party
responsible
for
compliance
could
void
the
user's
authority
to
operate
the
equipment.
NOTE:
This
equipment
has
been
tested
and
found
to
comply
with
the
limits
for
a
Class
B
digital
device,
pursuant
to
Part
15
of
the
FCC
Rules.
These
limits are
designed
to
provide
reasonable
protection
against
harmful
interference
in
a
residential
installation.
This
equipment
generates,
uses
and
can
radiate
radio
frequency
energy
and,
if
not
installed
and
used
in
accordance
with
the
instructions,
may
cause
harmful
interference
to
radio
communications.
However,
there
is
no
guarantee
that
interference
will
not
occur
ina
particular
installation.
If
this
equipment
does
cause
harmful
interference
to
radio
or
television
reception,
which
can
be
determined
by
turning
the
equipment
off
and
on,
the
user
is
encouraged
to
try
to
correct
the
interference
by
one
or
more
of
the
following
measures:
-
Reorient
or
relocate
the
receiving
antenna.
-
Increase
the
separation
between
the
equipment
and
receiver.
-
Connect
the
equipment
into an
outlet
ona
circuit
different
from
that
to
which
the
receiver
is
connected.
-
Consult
the
dealer
or
an
experienced
radio/
TV
technician
for
help.
[5]

Supplier's
Declaration
of
Conformity
a.
This
device
complies
with
part
15
of
the
FCC
rules.
b.
Responsible
supplier
listed
as
per
SDoC:
Contact
+1
725
726
4267
Instruction
This
appliance
has
a
polarized
plug
(one
blade
is
wider
than
the
other).
To
reduce
the
risk
of
electric
shock,
this
plug
is
intended
to
fit
in
a
polarized
outlet
only
one
way.
If
the
plug
does
not
fit
fully
in
the
outlet,
reverse
the
plug.
If
it
still
does
not
fit,
contact
a
qualified
electrician.
Do
not
attempt
to
defeat
this
safety
feature.
WARNING
1.
Unplug
and
disconnect
the
cooler
from
power
source
before
attempting
any
maintenance,
service
or
cleaning
and
filling
water.
.
If
the
supply
cord
is
damaged,
it
must
be
replaced
by
authorised
service
provider
in
order
to
avoid
hazard.
Do
not
operate
the
product
with
a
damaged
power
cord
or
plug.
3.
To
avoid
electric
shock,
connect
only
to
an
outlet
provided
with
a
ground
fault
circuit
interrupting
device.
(ELCB
=
Earth
leakage
current
breaker)
4.
This
appliance
is
not
intended
for
use
by
persons
(including
children)
with
reduced
physical,
sensory
or
mental
capabilities,
or
lack
of
experience
and
knowledge,
unless
they
have
been
given
supervision
or
instruction
concerning
use
of
the
appliance
by
a
person
responsible
for
their
safety.
5.
Children
of
less
than
3
years
should
be
kept
away
unless
continuously
supervised.
6.
Children
aged
3
years
and
above
shall
only
switch on/off
the
appliance
provided
that
it
has
been
placed
or
installed
in
its
intended
normal
operating
position
and
they
have
been
given
supervision
or
instruction
concerning
use
of
the
appliance
in
a
safe
way
and
understand
the
hazards
involved.
Children
aged
3
years
and
above
shall
not
plug
in,
regulate
and
clean
the
appliance
or
perform
user
maintenance
7.
Children
must
not
be
allowed
to
play
with
cooler.
8.This
appliance
is
not
intended
to
be
used
in
locations
where
special
conditions
prevail,
such
as
the
presence
of
a
corrosive
or
explosive
atmosphere
(vapour
or
gas).
9.This
appliance
can
be
used
by
children
aged
from
8
years
and
above
and
persons
with
reduced
physical,
sensory
or
mental
capabilities
or
lack
of
experience
and
knowledge
if
they
have
been
given
supervision
or
instruction
concerning
use
of
the
appliance
in
a
safe
way
and
understand
the
hazards
involved.
Children
shall
not
play
with
the
appliance.
Cleaning
and
user
maintenance
shall
not
be
made
by
children
without
supervision.
nN
This
marking
indicates
that
this
product
should
not
be
disposed
off
with
other
house
hold
wastes
through
out
the
EU
and
other
applicable
countries.
To
prevent
possible
harm
to
the
environment
or
human
health
from
uncontrolled
waste
disposal,
recycle
it
responsibly.
If
you
wish
to
discard
this
product
please
contact
your
local
authorities
or
dealer
from
where
it
was
purchased
and
ask
for
correct
method
of
disposal.
a
Symphony
cooler
works
on
inverter.
The
inverter
should
be
of
sine-wave
type
of
appropriate
rating.
Cooling
performances
depends
on
temperature
of
water
used
relative
humidity
and
ambient
temperature
/1//
[6]

WARRANTY
REGISTRATION
CARD
Product
Sr.
No.
Date
of
Purchase
___y_/,
Model
Name
Address
:
E-mail
Mobile:
Phone:
Condition
of
warranty
We
extend
this
limited
warranty
to
the
original
buyer
(first
retail
purchaser)
and
warranty
that the
product
shall
be
free
from
manufacturer
defects
in
workmanship
and
materials
for
12
months
from
the
date
of
purchase.
a.
Warranty
will
come
in
with
effect
when
the
following
conditions
are
met
with:
a)
Warranty
registration
card
duly
filled
and
received
by
the
company
within
10
days
from
the
date
of
purchase.
b)
Product
is
operated
following
the
recommendations
explained
inside
the
user
manual.
b.
The
company's
liability
under
the
warranty
will
be
limited
only
to
motor,
pump,
louver
motor,
remote,
PCB
and
also
restricted
to
any
such
defect
which
occurs
under
conditions
of
normal
operations
and
under
proper
use.
Any
part/s
replaced
by the
company
at
its
discretion
shall
be
a
functionally
operative
unit.
c.
This
warranty
shall
not
apply
to
product:
1)
Which
have
not
been
purchased
from
authorized
distributor
through
their
network
or
company's
authorized
retail
stores,
2)
Which
have
been
altered/opened
by
any
other
personnel
not
authorized
by
the
company,
3)
Incorrectly
used
in
combination
with
any
other
substance
or
products,
4)
Which
are
used
for
commercial
rental
purpose
and
/
or
which
develops
problems
due
to
faulty
care
or
maintenance
and
alterations
to
product
or
its
parts.
5)
Which
is
subjected
to
electrical
supply
for
which
the
product
is
not
designed,
6)
Warranty
will
void
if
the
product
is
operated
with
a
sub-standard
inverter
or
non-sine
wave
inverter.
7)
If
documentation
of
buying
is
not
available
to
validate
an
original
purchase.
d.
While
the
company
will
make
every
effort
to
carry
out
the
repairs
at
the
earliest,
it
however
is
made
expressly
clear
that
the
company
is
under
no
obligation
to
do
soina
specified
period
of
time.
e.
This
warranty
shall
automatically
terminated
on
expiry
of
the
warranty
period
of
12
months
from
the
date
of
purchase
even
if
the
product
may
not
be
used
for
any
time
during
the
warranty
period
for
any
reason
whatsoever.
f.
Cooling
pads
and
outer
plastic
parts
are
not
covered
under
warranty.
g.
The
company
shall
not
be
liable
in
any
case
for
any
loss
or
damage
caused
to
any
property,
death
or
disability
caused
to
any
human
life
arising
out
of
fire,
electrical
fault,
short
circuit,
accidental
handling
or
any
kind
of
natural
calamity.
As,
such
the
company's
liability
is
limited
to
the
cost
of
the
spare
parts
of
the
said
products
only.
h.
Change
of
address
of
the
customers
must
be
intimated
to
the
company
without
which
the
warranty
shall
not
be
operational.
|.
Due
to
ongoing
research
and
development,
the
company
holds
the rights
to
modify
the
product
without
any
prior
notice
or
obligation
to
buyers.
j.
Purchaser
should
retain
the
purchase
bill
as
evidence
of
the
date
of
purchase.
Copy
of
the
purchase
invoice
should
be
given
to
the visiting
service
technician
while
attending
the
complaint.
In
case
of
any
alteration
in
the
date
of
purchase
invoice
is
found
without
sign
and
seal
of
the
dealer,
the
warranty
shall
be
void.
k.
During
the
warranty,
customer
is
not
entitled
for
exchange
of
product
or
refund
money.
|.
The
company
does
not
have
any
Annual
Maintenance
Contract
(AMC)
policy.
m.
.Warranty
will
be
applicable
if
registered
within
21
days
of
purchase.
Warranty
Period
Product
Model
Parts
Product
Model
Parts
Diet
8i
BU
12
Months
Diet
50i
BU
12
Months
Diet
12i
BU
12
Months
Winter
i
BU
12
Months
Diet
22i
BU
12
Months
Winter 80iBU|
12
Months
Diet
35i
BU
12
Months
Symphony
Limited
1
Sy
‘
H
FP12-TP50
Bodakd
Dealer's
name
ymphony
House,
-
odakdev,
&
si
.
.
signature
Off
SG
Highway,
Anmedabad
380059,
India.
g
[7]

\ympheny

Instrucciones
Originales
LEA
Y
GUARDE
ESTE
INSTRUCTIVO
Lider
Mundial
en
Aire
Evaporativo
Manual
de
propietario
&
Tarjeta
de
Garantia
Antes
de
usar
este
equipo,
favor
de
leer
y
conservar
estas
importantes
Instrucciones
Wmpheny

Como
Instalar
y
operar
un
enfriador
evaporativo
Saque
el
enfriador
evaporativo
de
la
caja.
Quitele
todas
las
protecciones.
Coloque
el
equipo
frente
a
una
ventana
o
corriente
de
aire.
Mantenga
abierta
siempre
puertas
o
ventanas.
Los
enfriadores
evaporativos
no
se
recomiendan
para
lugares
cerrados.
valvula
flotador
Un
valvula
o
flotador
esta
disponible
en
algunos
modelos.Estas
caracteristicas
hacen
que
el
Ilenado
de
agua
pueda
ser
de
manera
automatica
en
su
equipo.
Asegurese
de
conectar
correctamente
la
tuberia
de
agua
para
evitar
fugas
Coloque
el
equipo
cerca
de
una
ventana
6
puerta
abierta.
Mantenga
el
flujo
de
aire
en
el
area
donde
use
el
equipo.
[2]
Desconecte
el
equipo
mientras
lo
Ilena
de
agua.
En
el
frente
del
equipo
encontrara
el
compartimento
para
Ilenarlo
de
agua.
Puede
agregar
hielos
en
casos
que
desee
potenciar
el
enfriamiento.
Al
Ilenarlo
el
agua
no
debe
rebasar
el
nivel
maximo
marcado
en
el
visor
que
esta
al
frente
del
equipo.
Para
cuidar
el
buen
funciona-
miento
de
su
equipo
mantengalo
con
agua
cuando
esté
en
funcidn
de
enfriamiento
A
Z
Conecte
el
equipo
directamente
a
un
conector
eléctrico
Siéntese
y
disfrute
su
Symphony

Como
Operar
Modelos
de
Control
Remoto
I I
I I
I I
I I
I I
I I
I I
1
sy
ANT
2h,
1
1
WATER
ee
ee,
1
'
e
e@4
'
I I
I I
'
FAN
TIMER
'
'
cooL
SWING
'
'
POWER
'
Lee
LL
Lee
LLL
Le
I
Control
Remoto
Panel
Control
El
Control
Remoto
y
Panel
de
Control
pueden
variar
de
un
modelo
a
otro
modelo
ENCENDIDO
(ON/OFF)
[©]:
presiona
el
bot6n
para
apagar
y
encender
el
enfriador.
El
bot6n
va
a
brilllar
en
color
rojo
cuando
este
encendido
y
va
a
parpadear
cuando
este
en
apagado.
Frio
[
#1:
Presiona
el
bot6n
para
apagar
y
encender
la
bomba
(ON/
OFF).
El
bot6n
de
enfriamiento
va
a
brillar
cuando
lo
encienda
(ON)
La
bomba
funcionara
solo
cuando
el
tanque
tenga
suficiente
agua.,
El
bot6n
de
indicador
de
tanque
vacio
brillara
cuando
el
tanque
necesite
llenarse.
Cuando
el
nievel
del
agua
sea
bajo
el
indicador
sonara
por
5
segundos
y
el
bot6n
estara
parpadeando.
Ventilador
[
&
]:cuando
inicie,
el
botdn
del
ventilador
brillara.
Presiona
el
bot6n
para
alta,
media
y
baja
velocidad.
La
velocidad
elegida
se
indicara
cuando
el
bot6n
correspondiente
brille.
Oscilaci6n
[
<
]:
Presione
el
bot6n
(ON/OFF)
para
la
funcidn
de
oscilacion.
El
bot6n
de
oscilaci6n
brillara
cuando
este
encendido
(ON)
Temporizador
[
G
]:Presione
el
bot6n
para
ajustar
el
tiempo
deseado
de
1
a
7
horas,
en
intervalos
de
1
horas.
El
bot6n
temporizador
brilara
cuando
este
encendido
(ON)
e
indicara
cuando
el
tiempo
termine
brillando
otra
vez
(OFF)
*La
forma
y
diseno
varia
dependiendo
del
modelo.
TiPS
DE
MANTENIMIENTO
1)
Desconecte
el
cable
antes
de
hacer
cualquier
servicio
o
mantenimiento.
2)
No
use
el
cableado
suelto
0
material
inferior
en
el
servicio
o
mantenimiento
para
evitar
el
riesgo
de
incendio.
3)
Por
favor
pare
el
equipo
y
contacte
un
servicio
autorizado
en
caso
de
descarga
eléctrica
encontrada
en
el
equipo.
4)
Por
favor
apague
el
equipo
y
contacte
servicio
autorizado
antes
de
abrir
cualquier
cubierta
para
evitar
lesiones
debido
a
la
parte
giratoria
o
una
descarga
eléctrica
5)
Para
limpiar
el
tanque,
retire
el
tapdn
de
drenado.
Vacie
toda
el
agua
que
le
quede
a
su
equipo,
Vacie
regularmente
su
equipo
para
evitar
residuos
en
el
tanque,
es
necesario
mantenerlo
lo
mas
limpio
posible
para
tener
el
ambiente
higiénico.
6)
Para
limpiar
los
filtros
de
alta
eficiencia,
desconecte
el
equipo
y
usando
una
manguera
de
jardin,
aplique
presion
baja
sobre
los
filtros.
Dependiendo
del
tipo
de
ambiente
donde
lo
tenga,
procure
limpiar
los
filtros
al
menos
una
vez
o
mas
durante
el
afo.
7)
Bajo
ninguna
circunstancia
un
usuario
debe
abrir
su
enfriador.
8)
Siempre
use
agua
limpia
para
el
llenado
de
su
equipo,
NO
se
recomienda
agregar
ningun
tipo
de
aromatizante
o
jab6n
liquido.
Limpieza
de
un
enfriador
evaporativo,
drenando
el
agua
Para
drenar
lo
que
queda
de
agua
en
el
tanque
de
almacenamiento,
es
necesario
quitar
el
tap6n,
puede
estar
a
un
costado
o
en
la
parte
baja
del
equipo.
=
Despues
de
que
ha
salido
toda
el
agua
del
equipo,
volver
a
colocar
el
tap6n
a
correctamente.
Tapon
de
Drenado
Es
aconsejable
drenar
el
agua
regularmente
para
un
mejor
rendimiento
y
una
mayor
vida
Util
de
los
filtros
de
alta
eficiencia.
[3]

Solucion
de
Problemas
Problema Causa
Remedio
Enfria
Poco
La
bomba
esta
apagada
Encienda
la
bomba
No
hay
circulaci6n
de
aire
Asegurese
que
haya
buena
circulaci6n
de
aire
Fuga
de
Agua
El
tap6n
de
drenado
esta
mal
puesto
Aseguresé
que
el
tapon
de
drenado
esta
bien
puesto
La
parrilla
esta
mal
cerrada
Cierre
otra
vez
la
parrilla
el
filtro
de
alta
eficiencia
esta
hundido
Remplace
los
filtros
de
alta
eficiencia
Ventilador
no
funciona
El
interruptor
del flujo
de
aire
esta
apagado
Encienda
el
ventilador,
seleccionando
la
velocidad requerida
No
esta
conectado
Revise
si el
cable
esta
bien
/ 6
el
enchufe
de
la
casa
El
interruptor
o
el
motor
no
estan
funcionando
Llame
al
numero
de
Atencién
a
Clientes
Especificacion
Eléctrica
Suministro
Nominal:
110-12
V~60Hz,
Fase
Unica
Especificaciones
|
Potencia
|
Potencia
Modelo
(Watts)
|
Nominal
Diet
81
BU
63
0.58
i
Diet
12i
BU
63
0.58
US
Diet
221
BU
63
0.58
_
sre
Diet
35i
BU
135
1.25
Intertek
Diet
50i
BU
135
1.25
5016817
Winter
1
BU
155
140
Conforms
to
UL
Std.507
Winter
80;
BU
155
1.40
Cl
Aislamiento
Doble
Symphony
Limited
Wmpheny
L
Hecho
en
India
Diagramas
Eléctricos
CN1
WLI
SENSOR
CN2
FRIO WATER
LEVEL
SENSOR
BOMBA
MOTOR
DE
REJILLLAS
sw
CN3
(
MOTOR
NEUTRAL
i
Meise
CABLE
DE
ENERGIA
HIGH
BLACK
MEDIUM
WHITE.
LOW.
RED
SYNCHRONOUS
MOTOR
Ly]
PUMP_L
KEY
BOARD
PCB
PHASE
(12)
NEUTRAL
POWER
PCB
SENSOR
DE
NIVEL
DE
AGUA
Clase
II
Modelos:
DIET
8i
BU,
DIET
12i
BU,
DIET
22
i
BU
[4]
Clase
Il
Modelos:
DIET
35i
BU,
DIET
50i
BU,
WINTER
i
BU,
WINTER
80i
BU

Instalaci6n
baterias
de
control
remoto
1.
Retire
la
cubierta
de
las
baterias
y
entonces
levante
la
cubierta
de
el
control
remoto
2.
Inserte
2
baterias
AAA
dentro
del
compartimento.
Debe
coincidir
los
simbolos
+
y
-
de
las
baterias
con
los
respectivos
simbolos
del
compartimiento
3.
Ponga
la
cubierta
de
la
bateria
A
*
Las
baterias
no
deberia
estar
expuestas
al
calor,
ni
del
sol,
ni
de
un
registro de
calor
o
del
fuego
«
Las
baterias
quimicas
pueden
causar
erupcion.
Si
la
bateria
fuga,
limpie
la
bateria
y
el
compartimento
de
las
baterias
con
un
pajio.
Si
el
quimico
de
la
bateria
toca
su
piel,
lave
inmediatamente.
«
Asegurese
que
las
baterias
son
eliminadas
correctamente.
No
las
queme
o
incinere.
«
Mantenga
las
baterias
lejos
de
los
nifos.
"
Los
nifios
no
deben
poner
o
re
emplazar
baterias
AAA
del
control
remoto
.
*
No
Mezcle
baterias
de
distintos
tipos
*
No
mezcle
baterias
nuevas
con
viejas
«
Retire
las
baterias
cuando
la
carga
esta
agotada
*
Si
el
control
remoto
no
va
a
ser
usado
por
un
tiempo,
retire
las
baterias.
a
PrecauciOn:
Los
cambios
0
modificaciones
de
esta
unidad
no
aprobados
expresamente
por
la
parte
responsable
de
la
garantia
podrian
anular
la
autoridad
del
usuario
para
hacer
uso
de
la
garantia
Nota:
Este
equipo
ha
sido
probado
y
se ha
encontrado
que
cumple
con
los
limites
parala
clase
B
de
dispositivos
electronicos
conforme
la
Parte 15
de
las
Reglas
de
la
FCC.
Estos
limites
son
disenados
para
proveer
una
proteccion
razonable
contra
iinterferencias
perjudiciales
en
una
instalaci6n
residen-
cial.
Este
equipo
genera,
usa
y
puede
radiar
energia
radio
frecuencia
si
no
es
intalado
y
usado
como
lo
indican
las
instrucciones,
puede
causar
dans
e
interferencia
en
radio
comunicaciones.
Sin
embargo,
no
esta
garantizado
que
la
interferencia
puede
ocurrir.
Sl
este
equipo causa
dajio
o
interferencia
en
la
recepcion
radios
o
television,
esto
puede
ser
determinado
apagando
y
prendiendo
el
equipo.
El
usuario
es
alentado
a
tratar
de
corregir
la
interferencia
por
una
de
las
siguientes
medidas;
»
Reorientar
o
colocar
en
otro
lugar
la
antena
receptora
:
Incrementar
la
separaci6n
entre
el
equipo
y
el
receptor.
»
Conectar
el
equipo
a
una
toma
corriente
diferente
a
la
que
este
conectada
el
receptor.
.
Consultar
para
ayuda
con
un
especialista
en
radio/
0
tecnico
en
televisores
[5]

Declaraci6n
de
conformidad
del
proveedor
a.
Este
dispositivo
cumple
con
la
parte
15
de
las
normas
de
la
FCC.
Instruccion
Este
electrodoméstico
tiene
un
enchufe
polarizado
(una placa
es
mas
ancha
que
la
otra).
Para
reducir
el
riesgo
de
descarga
eléctrica,
este
enchufe
esta
disefiado
para
encajar
en
un
tomacorriente
polarizado
de
una
sola
manera.
No
intente
vencer
esta
caracteristica
de
seguridad.
Garantia
1)
Desenchufe
y
desconecte
el
enfriador
de
la
fuente
de
energia
antes
de
intentar
cualquier
mantenimiento,
servicio
o
limpieza
y
llenado
de
agua.
2)
Si
el
cable
esta
dafiado,
debe
ser
reemplazado
por
un
proveedor
de
servicio
autorizado
para
evitar
riesgos.
No
opere
el
producto
con
un cable
o
enchufe
danado.
3)
Para
evitar
descargas
eléctricas,
conecte
solo
a
un
tomacorriente
provisto
de
un
dispositivo
de
interrupcion
de
circuito
de
falla
a
tierra.
(ELCB)
4)
Este
electrodoméstico
no
esta
disefiado
para
ser
utilizado
por
personas
(incluidos
nifios)
con
capacidades
fisicas,
sensoriales
o
mentales
reducidas,
o
falta
de
experiencia
y
conocimien-
to,
amenos
que
hayan
recibido
supervision
o
instrucciones
sobre
el
uso
del
electrodoméstico
por
una
persona
responsable
de
su
seguridad.
5)
Los
nifos
de
menos
de
3
afios
deben
mantenerse
alejados
a
menos
que
sean
supervisados
continuamente.
6)
Los
nifios
mayores
de
3
afios
solo
deben
ENCENDER
/
APAGAR
el
electrodoméstico
siempre
que
se
haya
colocado
o
instalado
en
su
posicion
de
funcionamiento
normal
prevista
y
se
les
haya
dado
supervision
o
instrucciones
sobre
el
uso
del
equipo
de
manera
segura
y
entiendan
los
peligros
involucrados.
Los
ninos
de
3
afios
en
adelante
no
deben
enchufar,
regular
y
limpiar
el
aparato
ni
realizar
tareas
de
mantenimiento
por
parte
del
usuario.
7)
No
debe
permitirse
a
los
nifios
jugar
con
el
equipo.
8)
Este
electrodoméstico
no
esta
disefiado
para
usarse
en
lugares
donde
prevalecen
condiciones
especiales,
como
la
presencia
de
una
atmésfera
corrosiva
o
explosiva
(vapor
o
gas)
9)
Este
electrodoméstico
puede
ser
utilizado
por
nifos
a
partir
de
8
anos
y
personas
con
capacidades
fisicas,
sensoriales
o
mentales
reducidas
o
falta
de
experiencia
y
conocimiento
si
se
les
ha
dado
supervision
o
instrucciones
sobre
el
uso
del
electrodoméstico
de
manera
segura
y
entienden
los
riesgos
involucrados
.
Los
nifios
no
deben
jugar
con
electrodomésticos.
La
limpieza
y
el
mantenimiento
del
equipo
no
deben
ser
realizados
por
nifos
sin
supervision.
Esta
marca
indica
que
este
producto
no
debe
desecharse
con
otros
desechos
domeésticos
en
la
UE.
Para
evitar
posibles
dafios
al
medio
ambiente
o
la
salud
humana
por
la
eliminacion
incontrolada
de
residuos,
reciclelo
de
manera
responsable.
Si
desea
desechar
este
producto,
comuniquese
con
las
autoridades
y
solicite
el
método
correcto
de
eliminacidon.
3
a
a
Airazona
enfriador
funciona
en
inverter.
El
inverter
debe
ser
de
onda
sinusoidal
de
clasificacion
adecuada.
Ik
El
rendimiento
de
enfriamiento
depende
de
la
temperatura
del
agua
utilizada,
M//
humedad
relativa
y
temperatura
ambiente
[6]

TARJETA
DE
REGISTRO
DE
GARANTIA
Product
Sr.
No.
FECHADECOMPRA
___/__/
MODELO
NOMBRE
DIRECCION
:
E-MAIL
TELEFONO
:
CELULAR
CONDICIONES
DE
GARANTIA
Extendemos
esta
garantia
al
comprador
original
(primer
comprador
minorista)
y
la
garantia
de
que
el
producto
estara
libre
de
defectos
de
fabricacién
y
materiales
del
fabricante
durante
12
meses
a
partir
de
la
fecha
de
compra.
a.
La
Garantia
entrara
en
vigencia
cuando
se
cumplan
las
siguientes
condiciones:
a)
Tarjeta
de
registro
de
garantia
debida-
mente
cumplimentada
y
recibida
por
la
empresa
dentro
de
los
10
dias
a
partir
del
dia
de
la
compra.
b.
El
producto
se
opera
siguiendo
las
recomendaciones
explicadas
en
el
manual
del
usuario.
¢..
La
responsabilidad
de
la
companiia
bajo
la
garantia
se
limitara
solo
al
motor,
la
bomba,
el
motor
de
la
rejilla,
el
control
remoto,
la
PCB
y
también
se
restringira
a
cualquier
defecto que
ocurra
bajo
condiciones
de
operacion
normal
y
bajo
el
uso
adecuado.
Cualquier
parte
reemplazada
por
la
companiia
a
su
discrecion
sera
una
unidad
funcionalmente
operativa.
d.Esta
garantia
no
se
aplicara
a
los
productos:
1)
que
no
hayan
sido
adquiridos
de
un
distribuidor
autorizado
a
través
de
su
red
0
tiendas
minoristas
autorizadas
de
la
empresa
2)
que
hayan
sido
alterados
/
abiertos
por
cualquier
otra
persona
no
autorizada
por
la
empresa,
3)
incorrectamente
utilizados
en
combinacion
con
cualquier
producto
o
sustento,
4)
que
se
utilizan
para
fines
de
alquiler
comercial
y
/
o
que
desarrollan
problemas
debido
a
un
cuidado
o
mantenimiento
defectuoso
y
alteraciones
del
producto
o
sus
partes
5)
que
esta
sujeto
a
un
suministro
eléctrico
para
el
cual
los
productos
no
estan
disefiados,
6)
La
garantia
se
anulara
si
el
producto
se
opera
con
un
inversor
de
baja
calidad
o
un
inversor
de
onda
sinusoidal.
5)
que
esta
sujeto
a
un
suministro
eléctrico
para
el
cual
los
productos
no
estan
disenados,
6)
La
garantia
se
anulara
si
el
producto
se
opera con
un
inversor
de
baja
calidad
o
un
inversor
de
onda
sinusoidal.
7)
Si
la
documentacion
de
compra
no
esta
disponible
para
validar
una
compra
original.
e.
Si
bien
la
compania
hara
todo
lo
posible
para
llevar
a
cabo
las
reparaciones
lo
antes
posible,
sin
embargo,
queda
expresamente
claro
que
la
compania
no
tiene
la
obligacion
de
hacerlo
en
un
periodo
de
tiempo
especifico.
f.
Esta
garantia
finalizara
automaticamente
al
expirar
el
periodo
de
garantia
de
12
meses
a
partir
de
la
fecha
de
compra,
incluso
si
el
producto
no
se
utilice
en
ningun
momento
durante
el
periodo
de
garantia
por
cualquier
motivo.
g.
Los
filtros
de
enfriamiento
y
las
piezas
plasticas
externas
no
estan
cubiertas
por
la
garantia.
h.
La
compariia
no
sera
responsable
de
ninguna
pérdida
o
dafio
causado
a
cualquier
propiedad,
muerte
o
discapacidad
causada
a
cualquier
vida
humana
que
surja de
un
incendio,
falla
eléctrica,
cortocircuito,
manejo
accidental
o
cualquier
tipo de
calamidad
natural.
Como
tal,
la
responsabilidad
de
la
empresa
se
limita
al
costo
de
las
piezas
de
repuesto
de
dichos
productos
unicamente,
f.
El
cambio
de
direccidn
de
los
clientes
debe
estar
relacionado
con
la
empresa
sin
la
cual
la
garantia
no
estara
operativa.
j.
Debido
a
la
investigacion
y
desarrollo
en
curso,
la
empresa
tiene
los
derechos
para
modificar
el
producto
sin
previo
aviso
u
obligacion
para
los
compradores.
L.El
comprador
debe
conservar
la
factura
de
compra
como
prueba
de
la
fecha
de
compra.
Debe
entregar
una
copia
de
la
factura
de
compra
al
técnico
de
servicio
visitante
mientras
asiste.
m.
Durante
la
garantta,
el
cliente
no
tiene
derecho
a
cambiar
el
producto
ni
reembolsar
el
dinero.
n.
La
comparniia
no
tiene
ninguna
politica
anual
de
contratista
de
mantenimiento
(AMC).
0.
La
garantia
sera
aplicable
si
se
registra
dentro
de
los
21
dias
posteriores
a la
compra
PERIODO
DE
GARANTIA
Producto
Modelo Partes
Producto
Modelo
Partes
Diet
8i
BU
12
Meses
Diet
50i
BU
12
Meses
Diet
12i
BU
12
Meses
Winter
i
BU
12
Meses
Diet
221
BU
12
Meses
Winter
80i
BU
12
Meses
Diet
351
BU
12
Meses
Distribuidor
&
Firma
Symphony
Limited
Symphony
House,
FP12-TP50
Bodakdev,
Off
SG
Highway,
Anmedabad
380059,
India.
[7]

\ympheny
This manual suits for next models
6
Table of contents
Languages:
Other Symphony Air Conditioner manuals
Popular Air Conditioner manuals by other brands

Daikin
Daikin VRV Series Operation manual

LG
LG G09LHK owner's manual

Carrier
Carrier CARRIER 38JB Installation and service instructions

Carrier
Carrier CENTRIFUGAL FAN AIR-COOLED CONDENSERS 09FA Start-up and service instructions

Black & Decker
Black & Decker BXAC40018GB Original instructions

Danby
Danby DAC080EB6WDB owner's manual