manuals.online logo
Brands
  1. Home
  2. •
  3. Brands
  4. •
  5. Synergy Global Technology
  6. •
  7. Switch
  8. •
  9. Synergy Global Technology LCDK3001 User manual

Synergy Global Technology LCDK3001 User manual

Model: LCDK3001
Synergy Global Technology, Inc 41394 Christy Street , Fremont, CA 94538 Tel: 510-226-8368 , Fax : 510-226-8968 www.Rackmountmart.com Rev.1.0 Copyright© All rights reserved.
2 x USB 2.0 hub ports
User-definable Hotkey Preceding Sequence
Firmware Upgradable
Resolution up to Digital 1920 x 1200 / Analog 2048 x 1536
HDCP Support
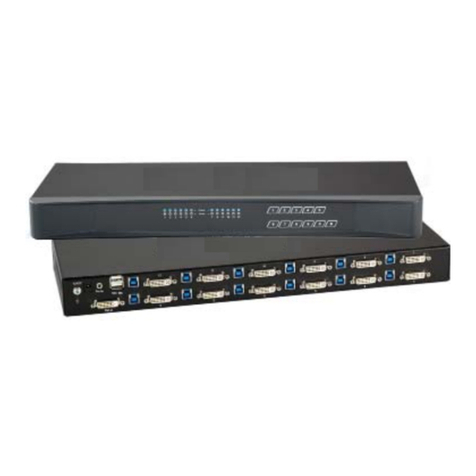
8-port DVI USB KVM Switch
w/ Audio & Microphone Switching
and 2 x USB 2.0 device hub ports
Quick Installation Guide
Thank you for purchasing the 8-port DVI USB KVM Switch w/
Audio&Mic Switching! With our highly reliable and quality
product, user can enjoy countless benefits from using this KVM
Switch.
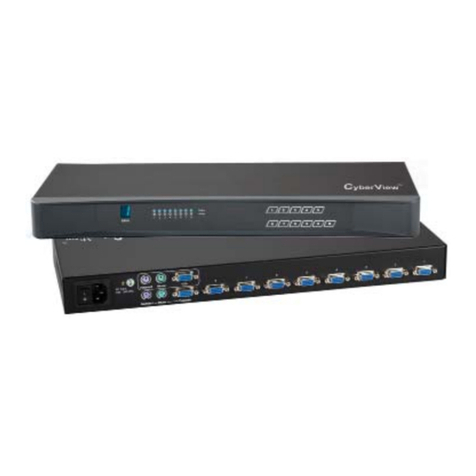
Rear View
Introduction
The DVI USB KVM Switch is an 8-port DVI USB KVM Switch that
allows you to access, control, boot and reboot multiple USB-
enabled multimedia computers using only one USB keyboard,
mouse, DVI monitor /Flat Panel Display and a speaker set and
microphone.
It supports both digital video (2048 x 1536) and analog video
(1920 x 1200) for your maximum convenience in adapting to your
display requirements. It also offers two USB 2.0 device hub ports
for high-speed USB device sharing. Its Audio&Mic switching
function offers you uninterrupted multimedia experience while
performing KVM Switching with multi-platform support for PC,
Macintosh G4/G5 and iMAC. For users who might need to use a
hotkey preceding sequence other than two scroll locks, we also
offer five key alternatives for free configuration.
It supports HDCP compliant for digital contents protection.
This KVM Switch also allows its user to upgrade firmware
contents whenever is needed to enhance compatibility or
functionality.
For the Flash upgrade procedure, please refer to the Flash Upgrade Operation Guide
provided with the new version of Firmware upgrade file.
Out-of-the-box Installation
The default setting of the DVI USB KVM Switch is appropriate
for most systems. In fact, you do not need to configure the KVM
Switch before installation.
The KVM Switch is a Plug-and-Play device for installation. For a
quick start on installation and operation, please follow the
instructions below for the setup sequence:
Take the KVM Switch out of the box and begin installation….
Step 1. Power up you KVM Switch by connecting the external
power adapter to it.
Configuration
Step 2. Connect the shared USB keyboard, mouse and monitor
and a speaker set and microphone as well as other
shared USB devices to the KVM switch.
Step 3. Connect each of your computers to the KVM switch,
using the DVI-Dvideocable and USB (Type A-to-Type B)
cable and audio & Mic cables).
Since USB interface is hot-pluggable, you don’t have to turn off the
computer before making connections to the USB KVM.
Step 4. (Now your KVM Switch should have been powered-up….)
Power up the connected computers one by one. After
your computers are powered up, the keyboard and
mouse will be recognized and now you can begin
operating the KVM switch.
Easy Operation
There are two methods to control your KVM Switch for PC, USB
hub port as well as audio/mic channel selection: using the front-
panel push buttons or a hotkey sequence.
Front-panel buttons
The front-panel buttons let you have direct control over KVM
switch operation and channel switching. Simply press the PC
button for PC port switching (and if binding is enabled between
PC / USB hub port control / audio&mic switching, they will be
jointly selected at the same time). If you want to enable the
binding of PC / Hub port control / Audio&Mic switching, use the
hotkey sequences. See Quick Reference Sheet
Keyboard hotkey
A keyboard hotkey sequence consists of at least three specific
keystrokes: See Quick Reference Sheet
Hotkey sequence = [ScrLk]*+ [ScrLk] * + Command key(s)
* User-definable = SCROLL LOCK, CAPS, ESC, F12 or NUM LOCK
Hotkey preceding sequence configuration: For users who want to use
a preceding sequence other than two consecutive Scroll Locks, there is
also one convenient way to configure it.
(1)Hit ScrollLock + ScrollLock + H, then two beeps will signal readiness
for new preceding sequence selection [or Press and hold down the last
front-panel button (Button 2 or Button 4) until you hear two beeps, then
release the button.]
(2) Select and press the key you would like to use as your preceding
sequence (SCROLL LOCK, CAPS, ESC, F12 or NUM LOCK keys are
available for selection) and you’ll hear a beep for selection confirmation.
Now you can use the new preceding sequence to execute your hotkey
commands.
Each keystroke within a hotkey sequence should be pressed within 2
seconds. Otherwise, the hotkey sequence will not be validated.
For detailed Hotkey sequences and their corresponding functional
commands, please refer to the Quick reference sheet.
Synergy Global Technology, Inc
41394 Christy Street
Fremont, CA 94538
T: 510-226-8368
F: 510-226-8968
www.rackmountmart.com
Model: LCDK3001
Synergy Global Technology, Inc 41394 Christy Street , Fremont, CA 94538 Tel: 510-226-8368 , Fax : 510-226-8968 www.Rackmountmart.com
Rev. 1.0 Copyright© All rights reserved
Q u i c k R e f e r e n c e S h e e t
Notes:
1. The USB keyboard hotkeys allows you a faster and broader control for your KVM switching operation in addition to the front-panel buttons. If you have configured a hotkey preceding sequence other than
two consecutive scroll locks, you should change your hotkey sequence accordingly.(For preceding sequence key configuration, please refer to Quick Installation Guide)
2. When the binding of PC & USB hub port control switching is enabled by the hotkey sequence: ScrLk + ScrLk + Z, any PC and hub port control switching are bound together. To remove this binding, use the
hotkey sequence: ScrLk + ScrLk + X.
3. When the binding of PC & Audio&Mic switching is enabled by the hotkey sequence: ScrLk + ScrLk + Q, any PC and audio&mic switching are bound together. To remove this binding, use the hotkey sequence:
ScrLk + ScrLk + W.
Mac User: Standard PC Keyboard mapping to MAC Keyboard -- ScrLk + ScrLk + C= (CD/DVD drive eject key); ScrLk + ScrLk + F10 = F13 ;ScrLk + ScrLk + F11= F14 ; ScrLk + ScrLk + F12= F15
LED Information: Green LED indicates PC port status: solid green –active port; flashing green –PC not connected; Red LED indicates hub port control status: solid red –that PC has the control of all hub ports.
Important Note: The USB hub control status LED (red) indicates not the connected status of each USB device, but indicates which PC port has the control of all hub ports and their connected devices. For example,
when USB LED 1 is lit, it means PC port 1 has the current control of all hub ports and their connected USB devices.
8-port DVI USB KVM Switch w/ Audio&Mic + 2 x USB 2.0 Hub Ports -- Operation Commands for Hotkeys / Front-Panel Buttons
Hotkey sequence = [ScrLk]*+ [ScrLk] * + Command key(s) * User-definable Preceding sequence = SCROLL LOCK, CAPS, ESC, F12 or NUM LOCK
Command
Hotkeys1
Front-panel Buttons
Description
Select PC Channel 2
(Joint-select PC port/hub port control/audio&mic,
if binding is enabled)
ScrLk + ScrLk + (x)
(x is a top-row number key)
x = 1~ 8 for PC channel no
Press the corresponding button to select the
active PC channel
Select the active PC channel
(Joint-select PC port/hub port control/audio&mic , if
binding is enabled)
Select Hub Port Control 2
(Joint-select PC & Hub port control, if binding is
enabled)
ScrLk + ScrLk + (Fx)
Fx = F1~ F8 (Fx is a function key)
x =8 for PC channel no
(Press the corresponding button to select the
specific PC+USB hub port control --works
only if PC port/hub port control binding
enabled)
Select the PC channel that control all USB hub ports
(Joint-select PC & Hub port control, if PC/hub port control
binding is enabled)
Select Audio&Mic Channel 3
(Joint-select PC port & audio/mic , if binding is
enabled)
ScrLk + ScrLk + A + (y)
(y is a top-row number key)
y = 1~8 for audio/mic channel no
--
Select the active Audio&Mic channel
(Joint-select PC & audio&mic channel, if binding is enabled)
Bind PC & Hub Port Control Switching 2
[Default]
ScrLk + ScrLk + Z
--
Enable the binding of PC port and hub port control switching.
(Once this feature is enabled, any pc and/or hub port control
switching is bound together) (factory default)
Unbind PC & Hub Port Control Switching 2
ScrLk + ScrLk + X
--
Disable the binding of PC port and hub port control switching
Bind PC & Audio/Mic Switching 3
[Default]
ScrLk + ScrLk + Q
--
Enable the binding of PC port and audio&mic switching.
(Once this feature is enabled, any pc and/or audio&mic
switching is bound together) (factory default)
Unbind PC & Audio/Mic Switching 3
ScrLk + ScrLk + W
--
Disable the binding of PC port and audio&mic switching
Next lower PC channel 2
(Joint-select PC /hub port control/audio&mic,
if binding is enabled)
ScrLk + ScrLk + ↑(arrow up)
--
Select the next lower connected PC channel
(Joint-select PC/hub port control/audio&mic, if binding is
enabled)
Next higher PC channel 2
(Joint-select PC /hub port control/audio&mic,
if binding is enabled)
ScrLk + ScrLk + ↓(arrow down)
--
Select the next higher connected PC channel
(Joint-select PC/hub port control/audio&mic , if binding is
enabled)
Previous PC channel
ScrLk + ScrLk + (Backspace)
--
Toggle between the previous channel and current channel
Beep Sound On/Off
ScrLk + ScrLk + B
--
Toggle on/off the beep sound while autoscanning
Define Hotkey Preceding Sequence
ScrLk + ScrLk + H + (y)
y= SCROLL LOCK, CAPS, ESC,
F12 or NUM LOCK
Press and hold down last button (Button 2 /
Butotn4) till two beeps, release the button,
then press (y) key
Select the hotkey preceding sequence among 5 alternative
keys
Autoscan
ScrLk + ScrLk + S
--
Autoscan through every connected channel for quick screen
browsing of each channel (scan delay = 5 sec.).
Autoscan with Programmable Delay Time
ScrLk + ScrLk + S+ (z)
z= 0~9
1 10” ; 2 20” ; 3 30” ; 4 40” ; 5 50”
6 60” ; 7 70” ; 8 80” ; 9 90” ; 0 100”
--
Autoscan with a user-defined delay time within a range of
10 ~ 100 seconds
Stop Autoscan
Press any key on keyboard
Press any button
Terminate Autoscan activity
RoHS Compliant

Other Synergy Global Technology Switch manuals

Synergy Global Technology LCDK 1070 User manual

Synergy Global Technology

Synergy Global Technology LCDK 1070 User manual

Synergy Global Technology LCDK1010 User manual

Synergy Global Technology

Synergy Global Technology LCDK1010 User manual

Synergy Global Technology LCDK2010-31 User manual

Synergy Global Technology

Synergy Global Technology LCDK2010-31 User manual

Synergy Global Technology LCDK1022 User manual

Synergy Global Technology

Synergy Global Technology LCDK1022 User manual

Synergy Global Technology LCDK1023 User manual

Synergy Global Technology

Synergy Global Technology LCDK1023 User manual

Synergy Global Technology Combo DB-15 ip 2-console KVM User manual

Synergy Global Technology

Synergy Global Technology Combo DB-15 ip 2-console KVM User manual

Synergy Global Technology LCDK2012-31 User manual

Synergy Global Technology

Synergy Global Technology LCDK2012-31 User manual

Popular Switch manuals by other brands

Brocade Communications Systems StoreFabric SN6500B reference guide

Brocade Communications Systems

Brocade Communications Systems StoreFabric SN6500B reference guide

Ross carbonite Setup manual

Ross

Ross carbonite Setup manual

Milltronics Pointek CLS 200 instruction manual

Milltronics

Milltronics Pointek CLS 200 instruction manual

H3C S5500-SI Series Configuration guide

H3C

H3C S5500-SI Series Configuration guide

Conrad 98 61 63 operating instructions

Conrad

Conrad 98 61 63 operating instructions

Kaiser Baas HD Media Hub user guide

Kaiser Baas

Kaiser Baas HD Media Hub user guide

Net Optics BPO-HBSX-LC instruction manual

Net Optics

Net Optics BPO-HBSX-LC instruction manual

Cisco 3750 - Catalyst EMI Switch Installation guidelines

Cisco

Cisco 3750 - Catalyst EMI Switch Installation guidelines

ZyXEL Communications Dimension GS-3012F release note

ZyXEL Communications

ZyXEL Communications Dimension GS-3012F release note

Care Call Jelly Bean quick start guide

Care Call

Care Call Jelly Bean quick start guide

Avocent SwitchView SC540 Quick installation guide

Avocent

Avocent SwitchView SC540 Quick installation guide

ANTAIRA LNX-2004G-SFP Series Quick installation guide

ANTAIRA

ANTAIRA LNX-2004G-SFP Series Quick installation guide

Brocade Communications Systems VDX 6720 Hardware reference manual

Brocade Communications Systems

Brocade Communications Systems VDX 6720 Hardware reference manual

H3C S1850 Series Getting started guide

H3C

H3C S1850 Series Getting started guide

Belkin OmniView F1DG102W user guide

Belkin

Belkin OmniView F1DG102W user guide

Allen-Bradley Stratix 5400 user manual

Allen-Bradley

Allen-Bradley Stratix 5400 user manual

Perle IDS-1 HP Series installation guide

Perle

Perle IDS-1 HP Series installation guide

HPE Altoline 6822 48XG 6QSFP28 x86 ONIE Product End-of-Life Disassembly Instructions

HPE

HPE Altoline 6822 48XG 6QSFP28 x86 ONIE Product End-of-Life Disassembly Instructions

manuals.online logo
manuals.online logoBrands
  • About & Mission
  • Contact us
  • Privacy Policy
  • Terms and Conditions

Copyright 2025 Manuals.Online. All Rights Reserved.