Synergy Global Technology ID-26AW User manual

Options : - TV tuner
ID-26PW Open frame LCD panel
ID-26AW Front aluminum LCD panel
ID-26DW Stylish front aluminum cover LCD panel
ID-26AWN Front NEMA4 / IP 65 LCD panel
User Manual 26" wide LCD

Contents
Chapter 1 Getting Started
1.1 Important Safeguards.......................................................1
1.2 Before Installation.............................................................2
1.3 Unpacking........................................................................2
1.4 Optional Accessories........................................................2
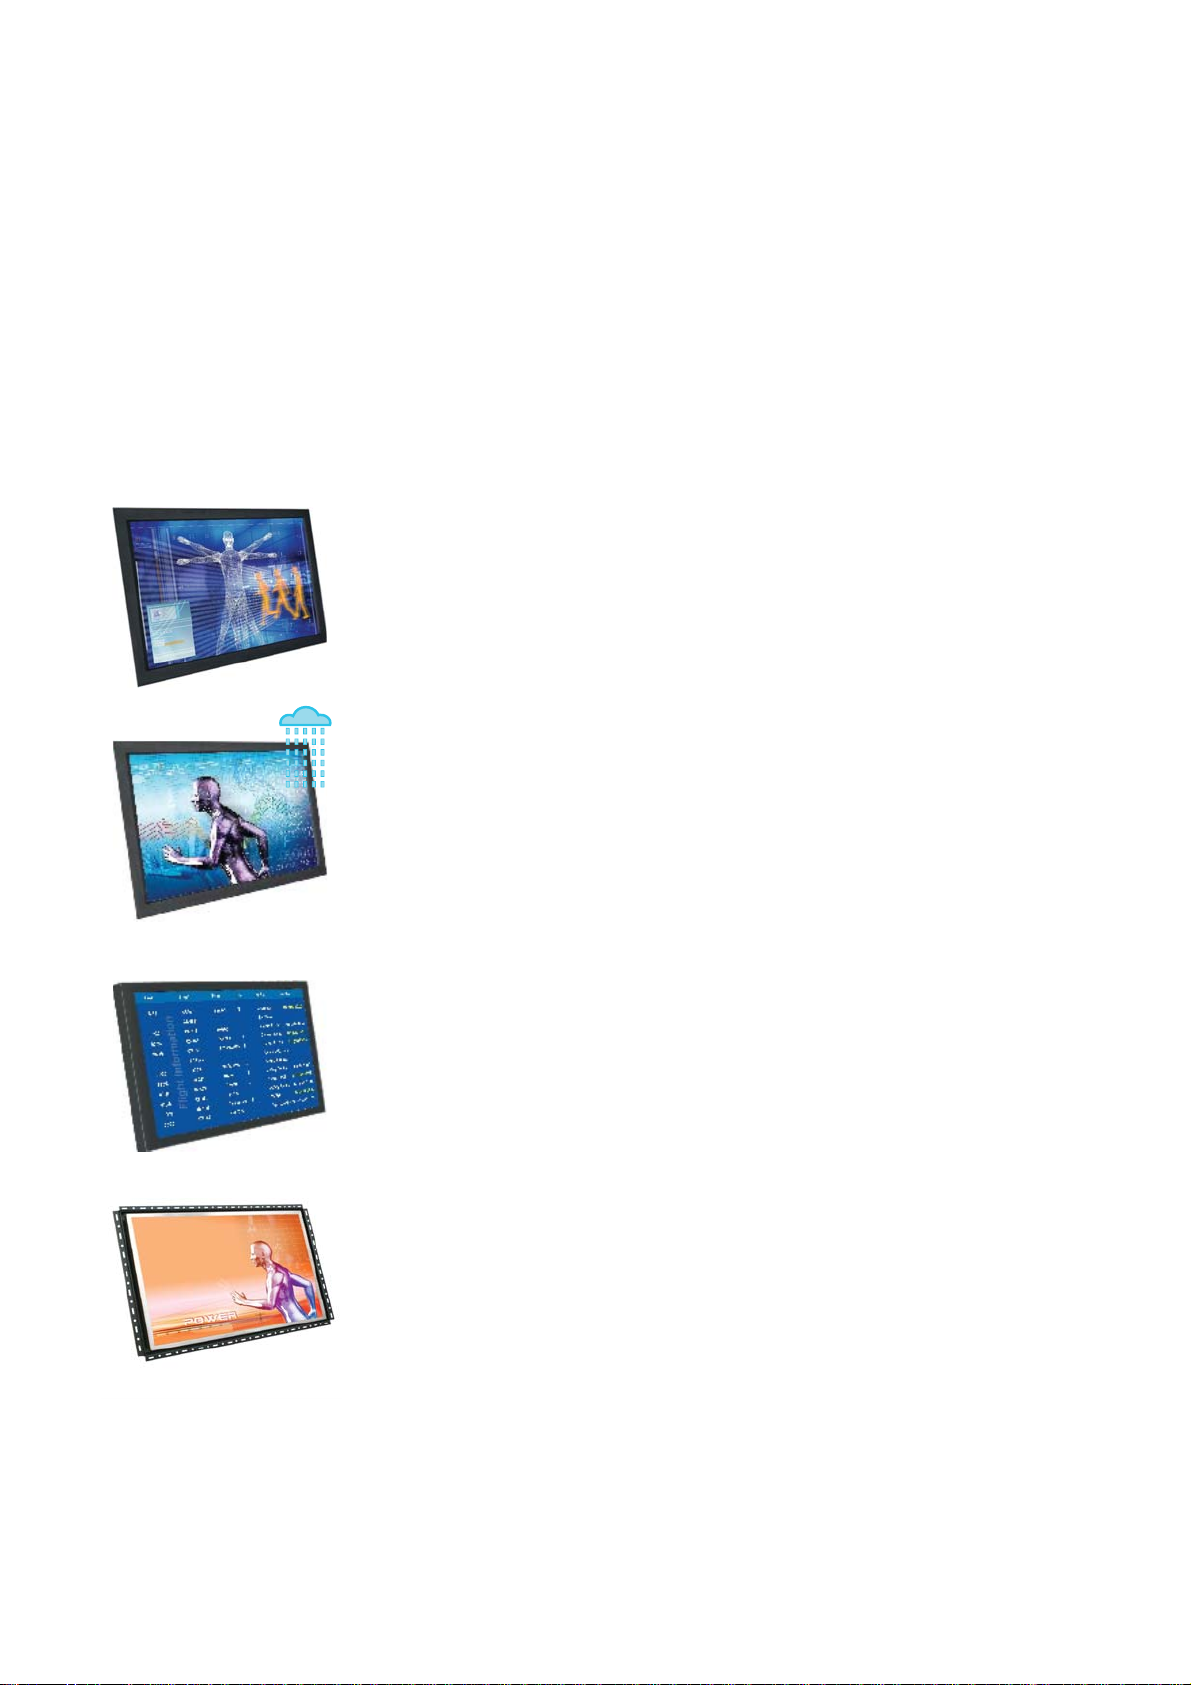
Chapter 2 ID-26AW front aluminum LCD panel
2.1 Package Contents.............................................................3
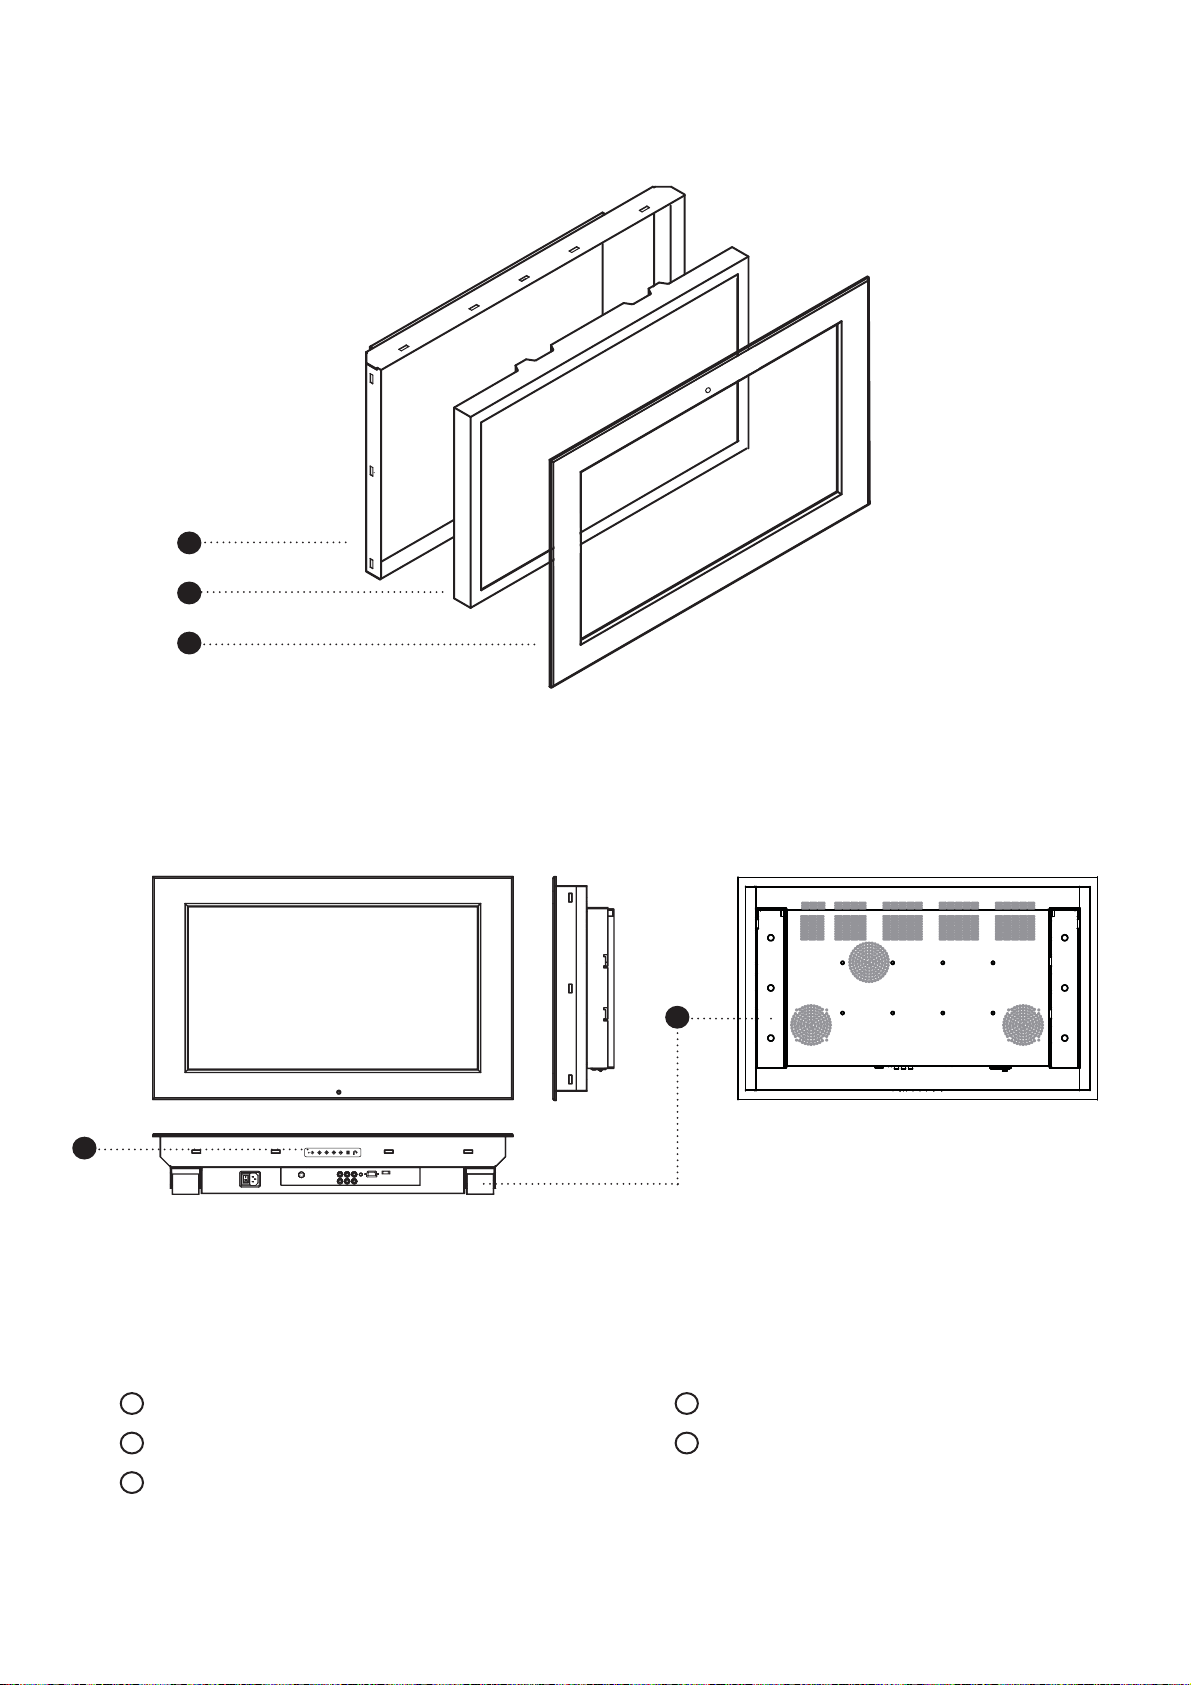
2.2 Structure Diagram.........................................................................4
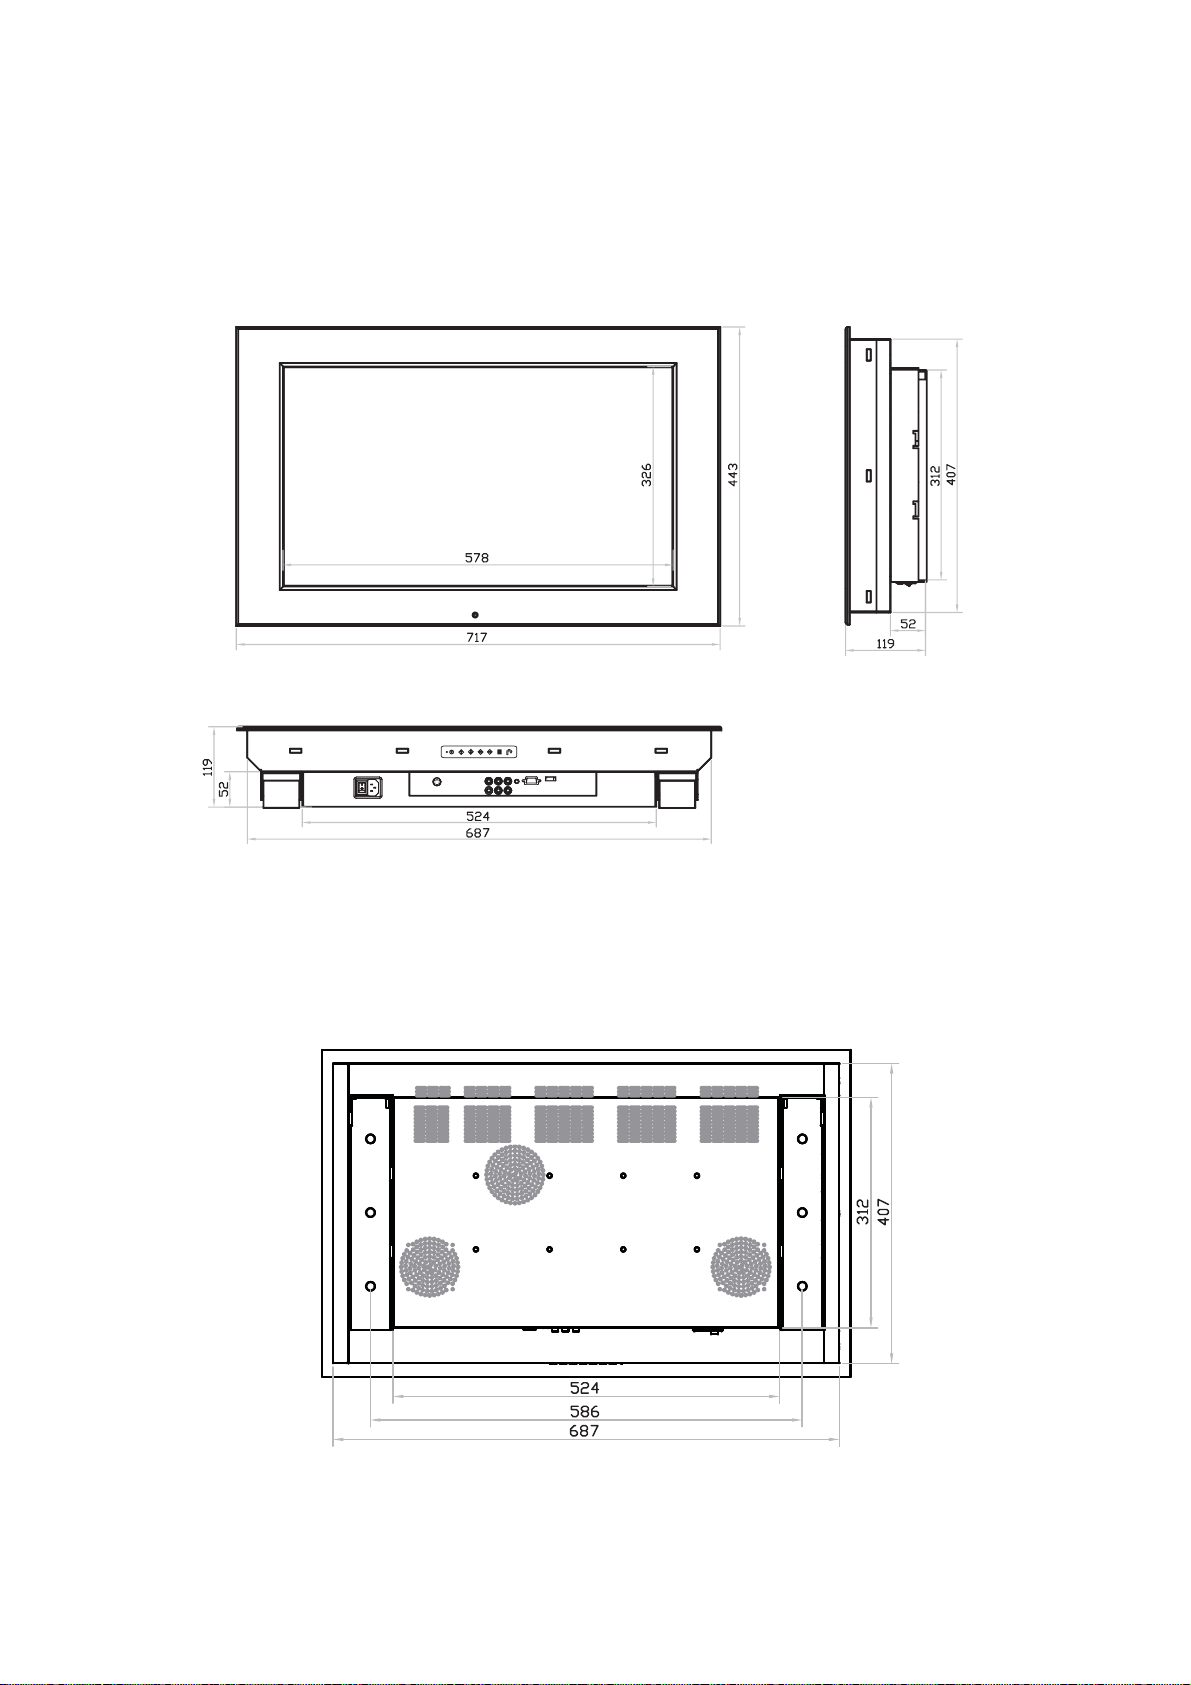
2.3 Dimension Diagram......................................................................5
2.4 Mounting Method.....................................................................6-7
Chapter 3 ID-26AWN front NEMA4 / IP 65 LCD panel
3.1 Package Contents.............................................................8
3.2 Structure Diagram.........................................................................9
3.3 Dimension Diagram....................................................................10
3.4 Mounting Method.................................................................11-12
Chapter 4 ID-26DW stylish front aluminum cover LCD panel
4.1 Package Contents...........................................................13
4.2 Structure Diagram.......................................................................14
4.3 Dimension Diagram....................................................................15
4.4 Mounting Method.......................................................................16
Chapter 5 ID-26PW open frame LCD panel
5.1 Package Contents...........................................................17
5.2 Structure Diagram.......................................................................18
5.3 Dimension Diagram....................................................................19
5.4 Mounting Method........................................................................20

Chapter 6 Connection...................................................................21
Chapter 7 Operation
7.1 On-screen Display Operation........................................22
7.2 On-screen Menu............................................................23
Chapter 8 LCDSpecifications.................................................24
Chapter 9 TV Tuner Options
9.1 TV Tuner Options...........................................................25
9.2 How to Use Remote Controller.................................26-27
Chapter 10 Troubleshooting.......................................................28
Chapter 11 Dimensions..................................................................29
Chapter 12 Cleaning
12.1 Cleaning the LCD display...............................................29
12.2 Cleaning the Remote Controller.....................................29
Contents

1.1 Important Safeguards Chapter 1
P. 1
Please read all of these instructions carefully before you use the device. Save this manual for future
reference.
What the warranty does not cover
■Any product, on which the serial number has been defaced, modified or removed.
■Damage, deterioration or malfunction resulting from:
□Accident, misuse, neglect, fire, water, lightning, or other acts of nature, unauthorized product modifi-
cation, or failure to follow instructions supplied with the product.
□Repair or attempted repair by anyone not authorized by us.
□Any damage of the product due to shipment.
□Removal or installation of the product.
□Causes external to the product, such as electric power fluctuation or failure.
□Use of supplies or parts not meeting our specifications.
□Normal wear and tear.
□Any other causes which does not relate to a product defect.
■Removal, installation, and set-up service charges.
ID-26AW/26AWN/26DW/26PW

1.4 Optional Accessories
■It is very important to locate the LCD Display in a suitable environment.
■The surface for placing and fixing the LCD Display should be stable.
■Make sure the place has good ventilation, is out of direct sunlight, away from sources of excessive dust, dirt, heat,
water, moisture and vibration.
■Convenience for connecting the LCD Display to the related facilities should be well considers too.
The LCD Display comes with the standard parts shown on the package contents. Check and make sure they are in-
cluded and in good condition. If anything is missing, or damage, contact the supplier immediately.
1.3 Unpacking
1.2 Before Installation Chapter 1
P. 2
1. Power Cord
1.1 IEC power cord
1.2 NEMA 5-15 power cord (US)
1.3 BS 1363 power cord (UK)
1.4 CEE 7/4 power cord (German)
1.5 AS 3112 power cord (Australia)
ID-26AW/26AWN/26DW/26PW

2.1 ID-26AW series Package Contents
Chapter 2
P. 3
LCD display x 1 pc
6' VGA cable (male to male) x 1 pc
User manual x 1 pc
Power cord x 1 pc
S-Video cable x 1 pc
RCA cable x 1 pc
Remote Controller x 1 pc
Mounting bracket A x 15 pcs
M4*50mm screw x 15 pcs
5
4
2
1
3
User
Manual
4
3
2 5
6
6
Remarks
■ID-26AW Series mounting bracket set includes item 8 - 9, please refer to p.6-7
8
7
7
8
9
9
AUDIO
ASPECT
PIP
SLEEP
FREEZE
ADJUST
SOURCE
+
+
SWAP
PIP
AUDIO
-
-
POSITION
PIP
ASPECT
ZOOM
ENTER
CH
+
-
POWER
1
DISPLAY
7
4
CLEA R
INPUT
3
9
6
MUTE
2
8
5
0
VOL
+
-
MENU EXIT
SELEC T BACK
PIP
ID-26AW/26AWN/26DW/26PW
1
■Wall mounting set is already installed on the back of the LCD panel

P. 4
2.2 ID-26AW series Structure Diagram Chapter 2
Rear case
SAMSUNG LCD panel
6mm aluminum front bezel
1
5
2
1
2
3
Front View Rear View
LCD membrane
Wall-mount bracket
4
5
3
4
ID-26AW/26AWN/26DW/26PW

2.3 ID-26AW series Dimension Diagram Chapter 2
Front View
Rear View
P. 5
UNIT : mm
1mm = 0.03937 inch
ID-26AW/26AWN/26DW/26PW

2.4 ID-26AW series Mounting Method Chapter 2
P. 6
Wall mounting
UNIT : mm
1mm = 0.03937 inch
43
x 15 pcs x 15 pcs
Mounting bracket A
Mounting bracket A M4*50mm screw
ID-26AW/26AWN/26DW/26PW
Remarks
■Wall mounting set is already installed on the back of the LCD panel

P. 7
2.4 ID-26AW series Mounting Method Chapter 2
100mm VESA standard
Remarks
■Hardware and M6*8pcs for VESA mounting is not provided
■To avoid damage of internal components, when mounting the VESA bracket, do not use screws that
exceed the depth (6mm) of the display mounting holes. Using screws that are too long may cause
damage to your display
ID-26AW/26AWN/26DW/26PW
UNIT : mm
1mm = 0.03937 inch

3.1 ID-26AWN series Package Contents
Chapter 3
P. 8
Remarks
■ID-26AWN Series mounting bracket set includes item 8 - 9, please refer to p.11-12
LCD display x 1 pc
6' VGA cable (male to male) x 1 pc
User manual x 1 pc
Power cord x 1 pc
S-Video cable x 1 pc
RCA cable x 1 pc
Remote Controller x 1 pc
Mounting bracket A x 15 pcs
M4*50mm screw x 15 pcs
5
4
2
1
3
User
Manual
4
3
2 5
6
6
8
7
7
8
9
9
AUDIO
ASPECT
PIP
SLEEP
FREEZE
ADJUST
SOURCE
+
+
SWAP
PIP
AUDIO
-
-
POSITION
PIP
ASPECT
ZOOM
ENTER
CH
+
-
POWER
1
DISPLAY
7
4
CLEA R
INPUT
3
9
6
MUTE
2
8
5
0
VOL
+
-
MENU EXIT
SELEC T BACK
PIP
ID-26AW/26AWN/26DW/26PW
1
■Wall mounting set is already installed on the back of the LCD panel.

P. 9
3.2 ID-26AWN series Structure Diagram Chapter 3
Rear case
SAMSUNG LCD panel
4mm protective glass (Front Nema 4 / IP 65 protection)
1
2
1
2
3
Front View Rear View
6mm aluminum front bezel
LCD membrane
Wall-mount bracket
4
5
3
5
4
6
6
ID-26AW/26AWN/26DW/26PW

3.3 ID-26AWN series Dimension Diagram Chapter 3
Front View
Rear View
P. 1 0
UNIT : mm
1mm = 0.03937 inch
ID-26AW/26AWN/26DW/26PW

3.4 ID-26AWN series Mounting Method Chapter 2
P. 11
Wall mounting
UNIT : mm
1mm = 0.03937 inch
43
x 15 pcs x 15 pcs
Mounting bracket A
Mounting bracket A M4*50mm screw
ID-26AW/26AWN/26DW/26PW
Remarks
■Wall mounting set is already installed on the back of the LCD panel.

P. 1 2
3.4 ID-26AWN series Mounting Method Chapter 2
100mm VESA standard
Remarks
■Hardware and M6*8pcs for VESA mounting is not provided
■To avoid damage of internal components, when mounting the VESA bracket, do not use screws that
exceed the depth (6mm) of the display mounting holes. Using screws that are too long may cause
damage to your display
UNIT : mm
1mm = 0.03937 inch
ID-26AW/26AWN/26DW/26PW

4.1 ID-26DW series Package Contents
Chapter 4
P. 1 3
LCD display x 1 pc
6' VGA cable (male to male) x 1 pc
User manual x 1 pc
Power cord x 1 pc
S-Video cable x 1 pc
RCA cable x 1 pcs
Remote controller x 1 pcs
5
4
2
1
3
6
User
Manual
4
3
2
5
6
7
7
AUDIO
ASPECT
PIP
SLEEP
FREEZE
ADJUST
SOURCE
+
+
SWAP
PIP
AUDIO
-
-
POSITION
PIP
ASPECT
ZOOM
ENTER
CH
+
-
POWER
1
DISPLAY
7
4
CLEA R
INPUT
3
9
6
MUTE
2
8
5
0
VOL
+
-
MENU EXIT
SELEC T BACK
PIP
ID-26AW/26AWN/26DW/26PW
1
Remarks
■Wall mounting set is already installed on the back of the LCD panel

P. 1 4
4.2 ID-26DW series Structure Diagram Chapter 4
1
2
3
Front View Rear View
ID-26AW/26AWN/26DW/26PW
5
4
Rear case
SAMSUNG LCD panel
1
2
1.2mm front aluminum cover
LCD membrane
Wall-mount bracket
3
4
5

4.3 ID-26DW series Dimension Diagram Chapter 4
Front View
Rear View
P. 1 5
UNIT : mm
1mm = 0.03937 inch
ID-26AW/26AWN/26DW/26PW

4.4 ID-26DW series Mounting Method Chapter 4
P. 1 6 ID-26AW/26AWN/26DW/26PW
Wall mounting
UNIT : mm
1mm = 0.03937 inch
100mm VESA standard
Remarks
■Wall mounting set is already installed on the back of the LCD panel
Remarks
■Hardware and M6*8pcs for VESA mounting is not provided
■To avoid damage of internal components, when mounting the VESA bracket, do not use screws that
exceed the depth (6mm) of the display mounting holes. Using screws that are too long may cause
damage to your display
This manual suits for next models
3
Table of contents