SYNQ DMC.2000 User manual


ENGLISH OPERATION MANUAL
SYNQ® 1/76 DMC2000
OPERATION MANUAL
Congratulations and thank you for buying this SYNQ®product. Please read these operating instructions
carefully so you will know how to operate this product properly. After you have finished reading the
instructions, put them in a safe place for future reference.
DON’T FORGET TO REGISTER YOUR NEW SYNQ® PRODUCT. YOU WILL AUTOMATICALLY RECEIVE A
REMINDER WHEN NEW SOFTWARE UPDATES ARE AVAILABLE!
SURF TO: WWW.SYNQ-AUDIO.COM/REGISTER/
FEATURES
This unit is radio-interference suppressed. This appliance meets the requirements of the current European
and national guidelines. Conformity has been established and the relevant statements and documents have
been deposited by the manufacturer.
This professional digital media controller offers an extremely compact all-in-one solution that will evensatisfy
the most demanding DJs! All you need is a pair of powered speakers toget the party rolling!
The unit is packed with tons of features like:
Music from different sources can be played and mixed seamlessly:
Two internal USB-players share the same USB-hard disk/USB-stick to play any WAV or MP3 file.
Different analog inputs like turntables, extra CD-players,etc.
Controls all popular MIDI DJ-software you can imagine, free Deckadance-LE software included!
Two microphones with talkover can be used simultaneously.
Q-DBase system: smart, fully featured database lookup system to find your tracks very easily, even on big
hard disks, up to 500GB!
Free Windows Q-DBase-builder software included.
The digital effects (echo, flange, filter, brake) can be used manually or fully beat synchronized with presets.
Seamless loops with real-time loop edit function
PCMS (Permanent Cue Memory System): for each track up to 4 cue points and seamless loops can be
stored/recalled at any moment
High precision scratch function and pitch bend, thanks to the touch sensitive jog wheels
Several jog wheel modes: vinyl, CDJ and A.CUE scratch!
DJ-software can use coded vinyl disks to control playback and scratch your MP3/WAV files.
2x 10character alphanumeric VFD-displays show all information, including ID3-tags.
SMART RANDOM: random play can be limited to 1 genre or artist (ex. play only slows!)
Original, upgradeable, Synq firmware: guarantees user-friendly, sophisticated functionality not found
elsewhere.
Fully customizable setup menu for MIDI and other functions.
Pitch control (+/-6%, 10%, 16%, +16%/-100%)
Pitch lock (Master Tempo)
Full featured 2channel digital mixer with customizable crossfader, balanced output and booth master.
PFL headphone monitor with CH1/CH2 mixing and adjustable volume.
Many more …
BEFORE USE
Before you start using this unit, please check if there’s no transportation damage. Should there be any, do
not use the device and consult your dealer first.
Important: This device left our factory in perfect condition and well packaged. It is absolutely necessary
for the user to strictly follow the safety instructions and warnings in this user manual. Any damage caused
by mishandling is not subject to warranty. The dealer will not accept responsibility for any resulting defects
or problems caused by disregarding this usermanual.
To protect the environment, please try to recycle the packing material as much as possible.
ENGLISH OPERATION MANUAL
SYNQ® 2/76 DMC2000
Keep this booklet in a safe place for future consultation. If you sell the unit, be sure to add this user
manual.
Check the contents:
Check that the carton contains the following items:
DMC2000 unit
Operating instructions
1 USB cable
1 AC power cord
SAFETY INSTRUCTIONS:
To prevent fire or shock hazard, do notexpose this appliance to rain or moisture.
To avoid condensation to be formed inside, allow the unit to adapt to the surrounding temperatures when
bringing it into a warm room after transport. Condense sometimes prevents the unit from working at full
performance or may even cause damages.
Thisunit is forindoor use only.
Don’t place metal objects or spill liquid inside the unit. No objects filled with liquids, such as vases, shall be
placed on this appliance. Electric shock or malfunction may result. If a foreign object enters the unit,
immediately disconnectthe mains power.
No naked flame sources,such as lighted candles, should be placed on the appliance.
Don’t cover any ventilation openings as this may result in overheating.
Prevent use in dusty environments and clean the unit regularly.
Keep the unit away from children.
Inexperienced persons should not operate this device.
Maximum save ambient temperature is 40°C. Don’t use this unit at higher ambient temperatures.
Minimum distances around the apparatus for sufficient ventilationis 5cm.
Always unplug the unit when it is notused for a longer time orbefore you start servicing.
The electrical installation should be carried out by qualified personal only, according to the regulations for
electrical and mechanical safety in your country.
Check that the available voltage is not higher than the one stated on the rear panel of the unit.
The socketinlet shall remain operable for disconnection from the mains.
The power cord should always be in perfect condition. Switch the unit immediately off when the power cord
is squashed or damaged. It must be replaced by the manufacturer, its service agent or similarly qualified
persons in order to avoid a hazard.
Never let the power-cord come into contact with other cables!
When the power switch is in OFFposition, this unit is not completely disconnected from the mains!
In order to prevent electric shock, do not open the cover. Apart from the mains fuse there are no user
serviceable parts inside.
Never repair a fuse or bypass the fuse holder. Always replace a damaged fuse with a fuse of the same
type and electrical specifications!
In the event of serious operating problems, stop using the appliance and contactyour dealer immediately.
Please use the original packing when the device is to be transported.
Due tosafety reasons it is prohibited to make unauthorized modifications to the unit.
CAUTION
CAUTION: To reduce the risk of electric shock, do not
remove the top cover. No user-serviceable parts inside.
Refer servicing to qualified service personnel only.
The lightning flash witharrowheadsymbol within the equilateral triangle is intended to alert the
use or the presence of un-insulated “dangerous voltage” within the product’s enclosure that may
be of sufficient magnitude to constitute a risk of electric shock.
The exclamationpoint within the equilateral triangle is intended to alert the user to the presence
of important operation and maintenance (servicing) instructions in the literature accompanying
this appliance.
This symbol means:indoor use only
This symbol means:Read instructions
This symbol means: Safety Class II appliance

ENGLISH OPERATION MANUAL
SYNQ® 3/76 DMC2000
INSTALLATION GUIDELINES:
Placing and using the unit for long periods near heat-generating sources such as amplifiers, spotlights,
etc. will affect its performance and may even damage the unit.
Take care to minimize shocks and vibrations during transport.
When installed in a booth or flight case, please make sure to have good ventilation to improve heat
evacuation of the unit.
To avoid condensation to be formed inside, allow the unit to adapt to the surrounding temperatures when
bringing it into a warm room after transport. Condense sometimes prevents the unit from working at full
performance.
Choose the place where you put your installation very carefully. Avoid presence of heat sources. Avoid
places with vibrations or places that are dusty and humid.
To prevent fire or shock hazard, do not expose this appliance to rain or moisture.
In order to prevent electric shock, do not open the top cover. If a problem occurs, contact your dealer.
Do not place metal objects or spill liquid inside the player. Electric shock or malfunction may result.
The player should not be adjusted or repaired by anyone except properly qualified service personnel.
This unit may cause interference to radio and television reception.
CLEANING THE PLAYER:
Clean by wiping with a polished cloth slightly dipped with water. Avoid getting water inside the unit. Do not
use volatile liquids such as benzene or thinner which will damage the unit.
CONTROLS AND FUNCTIONS
1. MAINS input: connect the unit to the 100-240V AC mains, using the supplied power-cord.
2. POWER ON/OFF switch: switches theunit on and off.
3. USB2 connection: this is the second (type-A) USB-connection, used to connect any USB mass storage
device that was formatted in FAT or FAT32. By default this input is used to connect a hard disk. (see
chapter “connections”)
4. MIDI / LINK USB connection: this (type-B) USB-connection is used to connect the player to a computer
with MIDI DJ-software. Please check the chapter “connections” for more information.
5. MASTER BALANCED OUTPUT: The XLR-connectors can be used to connect this mixer to any
balanced amplifier inputor powered speakers, using special balanced signal cables.
6. MASTER UNBALANCED OUTPUT: The “master” output has the same output signal as the balanced
master output(5) but unbalanced.
7. BOOTH MASTER OUTPUT: The “booth master” output carries the same signal as the master but can
be controlled independently by the booth master (49). Use the outputs to connect unbalanced amplifiers
or connect a sound recorder.
8. PH/LINE SWITCH: This switch makes it possible to switch between the Phono and the Line input level
for this channel.
9. ANALOG INPUT: to both mixer channels you can connect turntables or extra CD-players that can be
mixed simultaneously with tracks from the DMC2000 players and DJ-software from your PC/MAC.
10. GROUND (GND) CONNECTION: Many Turntables have a GND-connection. It is preferable to connect
this signal ground to the GND-connector. If your turntable does not have a ground wire, you don’t have
to use this connector.
11. DJ MIC INPUT JACK: Combo jack. Accepts either a balanced microphone with an XLR connector or an
unbalanced microphone with 1/4” mono jack. This input is mainly used as DJ-microphone. The talkover
does not affect the signal level of this input.
ENGLISH OPERATION MANUAL
SYNQ® 4/76 DMC2000
12. KENSINGTON SECURITY SLOT: can be used to protect the DMC2000 from opportunist theft. Keep in
mind that this is absolutely not a 100% anti-theft protection! You can buy a compatible “Kensington”
security cable from almost everycomputer store.
13. USB1 connection: this is the first (type-A) USB-connection, used to connect any USB mass storage
device that was formatted in FAT or FAT32. By default this input is used to connect an occasional USB-
drive like USB-sticks etc.
14. SOURCE SELECT switch: use this button to select the desired audio source: USB1 or USB2.
15. DATABASE / NEXT TRACK button: a very important button if you want to find your next track easily
and fast, even while the previous track is still playing! This button works in two different ways:
NEXT TRACK function: will be used while searching on mass storage devices that don’t have the
“Q-DBase system” files installed. You can only search on track and folder numbers.
DATABASE function: will be used while searching mass storage devices that have the “Q-DBase
system” files installed. You can alphabetically search on artist, track title, genre or album. Very fast
and no need for you to know whereyour files are located!
Once you have found the desired song, just press the LOAD TRACK-button (19) to load the track.
For both functions, please refer to chapter“HOW TO USE” for more information.
16. FOLDER knob: this knob has different functions:
No Q-Dbase: turn this knob to browse the folders of USB-drive while you don’t use the Q-Dbase
system.
During Q-Dbase search: press while you turn the knob to select the first character of the search key
you’re looking for. Turn the knob to go to the next search key that starts with the same character.
Press the knob to show the search key on the 2nd textline of the display.
Setup menu: turn the knob to browse the different menu options.
Please refer to chapters “HOW TO USE” & “SETUP MENU” for more information.
17. TRACK knob: this knob has different functions:
No Q-Dbase: turn this knob to browse the tracks inside a folder of a storage device while you don’t
use the Q-Dbase system.
Q-Dbase search: two options:

ENGLISH OPERATION MANUAL
SYNQ® 5/76 DMC2000
Turn the knob to browse all files with the same first character that was first selected with the
FOLDER button.
Press the knob while you turn it to change the search key in the database, you can search
the keys:
Art: search for “artist names” in alphabetical order (default search key)
Alb: search for “album names” in alphabetical order
Gen: search for “Genres” in alphabetical order
Std: don’t use the Q-Dbase system, just folders and tracks manually.
During playback: press the knob to see the different ID3-tags on the display:
Press 1x: Album name of the current track is shown
Press 2x: Genre of the current track is shown
Press 3x: Bitrate information of the current track is shown
Setup menu: turn the button to change the settings of the selected menu option.
Please refer to chapter “HOW TO USE” for more information.
18. SEARCH buttons: used to search quickly inside a track.
19. LOAD TRACK button: this button has different functions:
Load a track: thatwas found using the database/next track function.
Open setup menu: press the LOAD TRACK button for about 3seconds.
Close setup menu: press the LOAD TRACK button shortly toleave setup.
Please refer to chapters “HOW TO USE” & “SETUP MENU” for more information.
20. PLAY/PAUSE button: every time you press the PLAY/PAUSE button the player changes from play to
pause or from pause to play. The button blinks as long as the player is set to pause.
21. CUE button: Pressing the CUE button during playback provides an immediate return to the position at
which play was started. Playback starts immediately from the programmed cue point for as long as the
CUE button is pressed. The player jumps back to the cue point as soon as the CUE button is released.
Also with the unit in pause mode (Play/Pause button blinks) the jog wheel is used to set a different start
point. By pressing "PLAY/PAUSE" or “LOOP IN” button followed by "CUE", you can confirm this new
cue point.
22. TACTILE JOG-WHEEL: The jog-wheel on this player has 2 parts:
Tactile center part: to match the vinyl feel as close as possible and largely improve scratch
performance, the central part of the jog-wheel uses a patented touch-sensitive technology. With the
WHEEL MODE buttons (23) you can change the behavior of this central part. Check the description
of theWHEEL MODE buttons (23) for more information.
Outer ring: silver colored part of the jog wheel which is not touch sensitive. Regardless of the
selected wheel mode the outer ring can be always be used for pitch bending, except while using one
of the digital effects.
23. WHEEL MODE button: toggles between 3 different modes for the tactile jog-wheel. The tactile center
part and outer ring behave differently:
VINYL-mode: used for extremely realistic scratching of any MP3 file played on the internal players
or DJ-software from your computer.
Tactile center part: During playback, the music stops immediately when you touch the jog-
wheel: playback speed and direction are now fully controlled by the movements of your hand.
In pause mode you can easily set a new cue point.
Outer ring: During playback you can use the outer ring for pitch bending to synchronize the
beats of 2 tracks. In pause mode you will hear the typical very small loops that give you the
possibility to set a cue point with 1frame (1/75seconds) accuracy.
CDJ-mode: this is the standard mode, used by most DJ players. Both the tactile center part and the
outer ring behave identically. While the track is playing, the jog wheel temporarily bends the pitch of
the music up to +/-100% by rotating the wheel clockwise to speed it up or counterclockwise to slow it
down. The amount of pitch change is determined by the speed of rotation. In pause mode you will
hear the typical very small loops that give you the possibility to set a cue point with 1frame
(1/75seconds) accuracy.
A.CUE SCRATCH-mode: very similar to VINYL mode but scratching always starts from the actual
cue point, the behavior of the outer ring is identical to that of vinyl mode:
Tactile center part: During playback, the music stops immediately and returns to the actual
cue point each time you touch the jog-wheel: playback speed and direction are now fully
controlled by the movements of your hand. In pause mode you can easily set a new cue point
but the player first returns to the actual cue point.
ENGLISH OPERATION MANUAL
SYNQ® 6/76 DMC2000
Outer ring: During playback you can use the outer ring for pitch bending to synchronize the
beats of 2 tracks. In pause mode you will hear the typical very small loops that give you the
possibility to set a cue point with 1frame (1/75seconds) accuracy.
24. HOT CUE buttons: 4 programmable buttons where you can store ordinary cue points and/or loops.
When a normal cue point is stored, the corresponding button is green, when a loop is stored the
corresponding button turns red. All stored cue points and loops can be backed up to permanent memory
for future use. This feature is called “PCMS Permanent Cue Memory System”. Check the chapter “HOW
TO USE” for more information on how toprogram cue pointsetc.
25. RECORD CUE button: press this button prior to one of the 4 HOT CUE buttons (24) to save a new cue
point or loop. See the chapter “HOW TO USE” to learn how you save cue pointsand loops.
Saving cues to permanent memory: the hot cue system uses 2 kinds of memory: temporary “track
memory” and “permanent” memory. New hot cues are only saved to the temporary “track memory”. If
you want to keep the hot cues for future use you must save the information to permanent memory.
To save the cues to permanent memory, just press the RECORD CUE-button until the display shows
“Saving”.
Saving personal settings: Press the RECORD CUE-button and X/SYNC-button (39) together to
save different personal parameters that are currently in use (pitch range, single/cont, standard time
display, jog wheel setting, auto cue, auto BPM-mode, pitch on/off, database search key and
starttime/brake time)
26. DELETE CUE: this button has several functions:
DELETE 1 HOT CUE: press the DELETE CUE button, followed by the HOT CUE button that you
want to delete from track memory. The deleted button will turn black.
DELETE 4 HOT CUES: press the DELETE CUE button for about 2seconds to erase all 4 hot cues
from track memory.
DELETE TRACK: press the DELETE CUE button and Y/RATIO-button (40) together to delete the
hot cues for the entire track from permanent memory. Because there will be no way back, the display
first asks you if you're sure: using the PITCH BEND buttons (29) you canchoose YESor NO.
Please refer to the chapter “HOW TO USE” for more information.
27. TEMPO RANGE button: press this button to select the different available speed ranges: +/-6%, +/-10%,
+/-16%, +16/-100%. The lower ranges make the SPEED-fader (28) more precise, the higher ranges are
suitable for special effects. To turn the speed function off simply press the button for 1second, until the
speed indicatorsturn off. Press the button again to re-activate speed control.
28. SPEED-fader: used to adjust the playback speed of the playing track. You can turn the speed function
on/off or change the range with the TEMPO RANGE-button (27)
29. PITCH BEND buttons: The speed rises while the “+ button” is pressed and returns to the original pitch
when the button is released. The speed drops when the “– button” is pressed and returns to the original
pitch when the button is released. These buttons can be used to synchronize the beats of 2 tracks. They
are also used to confirm (or not) the questions that are sometimes shown on the display.
30. KEY LOCK Button: (Master tempo) activates the Pitch Lock function. This function allows you to make
adjustments to a tracks speed using the SPEED-fader without altering the tonal pitch.
31. LOOP IN button: Allows you to set a new cue point without stopping playback (CUE ON THE FLY). This
button also sets the beginning of a seamless loop: marks the beginning of the loop, you have to press
the LOOP OUT button tomark the end of the loop and start playback in loop mode.
Please refer to the chapter “HOW TO USE” for more information.
32. OUT/EXIT button: Used to set the endpoint when looping music. The player starts seamless loop
playback until you press this button again to exit. When a loop is programmed but not active you can
also restart the loop. The point where you press the button will be memorized as the new end point of
the loop. In loop edit mode pressing the OUT/EXIT button stops the loop editing and saves the new loop
endpoint.
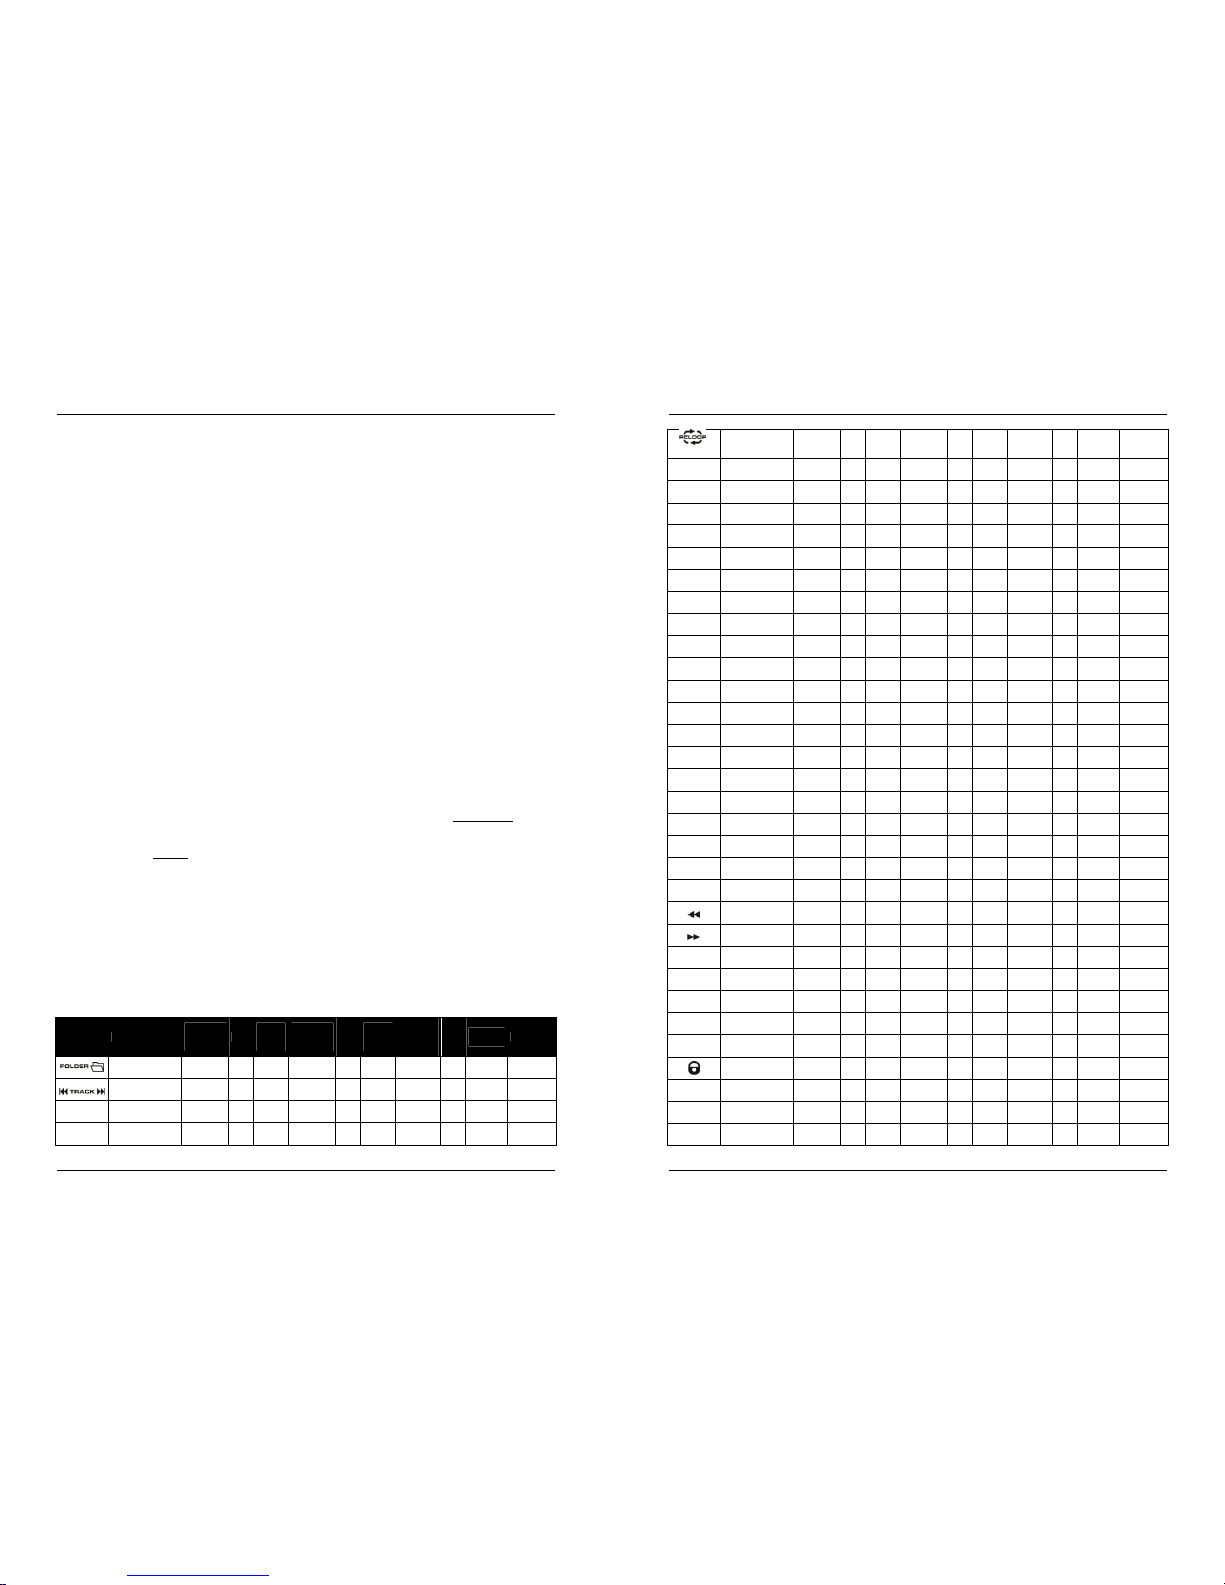
33. RELOOP/STUTTER button: This button has 3 functions:
RELOOP: When a loop was programmed and you have hit the OUT/EXIT button, press the reloop
button to enter the loop again. To exit the loop press the OUT/EXIT button. (intro and end points of
the loop are unchanged)
STUTTER: When a loop is playing you can press this button to restart the loop at once. You can also
press this button when a track is not playing in loop. Every time the RELOOP/STUTTER button is
pressed, it will restart the music from the actual cue point. The stutter effect adds extra creativity to
your performance.
ENTER EDIT LOOP MODE: When a loop is programmed (LOOP IN and OUT/EXIT buttons are on)
you can enter loop edit mode by pressing the RELOOP/STUTTER button until the display shows
“OUT EDIT”. While in loop editmode you toggle between “OUT EDIT” and “IN EDIT”.

ENGLISH OPERATION MANUAL
SYNQ® 7/76 DMC2000
34. ECHO EFFECT button: press this button to activate the echo effect. Depending on the sync-mode
(manual or beat synchronized), different settings are possible:
Manual mode: the FX-SYNC button (38) is dark. You can set all parameters manually, use the
following controls:
Jog-wheel (22): used to set the echo time from 1ms to 2000ms.
Y/RATIO button (40): as long as the Y/RATIO-button is blinking you can use the jog-wheel
(22) tochange the impact (dry/wet) of the effect.
Beat synchronized mode: the FX-SYNC button (38) is lit. You can use the following controls:
EFFECT SYNC-buttons (39+40): choose one of the beat synchronized echo presets.
Y/RATIO button (40): as long as the Y/RATIO-button is blinking you can use the jog-wheel
(22) tochange the impact (dry/wet) of the effect.
35. FLANGER EFFECT button: press this button to activate the flanger effect. Depending on the sync-
mode (manual or beat synchronized), different settings are possible:
Manual mode: the FX-SYNC button (38) is dark. You can set all parameters manually, use the
following controls:
Jog-wheel (22): used to manually change the effect.
Y/RATIO button (40): as long as the Y/RATIO-button is blinking you can use the jog-wheel
(22) tochange the impact (dry/wet) of the effect.
Beat synchronized mode: the FX-SYNC button (38) is lit. You can use the following controls:
EFFECT SYNC-buttons (39+40): choose one of the beat synchronized sweep presets.
Y/RATIO button (40): as long as the Y/RATIO-button is blinking you can use the jog-wheel
(22) tochange the impact (dry/wet) of the effect.
36. FILTER EFFECT button: press this button to activate the filter effect. Depending on the sync-mode
(manual or beat synchronized), different settings are possible:
Manual mode: the FX-SYNC button (38) is dark. You can set all parameters manually, use the
following controls:
Jog-wheel (22): used to manually change the cutoff frequency ofthe filter.
Y/RATIO button (40): as long as the Y/RATIO-button is lit you can use the jog-wheel (22) to
change the impact (Q-factor) of the filter.
Beat synchronized mode: the FX-SYNC button (38) is lit. You can use the following controls:
EFFECT SYNC-buttons (39+40): choose one of the beat synchronized sweep presets.
Y/RATIO button (40): as long as the Y/RATIO-button is lit you can use the jog-wheel (22) to
change the impact (Q-factor) of the filter.
37. BRAKE button: press this button to activate the brake effect. Now you can determine the
acceleration/deceleration speed of the music while using the PLAY/PAUSE button (20). You can set the
parameters withbuttons (39+40), see below.
38. FX SYNC button: press this button to toggle between manual and beat synchronized effect mode!
Please refer to points (34+35+36) for more information.
39. EFFECT SYNC/START-button: this button has several functions, depending on the effect mode:
BPM-Synced effects: when an effect is used in beat synchronized mode, this button is lit. You can
now choose how you want the effect to be synchronized to the beat. Use this button to cut the
current BPM-parameter in half.
BRAKE effect: press this button to change the acceleration time (time from zero to full speed).
While the button is lit, you can use the jog-wheel (22) to change the time from 0,0s (instant start) to
almost 10s. (very slow start)
40. EFFECT SYNC/STOP/Y/RATIO-button: this button has several functions, depending on the effect
mode:
BPM-Synced effects: when an effect is used in beat synchronized mode, this button is lit. You can
now choose how you want the effect to be synchronized to the beat. Use this button to double the
current BPM-parameter.
BRAKE effect: press this button to change the deceleration time (time from full speed to zero).
While the button is lit, you can use the jog-wheel (22) to change the time from 0,0s (instant stop) to
almost 10s. (very slow stop)
IMPACT parameter: while one of the 3 DSP-effects is activated, press the button until it starts
blinking. Now you can adapt the impact of the selected effect, also see EFFECT buttons (34+35+36).
41. TIME Button: The TIME button switches between elapsed playing time, remaining time of the selected
track.
ENGLISH OPERATION MANUAL
SYNQ® 8/76 DMC2000
42. SGL/CTN: You can choose between “single track mode” and “continuous play”.
Continuous play: all tracks will be played without interruption. (mostly used in pubs)
Single track: player stops at the end of each track and waits at the beginning of the next track.
(mostly used by deejays)
Push the SGL/CNT button for more than 1second to switch between normal and “auto cue” mode. In
“auto cue” mode the player waits at the first music note of each track. This means that badly indexed
tracks will not interfere with the instant start capabilities of the player. This is a very useful feature for
deejays!
43. TAP/SHIFT button: this button has two functions:
TAP-function: This player has a full automatic BPM-counter. In some rare cases the automatic beat
counter doesn’t count as it should do (beats are out of the normal range or there’s simply no beat to
detect). In these cases you can help the beat counter by manually tapping this button to the rhythm
of the beat. You can switch back to the automatic beat counter by pressing the TAP button until the
“AUTOBPM” in the rightupper corner of the display turns on.
SHIFT-function: only used while the player is used as a MIDI controller. The shift function doubles
the functions of each control: press the shift button while using another control to obtain an extra,
secondary, function. See the chapter “MIDI MAP” for more information.
44. VFD DISPLAY: Shows all important information needed during playback.
45. RANDOM button: you can select 2 different random play functions.
TOTAL random: press the RANDOM button shortly until the LED is lit. Player 1 now plays tracks,
randomly selected from the complete USB-mass storage. While player 1 is playing in random mode,
player 2 can still be used to play any track you like.
SMART random: you can choose to play only tracks from a certain directory, only tracks from a
certain genre,or even only tracks from a certain album or artist:
Play tracks only from 1 directory: first choose “search-key = Std” (folders/tracks). Now you
have to select a directory, then press the RANDOM button for +/-2seconds until the LED starts
blinking.Player 1 now plays only tracks from the selected directory.
Play tracks only from a certain genre/artist/album: choose the right search-key and select a
track that corresponds to the desired genre, artist or album. After pressing the RANDOM button
for +/-2seconds, the player will only play tracks with the same genre, artist or album as the track
you’re currently playing. (Avoids mix-up of 2 completely different music styles: perfect for bars,
clubs, restaurants, …) See chapter “HOW TO USE” for examples.
46. INPUT SOURCE SELECTOR: Used to select the correct input on both channels: internal player, MIDI-
control for DJ-software on computer or external analog phono/line inputs (there are also additional input
selectors (8) on the back).
47. GAIN LEVEL: Adjusts the input level on both channels. Use this control to adjust the level on the VU-
meter at about 0dB.
48. 3-BAND TONE CONTROLS: The frequency of each channel can be controlled separately over a range
from -35dB to +10dB. You can kill (completely remove) the high, mid and/or low frequencies by pressing
the corresponding knob(s). In the center position the tone control is flat.(switched off)
49. BOOTH MASTER LEVEL: Used toadjust the level of the unbalanced booth master output.
50. MASTER LEVEL: Used to adjust the level of the balanced Master output.
51. VU METER: Each channel has its own LED VU-meter so you can adjust the gain level (47) very quickly.
Make sure the levels do not exceed 0dB (or 100%). The audio risks to be distorted when the signal level
comes in the red zone of the VU-meter. While the MASTER METER-button (52) is lit the VU-meters
indicate the ouput level on the master.
52. MASTER METER button: when this button is dark, the VU-meters indicate the levels of individual
channels. Pressthe button to light it up: the VU-meters now indicate the output level of the master.
53. CHANNEL FADER: Used to set the level of each channel separately.
54. FADER START switch: when switched to ON the internal players can be started/stopped by moving the
crossfader.
55. CROSS FADER CURVE: Adjusts the curve of the cross fader from sharp (left position) to smooth (right
position).
56. CROSSFADER: With this fader you can mix over between both channels. The crossfader only works
when you move the selected channel faders (53) to the desired level!

ENGLISH OPERATION MANUAL
SYNQ® 9/76 DMC2000
57. DJ MIC INPUT JACK: Accepts either an unbalanced microphone with 1/4” mono jack. This input is
mainly used as DJ-microphone. The talkover does not affect the signal level of this input.
58. MIC1 VOL: Used to adjust the input level of micro 1.
59. MIC2 VOL: Used to adjust the input level of micro 2.
60. MIC TONE: used to adapt the sound of both microphone inputs.
61. MIC ON/OFF/TALK OVER SWITCH: Used to switch the microphones:
OFF: Both mic1 & mic2 are switched off.
ON: Both mic1 & mic2 are switched on.
TALK OVER: mic1 & 2 are switched on; the sound level of all the other channels will decrease to
around -20dB.
62. CUE MIX: With this knob you can mix the the input channels through the headphone output (64):
Put the knob in the extremeleft position to hear channel1.
Put the knob in the extremeright position to hear channel2.
Put the knob in any other position to heara mix of the two signals.
This option makes it possible to check your mix before you put it on the master output.
63. HEADPHONE VOLUME: controlsthe sound level of the headphone output.
64. HEADPHONE output: if you like you can connectyour headphone here.
VFD DISPLAY
A. PLAY: appears while the unit is playing a track.
B. PAUSE: appears while the playeris in pause or cue mode.
C. CUE: appears when the player is waiting at the CUE-point.
D. TOUCH INDICATOR: appears when the touch sensitive partof the jog wheel is active.
E. ALPHANUMERIC DISPLAY: Shows all kinds of important information like effect parameters, loop
information, ID3-tags, …
F. BPM DISPLAY: the automatic beat counter shows the number of Beats Per Minute on the display. In
manual mode the display shows “BPM”. In automatic mode the display shows “AUTOBPM”. (press the
TAP button for 2seconds to switch to automatic mode)
G. MEMORY BUCKET: shows the status of the buffer memory needed for anti-shock and some special
functions. Each bar ofthe bucket represents 2seconds buffer memory.
ENGLISH OPERATION MANUAL
SYNQ® 10/76 DMC2000
H. AUTO CUE: appears when the “auto cue” function is active.See SGL/CTN button (42).
I. RELOOP: shows when a loop is programmed. (repeating a particular area)
RELOOP Flashing: Loop is programmed and currently playing.
RELOOP on: Loop is programmed but not playing.
J. SINGLE: appears when the unit is set to play just one track at a time. When it is not shown, all tracks are
played without interruption. The function is controlled by the SGL/CTN button (42).
K. MP3 indicator: appears when an MP3-file is playing.
L. TRACK indicator: shows the number of tracks available in your current selection.
Standard lookup: (no Q-Dbase) the track numbers in the current folder (M) are shown.
Q-Dbase lookup: the track numbers that correspond to your Q-Dbase pre-selection.
M. FOLDER/SEARCH KEY indicator: the information depends on the lookup mode you selected.
Standard lookup: (no Q-Dbase) the current folder number is shown.
Q-Dbase lookup: the current search key(Art, Alb or Gen) is shown.
N. ELAPSED, TOTAL REMAIN: indicates that the time shown on the display is the track elapsed, remaining
or total remaining time.
O. MINUTE: Shows “minutes” timeinformation of current track.
P. SECOND: Shows “seconds” time information of current track.
Q. FRAME: Shows “frame” time information ofcurrent track. (1 frame = 1/75th sec.)
R. TIME BAR: has 2 functions:
During normal playback: shows either time remaining or elapsed depending on the setting of the
TIME button.Starts flashing at the end of each track to alert the user to take action.
During loop playback: shows the time remaining until the end of the loop. This visual aid helps you
to see whereand when the seamless loop starts again.
S. PITCH DISPLAY: Shows the actual percentage of speed change, selected with the SPEED slider (28).
The small red colored padlock is shown when the pitch lock function (MasterTempo) is active.
CONNECTIONS
Some important notes for the USB-storage devices that you will connect:
Note 1: the hard disk must be formatted in FAT32! A hard disk formatted in NTFS (mostly drives with big
capacity) will NOT be recognized: such hard disk should be re-formatted in FAT32! (this can be done under
Windows, support can be found on the DMC2000 product page)
Note 2: the USB-slots on this player can each deliver 1A power to the connected hard disk. However we
suggest using a hard disk with separate power supply for better reliability.
Note 3: only WAV and MP3 files are recognized and can be played.
Note 4: for your convenience we strongly advice using the Q-DBASE indexer software, it simply mazkes life
a lot easier!
SIMPLE SETUP – 1 DECK
Connect the balanced(5) or unbalanced(6)master to a power amplifier or powered speaker cabinets.
Connect a USB-stick to USB1-input (13) or USB-harddisk to the USB2-input (3).
If needed, connect amicrophone to the mic1 (57) or mic2 (11) input.
Connect the suppliedpower cord between the mains input (1) on the player and the mains socket.
You are ready to play and mix the MP3/WAV files on your USB-storage. Have fun!

ENGLISH OPERATION MANUAL
SYNQ® 11/76 DMC2000
SETUP – WITH DMC1000 for harddisk share
Connect a USB hard disk to the USB2-connection of the DMC1000.
Make sure that the USB-link on the DMC1000 is set to “LINK”.
Use the USB-cable, supplied with DMC1000, to connect the USB-link connection of the player to the
USB2-connection (3) ofthe DMC2000.
Use the SOURCE SELECT button (14) to select USB2 on the DMC2000: both the DMC1000 and
DMC2000 players will connect to hard disk.
You can now play MP3 andWAV files from the connected hard disk.
IMPORTANT: for good, stable performance only use a good quality USB-cable with a maximum
length of 1meter!
SETUP – COMPLETE SETUP, INCLUDING MIDI CONTROLLER
The drawing shows a complete setup, including the MIDI-controller function.
You can connect up to 2 external audio sources (turntable or line) to turn your DMC2000 into a
multifunctional DJ-unit. All you have to do is switch the inputs on top of the 2 mixer channels!
If you only want to use the MIDI controller function, you just have to connect the computer with DJ-
software via the supplied USB-cable to the USB-MIDI output (4) on the DMC2000: the controller will be
recognized and the drivers will be automatically installed.
Put both mixer channel inputs (46) in MIDI-mode: most controls on the DMC2000 will send out MIDI.
For specific MIDI-settings please refer to the chapter “SETUP MENU”.
Depending on the DJ-sofware you’re using, you will have to load the desired MIDI-mappings. On some
DJ-software the DMC2000 mapping will be loaded automatically, on other DJ-software you will have to
download the MIDI mapping from our site or from the download section of the DJ-software. If the
DMC2000 is not supported by the DJ-software you can make your own MIDI-mapping but this entirely
depends on the software you’re using. Please note that the installation and the use of different DJ-software
is very specific and therefore not supported by Synq!
TheDMC2000 as internal sound cards: the music of your mix will come throught the master outputs (5+6).
MIDI function mixer: The setup of the DMC2000 is such that you can easily mix music from all inputs with
eachother. You can even mix music from the DJ-software with music coming from the internal players or a
connected turntable. To be able to do this you must switch the MIDI-function of the internal mixer off. (see
setup menu)
VINYL scratching option on DJ-software: with the DMC2000 you can even use the very powerful “vinyl
scratch function” available on some highend DJ-software. This means that you can scratch and manipulate
ENGLISH OPERATION MANUAL
SYNQ® 12/76 DMC2000
the audio tracks played on your DJ-software by using a special coded vinyl disc! Just connect a turntable
toone of the audio inputs: the signals from the specialcoded vinyl disc will be sent to the DJ-software.
Note1: first check if your DJ-software can use this feature. If yes, follow the instructions of the
software to setup this function.
Note2: a special vinyl scratch disc is optionally available from Synq, it uses a “time dephased 1kHz
stereo signal” which can be used on different DJ-software.
Installing DECKADANCE-LE software
The DMC2000 comes with a free license for Deckadance-
LE. The unlock code (also called serial) for this free license
is fixed to the bottom of the DMC2000 (see drawing).
To assure that you always have the latest version, the
program is only available through download. Please follow
the actions below to register and download your
Deckadance-LE copy:
Download the demo version of the software:
WINDOWS: http://windemo.deckadance.com
MAC OS: http://macdemo.deckadance.com
Install the demo version
To turn the demo version into an LE-version, go to:
http://www.deckadance.com/synq you will see the
SYNQ-page on your computer.
Press the “Register” button.
Enter your email address and indicate that you’re a new
customer. Now click the “Next” button.
Follow all steps of the registration.
Now you are able to login on your personal account:
click on the Deckadance LE license (see arrow on the
right)
Click on the dark blue area “click here to unlock this
product” download the the Reg-file and double-click it
to change the demo into a full functional LE-version of
the software.
Difficulties? Check these links:
http://support.image-line.com/knowledgebase/base.php?id=45&ans=108
http://support.image-line.com/knowledgebase/base.php?id=&ans=119
After this procedure you can use the free Deckadance LE
software and upgrade to newer versions when they come
available!
To become more familiar with Deckadance, we suggest also
visiting the following links:
A complete overview on how to install and use
Deckadance: http://deckadance.image-line.com/help
All kinds of video tutorials:
Go to: http://www.youtube.com/user/imageline and
search for “Deckadance”.
IMPORTANT: we strongly advise you to register your software on the Deckadance website:
You will gain access to the user forum, receive a newsletter and get full support from their support team. You
will also receive 30% discount while upgrading to the HOUSE and CLUB edition of Deckadance. On the
Deckadance site you can find a feature list with differences between the 3 versions. Please note that support
for the Deckadance DJ-software goes exclusively through the Deckadance website (www.deckadance.com).
They have a very well-developed support section with a user forum, video tutorials, …

ENGLISH OPERATION MANUAL
SYNQ® 13/76 DMC2000
Configuring DECKADANCE-LE software for DMC2000
Before you can use the DMC2000 with Deckadance, you have to configure both. We will configure the
DMC2000 to use it its most flexible way. You will be able to mix tracks from Deckadance with tracks from the
internal MP3 players and/or external sources (CD-player, turntable, …) very easily.
Put both channel input selectors (46) NOT in MIDI mode
otherwise you cannot enter the setup menu.
Press the LOAD TRACK button (19) for about 3secs to
open the setup menu. (also see next chapter for help!)
Go to menu option 1. MIDI CH and check if it is set to
01-02-03. Correct if needed.
Go to menu option 2. MIDI Setup and check if it is set to
TAP = HOLD. Correct if needed.
Go to menu option 3.MIXER-mode and check if it is set to
NO MIDI. Correct if needed.
When these 3 options are correct: press the RECORD
CUE-button (25) to close the setup menu and save your
settings.
Connect the DMC2000 to your PC, using the supplied USB-
cable and wait until the drivers are automatically installed
(NO external driver are needed!)
Put both channel input selectors(46) in MIDI mode.
Start Deckadance and press the SETUP-button on the
screen: the setup window opens (see picture)
Go to the option “Remote controller” and press the button on top to scan for the connected controllers: you
will be prompted that the DMC2000 is found and if you want to use it: confirm!
Make sure that both MIDIinput and output are switched ON (green color)
Close the Setup window
Now pressthe AUDIO button on the upper partof the Deckadance screen, the window below opens:
Make sure that your setup window is identical to the window shown above.
Remark: no headphones are configured, this is normal since Deckadance is configured to be used with an
external mixer (the mixer of your DMC2000)
You are now ready to use the DMC2000 with Deckadance.
SETUP MENU
For maximum flexibility this unit is highly customizable. Therefore a lot of parameters can be set via the
setup menu.To be able to enter the setup menu, the player should NOT be in MIDI mode.
To enter the SETUP menu, press the LOAD TRACK button (19) for about 3seconds.
Use the FOLDER knob (16) to browse the different menu options.
Use the TRACK knob (17) to browse the sub menus (if any)
Use the JOG WHEEL (22) to change the settings (parameters) of the selected menu option.
ENGLISH OPERATION MANUAL
SYNQ® 14/76 DMC2000
To save your settings: choose menu option E (EXIT & SAVE) and press the TRACK knob (17) or
press the RECORD CUE button (25).
1. MIDI CHANNEL: used to set the MIDI-channels of the 3 different parts of the DMC2000. The display
shows 3 groups of 2 digits: 01-02-03:
First 2 digits: MIDI-channel for the controls of player1 + channel1 of the mixer.
Second 2 digits: MIDI-channel for the controls of the mixer, except the controls of the 2 input
channels (gain+high/mid/low+fader)
Third 2 digits: MIDI-channel for the controls of player2 + channel2 of the mixer.
Turn the TRACK knob (17) to browse the three 2digit groups
Turn the JOGWHEEL (22) tochange the MIDI-channel.
Note: the 3 parts should have different MIDI-channels.
2. MIDI SETUP:
There are 2 submenus: turn the TRACK knob (17) toselect a submenu.
oSubmenu 1 – SHIFT button (43) functionality: you can choose how the SHIFT-button
works in MIDI-mode.
Turn the JOGWHEEL (22) to select the desired setting:
TAP = HOLD: similar to the SHIFT-key on your PC-keyboard the MIDI-
code of a button/knob changes only when you use it while the SHIFT-button
(43) is pressed.
TAP = TOGGLE : similar to the CAPS LOCK-key on your PC-keyboard
press the SHIFT-button (43) to turn the shift-function on: as long as the
display shows “SHIFT” the MIDI-code of most buttons/knobs changes so
they get a second (double) function.
oSubmenu 2 – MIDI message display: you can select if the MIDI I/O messages should
appear on the display or not. This can be helpful while making MIDI configuration files.
Turn the JOGWHEEL (22) to select the desired setting:
I/O = Hide : don’t show MIDI messages that are sent / received
I/O = DIS. : show MIDI messages that are sent / received
3. MIXER-mode: used to switch the mixerbetween MIDI and non-MIDI mode.
Turn the JOGWHEEL (22) to select the desired setting:
MIDI : use this setting when the DMC2000 is exclusively used to control DJ
software. The mixer of the DJ software will be controlled.
NO MIDI : use this setting if you want to mix different audio sources (DJ
software, external inputs, internal players) with each other, the levels of all
audio sources can be easily matched using the gain knobs (47).
Note: with this setting the mixer is not sending any MIDI, instead it works as
a normal audio mixer.
4. LOAD HOTCUES: you can choose if the saved hot cues of a track should be recalled automatically.
Turn the JOG WHEEL (22) to select one of the 2 possibilities:
oFirst Ask: when a track contains hot cues, the display asks if you want to load the hot cues
or not. You can reply with the YES/NO buttons (29).
oAutoload: when a track contains hot cues,they will be loaded automatically.
5. CROSS FADER: switches the cross fader of the audio mixer on/off, this has no effect on the MIDI
function of the crossfader.
Turn the JOG WHEEL (22) to select one of the 2 possibilities:
oOn: crossfader (56)is activated, ready to be used.
oOff: if you don’t like using the crossfader, use this option.
6. REVERSE CROSS FADER: switches the cross fader of the audio mixer in reverse mode, this has no
effect on the MIDI function of the crossfader.
Turn the JOG WHEEL (22) to select one of the 2 possibilities:
oOn: crossfader (56) is working in reverse mode, channel1 is audible while the crossfader is
in the right position.
oOff: crossfader (56) is working in normal mode, channel2 is audible while the crossfader is
in the right position.
7. DISPLAY TIME: you can select how long a message is shown before the display returns to normal
operation.
Turn the JOG WHEEL (22) to select the desired value: 0,5sec 12,0sec.

ENGLISH OPERATION MANUAL
SYNQ® 15/76 DMC2000
8. SCROLL SPEED: you can select how fast the textscroll on the display.
Turn the JOGWHEEL (22) to select the desired value: 50 2000ms (50ms=fast/2000ms=slow).
9. Sensitivity: you canchange the sensitivity of the tactile jog wheel to optimize the jog wheel performance.
Turn the JOG WHEEL (22) to select one of the 41 possibilities:
oADJ. = 0: neutral setting (default setting, OK in most cases)
oADJ. = -20: lowest sensitivity
oADJ. = +20: highest sensitivity
A. INTENSITY: used to adapt the brightness of the VFD-display.
Turn the JOG WHEEL (22) to select one of the 4 possibilities.
oADJ. = 1 4: 1 = low brightness, 4 = high brightness (default)
B. A.CUE Level: the auto cue function detects where the music really starts, this avoids blanks when a track
is not well indexed. You can selectone of eight detection level presets:
Turn the JOGWHEEL (22) to select one of the 8 possibilities.
oADJ. = -78dB -36dB: the default setting = -48dB
C. Firmware version / upgrading: use this option to check and/or upgrade the firmware versions.
Turn the TRACK knob (17) to select the 4 firmware parts:
oCON: xx: shows the version of the control firmware
oDSP: xx: shows the version of the DSP firmware
oUpgrade: blinks when the unit is ready to check if there are new firmware versions
available. See “FIRMWARE UPGRADING” formore information.
D. Load defaults: as you already noted this unit is highly configurable but that means also that you can
mess up a lot of settings as well. If you really messed up things, you can still reload the default setting!
While “Enter Load” is blinking in the display: press the TRACK knob (17) to load the defaults.
E. Exit & Save: if you want your changes to the setup menu to be permanently saved (also after switching
the unit off) you MUST use this option!
Press the TRACK knob (17) : the display shows “Saving” and exits the setup menu.
Note: alternatively you can also press the RECORD CUE-button (25) to save settings permanently.
FIRMWARE UPGRADING
We strongly suggest to register your player on our website (www.synq-audio.com/register/) so we can inform
you if new firmware updates are available. Upgrading firmware should always be done very carefully!
Download the file containing the upgrade file(s)
Read the instructionsand follow them strictly, otherwise you could damage your equipment…
Put the files on an EMPTY (important!) USB-stick.
Press the LOAD TRACK button (19) for about 3seconds to enter the setup menu.
Use the FOLDER knob (16) to browse to menu option “C. Version”.
Turn theTRACK knob (17) until the display shows “Upgrade”.
Use the SOURCESELECT button (14) to select USB1 input (13).
Insert the USB-stick with firmware files in USB1-input (13)
Upgrading will start automatically: WAIT (!) until the upgrading process is finished. NEVER turn the
player off while upgrading the software!!!
If the display asks you toturn off the unit: turn the unit off, wait 3seconds and turn it back on.
Check if the software version corresponds to the version marked in the readme file that came with the
update.
MIDI MAP (default settings)
FUNCTION Type
FUNCTION
CODE
(DECK A)
NOTE
SHIFT
(Hold
TAP)
FUNCTION
CODE
(DECK B)
NOTE
SHIFT
(Hold
TAP)
FUNCTION
CODE
(CENTER
DECK)
NOTE
SHIFT
(Hold TAP) ACTION
SW/ENC 05/17 44/56 05/27 44/66 7FH:ON
00H:OFF
SW/ENC 01/16 40/55 01/26 40/65 7FH:ON
00H:OFF
IN SW/LED 02/02 D-1 41 02/02 D-1 41 7FH:ON
00H:OFF
OUT SW/LED 03/03 D#-1 42 03/03 D#-1 42 7FH:ON
00H:OFF
ENGLISH OPERATION MANUAL
SYNQ® 16/76 DMC2000
SW/LED 04/04 E-1 43 04/04 E-1 43 7FH:ON
00H:OFF
SOURCE
SELECT SW 06 45 06 45 7FH:ON
00H:OFF
RECORD CUE SW/LED 07/07 G-1 46 07/07 G-1 46 7FH:ON
00H:OFF
1 SW/LED
(RED) 08/08 G#-1 47 08/08 G#-1 47 7FH:ON
00H:OFF
1 SW/LED
(GREEN) 08/05 F-1 47 08/05 F-1 47 7FH:ON
00H:OFF
2 SW/LED
(RED) 09/09 A-1 48 09/09 A-1 48 7FH:ON
00H:OFF
2 SW/LED
(GREEN) 09/06 F#-1 48 09/06 F#-1 48 7FH:ON
00H:OFF
3 SW/LED
(RED) 0A/0A A#-1 49 0A/0A A#-1 49 7FH:ON
00H:OFF
3 SW/LED
(GREEN) 0A/15 A0 49 0A/15 A0 49 7FH:ON
00H:OFF
4 SW/LED
(RED) 0B/0B B-1 4A 0B/0B B-1 4A 7FH:ON
00H:OFF
4 SW/LED
(GREEN) 0B/16 A#0 4A 0B/16 A#0 4A 7FH:ON
00H:OFF
DELETE CUE SW/LED 0C/0C C0 4B 0C/0C C0 4B 7FH:ON
00H:OFF
LOAD TRACK SW/LED 0D/0D C#0 4C 0D/0D C#0 4C 7FH:ON
00H:OFF
TIME X SW/LED 0E/0E D0 4D 0E/0E D0 4D 7FH:ON
00H:OFF
ECHO SW/LED 0F/0F D#0 4E 0F/0F D# 0 4E 7FH:ON
00H:OFF
FLANGER SW/LED 10/10 E0 4F 10/10 E0 4F 7FH:ON
00H:OFF
HOLD SW/LED 11/11 F0 50 11/11 F0 50 7FH:ON
00H:OFF
FILTER SW/LED 12/12 F#0 51 12/12 F#0 51 7FH:ON
00H:OFF
BRAKE SW/LED 13/13 G0 52 13/13 G0 52 7FH:ON
00H:OFF
RATIO Y SW/LED 14/14 G#0 53 14/14 G#0 53 7FH:ON
00H:OFF
% SW 15 54 15 54 7FH:ON
00H:OFF
SW 16 55 16 55 7FH:ON
00H:OFF
SW 17 56 17 56 7FH:ON
00H:OFF
A.Cue
scratch SW/LED 18/18 C1 57 18/18 C1 57 7FH:ON
00H:OFF
VINYL SW/LED 19/19 C#1 58 19/19 C# 1 58 7FH:ON
00H:OFF
CDJ SW/LED 1A/1A D1 59 1A/1A D1 59 7FH:ON
00H:OFF
Time SW 1B 5A 1B 5A 7FH:ON
00H:OFF
SGL/CTN SW 1C 5B 1C 5B 7FH:ON
00H:OFF
SW/LED 1D/1D F1 5C 1D/1D F1 5C 7FH:ON
00H:OFF
JOG SW/ENC 27/18 66/57 27/28 66/67 7FH:ON
00H:OFF
TAP/SHIFT SW 1E 5D 1E 5D 7FH:ON
00H:OFF
CUE SW/LED 1F/1F G1 5E 1F/1F G1 5E 7FH:ON
00H:OFF

ENGLISH OPERATION MANUAL
SYNQ® 17/76 DMC2000
SW/LED 20/20 G#1 5F 20/20 G#1 5F 7FH:ON
00H:OFF
DATABASE SW/LED 21/21 A1 60 21/21 A1 60 7FH:ON
00H:OFF
SW 22 61 22 61 7FH:ON
00H:OFF
SW 23 62 23 62 7FH:ON
00H:OFF
Pitch Silder VR/CENTER PITCH
BEND/28 67 PITCH
BEND/28 67 7FH:ON
00H:OFF
GAIN VR 11 50 21 60 VR:00~7F
HIGH VR/SW/CENTER/LED
12/24/29/24 C2 51/63/68 22/24/29/24 C2 61/63/68 VR:00~7F
MID VR/SW/CENTER/LED
13/25/2A/25 C#2 52/64/69 23/25/2A/25 C#2 62/64/69 VR:00~7F
LOW VR/SW/CENTER/LED
14/26/2B/26 D2 53/65/6A 24/26/2B/26 D2 63/65/6A VR:00~7F
Channel Fader
VR 10 4F 20 5F VR:00~7F
U1 LED 17 B0 17 B0 7FH:ON
00H:OFF
U2 LED 1B D#1 1B D#1 7FH:ON
00H:OFF
16 LED 1C E1 1C E1 7FH:ON
00H:OFF
10 LED 1E F# 1 1E F#1 7FH:ON
00H:OFF
6 LED 22 A#1 22 A#1 7FH:ON
00H:OFF
LEVEL
METER LED LEVEL LED 1 1 00H~7FH *
RANDOM SW/LED 2C/2C G#2 6B 7FH:ON
00H:OFF
MASTER
METER SW/LED 2D/2D A2 6C 7FH:ON
00H:OFF
MASTER VR 31 70 VR:00~7F
BOOTH VR 32 71 VR:00~7F
Cross Fader VR/SW/
SW/CENTER 30/08/
09/0A 6F/47/48/49
VR:00~7F
MIC1 LEVEL VR 35 74 VR:00~7F
MIC2 LEVEL VR 36 75 VR:00~7F
CUE PAN
SLIDER VR 34 73 VR:00~7F
CUE PAN
LEVEL
VR 33 72 VR:00~7F
Fader Start
ON(L) SW 1 40 7FH:ON
00H:OFF
Fader Start
OFF(L) SW 2 41 7FH:ON
00H:OFF
Fader Start
ON(R) SW 3 42 7FH:ON
00H:OFF
Fader Start
OFF(R) SW 4 43 7FH:ON
00H:OFF
C.F CURVE
(L) SW 7 46 7FH:ON
00H:OFF
C.F CURVE
(CENTER) SW 6 45 7FH:ON
00H:OFF
C.F CURVE
(R) SW 5 44 7FH:ON
00H:OFF
CC-ABSOLUTE (VR, LEVEL METER LED) TYPE
Control Change messages are sent with status 0xBn, where n is the channel, for the specified CC
controller. Thus the controller MIDI ID is indicated with the channel along with the CC number. The value
from 0x00 to 0x7F, directly related to the location of the controller.
ENGLISH OPERATION MANUAL
SYNQ® 18/76 DMC2000
* LEVEL METER LEDS
00~0B => ALL LEDS OFF
0C~17=>LED(-30) ON
18~23=>LED(-30, -20) ON
24~2F=>LED(-30, -20, -10) ON
30~3B=>LED(-30,-20, -10, -7) ON
3C~47=>LED(-30, -20, -10, -7, -4) ON
48~53=>LED(-30,-20, -10, -7, -4, -2) ON
54~5F=>LED(-30, -20, -10, -7, -4, -2, 0) ON
60~6B=>LED(-30,-20, -10, -7, -4, -2, 0, +2) ON
6C~77=>LED(-30, -20, -10, -7, -4, -2, 0, +2, +4) ON
78~7F=> ALL LEDS ON (-30, -20, -10, -7, -4, -2, 0, +2, +4, +7)
CC-RELATIVE (ENC) TYPE
Control Change messages are status 0xBn, where n is the channel, for the specified CC controller. Thus
the controller MIDI ID is indicated with the channel along with the CC number. The value 0x40 is the
reference value of the controller. This is an offset to 0x40 “one’s complement” notation.
A message with data0x43 indicates a positivechange of 3.
A messages with data0x31 indicatesa negative change of 15.
SWITCH ON/OFF (SW,CENTER)
These messagesare used for switches.
Control Change messages are sent with status 0x9n, SWITCH On and Off value are 0x7F and 0x00,
where n is the channel.
LED ON/OFF (LED)
These messages are used for LED.
Control Change messages are sent with status 0x9n, LED On and Off value are 0x7F and 0x00, where n
is the channel.
INSTALLING THE Q-DBASE SOFTWARE
The DMC2000 works perfectly without the Q-DBASE database files but if you want to search your tracks
easily and lightning fast than you should install the Q-DBASE software on your computer! Please note that
the program currently only works under Windows (XP, Vista, Win7). To be sure that you always have the
latest version, you can download the software from our website (check the download section on the
DMC2000 product page). Installing the program is very easy: just double-click the file and follow the
instructions on your screen.
USING THE Q-DBASE SOFTWARE
Each time you add or remove tracks from your USB hard disk,
you must run the Q-DBASE software again to update the database files!
After the installation you will see a new program directory called
“SYNQ”. In this directory you will find 2 files:
- Uninstall (to uninstall the software)
- Q-DBASE (to start the software)
Connect your USB-hard drive to your PC and check which drive
letterwas assigned to it.
Click on the Q-DBASE icon to start the software: the main screen is
shown.
In the upper left corner choose your USB-drive.
Press the BUILD-button on the right side.
The software starts scanning the USB-drive for compatible
audio files and extracts the ID3-tags to build the Q-DBASE files, needed to speed up the search
function on player. Once the progression bar on the bottom is full, the database building process is
finished and a shortsummary is shown.

ENGLISH OPERATION MANUAL
SYNQ® 19/76 DMC2000
The program wrote the Q-DBASE files (file extensions: .DBH + .dat
+ .DBX) to the USB-drive so now you can remove it from your PC
and connect it to the DMC2000.
To achieve the best results, please always use the latest version of
the database software. You can find the software version at the
bottomleft of the “About” screen.
! IMPORTANT MESSAGE FOR VISTA USERS !
Many Vista users will not be able to run the Q-DBASE software. This
problem is caused by the UAC (User Account Control) limitation, a
security option limiting the user privileges in Vista. To overcome this
problem, right-click the Q-DBASE program icon and choose “Run as
administrator” in the popup menu. Windows will respond with the
window shown on the right:just click “Allow”.
HOW TO USE …
Most of the common functions are explained in the previous chapter “controls and functions” In this chapter
we talk about the functions that need a little more explanation.
SOME GENERAL FUNCTIONS:
SEARCH A TRACK WITH THE Q-DBASE SYSTEM:
Important: before you can use the Q-DBASE system, you should scan your USB-drive so it contains the
necessary files.
You can choose the search key at any moment by pressing the TRACK-knob (17) while you turn it. You
can search for Art(artist), Alb(album) or Gen(genre).
Press the DATABASE-button (15) to start the lookup function the first character of the list you want
tosearch is blinking in the display.
Turnthe FOLDER knob (16) to change the first character.
Turn the JOG WHEEL (22) to browse the list that corresponds to your demand at high speed. If you
want to search more precisely trackby track, you can also turn theTRACK knob (17).
Once you have found the right track: press the LOAD TRACK-button (19).
SEARCH A TRACK WITHOUT THE Q-DBASE SYSTEM:
Press and turn the TRACK-knob (17) to select Std(standard lookup system). If the USB-drive has no Q-
DBASE files, the player automatically selects the standard lookup system.You have Two options:
Option 1:
Simply use the FOLDER and TRACK knobs to browse the differentdirectories.
Option 2:
Press the DATABASE-button (15) to start the lookup function both the FOLDER and TRACK
displays start blinking.
Turnthe FOLDER knob (16) to browse the folders.
Turn the JOG WHEEL (22) to browse the selected folder at high speed. If you want to search more
precisely track by track, you can also turn the TRACK knob (17).
Once you have found the right track: press the LOAD TRACK-button (19).
TOTAL RANDOM ON A USB-drive:
This is the simple random function where any track on your USB-drive can be played randomly on player1:
Open the fader (53) for player1 on the audio mixer.
Press the SOURCE SELECT-button (14) ofplayer1 to choose one of the USB-drives.
Press the RANDOM-button (45) shortly until it is lit.
Press the PLAY-button (20) ofplayer1 to start random playback.
ENGLISH OPERATION MANUAL
SYNQ® 20/76 DMC2000
“SMART” RANDOM ON A USB-drive:
This is the “smart” random function where you have full control over which folder, genre, album or artist
you want to play in your random selection, perfect for background music in restaurants, shops, clubs &
bars without a dj. This is how it works:
Open the fader (53) for player1 on the audio mixer.
Press the SOURCE SELECT-button (14) of player1 to choose one of the USB-drives.
PLAY ONLY TRACKS FROM 1 FOLDER
Press & turn the TRACK-knob (17) to select the “Std” search-key.
Press the FOLDER knob (16), the display will show the currently selected directoryname.
Turn the FOLDER knob (16) to select the directory you want to play files from.
Press the RANDOM-button (45) for about 2seconds until the LED starts blinking.
Press the PLAY-button (20) to start random playback only from the selected folder.
PLAY ONLY TRACKS FROM 1 GENRE
Press & turn the TRACK-knob (17) to select the “Genre” search-key.
Press the FOLDER knob (16), the display will show the currently selected genre.
Press and turn the FOLDER knob (16) to select the first letter of the genre you want to choose.
If needed, turn the JOG WHEEL (22) while you keep the FOLDER knob (16) pressed to browse the
different genres starting with the same letter.
Press the RANDOM-button (45) for about 2seconds until the LED starts blinking.
Press the PLAY-button (20) to start random playback only from the tracks of the selected genre.
Remark1: to play only tracks from a certain artist or album, just repeat the actions but select the artist
or album search-key.
Remark2: please note that the “SMART” random function will only work properly on condition that you
ID3-tags are well maintained. A perfect “freeware” ID3-tag editor for this task is called “MP3TAG” and
can be downloaded from www.mp3tag.de !
ABOUT LOOPS:
CREATE A LOOP:
While a track is playing, press LOOP IN button (31) to program the starting point of the loop. Now press
the OUT button (32) to program the endpoint of the loop. The seamless loop starts playing at once. (With
some practice you will be able to create perfect loops!) While the loop is playing, you can press the OUT
button (32) again to exit the loop and continue the rest of the track.
It is possible to program a new loop, even when the current loop is still playing. While the loop is playing,
simply press the LOOP IN button (31) to set the starting point of the new loop. Now enter the endpoint by
pressing the OUT button (32).Your new loop is programmed and playing.
RESTART A LOOP:
This can be done in 3 ways:
When a loop is programmed and you left it by pressing the OUT button (32), just press RELOOP (33)
to restart the loop.
When a loop is programmed and you left it by pressing the OUT button (32), just press OUT again to
restart the loop. The point where you pressed OUT is now programmed as the new endpoint of the
loop.
When the loop is still playing, press the RELOOP button (33) to restart the loop immediately. You can
repeat this several times to create a “Stutter” effect.
EDIT A LOOP:
When a loop is programmed, press the RELOOP button (33) for about 2 seconds to enter “loop edit” mode.
While the loop is seamlessly playing, the alphanumerical display shows the time information of the loop
endpoint. Use the jog wheel to set the new loop endpoint. To make things very easy you can hear your
modifications to the loop endpoint continuously. If you also want to edit the loop intro point, press the
RELOOP-button (33) to toggle between the loop start and endpoint. When the loop is perfect, press the
LOOP OUT button (32) to save the new loop endpoint.

ENGLISH OPERATION MANUAL
SYNQ® 21/76 DMC2000
ABOUT EFFECTS:
In the descriptionof the effects you can already find a lot of information, don’t forget to also check that part!
USE THE EFFECTS IN BEAT SYNCHRONIZED MODE:
Press the FX-SYNC button (38) so it’s lit.
While music is playing you can press any of the 3 effects: the effect works in beat synchronized mode.
Use the EFFECT SYNC X/Y buttons (39+40) to choose different beat presets. Press the RATIO-button
(40) until it starts blinking to adapt the impactof the effect.
USE THE EFFECTS IN MANUAL MODE:
Press the FX-SYNC button (38) so it’s dark.
While music is playing you can press any of the 3 effects: use the JOG WHEEL (22) to change the effect
in real-time. Pressthe RATIO-button (40) until it starts blinking to adapt the impact of the effect.
ABOUT MEMORY:
DIFFERENT MEMORIES:
Before we talk about using the memory, we have to know the difference between “track memory” and
“permanent memory”:
Track Memory: This is the memory where the DMC2000 stores a set of up to four cue points and/or
loops forone track. You can set up a “track memory” for every single track on a USB-drive.
Example: your USB-drive contains 5000 tracks
for every track you can store up to 4 cue points
and/or loops. This makes a total of 5000 x 4 = 20000 cue points and/or loops on one USB-drive!
Permanent Memory: This is the large memory where all the cue points and loops are permanently
stored. In fact it’s an indexed collection of “track memories”. When you recall previously stored cue
points ofa certain track, you makea transfer from “permanent memory” to “track memory”.
Note: all cue points are stored in database files on your USB-drive. If you connect the drive to another
DMC2000 or DMC1000, all cue points can also be used immediately on this player.
USING THE “TRACK MEMORY”:
STORING A MASTER CUE POINT:
There are 2 ways to set a master cue point:
Press the LOOP IN (31) button during normal playback to set the new cue point (“CUE on the fly”).
Put the player in pause and use the jog/shuttle wheel to search for the exact location for the cue point.
Once this location is found, press LOOP IN button (31) to set the new cue point. (or press
PLAY/PAUSE button)
Once the cue point is programmed, just press the CUE button (21) to recall it.
STORING A SIMPLE CUE POINT TO THE “HOT CUE” BUTTONS:
First press the RECORD CUE button (25) to make the unit enter hot cue memory mode (RECORD CUE
button is on):
Press one of the four HOT CUE buttons (24) at the right moment during normal playback: the HOT
CUE button you just pressed changes to green color to indicate that the desired cue point is stored.
(“Cue on the fly”).
Put the player in pause and use the jog/shuttle wheel to search for the exact location for the cue point.
Once this location is found, press one of the four HOT CUE buttons to set the new cue point: the HOT
CUE button you just pressed changes togreen color to indicate that the desired cue point is stored.
Once the cue point is programmed, just press the HOT CUE button to start playback from the stored cue
point.
STORING A LOOP TO THE “HOT CUE” BUTTONS:
This is very similar to storing a simple cue point. The only difference is that you have to put the DMC2000
in loop mode first. When the loop is playing, you press the RECORD CUE button (25) to make the player
enter hot cue memory mode (RECORD CUE button is on). After this press one of the four HOT CUE
buttons (24): the HOT CUE button you just pressed changes to red color to indicate that the loop, playing
at that moment, is stored. You can store up to 4 loops per track!
DELETE THE “HOT CUE” BUTTONS:
You can easily delete the contents of a HOT CUE button by pressing the DELETE CUE button (26),
followed by the HOT CUE button you want to delete. Or simply store a new cue point or loop to this HOT
CUE button. You can also erase all four HOT CUE buttons together by pushing the DELETE CUE button
(26) for more than 2 seconds. You will notice that all 4 HOT CUE buttons turn dark to indicate that the
HOT CUE buttons are empty.
ENGLISH OPERATION MANUAL
SYNQ® 22/76 DMC2000
USING THE “PERMANENT MEMORY”:
For security reasons the cue points and loops stored in the HOT CUE buttons are not automatically stored
to the permanent memory. This means that if you recall a set of cue points and loops from permanent
memory to the HOT CUE buttons (which is track memory), you can change, edit and delete them as much
as you want. The permanent memory will not be affected until you make a backup of the HOT CUE
buttons to permanent memory.
STORING TO “PERMANENT MEMORY”:
Press the RECORD CUE button (25) until the display shows “Now saving” to indicate that the cue points
and loops in the HOT CUE buttons for that track are stored to permanent memory.
DELETE A TRACK IN “PERMANENT MEMORY”:
Select the track that you want to delete. Press the “DELETE CUE” (26) and “SYNC/Y” (40) buttons
together. The display asks “DEL TRACK?” if you press the YES button (PITCH BEND+ button), the track
information will be deleted in the permanent memory.
RECALLING “HOT CUE POINTS/LOOPS” FROM PERMANENT MEMORY:
Because it takes some seconds to load the permanent cue points, they are not automatically restored.
Sometimes you simply don’t need them so why would you wait for them? Below we explain how
everything works:
No cue points stored: When you select a track that has no cue points or loops stored in permanent
memory, nothing happens:you can start playback rightaway.
Cue points stored: When you select a track where cue points or loops are stored in permanent
memory, the DMC2000 shows “Load Cues?” and wants to know if you want to load the cue points.
This is what you can do:
You press the YES button: Press yes (pitch bend + button) to load the pre-stored cue points
and loops. The display shows RECALL while the Hot cue buttons are filled up.
You press the NO button: the cue points are not loaded and the display becomes normal.
You can start playback right away.
You do nothing: after some seconds the display becomes automatically normal and of
course the cue points are notloaded.
Note: in the setup menu (point4) you can choose to load the cue points automatically (autoload). In
that case the player asks nothing but simply loads the cue points.

ENGLISH OPERATION MANUAL
SYNQ® 23/76 DMC2000
SPECIFICATIONS
Power Supply: AC 100 - 240V, 50/60Hz
Power Consumption: 21W
Reference input level / impedance:
Line: 47kΩ/-14dBV (200mV) +/-0.1dB
Phono: 47kΩ/-51dBV (2.8mV) +/-0.1dB
Mic: 10kΩ/-56dBV (1.5mV) +/-0.1dB
Maxi input: (1kHz, THD=1%, EQ flat, max. gain, load=100kΩ)
Line: > +0dBV
Phono: > -38dBV
Mic: > -42dBV
Talkover: -20dB +/-2dB
Frequency response: (EQ flat, max. gain, load = 100kΩ)
Line: 20Hz - 20kHz +/-2dB
Phono: 20Hz - 20kHz +2/-3dB (RIAA)
Mic: 20Hz - 20kHz +2/-3dB
THD+N: (EQ flat, max. gain, w/20kHz LPF, A-weighted, load = 100kΩ)
Line: < 0.06% @ 1 KHz
Phono: < 0.08% @ 1 KHz
Mic: < 0.15% @ 1 KHz
Output level / impedance:
Master unbalanced: 1kΩ/3.8dBV (1.55V) +/-2dB
Master balanced (load=600Ω): 600Ω/+6dBm (1.55V) +/-3dB
Booth master: 1kΩ/3.8dBV (1.55V) +/-2dB
Headphones (load=32Ω): 33Ω/0dBV (1V) +/-2dB
Max. output: (1kHz, THD=1%, EQ flat, max. gain, load = 100kΩ)
Master: > +18dBV (8V) load=100kΩ
Headphones: > +4dBV (1,6V) load=32Ω
USB FORMAT:
File System: FAT12/16/32
Max. Hard disk capacity: 500GB
Max. Folders: 999
Max. Tracks / Folder: 999
Max. Q-DBASE track capacity: 9999
WAV FORMAT: PCM, 1411kbps.
MP3 FORMATS:
MPEG1 Layer3 (ISO/IEC11172-3): mono / stereo sampled at:32 - 44,1 - 48kHz
Bitrates: 32 – 320 Kbps
Bitrate modes: CBR (Constant Bitrate)or VBR (Variable Bitrate)
MPEG2 Layer3 (ISO/IEC13818-3): mono /stereo sampled at: 16 – 22,05 - 24kHz
Bitrates: 32 – 160 Kbps
Bitrate modes: CBR (Constant Bitrate)or VBR (Variable Bitrate)
MPEG2,5 Layer3: mono /stereo sampled at: 8 – 11,025 - 12kHz
Bitrates: 32 – 160 Kbps
Bitrate modes: CBR (Constant Bitrate)or VBR (Variable Bitrate)
Q-DBASE Software :
File extensions : .DBH + .dat + .DBX
System requirements : RAM 512MB
100MB free disk space
Microsoft®Win XP SP3 ~ Win Vista SP2 ~ Win 7
Dimensions: 299(D) x 420(W) x 89(H) mm
Weight: 4,42kg
Every information is subject to change without prior notice
You can download the latest version of this user manual on our website: www.beglec.com
FRANCAIS MODE D’EMPLOI
SYNQ® 24/76 DMC2000
MODE D’EMPLOI
Nous vous remercions d’avoir acheté ce produit SYNQ®. Veuillez lire ce mode d’emploi très attentivement
afin de pouvoir exploiter toutes les possibilités de cet appareil. Conservez ce manuel dans un endroit sûr
pour toute consultation future..
N'OUBLIEZ PAS D'ENREGISTRER VOTRE NOUVEL ACHAT SYNQ. VOUS RECEVREZ
AUTOMATIQUEMENT UN RAPPEL QUAND LES NOUVELLES MISES À JOUR DE
LOGICIEL SERONT DISPONIBLES!
SURFEZ SUR: WWW.SYNQ-AUDIO.COM/REGISTER/
CARACTERISTIQUES
Cet appareil ne produit pas d’interférences radio. Il répond aux exigences nationales et européennes. La
conformité a été établie et les déclarations et documents correspondants ont été déposés par le fabricant.
Ce contrôleur digital professionnel de médias proposeune solution "tout en un" extrêmement compacte qui
est en mesure de donner satisfaction même aux DJ les plus exigeants ! Tout ce dont vous avez besoin en
plus pour animer un événement, c'est une paire de haut-parleurs actifs !
En effet, cet appareil est bourré d'une foule de caractéristiques intéressantes, comme, par exemple :
De la musique en provenance de différentes sources peut être jouée et mixée sans raccord audible.
Deux lecteurs USB internes partagent le même disque dur USB et/ou le même stick USB, dont ils
peuvent lire n'importe quel fichier WAV ou MP3 ;
Présence de différentes entrées analogiques comme des tourne-disque, des lecteurs CD
supplémentaires, etc …
L'appareil est capable de contrôler tous les softwares MIDI populaires pour DJ ; quant au software
Deckadance LE, il est inclus à la livraison!
Possibilité d'utiliser 2 micros avec fonction talkover en même temps.
Q-DBase system: Système de recherche doté de toutes les fonctions existantes pour retrouver aisément
un morceau,et ce, même sur des disques durs de grande capacité jusqu’à 500GB!
Software Windows Q-DBase-builder inclus.
Les effets digitaux (écho, flanger, filtre, brake) peuvent être utilisé en fonction manuelle ou réagir de
manière synchronisée au rythme de nombreuses présélections.
Fonction d'édition des boucles sans raccord en temps réel !
PCMS (Permanent Cue Memory System): Pour chaque morceau, quatre points de cue et boucles sans
raccord peuvent être mémorisés et rappelés à tout moment
Fonction scratch et pitch bend, tous deux de haute précision grâce à la molette sensible au toucher
La molette possède plusieurs modes : vinyl, CDJ et A.CUE scratch!
Un software pour DJ peut utiliser des disques en vinyle codés pour contrôler la lecture et produire des
effets de scratch sur les fichiers WAV et MP3.
Ecrans VFD (afficheur luminescent sous vide) de 2 x 10 caractères affichant toutes les informations utiles,
y compris les tags ID3.
SMART RANDOM : la lecture aléatoire peut être limitée à un genre ou à un artiste (par exemple, ne jouer
que des slows!).
Firmware Synq original pouvant être mis à jour, et qui garantit une fonctionnalité aussi sophistiquée que
conviviale.
Menu de configuration totalement adaptable pour les fonctions MIDI et autres.
Pitch control (+/-6%, 10%, 16%, +16%/-100%)
Pitch lock (Master Tempo)
Mixer digital à 2 canaux possédant toutes les fonctions utiles, avec cross fader réglable, sorties
symétriques et booth master.
Casque de monitoring PFL permettant de mélanger les canaux 1 et 2 et avec ajustement du volume.
Et il y a encore beaucoup d'autres atouts à découvrir …

FRANCAIS MODE D’EMPLOI
SYNQ® 25/76 DMC2000
AVANT L’UTILISATION
Quelques instructions importantes:
Avant d’utiliser cet appareil, assurez-vous de l’absence de dommages liés au transport. En cas de
dommages,n’utilisez pas l’appareil etcontactez le vendeur.
Important: Cet appareil a quitté notre usine en parfaite condition et bien emballé. Il est primordial que
l’utilisateur suive les instructions de sécurité et avertissements inclus dans ce manuel. La garantie ne
s’applique pas en cas de dommage lié à une utilisation incorrecte. Le vendeur ne prend pas la
responsabilité des défauts ou de tout problème résultant du fait de n’avoir pas tenu compte des mises en
garde de cemanuel.
Conservez ce manuel dans un endroit sûr pour toute consultation future. Si vous vendez l’appareil,
assurez-vous d’y joindre ce manuel également.
Afin de protéger l’environnement, merci de recycler les emballages autantque possible.
Vérifiez le contenu:
Vérifiez si l'emballage contient bien les articles suivants :
Le DMC2000
mode d’emploi
1 câble USB
1 câble d’alimentation
INSTRUCTIONS DE SECURITE:
Afin d’éviter tout risque d’incendie ou de décharge électrique, ne pas exposer cet appareil à la pluie ou
l’humidité.
Pour éviter la formation de condensation à l’intérieur de l’appareil, patientez quelques minutes pour laisser
l’appareil s’adapter à la température ambiante lorsqu’il arrive dans une pièce chauffée après le transport.
La condensation empêche l'appareil de fonctionner de manière optimale, et elle peut même causer des
dommages.
Cet appareil est destiné à une utilisation à l’intérieur uniquement.
Ne pas insérer d’objet métallique ou renverser de liquide dans l’appareil. Aucun objet contenant un liquide,
tels que des vases, ne peut être placé sur cet appareil. Cela risquerait de provoquer une décharge
électrique ou un dysfonctionnement. Si un corps étranger est introduit dans l’appareil, déconnectez
immédiatement de la source d’alimentation.
Aucune source de flamme nue, telle que desbougies allumées,ne peut être placée sur l'appareil.
Ne pas couvrir les orifices de ventilation, un risque de surchauffe en résulterait.
Ne pas utiliser l'appareil dans un environnement poussiéreux et le nettoyer régulièrement.
Ne pas laisser l'appareil à portée des enfants.
Les personnes non expérimentées ne doivent pas utiliser cet appareil.
La température ambiante maximale d’utilisation de l’appareil est de 40°C. Ne pas l’utiliser au-delà de cette
température.
CAUTION
ATTENTION:
afin de réduire le risque d’électrocution,
n’enlevez jamais le couvercle de l’appareil. Il n’y a aucune
pièce à l’intérieur de l’appareil que vous puissiez
remplacer vous-même. Confiez l’entretien uniquement à
des techniciens qualifiés.
La flèche dans un triangle met l'utilisateur en garde contre la présence de haute tension sans
isolation dans l'appareil, ce qui peut causer un risque d'électrocution.
Un point d'exclamation dans un triangle prévient de la présence d'instructions relatives au
fonctionnement et à la maintenance se trouvant dans le manuel fourni avec l'appareil.
Ce symbole signifie: uniquement pour usage à l'intérieur.
Ce symbole signifie : Lire le mode d’emploi.
Ce symbole signifie: appareil construit selon les normes de sécurité classe II
FRANCAIS MODE D’EMPLOI
SYNQ® 26/76 DMC2000
Rien ne doit se trouver contre l'appareil : la distance minimum pour en permettre une ventilation suffisante
est de 5cm.
Débranchez toujours l’appareil si vous ne l’utilisez pas de manière prolongée ou avant d’entreprendre des
réparations.
Les installations électriques ne peuvent être faites que par du personnel qualifié et conformément aux
règlements de sécurité électrique et mécanique en vigueur dans votre pays.
Assurez-vous que la tension d’alimentation de la source d’alimentation de la zone dans laquelle vous vous
trouvez ne dépasse pas celle indiquéeà l’arrière de l’appareil.
La prise doit toujours être accessible pour que le cordon secteur puisse être enlevé à tout moment.
Le cordon d’alimentation doit toujours être en parfait état. Mettez immédiatement l’unité hors tension si le
cordon devait être écrasé ou endommagé. Pour éviter tout risque de choc électrique, le cordon doit être
remplacé par le constructeur, son agent ou un technicien qualifié.
Ne laissez jamais le cordon d’alimentation entrer en contact avec d’autrescâbles !
Quand l’interrupteur principal est en position OFF, cet appareil n'est pas complètement isolé du courant
230V !
Utilisez toujours des câbles appropriés et certifiés lorsque vous installez l’appareil.
Pour éviter toute décharge électrique, ne pas ouvrir l’appareil. En dehors du fusible principal, il n’y a pas
de pièces pouvant être changées parl’utilisateur à l’intérieur.
Ne jamais réparer ou court-circuiter un fusible. Remplacez systématiquement un fusible endommagé par
un fusible de même type et ayant les mêmes spécifications électriques !
En cas de problèmes de fonctionnement sérieux, arrêtez toute utilisation de l’appareil et contactez votre
revendeur immédiatement.
Utilisez l’emballage d’origine si l’appareil doit être transporté.
Pour des raisons de sécurité, il est interdit d’apporter une quelconque modification à l’appareil non
spécifiquement autorisée par les parties responsables.
CONSEILS D'INSTALLATION:
Placer ou utiliser l’appareil pendant de longues périodes à proximité de sources de chaleur tel des
amplificateurs, des Spot’s, etc. peut entraver le bon fonctionnement de l’appareil et peut même
l’endommager.
Evitez au maximum les chocs etles vibrations pendant le transport.
Si l’appareil est fixé dans un rack ou un flight case, faites attention à ce qu’il soit bien ventilé, afin
d’assurer l’évacuationde la chaleur de l’appareil.
Pour éviter la formation de condensation à l’intérieur de l’appareil, laissez le s’adapter à la température
ambiante si vous l’installez dans un endroit chaud après l’avoir transporté à l’extérieur. La condensation
peut parfois empêcher l’appareil de fonctionner correctement.
Choisissez avec prudence l’endroit ou vous allez placer l’appareil. Evitez la présence de sources de
chaleur. Evitez des endroits assujettis aux vibrations, des endroits poussiéreux ou humides.
Pour éviter des incendies ou l’électrocution, n’exposezjamais l’appareil à la pluie où a l’humidité.
Pour éviter l’électrocution, n’ouvrez pas le couvercle de protection. Si un problème surgit, contactez votre
revendeur.
N’insérez jamais d’objets métalliques et ne renversez jamais de liquide dans l’appareil. L’électrocution ou
le mal fonctionnement peuvent en résulter.
Le lecteur ne devrait être réglé ou réparé que par des personnes qualifiées du service après vente
Cet appareil peut causer des interférences à la réception des radios ou télévisions.
NETTOYAGE DU LECTEUR:
Nettoyez l’appareil à l’aide d’un chiffon doux, légèrement humide. Evitez d’introduire de l’eau à l’intérieur de
l’appareil. N’utilisez pas de produits volatiles tels le benzène ou le thinner qui peuvent endommager
l’appareil.

FRANCAIS MODE D’EMPLOI
SYNQ® 27/76 DMC2000
CONTRÔLES ET FONCTIONS
1. ALIMENTATION: Connectez l’appareil au 100-240V AC, en utilisant le câble d’alimentation fourni avec
l’appareil.
2. POWER (Interrupteur de mise sous tension): Si l’interrupteur est enfoncé, l’appareil est mis sous
tension.
3. Connexion USB 2 : il s'agit de la seconde connexion USB (de type A), utilisée pour connecter n'importe
quel appareil USB de stockage de masse qui a été formaté aux formats FAT ou FAT32. Par défaut, cette
entrée est destinée à connecterun disque dur
4. Connexion USB MIDI / LINK : cette connexion USB (de type B) est utilisée pour connecter le lecteur à
un ordinateur muni d'un software MIDI destiné aux DJ. Se référer au chapitre 'Adressage' pour de plus
amples informations.
5. SORTIE SYMETRIQUE MASTER: les connecteurs XLR peuvent être utilisés pour connecter cette table
de mixage à n’importe quelle entrée symétrique d’amplificateur ou à des haut-parleurs actifs en utilisant
un câble spécifique pour signal symétrique.
6. SORTIES MASTER ASYMETRIQUE: la sortie “master” transmet le même signal de sortie que la sortie
master symétrique (5), mais est dans cecas asymétrique.
7. SORTIE 'BOOTH MASTER' : la sortie “booth master” transmet le même signal de sortie que la sortie
master, mais il peut être réglé indépendamment par le potentiomètre Booth (49). Utilisez ces sorties
pour connecter des amplificateurs asymétriques ou connectez y un enregistreur audio.
8. INTERRUPTEUR PH/LINE : Utilisez l’interrupteur pour changer l’entrée Ligne en entrée Phono (platine
vinyl)
9. ENTREE ANALOGIQUE : on peut connecter des tourne-disque ou des lecteurs de CD externes aux
deux canaux du mixer ; ceux-ci peuvent être mixés en même temps avec des pistes provenant des
lecteurs internesdu DMC2000 et/ou de softwarespour DJ venant de votre PC ou de votre MAC.
10. GROUND (GND) CONNECTION: Beaucoup de platines vinyle sont équipés d’un connecteur de masse
(GND). Il est conseillé de connecter ce signal de masse au connecteur GND. Si votre platine vinyle ne
dispose pas d’un câble de masse, vous ne devez pas utiliser ce connecteur.
11. DJ MIC INPUT JACK: jack Combo. Accepte les micros symétriques pourvus d’un connecteur XLR, ainsi
que les micros asymétriques pourvus d’un connecteur jack mono de 1/4”. Cette entrée est
principalementutilisée pour le micro DJ. Le talkover n’affecte pas le niveau du signal de cette entrée.
12. ORIFICE DE SECURITE 'KENSINGTON' : ce dispositif peut être employé pour protéger le DMC2000
contre le vol d'un opportuniste malpensant. Il faut néanmoins garder en tête qu'il ne s'agit absolument
pas d'un dispositif antivol sûr à 100 % ! On peut se procurer un câble de sécurité Kensington dans
pratiquement n'importe quel magasin d'informatique.
FRANCAIS MODE D’EMPLOI
SYNQ® 28/76 DMC2000
13. Connexion USB 1 : il s'agit de la première connexion USB (de type A), utilisée pour connecter n'importe
quel appareil USB de stockage de masse qui a été formaté aux formats FAT ou FAT32. Par défaut, cette
entrée estutilisée pour connecter une mémoirede masse USB occasionnelle, comme les sticks usb,etc
14. INVERSEUR DE SELECTION DE LA SOURCE : utilisez cette touche pour sélectionner la source audio
désirée : USB1 ou USB2.
15. Touche DATABASE / NEXT TRACK : voici une touche très importante lorsqu'il s'agit de trouver le
morceau suivant facilement et rapidement, même lorsque la piste précédente est toujours en phase de
lecture. Cette touche fonctionne de deux manières différentes:
fonction NEXT TRACK : cette fonction est utilisée pour entamer une recherche sur un appareil de
stockage de masse qui n'est pas équipé du système 'Q-DBase system'. Les recherches ne peuvent
avoir pour objet que des nombres correspondant à des morceaux ou à des dossiers.
Fonction DATABASE : cette fonction est utilisée pour entamer une recherche sur des appareils de
stockage de masse sur lesquels sont installés les fichiers du système 'Q-DBase system'. Vous
pouvez faire des recherches alphabétiques sur le nom des artistes, le titre des morceaux, le genre
ou le nom des albums. C'est très rapide et vous n'avez pas besoin de savoir à quel endroit vos
fichiers se trouvent.
Une fois que le morceau recherché est localisé, il suffit d'appuyer sur la touche LOAD TRACK (19) pour
charger la piste en question.
Pour ces deuxfonctions, prière de se reporter au chapitre 'Utilisation' pour de plus amples informations.
16. Bouton FOLDER (dossier) : Ce bouton possède plusieurs fonctions :
Si vous faites une recherche sur un appareil sans Q-DBASE : faites tourner ce bouton pour naviguer
parmi les dossiers d'un appareil de stockage de masse lorsque vous n'utilisez pas le système Q-
DBASE.
Si vous faites une recherche avec Q-DBASE : appuyez en même temps que vous faites tourner le
bouton afin de sélectionner le premier caractère de la clé de recherche que vous désirez trouver.
Faites tourner le bouton pour aller à la clé de recherche suivante qui commence par le même
caractère. Appuyez sur le bouton pour afficher la clé de recherche sur la seconde ligne de texte de
l'écran.
Si vous êtes dans le menu de configuration : faites tourner ce bouton pour naviguer parmi les
différentes options de ce menu.

FRANCAIS MODE D’EMPLOI
SYNQ® 29/76 DMC2000
Pour de plus amples informations, prière de se reporter aux chapitres 'UTILISATION' et 'MENU DE
CONFIGURATION'.
17. Bouton TRACK : Ce bouton possède plusieurs fonctions :
Si vous faites une recherche sur un appareil sans Q-DBASE : faites tourner ce bouton pour naviguer
parmi les morceaux contenus dans un dossier d'un appareil de stockage de masse lorsque vous
n'utilisez pas le système Q-DBASE.
Si vous faites une recherche avec Q-DBASE, deux options sontpossibles :
faites tourner le bouton pour naviguer parmi tous les fichiers qui commencent tous par la
même lettre (celle qui avaitété sélectionnée juste avant au moyen de la touche FOLDER) ;
Appuyez sur le bouton pendant que vous le faites tourner pour modifier la clef de recherche
dans la base de données ; vous pouvez choisir les clefs de recherche suivantes :
Art : recherche basée sur les noms des artistes, par ordre alphabétique (clef par défaut) ;
Alb : recherche basée sur les noms des albums, par ordre alphabétique ;
Gen : recherche basée sur les gentes de musique, par ordre alphabétique ;
Std : recherche n'utilisant pas le système Q-DBASE : on recherche simplement les
dossiers et les morceaux en "mode manuel".
Pendant la lecture : Appuyez sur le bouton pour visionner les différents tags ID3 à l'écran :
Si vous appuyez sur le bouton une fois : Le nom de l'album du morceau en cours est affiché ;
Si vous appuyez sur le bouton deux fois : Le nom du genre musical du morceau en cours est
affiché ;
Si vous appuyez sur le bouton trois fois : La vitesse d'échantillonnage du morceau en cours
est affichée ;
Si vous êtes dans le menu de configuration : faites tourner le bouton pour changer les
réglages de l'option sélectionnée dans ce menu.
Pour de plus amples informations, prière de se reporter au chapitre 'UTILISATION'.
18. Touches SEARCH: sont utilisées pour effectuer desrecherché rapides dans la plage.
19. Touche LOAD TRACK : Ce bouton possède plusieurs fonctions :
Charger un morceau : ce dernier est le résultat d'une recherche ayantutilisé la touche database/next
track ;
Ouvrir le menu de configuration : il faut appuyer environ 3 secondes sur la touche pour accéder à ce
menu ;
Fermer le menu de configuration : il faut appuyer brièvement sur la touche pour quitter le menu de
configuration.
Pour de plus amples informations, prière de se reporter aux chapitres 'UTILISATION' et 'MENU DE
CONFIGURATION'.
20. Touche PLAY/PAUSE: chaque fois que vous appuyez sur la touche PLAY/PAUSE le lecteur passera
du mode lecture au mode pause ou du mode pause au mode lecture. La touche clignote aussi
longtemps que le lecteur est en mode pause.
21. Touche CUE: Si vous appuyez sur la touche CUE pendant la lecture vous obtiendrez un retour
immédiat vers la position de départ de la lecture initiale. La lecture démarre immédiatement à partir du
point de départ programmé (CUE point) et continuera tant que vous tenez cette touche enfoncée. Le
lecteur retourne à nouveau au point de départ « CUE point » dès que vous relâchez la touche CUE. Si le
lecteur est en mode pause (la touche Play/Pause clignote) la roue “jog wheel” peut être utilisée pour
définir un nouveau point de départ. En appuyant sur la touche "PLAY/PAUSE" ou «LOOP IN » puis sur
la touche "CUE", vous pouvez confirmer ce nouveau point de départ.
22. MOLETTE TACTILE : La molette de ce lecteur comporte deux parties distinctes :
Partie centrale tactile : pour se rapprocher du "toucher vinyle" le plus possible, mais aussi pour
améliorer la performance au niveau du scratch, la partie centrale de la molette fait appel à une
technologie déposée réagissant au toucher. Grâce aux touches WHEEL MODE (23), il vous est
loisible de modifier les réactions de cette partie centrale ; prière de se reporter à la description des
touches WHEEL MODE (23) pour de plus amples informations.
Bord extérieur : il s'agit de la partie de la molette qui est de couleur argentée, et qui n'est pas
sensible au toucher : cette surface ne tient pas compte du mode sélectionné pour la molette : le bord
extérieur peut donc toujours être utilisé pour le pitch bending, sauf quand on utilise un des effets
digitaux.
23. Touche WHEEL MODE : elle permet de désigner l'un des trois modes disponibles de la molette tactile ;
la partie centrale tactile et le bord extérieur réagissent différemment quand elle est utilisée avec des
musiques en provenance des lecteurs internes ou des softwares pour DJ de votre ordinateur.
FRANCAIS MODE D’EMPLOI
SYNQ® 30/76 DMC2000
Mode VINYL : à utiliser pour son scratchextrêmement réaliste, sur n'importe quel fichier MP3.
Partie centrale tactile : Pendant la lecture, la musique s'arrête immédiatement dès que vous
touchez la molette : la vitesse et la direction de lecture sont à ce moment totalement
contrôlées par les mouvements de votre main. En mode pause, il est très facile de déterminer
un nouveau point de cue.
Bord extérieur : Pendant la lecture, vous pouvez utiliser le bord extérieur pour le pitch
bending, ce qui permet de synchroniser le rythme de deux morceaux différents. En mode
pause, vous entendrez les boucles, très courtes et très typiques, qui donnent la possibilité de
fixer un point de cue avec une précision d'un 75ème de seconde.
Mode CDJ : il s'agit du mode standard, utilisé par la plupart des lecteurs destinés aux DJ. Les deux
parties, que ce soit la partie centrale tactile ou le bord extérieur, se comportent de manière
identique. Pendant la lecture d'une piste, la molette est à même de modifier la vitesse de la musique
jusqu'à environ 100 %, et ce, en faisant tourner la molette dans le sens des aiguilles d'une montre
pour accélérer la vitesse, ou dans le sens contraire des aiguilles d'une montre pour la ralentir. La
proportion du changement de vitesse est déterminée par la vitesse de rotation. En mode pause,
vous entendrez les boucles, très courtes et très typiques, qui donnent la possibilité de fixer un point
de cue avec uneprécision d'un 75ème de seconde.
Mode A.CUE SCRATCH : ce mode est très semblable au mode vinyle, mais le scratch commence
toujours à partir du point de cue, et les réactions du bord extérieur sont similaires à celle du mode
vinyle :
Partie centrale tactile : pendant la lecture, la musique s'arrête immédiatement, et elle
retourne au point de cue actif chaque fois que l'on touche la molette : la vitesse et la direction
de lecture sont à ce moment totalement contrôlées par les mouvements de votre main. En
mode pause, on peut facilement fixer un nouveau point de cue, mais tout d'abord, le lecteur
retourne au point de cue actif.
Bord extérieur : Pendant la lecture, vous pouvez utiliser le bord extérieur pour le pitch
bending, ce qui permet de synchroniser le rythme de deux morceaux différents. En mode
pause, vous entendrez les boucles, très courtes et très typiques, qui donnent la possibilité de
fixer un point de cue avec une précision d'un 75ème de seconde.
24. Touches HOT CUE : il s'agit de quatre touches programmables qui peuvent enregistrer des points de
cue ordinaires et/ou des boucles. Lorsqu'un point de cue ordinaire est enregistré, la touche
correspondante est verte, et quand une boucle est enregistrée, la touche correspondante est rouge.
Tous les points de cue et les boucles enregistrés peuvent être stockés dans la mémoire permanente
pour une utilisation future. Cette possibilité est appelée “PCMS", soit Permanent Cue Memory System.
Prière de se reporter au chapitre 'UTILISATION' pour de plus amples informations concernant la
programmation des points de cue, etc …
25. RECORD CUE (enregistrer un point de cue) : appuyez sur cette touche avant de faire de même sur
l'une des 4 touches HOT CUE (24) afin d'enregistrer un nouveau point de cue ou une nouvelle boucle.
Pour apprendre comment enregistrer un nouveau point de cue ou une nouvelle boucle, prière de se
reporter au chapitre 'UTILISATION'.
Pour enregistrer les cues vers la mémoire permanente : le système HOT CUE utilise deux sortes
de mémoires : la "mémoire de piste", temporaire, et la mémoire permanente. Les nouveaux hot cues
ne sont enregistrés que sur la mémoire de piste temporaire. Si vous voulez garder en mémoire
permanente les hot cues pour un usage ultérieur, il faut enregistrer ces informations vers la mémoire
permanente. Pour enregistrer les cues vers la mémoire permanente, il suffit de maintenir la touche
RECORD CUE jusqu'à ce que l'écran affiche le message "Saving".
Pour enregistrer des réglages personnels : Il faut appuyer en même temps sur les touches
RECORD CUE et X/SYNC (39) pour enregistrer certains paramètres personnels qui sont en cours
d'utilisation, comme : niveau du pitch, lecture simple ou continue, affichage du temps normal,
réglages de la molette, auto cue, mode BPM auto, pitch en ou hors service, clef de recherche dans
la base de données, vitesse de démarrage et de frein.
26. Touche DELETE CUE (supprimer un point de cue) : Ce bouton possède plusieurs fonctions :
DELETE 1 HOT CUE (supprimer 1 point de hot cue) : appuyez sur la touche DELETE CUE, puis
appuyez ensuite sur la touche HOT CUE que vous voulez supprimer de la mémoire de piste. Le
bouton concerné va s'éteindre.
DELETE 4 HOT CUE (supprimer 4 points de hot cue) : appuyez sur la touche DELETE CUE
pendant environ 2 secondes afin de supprimer tous les hotcues de la mémoire de piste.
DELETE TRACK (supprimer la piste) : appuyez en même temps sur la touche DELETE CUE et la
touche Y/RATIO (40) afin de supprimer les hot cues présents sur la piste et enregistrés dans la

FRANCAIS MODE D’EMPLOI
SYNQ® 31/76 DMC2000
mémoire permanente. Etant donné qu'il n'est pas possible de revenir en arrière, l'écran vous
demande d'abord si vous êtes sûr de vous : en recourant aux touches de PITCH BEND (29), vous
pouvez choisir entre YES et NO.
Pour de plus amples informations, prière de se reporter au chapitre 'UTILISATION'.
27. Touche TEMPO RANGE : appuyez sur ce bouton pour sélectionner les différentes fourchettes de
vitesse disponibles : +/-6%, +/-10%, +/-16%, +16/-100%. Les fourchettes inférieures rendent le speed
fader (28, curseur de vitesse) plus précis, quant aux vitesses supérieures, elles sont surtout indiquées
pour réaliser des effets spéciaux. Pour mettre cette fonction hors service, il suffit d'appuyer sur la touche
pendant environ une seconde, jusqu'à ce que les indicateurs de vitesse s'éteignent. Appuyez de
nouveau sur la touche pour réactiver le contrôle de vitesse.
28. Curseur SPEED (de vitesse) : utilisé pour régler la vitesse de lecture du morceau en cours de lecture.
Vous pouvez mettre en ou hors service la fonction de contrôle de vitesse ou changer sa fourchette avec
la touche TEMPO RANGE (27)
29. Touches PITCH BEND: La vitesse augmente si vous appuyez sur la touche “+” et retourne à sa vitesse
initiale dès que vous la relâchez. La vitesse de lecture diminue si vous appuyez sur la touche “– ” et
retourne à sa vitesse initiale dès que vous la relâchez. Ces touches peuvent être utilisées pour
synchroniser le tempo des 2 lecteurs. Elles sont aussi utilisées pour confirmer (ou non) les questions qui
sont parfois affichées à l’écran.
30. Touche KEY LOCK: (Master tempo) active la fonction Pitch Lock. Cette fonction vous permet de faire
des réglages de vitesse de lecture en utilisant le curseur SPEED, mais sans altérer la tonalité (hauteur
du son).
31. Touche LOOP IN: Vous permet de définir le point CUE sans arrêter la lecture (CUE VOLANT).
Cette touche définit également le début d’une boucle sans fin (seamless loop): fixe le repère du début de
la boucle ; il faut appuyer sur la touche LOOP OUT pour fixer le repère de fin de boucle et démarrer la
lecture en mode loop (boucle).
Pour de plus amples informations, prière de se reporter au chapitre 'UTILISATION'.
32. OUT/EXIT button: est utilisée pour déterminer la fin de la boucle pendant la création de boucles (loops).
Le lecteur CD reproduira la boucle sans fin jusqu'à-ce que vous appuyez a nouveau sur cette touche
pour sortir de la boucle et continuer la lecture normale. Quand une boucle est programmée mais pas
activé vous pouvez également redémarrer la boucle avec cette touche. L’endroit où vous appuyez sur la
touche pendant la lecture sera mémorisé comme nouveau point de sortie de la boucle. Chaque fois que
vous appuyez sur la touche OUT/EXIT pendant que vous êtes en mode d’édition de boucle, vous sortez
du mode d’édition de boucle et vous sauvez en même temps le nouveau point de sortie de boucle.
33. Touche RELOOP/STUTTER: Cette touche a 3 fonctions:
RELOOP: quand une boucle à été programmée et que vous avez appuyé sur la touche OUT/EXIT,
appuyez sur la touche reloop pour réactiver la boucle. Pour sortir de la boucle appuyez sur la
touche OUT/EXIT. (les points de départ et de sortie de la boucle restent inchangés)
STUTTER: Quand une boucle est activée (en lecture) vous pouvez appuyer sur cette touche pour
redémarrer instantanément la boucle à partir de son point de départ. Vous pouvez également
appuyer sur cette touche quand une plage n’est pas reproduite en boucle. Chaque fois que vous
appuyez sur la touche RELOOP/STUTTER, vous redémarrez la musique à partir de son point de
départ programmé.
L’effet “stutter” (bégaiement) vous permet d’ajouter une touche de créativité supplémentaire à votre
prestation.
ENTRER DANS LE MODE D’EDITION DE BOUCLE: quand une boucle est programmée (les
touches LOOP IN et OUT/EXIT sont allumées) vous pouvez entrer dans le mode d’édition de
boucle en appuyant sur la touche RELOOP/STUTTER jusqu’à ce que “ OUT EDIT ” soit affiché
à l’écran. Pendant que vous êtes en mode d'édition de boucle, vous pouvez passer de “ OUT EDIT
” à “ IN EDIT ” et vice versa.
34. Touche ECHO EFFECT : appuyez sur cette touche pour activer l'effet d'écho. Suivant le statut du mode
SYNC (manuel ou synchronisé au rythme),différents réglages sont possibles :
Mode manuel : la touche FX-SYNC (38) reste éteinte. Vous pouvez régler tous les paramètres
manuellement en utilisant les contrôles suivants :
Molette (22) : à utiliser pour régler le temps d'écho entre 1 ms et 2000 ms.
Touche Y/RATIO (40) : tant que la touche Y/RATIO clignote, on peut utiliser la molette (22)
pour changer la balance (entre son non traité etson traité) de l'effet.
Mode synchronisé au rythme : la touche FX-SYNC (38) est allumée. Vous pouvez utiliser les
contrôles suivants :
FRANCAIS MODE D’EMPLOI
SYNQ® 32/76 DMC2000
Touches EFFECT SYNC (39+40) : choisissez une des présélections d'écho synchronisé au
rythme.
Touche Y/RATIO (46) : tant que la touche Y/RATIO clignote, on peut utiliser la molette (22)
pour changer la balance (entre son non traitéet son traité) de l'effet.
35. Touche FLANGER EFFECT : appuyez sur cette touche pour activer l'effet de flanger. Suivant le statut
du mode SYNC(manuel ou synchronisé au rythme), différents réglages sont possibles :
Mode manuel : la touche FX-SYNC (38) reste éteinte. Vous pouvez régler tous les paramètres
manuellement en utilisant les contrôles suivants :
Molette (22) : à utiliser pour modifier l'effet manuellement.
Touche Y/RATIO (40) : tant que la touche Y/RATIO clignote, on peut utiliser la molette (22)
pour changer la balance (entre son non traitéet son traité) de l'effet.
Mode synchronisé au rythme : la touche FX-SYNC (38) est allumée. Vous pouvez utiliser les
contrôles suivants :
Touches EFFECT SYNC (39+40) : choisissez une des présélections de balayage
synchronisé au rythme.
Touche Y/RATIO (40) : tant que la touche Y/RATIO clignote, on peut utiliser la molette (22)
pour changer la balance (entre son non traité etson traité) de l'effet.
36. Touche FILTER EFFECT : appuyez sur cette touche pour activer l'effet de filtre. Suivant le statut du
mode SYNC (manuel ou synchronisé au rythme),différents réglages sont possibles :
Mode manuel : la touche FX-SYNC (38) reste éteinte. Vous pouvez régler tous les paramètres
manuellement en utilisant les contrôles suivants :
Molette (22) : à utiliser pour modifier manuellementla fréquence de coupure du filtre.
Touche Y/RATIO (40) : tant que la touche Y/RATIO reste allumée, on peut utiliser la molette
(22) pour changer la profondeur (facteur Q) de l'effet de filtre.
Mode synchronisé au rythme : la touche FX-SYNC (38) est allumée. Vous pouvez utiliser les
contrôles suivants:
Touches EFFECT SYNC (39+40) : choisissez une des présélections de balayage
synchronisé au rythme.
Touche Y/RATIO (40) : tant que la touche Y/RATIO reste allumée, on peut utiliser la molette
(22) pour changer la profondeur (facteur Q) de l'effet de filtre.
37. Touche BRAKE: appuyez sur cette touché pour active l’effet de frein. Vous pouvez dès à présent
déterminer la vitesse d’accélération / décélération de la musique quand vous activez la touche
PLAY/PAUSE (20). Vous pouvez régler les paramètres à l’aide des touches (39+40), voir ci-dessous.
38. Touche FX SYNC : appuyez sur cette touche pour traiter les effets soit en mode manuel, soit en mode
synchronisé au rythme ! Pour de plus amples informations, prière de se reporter aux points (34+35+36).
39. Touche EFFECT SYNC/START: cette touche possède plusieurs fonctions, dépendant de l’effet choisi:
Effets synchronisés: La touche est allumée quand un effet, synchronisé au rythme de la musique,
est utilisé. Vous pouvez maintenant choisir comment vous voulez que l’effet soit synchronisé au
rythme de la musique. Utilisez cette touché pour diviser le tempo par 2.
Effet BRAKE: appuyez sur cette touché pour modifier le temps d’accélération (temps nécessaire
pour passer de l’arrêt à la vitesse maximale). Quand la touche est allumée, vous pouvez utiliser la
molette JOG (22) pour modifier la durée de 0,0s (démarrage instantané)à 10s. (démarrage très lent)
40. Touche EFFECT SYNC/STOP/Y/RATIO: cette touche possède plusieurs fonctions, dépendant de l’effet
choisi:
Effets synchronisés: La touche est allumée quand un effet, synchronisé au rythme de la musique,
est utilisé. Vous pouvez maintenant choisir comment vous voulez que l’effet soit synchronisé au
rythme de la musique. Utilisez cette touche pour doubler le tempo.
Effet BRAKE: appuyez sur cette touché pour modifier la durée de décélération (temps nécessaire
pour passer de la vitesse maximale à l’arrêt). Quand la touche est allumée, vous pouvez utiliser la
molette JOG (22) pour modifier la durée de 0,0s (arrêt instantané) à 10s. (temps d’arrêt très long)
Paramètre d’IMPACT: quand un des 3 effets DSP est activé, vous pouvez appuyer sur la touché
jusqu’à ce qu’elle commence à clignoter. Vous pouvez maintenant régler l’impact de l’effet
sélectionné. Voir également la description des touches EFFECT (34+35+36).
41. Touche TIME: La touche TIME vous permet de choisir entre l’affichage du temps de lecture écoulé
(elapsed) et le temps restant d’une plage (remaining/track))
42. SGL/CTN: Vouspouvez choisir entre “single track mode” et “continuous play”.
Continuous play: toutes les plages seront reproduites sans interruption. (le plus souvent utilisé
dans les tavernes)

FRANCAIS MODE D’EMPLOI
SYNQ® 33/76 DMC2000
Single track: La lecture s’arrête à la fin de la plage et attends au début de la plage suivante. (le
plus souvent utilisé par les deejays)
Appuyez sur la touche SGL/CNT pendant plus d’une seconde pour passer du mode normal au mode
“auto CUE” ou inversement. En mode “auto CUE” le lecteur attendra à la première note musicale de la
plage. Ce qui veut dire que les morceaux mal indexés ne poseront pas de problèmes aux capacités de
démarrage instantané du lecteur. Ceci estune caractéristique très utile pour les deejays!
43. Touche TAP/SHIFT: Cette touche possèdedeux fonctions :
Fonction TAP : Ce lecteur possède un compteur automatique de BPM. Dans quelques rares cas il
se pourrait que le compteur automatique n’arrive pas à calculer le tempo comme il devrait le faire
(tempo irrégulier ou simplement pas de battement à détecter). Dans ces cas vous pouvez aider le
compteur de tempo en tapant manuellement sur cette touche au rythmede la musique. Vous pouvez
retourner au compteur de tempo automatique en appuyant sur la touche TAP jusqu’à ce que
“AUTOBPM” s’allume dans le coin supérieur droit de l’écran.
Fonction SHIFT : cette touche n'est utilisée qua dans le cas où le lecteur est utilisé en tant que
contrôleur MIDI. La fonction SHIFT double les fonctions de chaque contrôle : maintenez la touche
SHIFT enfoncée pendant que vous utilisez un autre contrôle, et vous obtiendrez une fonction
supplémentaire secondaire. Pour de plus ample informations, se reporter au chapitre
"IMPLEMENTATION MIDI".
44. Ecran VFD: Affiche toutesles informations importantes, nécessaires pendant la lecture du CD.
45. Touche RANDOM: vous pouvez sélectionner2 modes de lecture aléatoire différents.
TOTAL random: appuyez brièvement sur la touche RANDOM jusqu'à ce que la LED s'allume ; dans
ce mode, le lecteur 1 lit des pistes sélectionnées au hasard et se trouvant sur l'ensemble des
appareils USB de stockage de masse. Pendant que le lecteur 1 est en train de lire en mode
aléatoire, le lecteur 2 peut toujours être utilisé pour lire n'importe quelle piste de votre choix.
SMART random: ici, vous ne pouvez choisir de jouer que des pistes en provenance d'un dossier
déterminé, d’un genre déterminé, ou mème d’un certain album ou artieste:
Jouer des pistes d’un seul dossier spécifique: sélectionnez d’abord “search-key = Std”
(folders/tracks). Ensuite, sélectionnez un dossier, puis appuyez sur la touche RANDOM
pendant environ 2 secondes, jusqu'à ce que la LED se mette à clignoter. A ce moment là, le
lecteur 1 ne jouera que des pistes contenues dans le dossier sélectionné.
Jouer des pistes d’un certain genre/artiste/album: choisissez la clef de recherche souhaitée et
sélectionnez une piste qui corresponds au genre, artiste ou album désiré. Si vous appuyez sur
la touche RANDOM pendant +/-2 secondes, le lecteur ne jouera que des pistes du même
genre, artiste ou album que celle qui est lue actuellement. (Ce qui évite de mélanger deux ou
plusieurs styles de musiques complètement différents : c'est exactement ce qu'il faut pour un
bar, un club, un restaurant, etc …). Prière de se reporter au chapitre 'UTILISATION' pour des
exemples.
46. SELECTEUR DE SOURCE D’ENTRÉE: est utilisé pour sélectionner la source d’entrée exacte pour les
deux canaux: lecteur interne, contrôle via MIDI des softwares pour DJ sur ordinateur, ou encore entrées
analogiques phono / line pour appareils externes (il y a des sélecteurs d’entrées (8) supplémentaires à
l’arrière de la table de mixage).
47. GAIN LEVEL: règle le niveau d’entré des deux canaux. Utilisez ce bouton pour régler le niveau jusqu'à
ce que vous atteigniez les 0dB sur le VU-mètre.
48. Réglage de TONALITÉ à 3 bandes: la fréquence de chaque canal peut être réglée séparément dans
une plage allant de -35dB à +10dB. Vous pouvez "tuer" ('kill' en anglais, comprenez : "supprimer
complètement") les aiguës, les médiums et/ou les basses en appuyant sur les touches correspondantes.
Dans la position centrale, le contrôle de tonalité est neutre. (éteint)
49. NIVEAU BOOTH MASTER: est utilisé pour régler le niveau de la sortie asymétrique booth master.
50. NIVEAU MASTER: est utilisé pour régler le niveau de la sortie symétrique Master.
51. VU MÈTRE: chaque canal possède son propre VU-mètre LED ce qui vous permet de régler le niveau
gain (47) très rapidement. Faites attention que les niveaux ne dépassent pas 0dB (ou 100%). Le signal
audio risque d’être déformé si le niveau du signal entre dans la zone rouge du VU-mètre. Quand la
touche MASTER METER (52) est allumée, les VU-mètres montrent le niveau de sortie du mix général.
52. Touche MASTER METER : quand cette touche est éteinte, les VU-mètres indiquent les niveaux des
canaux individuels. Appuyez sur cette touche pour l'allumer : les VU-mètres indiquent maintenant le
niveau du mix général.
53. CURSEUR / CANAL: sont utilisés pour réglerle niveau de chaque canal séparément.
54. Interrupteur FADER START : quand cette fonction est active, les lecteurs internes peuvent être mis en
route ou arrêtés en déplaçant le cross fader.
FRANCAIS MODE D’EMPLOI
SYNQ® 34/76 DMC2000
55. CROSS FADER CURVE: Règle la courbe du cross fader : transition douce = position droite, transition
brusque = position gauche.
56. CROSS FADER: avec ce curseur vous pouvez mixer les deux canaux. Le cross fader ne fonctionnera
que si vous avezréglé les curseurs des canaux (53) sélectionnés au niveaudésiré !
57. DJ MIC INPUT JACK: Accepte les micros asymétriques pourvus d’un connecteur jack mono de 1/4”.
Cette entrée est principalement utilisée pour le micro DJ. Le talkover n’affecte pas le niveau du signal de
cette entrée.
58. MIC1 VOL: Ajustement du niveau d'entrédu micro1.
59. MIC2 VOL: Ajustement du niveau d'entrédu micro2.
60. TONALITE DU MICRO : à utiliser pour adapter le son des deux entrées pour micro.
61. INTERRUPTEUR MICRO ON/OFF/TALK OVER:
OFF: les 2 micros mic1 & mic2 sont coupés.
ON: les 2 micros mic1 & mic2 sont allumés.
TALK OVER: mic1 & 2 sont allumés; le niveau de tous les autres canaux diminue d'environ -20dB.
62. CUE MIX: avec ce bouton vous pouvez mixer n’importe quel canal d’entré dans la sortie casque (64):
Tournez le bouton complètement à gauche pour entendre le canal 1.
Tournez le bouton complètement à droite pour entendre le canal 2.
Mettez le bouton dans une autre positionpour écouter le mixage desdeux signaux.
Cette option vous permet de vérifier votre mixage avant que vous l’envoyiez vers la sortie master.
63. VOLUME DU CASQUE : Ce bouton contrôle le niveau du son de la sortie du casque.
64. Sortie CASQUE : Si vous le désirez, c'estici que vous pouvez connecter votre casque.
ECRAN VFD
A. PLAY: apparaît quand la lecture d’une plage est activée.
B. PAUSE: apparaîtpendant que le lecteur est en mode pause ou CUE.
C. CUE: s'affiche quand le lecteur est en attente, au point de CUE.
D. INDICATEUR DE TOUCHER : est affiché quand la fonction tactile de la partie sensible au
toucher de la molette est active.
E. ECRAN ALPHANUMERIQUE : Il affiche toutes sortes d'informations importantes comme les
paramètres deseffets, des informations sur les boucles, les tags ID3, etc …

FRANCAIS MODE D’EMPLOI
SYNQ® 35/76 DMC2000
F. BPM DISPLAY: le compteur de tempo automatique affiche le nombre de battements par minute.
En mode manuel, “BPM” est affiché. En mode automatique, “AUTOBPM” est affiché. (appuyez
pendant 2 secondes sur la touche TAP pour passer en mode automatique)
G. MEMOIRE TAMPON : affiche le statut de la mémoire tampon nécessaire au dispositif antichocs
et à certaines fonctions spécifiques. Chaque tiret affiché représente 2 secondes de mémoire
tampon.
H. AUTO CUE: apparaît quand la fonction “auto CUE” est activée. voir touche SGL/CTN (42).
I. RELOOP: vous montre quand le CD joue une boucle. (répétant une partie spécifique)
RELOOP Clignote: une boucle est programmée etest lue.
RELOOP allumé: une boucle est programmée maisn’est pas reproduite.
J. SINGLE: apparaît quand l’appareil est réglé pour jouer uniquement une plage à la fois. Quand
Single n’est pas affiché, toutes les pistes sont jouées sans interruption. La fonction est contrôlée
par la touche SGL/CTN (42).
K. Indicateur de MP3 : est affiché quand un fichier de type MP3 esten cours de lecture.
L. Indicateur de piste : montre le nombre de pistes disponibles dans votre sélection en cours :
Vue standard : sans système Q-DBASE : l'écran affiche le nombre de pistes présentes
dans le dossier en cours (M) ;
Vue avec système Q-DBASE : l'écran affiche le nombre de pistes qui correspond à votre
présélection Q-DBASE.
M. Indicateur FOLDER/SEARCH KEY : l'information affichée dépend du mode d'affichage que
vous avez sélectionné :
Vue standard : sans système Q-DBASE : l'écran affiche le numéro du dossier en cours ;
Vue avec système Q-DBASE : l'écran affiche le mode de recherche en cours (Art, Alb ou
Gen).
N. ELAPSED, TOTAL REMAIN: indique si le temps affiché à l’écran est le temps écoulé (elapsed),
le temps restant total du disque (total) ou le temps restant de la plage (remain).
O. MINUTE: Vous montre les “minutes” de la plage en cours d’exécution.
P. SECOND: Vous montre les“secondes” de la plage en cours d’exécution.
Q. FRAME: vous montre le “frame” dela plage en cours d’exécution. (1 frame = 1/75éme sec.)
R. TIME BAR: possède 2 fonctions:
Pendant la lecture normale: montre soit le temps restant soit le temps écoulé, selon
l’option choisie avec la touche TIME. Cette barre se met à clignoter à la fin de chaque
plage pour prévenir l’utilisateur qu’il est grand temps de passer àl’action.
Pendant la lecture d’une boucle: affiche le temps restant jusqu’à la fin de la boucle.
Cette aide visuel vous aide repérer ou et quand la boucle redémarrera.
S. AFFICHAGE DU PITCH : l'écran montre le pourcentage en cours du changement de rythme
sélectionné par le curseur de vitesse (30). Un petit cadenas rouge est affiché quand la fonction
de blocage de tonalité (Master Tempo / pitch lock) est activée.
CONNEXIONS
Voici quelques indications importantes pour les appareils USB de mémoire de masse que vous serez
amené à connecter :
Note 1 : le disque dur doit absolument être formaté au standard FAT32 ! En effet, un disque dur formaté au
standard NTFS (le choix pour la plupart des disques à haute capacité) NE sera PAS reconnu : un tel disque
dur devrait être reformaté au standard FAT32 ! (Cela peut être réalisé sous Windows, des explications se
trouvent sur la page produit du DMC2000).
Note 2 : les emplacements USB de ce lecteur peuvent chacun fournir un ampère de puissance au disque
dur qui y est raccordé. Cependant, nous suggérons d'utiliser un disque dur avec une alimentation propre
pour améliorer la fiabilité du système.
Note 3 : seuls les fichiers aux formats WAV et MP3 sont reconnus et sont donc en mesure d'être lus.
Note 4 : pour votre propre facilité, nous vous recommandons vivement d'utiliser le software d'indexation Q-
DBASE : il vous rendra la vie drôlement plus facile, tout simplement !
FRANCAIS MODE D’EMPLOI
SYNQ® 36/76 DMC2000
CONFIGURATION MINIMALE - UN LECTEUR
Connectez les sorties master symétriques (5) ou asymétriques (6) à un amplificateur de puissance ou à
des haut-parleurs actifs.
Connectez un stick USB à l'entrée USB 1 (13) ou un disque dur USB à l'entrée USB 2 (3).
Si nécessaire, connectez un micro à l'entrée MIC 1 (57) ou MIC 2 (11).
Raccordez le câble d'alimentation secteur fourni à l'entrée de l'alimentation secteur (1) du lecteur et à une
prise d'alimentation secteur.
Vous êtes dès lors prêt à lire et à mixer les fichiers WAV et MP3 qui se trouvent sur votre mémoire de
masse USB. Amusez-vous bien !
CONFIGURATION – LE DMC1000 ASSOCIE A UN DISQUE DUR
Raccordez un disque dur USB à la connexion USB2 du DMC1000
Assurez-vous que la liaison USB est bien réglée sur 'LINK' au niveau du DMC1000.
Utilisez le câble USB (fourni avec le DMC1000) pour raccorder la liaison USB Link du lecteur à la
connexion USB2 (3) du DMC1000.
Utilisez la touche SOURCE SELECT (14) pour sélectionner l'USB2 sur le DMC2000: ainsi, les deux
lecteurs, DMC1000 et DMC2000, seront connectés au disque dur.
Vous êtes donc maintenant en mesure de lire des fichiers MP3 et WAV en provenance du disque dur
auquel vous venez de connecter vos lecteurs.
IMPORTANT : pour assurer des performances stables et de bonne qualité, utilisez uniquement des
câbles USB de bonne qualité et ayant au maximum un mètre de long !
CONFIGURATION – INSTALLATION COMPLETE INCLUANT UN CONTRÔLEUR MIDI

FRANCAIS MODE D’EMPLOI
SYNQ® 37/76 DMC2000
La figure montre une installationcomplète, y compris un contrôleur MIDI.
On peut connecter jusqu'à 2 sources audio externes (de niveau Phono ou ligne) de manière à transformer
ainsi votre DMC2000 en un appareil multifonctionnel pour DJ. Tout ce que vous avez à faire pour cela, c'est
de connecter les entrées en plus des 2 canaux du mixer !
Si vous ne voulez utiliser que la fonction de contrôleur MIDI, il vous suffit de connecter l'ordinateur
contenant des softwares pour DJ via le câble USB (fourni) à la sortie USB-MIDI (4) du DMC2000 : le
contrôleur sera reconnu et les pilotes seront installés automatiquement.
Réglez les 2 entrées des canaux du mixer (46) en mode MIDI : la plupart des contrôles sur le DMC2000
vont envoyer des signaux MIDI.
Pour ce qui est des réglages MIDI spécifiques, prière de se reporter au chapitre "MENU DE
CONFIGURATION".
Selon le software pour DJ que vous allez utiliser, vous allez devoir charger les mappings MIDI désirés.
Avec certains softwares pour DJ, le mapping du DMC2000 va se charger automatiquement ; avec d'autres
softwares pour DJ, vous allez devoir charger le mapping MIDI depuis notre site ou depuis la section de
téléchargement du software pour DJ. Si le DMC2000 n'est pas compatible avec le software pour DJ, vous
pouvez réaliser votre propre mapping MIDI, mais cela dépend entièrement du software que vous utilisez.
Veuillez noter que l'installation et l'utilisation de divers softwares pour DJ sont très spécifiques ; c'est la
raison pour laquelle tous ne sont pas supportés par Synq !
Quand le DMC2000 fait usage de sa carte son interne, la musique de votre mix arrivera sur les sorties
master (5 + 6).
Mixer via fonction MIDI : La configuration du DMC2000 est ainsi faite qu'elle vous permet de mixer de la
musique venant de toutes les entrées. Vous pouvez même mixer de la musique en provenance du
software pour DJ avec de la musique venant des lecteurs internes ou d'un tourne-disque s'il est connecté.
Pour être en mesure de travailler de telle sorte, vous devez régler la fonction MIDI du mixer interne sur la
position OFF.(prière de se reporter au MENU DE CONFIGURATION).
Option ' vinyl scratching' sur le software pour DJ : grâce au DMC2000, vous pouvez aussi utiliser une
fonction très puissante, la “vinyl scratch function”, présente sur certains softwares pour DJ particulièrement
sophistiqués. Cela veut dire que vous êtes en mesure de scratcher et de manipuler les pistes audio jouées
via votre software pour DJ en utilisant un disque vinyle spécialement codé ! Il suffit de connecter un
tourne-disque à l'une des entrées audio : les signaux du disque vinyle spécialement codé seront envoyés
vers le software pour DJ.
Note 1 : vérifiez tout d'abord si votre software pour DJ supporte cette fonction. Si oui, suivez les
instructions du software pour régler cette fonction.
Note 2 : un disque spécial en vinyle pour le scratch est disponible en option chez Synq : il utilise un
signal stéréo de type "time dephased 1 KHz" qui est compatible avec différents softwares pour DJ.
Installation du software DECKADANCE-LE
Le DMC2000 est livré avec une licence gratuite pour
Deckadance-LE, le code de déverrouillage pour cette
licence se trouve en dessous du DMC2000 (voir dessin).
Afin de garantir que vous ayez toujours la dernière version,
le programme est uniquement disponible via
téléchargement. Veuillez suivre les pas suivants pour vous
inscrire et pour télécharger votre copie de Deckadance-LE:
Téléchargez la version démo du software:
WINDOWS: http://windemo.deckadance.com
MAC OS: http://macdemo.deckadance.com
Installez la version démo.
Pour modifier la version démo en version LE : allez
vers: http://www.deckadance.com/synq vous y
trouverez la page SYNQ.
Cliquez sur “Register”.
Entrez votre adresse email et indiquez que vous êtes
un nouveau client (new customer). Puis, cliquez sur
“Next”.
Suivez toutes les étapes pour enregistrer votre version.
Maintenant, vous pouvez vous connecter sur votre
compte personnel: cliquez sur la licence Deckadance
FRANCAIS MODE D’EMPLOI
SYNQ® 38/76 DMC2000
LE (voir image du milieu ci-contre)
Cliquez sur la zone bleu foncé “click here to unlock this
product” téléchargez le fichier Reg n’importe ou sur
votre ordinateur, puis double cliquez sur le fichier
téléchargé pour l’installer et changer votre version démo
en version LE entièrement fonctionnelle.
Vous éprouvez des difficultés? Vérifiez ces liens:
http://support.image-line.com/knowledgebase/base.php?id=45&ans=108
http://support.image-line.com/knowledgebase/base.php?id=&ans=119
Après cette procédure, vous pouvez utiliser gratuitement le
logiciel Deckadance LE et le mettre à jour chaque fois qu’une
version plus récente seradisponible!
Pour se familiariser davantage avec Deckadance, nous vous
suggérons également de visiter les liens suivants:
Un aperçu complet sur la façon d'installer et d'utiliser
Deckadance: http://deckadance.image-line.com/help
Toutes sortes de tutoriels vidéo:
Visitez: http://www.youtube.com/user/imageline et
recherchez “Deckadance”.
IMPORTANT ! nous vous incitons vivement à enregistrer votre software sur le site de Deckadance :
vous aurez ainsi accès au forum des utilisateurs, vous recevrez régulièrement une lettre d'information, et
vous serez aidé par leur équipe de support. Vous aurez aussi droit à une ristourne de 30 % quand vous
passerez aux versions HOUSE et CLUB de Deckadance. Sur le site de Deckadance, vous allez trouver une
liste de caractéristiques avec les différences entre les 3 versions.
Veuillez également noter que le support concernant le software pour DJ Deckadance fonctionne
exclusivement via le site de Deckadance (www.deckadance.com). Ce site comporte une section réservée au
support et elle est particulièrement bien développée : on y trouve un forum des utilisateurs, des vidéos
pédagogiques, etc …
Configurer DECKADANCE-LE pour l’utiliser avec le DMC2000
Avant de pouvoir utiliser le DMC2000 avec Deckadance, vous devez configurer les deux. Nous allons
configurer le DMC2000 afin qu’il soit le plus polyvalent possible. Vous pourrez mixer des plages du logiciel
Deckadance avec des plages des lecteurs MP3 et/ou d’autres sources externes (lecteur CD, platine vinyl,
…).
Placez les deux sélecteurs de canaux d'entrée (46) dans
n’importe quel position, mais PAS en mode MIDI, sinon
vous ne pourrez pas entrer dans le menude configuration.
Appuyez pendant environ 3 secondes sur la touche LOAD
TRACK (19) pour entrer dans le menu de configuration.
(voir chapitre suivant pour plus d’info!)
Allez à l’option 1. MIDI CH et vérifiez qu’il soit bien réglé sur
01-02-03. Adaptez si nécessaire.
Allez à l’option 2. MIDI Setup et vérifiez qu’il soit bien réglé
sur TAP = HOLD. Adaptez si nécessaire.
Allez à l’option 3.MIXER-mode et vérifiez qu’il soit bien
réglé sur NO MIDI. Adaptez si nécessaire.
Si ces 3 options sont correctes: appuyez sur la touche
RECORD CUE (25) pour fermer le menu de configuration et
sauvegarder vos réglages.
Connectez le DMC2000 à votre PC en utilisant le câble
USB fourni avec l’appareil et attendez que les “drivers”
soient installés automatiquement (vous n’avez PAS besoin
de drivers externes!)
Placezles deux sélecteurs de canaux d'entrée (46) en mode MIDI.
DémarrezDeckadance et cliquez sur SETUP: la fenêtre de configuration s'ouvre (voir photo)
Table of contents
Languages: