Griven GR0632 User manual

Foglio di Istruzioni
Owner’s Manual
2-WHEEL Colour changer
GR0632
GR0632 Rev. 0
13 Dic 2002
ORDER DIRECTLY TODAY AT: www.BulbAmerica.com or CALL TOLL FREE 888-505-2111

INDICE
INDICE
Pag.
1.0 CONTENUTO DELL’IMBALLAGGIO 3
2.0 SICUREZZA 3
3.0 INSTALLAZIONE 3
3.1 Montaggio sul proiettore 3
4.0 USO DEL DISPOSITIVO GR0632 4
4.1 Creazione di un programma (Utilizzo senza controller) 4
4.2 Esecuzione di un programma 5
5.0 MANUTENZIONE 5
6.0 PARTI DI RICAMBIO 5
INDEX
INDEX
Page
1.0 PACKING 6
2.0 SAFETY 6
3.0 INSTALLATION 6
3.1 Mounting position 6
4.0 USE OF THE GR0632 COLOUR CHANGER 7
4.1 Creating a program (use without controller) 7
4.2 Executing a program 8
5.0 MAINTENANCE 8
7.0 SPARE PARTS 8
ORDER DIRECTLY TODAY AT: www.BulbAmerica.com or CALL TOLL FREE 888-505-2111

1.0 CONTENUTO DELL’IMBALLAGGIO
Controllate attentamente il contenuto del cartone e, in caso di danni al prodotto, contattate il Vs.
trasportatore. Nell’imballaggio del presente proiettore sono contenuti i seguenti prodotti:
n° 1 accessorio 2-WHEEL Colour changer;
n° 1 Foglio di Istruzioni;
2.0 SICUREZZA
L’ accessorio 2-WHEEL Colour changer è stato progettato per essere utilizzato esclusivamente con
un proiettore PRO-MOTION 1200.
Prima di effettuare qualsiasi operazione sul proiettore, sconnettere fisicamente la linea di alimenta-
zione staccando la spina (ad esempio durante l’installazione degli accessori).
Attenzione: lampada molto calda.
3.0 INSTALLAZIONE
3.1 Montaggio sul proiettore
Per installare l’accessorio 2-WHEEL Colour changer
sul proiettore PRO-MOTION attenetevi alle seguenti
istruzioni:
1) Rimuovere il coperchio superiore: allentare le due
viti laterali A fig.1 (il coperchio rimane comunque
legato al proiettore tramite un cavetto);
2) Sganciate le due chiusure a clips (B fig.1); tramite
una molla le aste si posizionano verticalmente;
3) Infilate l’accessorio 2-WHEEL Colour changer
all’interno del proiettore facendo corrispondere i rife-
rimenti colorati di rosso presenti sia sul proiettore
che sul dispositivo; i fori (C fig.1) si assemblano con
i punti di fissaggio presenti sul proiettore;
4) Sulla parte inferiore del dispositivo 2-WHEEL
Colour changer è presente una protuberanza che
entra nella sede sulla base del proiettore (vedi figura
3);
5) Riabbassate le aste di chiusura e ruotate di un quarto
di giro le clips di serraggio;
6) Collegate il cavo piatto di alimentazione (figura 2)
ad uno dei morsetti di alimentazione presenti sul
proiettore (E fig.1);
NOTA: Il morsetto di alimentazione del proiettore deve
sempre essere collegato, o scollegato, a proiettore
spento.
7) Richiudete il coperchio del proiettore prestando atten-
zione ai morsetti che portano l’alimentazione alle
ventole che devono assemblarsi come mostra la figura
a lato (F fig.1). Verificate quindi il funzionamento
delle ventole.
fig.1
3
Morsetti
alimentazione
ventole
fig.2
ORDER DIRECTLY TODAY AT: www.BulbAmerica.com or CALL TOLL FREE 888-505-2111

4.0 USO DEL DISPOSITIVO 2-WHEEL Colour changer
4.1 Creazione di un programma (Utilizzo senza controller)
Premere il pulsante MENU e scorrere il menu con i pulsanti UP e DOWN fin-
chè il display non mostra la scritta “-3 Master/Manuale”; premere il pulsante
ENTER per entrare nel menu;
Selezionare, tramite i pulsanti UP e DOWN, il programma (da 1 a 4) da creare; confermare pre-
mendo ENTER;
Premendo i pulsanti UP e DOWN sono mostrate in sequenza le scritte ESECUZIONE e PRO-
GRAMMAZIONE, selezionare PROGRAMMAZIONE:
Premere ENTER, il display mostra la scritta Programmazione Scena.
Premere di nuovo il pulsante ENTER e tramite i pulsanti UP e DOWN selezionare la scena (massi-
mo 50 per programma) da creare, o modificare; confermare premendo ENTER.
Ad ogni pressione del pulsante ENTER, il display visualizza in sequenza il valore relativo ai cana-
li:
- 1. Canale Vuoto.
- 2. Canale Vuoto.
4
fig.3
Menu PPrincipale
3.Master/Manuale
3.Master/Manuale
Programma 11
Programma 11
Programmazione
Programmazione
Scena
Programma 11
Scena 0001
1CCanale VVuoto
001
ORDER DIRECTLY TODAY AT: www.BulbAmerica.com or CALL TOLL FREE 888-505-2111

- 3. Con i valori da 1 a 25 seleziona i colori; sono inoltre disponibili 6
effetti rainbow, 3 per ognuna delle ruote colori;
- 4. Canale Vuoto.
- 5. Canale Vuoto.
- 6. Canale Vuoto.
- 7. Tempo di pausa: Definisce la durata della scena; selezionare, tramite i
pulsanti UP e DOWN, i tempi di pausa preimpostati (6, 12, 18, 24, 35, 50
sec; 1, 2, 4, 6, 10, 15, 20, 30 e 40 min); confermare premendo ENTER.
Ripetere i passaggi precedenti per tutte le scene che si desidera inserire nel programma.
Uscire dalla programmazione premendo il pulsante MENU/ESC. Al momento dell’esecuzione
del programma, vengono riprodotte tutte le scene con numero compreso tra 1 e il numero
della scena in cui è stato premuto il pulsante ESC.
4.2 Esecuzione di un programma
Dopo aver programmato tutte le scene desiderate di un programma, premere
il pulsante ESC (2 volte) e selezionare ESECUZIONE per eseguire un pro-
gramma.
Premendo il pulsante ENTER il proiettore inizia ad eseguire il programma
selezionato. Il display, oltre ad indicare il numero del programma e della
scena in esecuzione, indica un valore che rappresenta, in percentuale, il
tempo trascorso dall’inizio della scena. All’accensione, il proiettore inizia
ad eseguire il programma che era in esecuzione nel momento in cui è stato spento
5.0 MANUTENZIONE
Per assicurare la massima funzionalità e la massima resa ottica si consiglia di pulire regolarmente i
filtri dicroici.
Prima di iniziare qualsiasi operazione di pulizia, si raccomanda di scollegare fisicamente il proiet-
tore dalla linea di alimentazione staccando la spina.
6.0 PARTI DI RICAMBIO
Tutti i componenti del proiettore PRO-MOTION e degli accessori sono disponibili come parti di
ricambio su richiesta.
La responsabilità di Griven S.r.l. cessa all’atto della consegna del materiale al vettore: reclami per
eventuali danni dovuti al trasporto dovranno essere indirizzati direttamente al corriere.
Si accettano reclami entro e non oltre i 7 giorni dal ricevimento merce.
Eventuali resi di materiale dovranno essere autorizzati da Griven S.r.l. ed inviati completi della
documentazione fiscale necessaria.
La garanzia non copre i materiali di consumo.
Le viste esplose, lo schema elettrico, il diagramma elettronico e la brochure promozionale del pro-
dotto sono disponibili su richiesta.
5
3CColori
001
7.Tempo ddiPPausa
12 SSec.
5CCanale VVuoto
001
Programma 11
Esecuzione
Prog 11SScena1
Esc PP336%
ORDER DIRECTLY TODAY AT: www.BulbAmerica.com or CALL TOLL FREE 888-505-2111

1.0 PACKING
Check carefully the content of the box and in case of damage contact immediately your forwarder.
The following items are included in the box:
n° 1 2-WHEEL Colour Changer;
n° 1 instructions leaflet;
2.0 SAFETY
The 2-WHEEL Colour Changer has been designed to be used exclusively with the PRO-MOTION
1200 unit.
Before proceeding with any operation (e.g., before installing accessories) on the unit, disconnect
the unit from mains supply, by unplugging it.
Caution: hot lamp.
3.0 INSTALLATION
3.1 Mounting position
To install the 2-WHEEL Colour Changer in the PRO-
MOTION unit, follow these instructions:
1) Remove the upper cover: loosen the 2 side screws A
pict.1; (the cover will remain linked to the unit by
means of a little wire);
2) Release the 2 clips (B pict.1); the rods will be posi-
tioned vertically by means of a spring.
3) Fit the 2-WHEEL Colour Changer inside the unit.
Make sure that the red colored references on the unit
correspond to the red colored references on the acces-
sory; the holes (C pict.1) are to be assembled with the
fixing points located on the unit;
4) A protrusion is located in the 2-WHEEL Colour
Changer lower part. This protrusion fits into the apposi-
te seat, which is placed in the unit's base (see pict. 3).
5) Lower the closing rods and rotate one quarter of a
turn the clamping clips.
6) Connect the flat power supply cable (pict.2) to one
of the power supply terminals located in the unit (E
pict.1).
NOTE: the power supply terminal must always be plug-
ged (when the unit is on), or unplugged (with the pro-
jector switched off).
7) Close the upper cover paying attention to the binding
clamps which supply the fans with power. The binding
clamps have to be assembled as per picture on the side
(F pict.1). Then ensure that the fans work properly.
6
Fan power
supply bin-
ding-clamps pict.1
pict.2
ORDER DIRECTLY TODAY AT: www.BulbAmerica.com or CALL TOLL FREE 888-505-2111

4.0 USE OF THE 2-WHEEL Colour Changer
4.1 Creating a program (use without controller)
Push the MENU key and go through the menu by using the UP and DOWN
keys until the writing "-3 Master/Manual" appears on display; push ENTER to
confirm.
Through UP and DOWN keys, select the program (from 1 to 4) to be created, push ENTER to con-
firm;
Push the UP and DOWN keys: the writings EXECUTION and PROGRAMMING are shown in
sequence; select PROGRAMMING:
Push ENTER: the writing Programming Scene appears on display.
Push again the ENTER key and, through the UP and DOWN keys, select the scene (max 50 per
program) to be created, or to be modified; push ENTER to confirm.
Each time the ENTER key is pushed, the display reads sequentially the value relevant to the chan-
nels:
- 1. Empty channel.
- 2. Empty channel.
7
pict.3
Main MMenu
3.Manual/Master
3.Manual/Master
Program 11
Program 11
Programming
Programming
Scene
Program 11
Scene 0001
1. EEmpty
001
ORDER DIRECTLY TODAY AT: www.BulbAmerica.com or CALL TOLL FREE 888-505-2111

- 3. It selects the colours with values from 1 to 25; 6 rainbow effects are
available, too, 3 for each of the colour wheels;
- 4. Empty channel.
- 5. Empty channel.
- 6. Empty channel.
- 7. Pause time: it adjusts the duration of a scene; through the UP and
DOWN keys, select the pre-set pause times (6, 12, 18, 24, 35, 50 seconds;
1, 2, 4, 6, 10, 15, 20, 30 and 40 minutes); push ENTER key to confirm.
Repeat the previous passages for all the scenes that you intend to include in the program.
Push the MENU/ESC key to exit the programming. When the program is operating, all the
scenes, from scene number 1 to the scene in which the ESC key was pushed, are played.
4.2 Executing a program
After programming all the desired scenes of a program, push the ESC key
(twice) and select EXECUTION to execute a program.
Push the ENTER button: the projector starts to execute the selected pro-
gram. The display, besides indicating the program number and the scene
being executed, indicates a value which represents, in percentage, the time
elapsed from the beginning of the scene. When it is switched on, the unit
starts to execute the program which was operating when the unit was switched off.
5.0 MAINTENANCE
It is suggested to clean regularly the dichroic filters to ensure maximum functionality and maxi-
mum optic output.
Before starting any cleaning procedure, it is recommended to disconnect the unit from the power
supply line by unplugging it.
6.0 SPARE PARTS
All components for the PRO-MOTION unit and for the accessories are available on request.
Griven S.r.l. is liable for the product until the unit is delivered to the shipping company: any claim
for damage occurred during transport must be addressed directly to the forwarding company.
Complaints will be accepted within 7 days from reception and no later.
Before returning any unit, authorization by Griven s.r.l. is necessary and the unit must be returned
back with the needed fiscal documents.
Warranty does not include consumables.
Exploded views, the electrical wire diagram, the electronic layout and the advertising brochure are
available on request.
8
Program 11
Play
Prog 11SScene1
Esc PP336%
5. EEmpty
001
3. CColours
001
7. PPause
12 ssec.
ORDER DIRECTLY TODAY AT: www.BulbAmerica.com or CALL TOLL FREE 888-505-2111

DMX Values
9
CHANNEL 3
DMX Level PRESET COLOURS
0-15 White
16-23 Yellow
24-31 Light yellow
32-39 Dark yellow
40-47 Yellow ochre
48-55 Orange
56-63 Dark orange
64-71 Light red
72-79 Red
80-87 Red purple
88-95 Light cyan
96-103 Cyan
104-111 Dark cyan
112-119 Blue
120-127 Dark Blue
128-135 Light Wood
136-143 Wood
144-151 Light green
152-159 Green
160-167 Light pink
168-175 Pink
176-183 Dark pink
184-191 Magenta
192-199 Violet
200-207 Dark violet
208-215 Rainbow 1
216-223 Rainbow 2
224-231 Rainbow 3
232-239 Rainbow 4
240-247 Rainbow 5
248-255 Rainbow 6
ORDER DIRECTLY TODAY AT: www.BulbAmerica.com or CALL TOLL FREE 888-505-2111

10
ORDER DIRECTLY TODAY AT: www.BulbAmerica.com or CALL TOLL FREE 888-505-2111

11
ORDER DIRECTLY TODAY AT: www.BulbAmerica.com or CALL TOLL FREE 888-505-2111

WORLD LIGHTING CHALLENGE
Professional Lighting Manufacturer
Via Bulgaria, 16 - 46042 CASTEL GOFFREDO (MN)
Telefono 0376/779483 - Fax 0376/779682 - 0376/779552
ORDER DIRECTLY TODAY AT: www.BulbAmerica.com or CALL TOLL FREE 888-505-2111
Table of contents
Languages:
Other Griven Dj Equipment manuals

Griven
Griven HELIOS MK2 Series User manual

Griven
Griven Parade L MC 1 User manual

Griven
Griven Jupiter B User manual

Griven
Griven ACROBAT PE 575 Manual

Griven
Griven Jasper AL4360 User manual

Griven
Griven PARADE i-PIX User manual

Griven
Griven Graph-i-Dot AL4700 User manual

Griven
Griven ACROBAT FE User manual

Griven
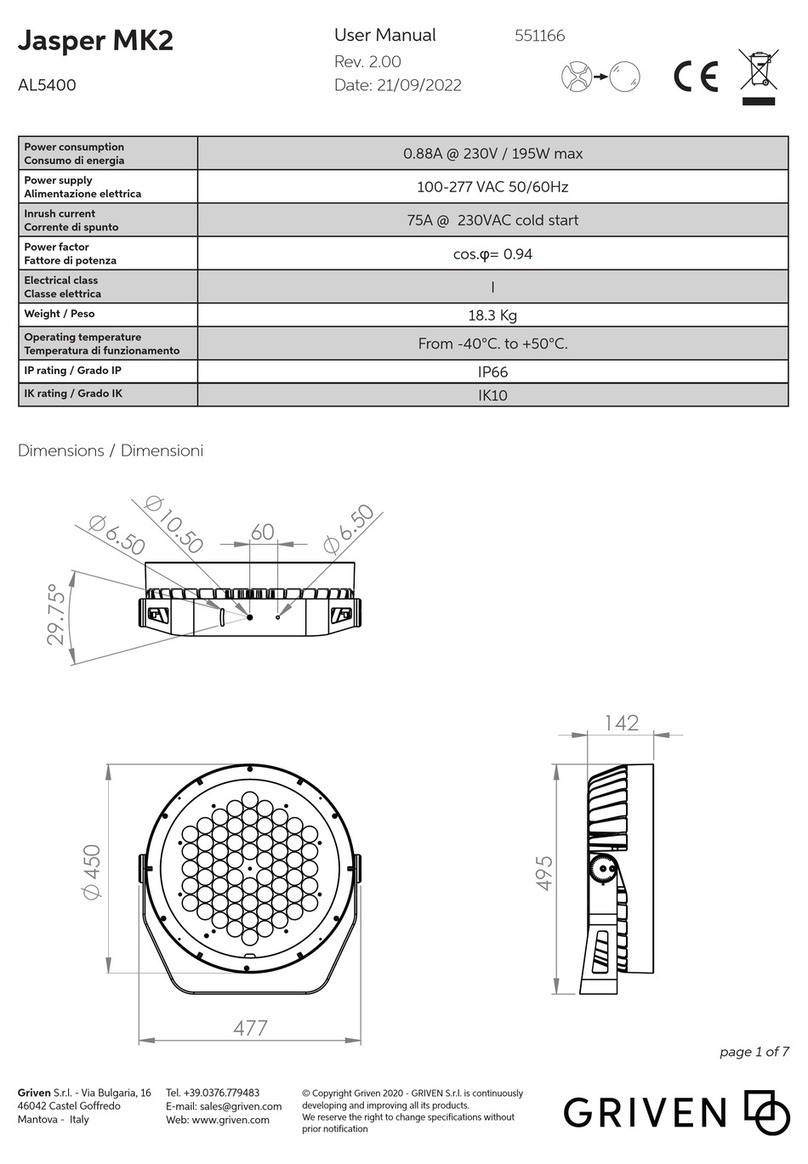
Griven Jasper MK2 User manual

Griven
Griven MAITRE User manual
Popular Dj Equipment manuals by other brands

SDJ
SDJ Slimbar 16 DL RGBWA-UV/FC user manual

Beamz
Beamz PAR36 Spot 55 Ultraviolet LED's DMX instruction manual

Chauvet Professional
Chauvet Professional COLORdash Par-Hex 12 QRG Quick reference guide

Pioneer
Pioneer CDJ-900nexus quick start guide

Ecler
Ecler EVO5 user manual

Ovation
Ovation Mainforce 1240 user manual