Systemline SE0120 User manual

E100 User Guide
Built-in DAB+, FM & Bluetooth® Hi-Fi sound system
SE0120
SE0150
2
1.0 Important Safety Instructions
CAUTION: To reduce the risk of electric shock, do not remove the cover. No user-serviceable parts
inside. Refer to qualified personnel.
WARNING: To reduce the risk of fire or electric shock, do not expose this appliance to rain or moisture.
Read Instructions: All the safety and operating
instructions should be read before the unit is operated.
Retain Instructions: The safety and operating instructions
should be retained for future reference.
Heed Warnings: All warnings on the unit and in the
operating instructions should be followed.
Follow Instructions: All operating instructions should be
followed.
Cleaning: Unplug the unit from the wall outlet before
cleaning. The unit should be cleaned only with a lint free
dry cloth.
Attachments: Only use attachments recommended by
the manufacturer as non-recommended attachments may
cause hazards.
Water and Moisture: Do not use the unit near water–for
example, near a bath tub, wash bowl, kitchen sink, or
laundry tub; in a wet basement; or near a swimming pool.
Accessories: Do not place the unit on an unstable surface,
stand, tripod, bracket, or table. The unit may fall, causing
serious injury to yourself or others, and serious damage
to the unit.
Ventilation: Do not place in a location or position that will
interfere with the unit’s ventilation. Do not operate on a
bed, sofa, rug, or other similar surface.
Power Sources: The unit should be operated only from
the type of power source indicated on the marking label.
If you are not sure of the type of power supplied to your
home, consult your local power company.
Power-Cord Protection: Power-supply cords should
be routed so that they are not likely to be walked on or
pinched by items placed upon or against them, paying
particular attention to cords where they enter a plug, or
exit from the unit.
Lightning: For added protection for the unit during a
lightning storm, or when it is left unattended and unused
for long periods of time, unplug it from the wall outlet and
disconnect from other devices. This will prevent damage
to the unit due to lightning and power-line surges.
Overloading: Do not overload wall outlets, extension
cords, or integral convenience receptacles as this can
result in a risk of fire or electric shock.
Object and Liquid Entry: Never push objects of any
kind into the unit through openings as they may touch
dangerous voltage points or short-out parts that could
result in a fire or electric shock. Never spill liquid of any
kind on the unit.
Servicing: Do not attempt to service the unit yourself
as opening or removing covers may expose you to
dangerous voltage or other hazards. Refer all servicing to
qualified service personnel.
Damage Requiring Service: Unplug the unit from the wall
outlet and refer servicing to qualified personnel under the
following conditions:
• When the power-supply cord or plug is damaged,
• If liquid has been spilled, or objects have fallen into
the unit,
• If the unit has been exposed to rain or water,
• If the unit does not operate normally by following the
operating instructions,
• If the unit has been dropped or damaged in any way.
• When the unit exhibits a distinct change in
performance– this indicates a need for service.
Replacement Parts: When replacement parts are
required, be sure the service technician uses replacement
parts specified by the manufacturer or which have the
same characteristics as the original parts. Unauthorized
substitutions may result in fire, electric shock, or other
hazards.
Heat: The unit should be situated away from heat sources
such as radiators, heat registers, stoves, or other units
(including amplifiers) that produce heat.
This product complies with the Radio
Equipment Directive (2014/53/EU) when
used and installed according to the
instruction manual.
The lightning flash with arrowhead within an equilateral triangle is intended to alert the user to the presence
of an uninsulated “dangerous voltage” within the product’s enclosure, that may be of sufficient magnitude to
constitute a risk of electrical shock to persons.
The exclamation mark within an equilateral triangle is intended to alert the user to the presence of important
operating maintenance (servicing) instructions in the guide accompanying this device.

3
The Bluetooth® word mark and logos are registered trademarks owned by Bluetooth SIG, Inc. and any use of such marks
by Armour Home Electronics Limited is under licence. Qualcomm® aptX™ is a product of Qualcomm Technologies
International, Ltd. Qualcomm® and aptX™ are registered trademarks of Qualcomm Incorporated, registered in the United
States and other countries, used with permission. Systemline and Q Acoustics are registered trademarks of Armour Home
Electronics Limited. All other product names are trademarks or registered trademarks of their respective owners.

4
2.0 First switching ON - Important information – tuning
the DAB radio
When the E100 is first switched on after installation, it will automatically perform a scan
to detect all available DAB radio stations. This may take a few minutes to complete..
Once the scan is complete, the E100 will return to normal operation
Note1: If power to the E100 is interrupted during the DAB scan process, the scan will
need to be repeated when the power is restored. See MENU functions on how to
initiate a DAB scan
Note2: The exact number of DAB stations available will vary from area to area.
If you experience poor reception, it may be that you are in a weak signal area
and require an external DAB antenna (recommended), or a higher gain amplified
antenna.
If you do change or move the antenna after installation or first connection of antenna a
factory reset will be required to ensure a full DAB scan is performed. see section 11.8.
2.1 Installation of included DAB antenna
The supplied DAB aerial should be instaled in the highest possible location and
mounted vertically in an upsidedown Y position.
Note: The aerial cable can be installed beforehand or extended using an CT100 or QED
QX100 cable
To the E100

5
3.0 Front panel controls
1. Standby
Illuminates red to indicate the unit has entered standby.
2. Pre-set 1-4
Touch here to choose or set pre-sets
3. Source selection
Touch here to switch between DAB/FM/Bluetooth/Line input
4. Volume keys
Touch here to increase or decrease the volume.
5. Enter key
DAB - Select radio station
Bluetooth - Play / Pause
Menu – Enter
6. Forward and back keys
DAB - Station + / -
FM – Tune frequency
Bluetooth – Skip track
Menu – Next / Prev item
7. Menu
8. Change dispay information
9. Set alarms and on/off
1
2
3
4
5
6
8 9
7

6
4.0 Pairing a Bluetooth device
Note: Number will be different
Systemline E100

7
5.0 Listening to a connected Bluetooth music source
Systemline E100
Skip functions
are available
Enter will Play/
Pause
8
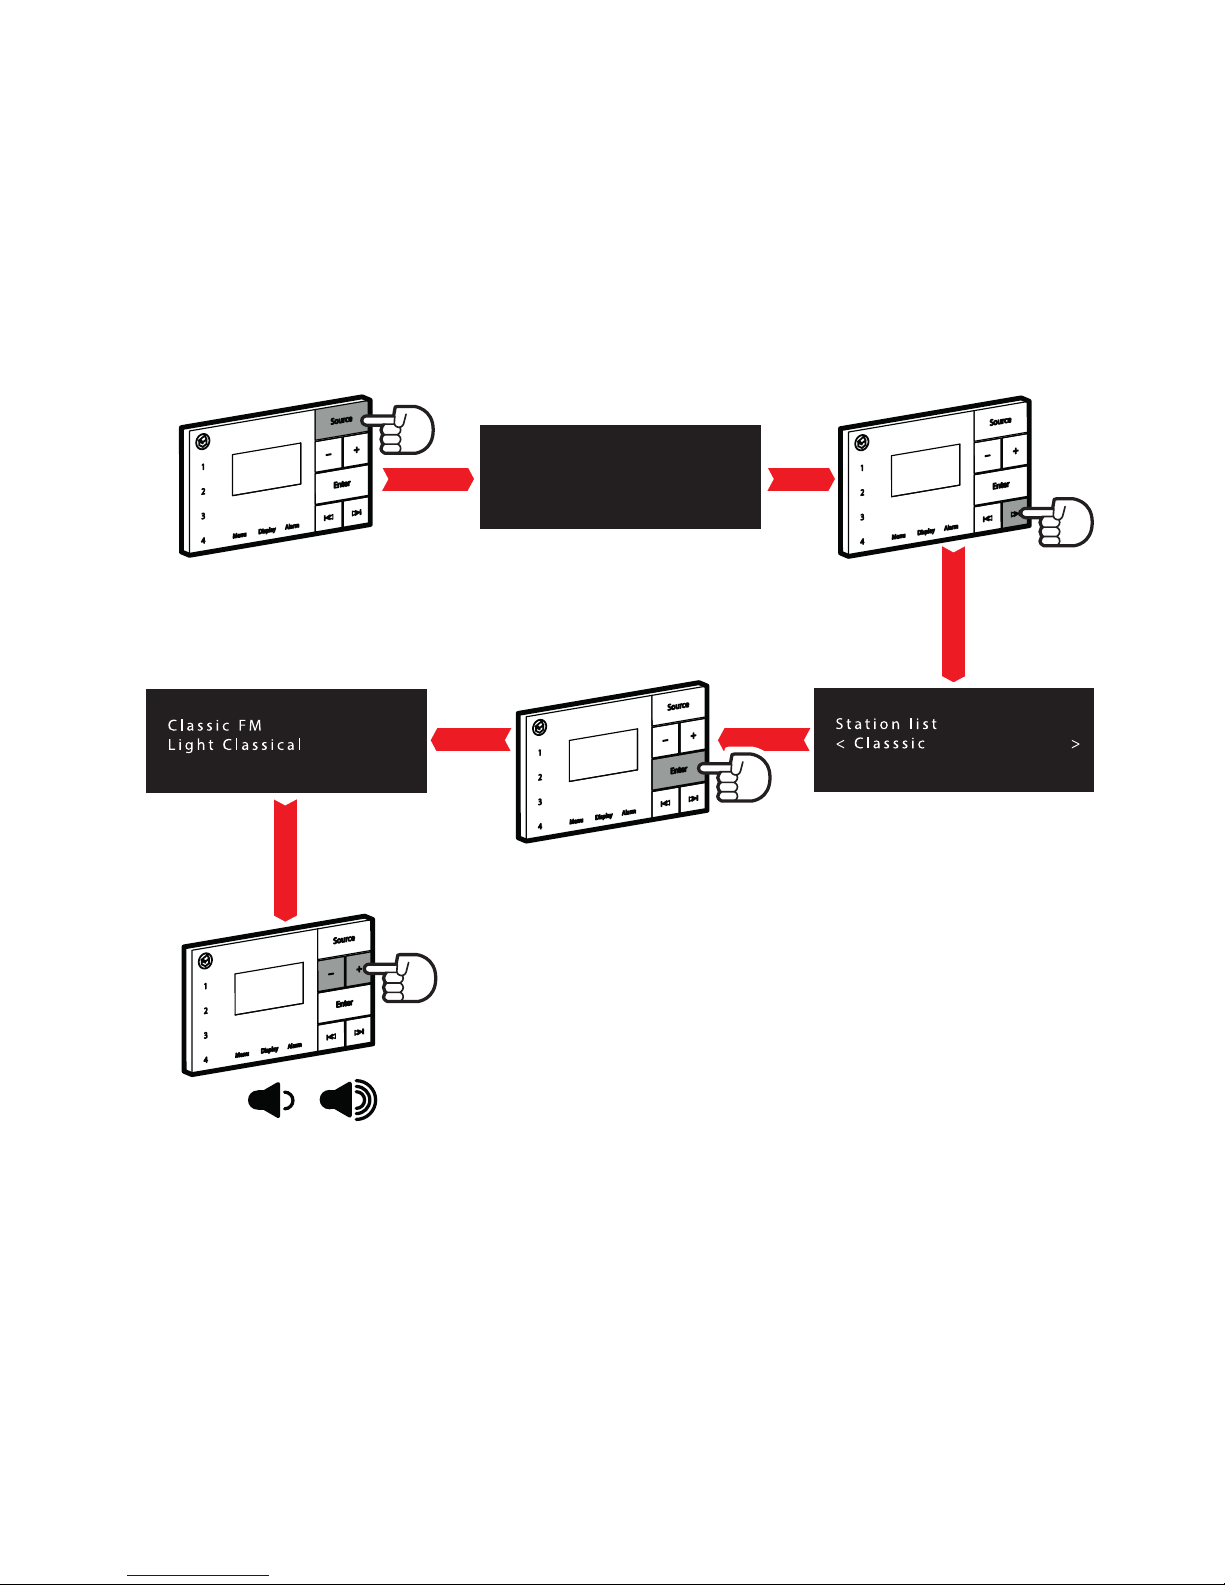
6.0 Listening to DAB Radio
BBC Radio 2
Steve Wright in the afternoon

9
7.0 Storing pre-sets
BBC Radio 2
Steve Wright in the afternoon AUX IN
BBC Radio 2
Preset 1 saved
AUX IN
Preset 4 saved
Hold 4 seconds
Hold 4 seconds
4s
4s
10
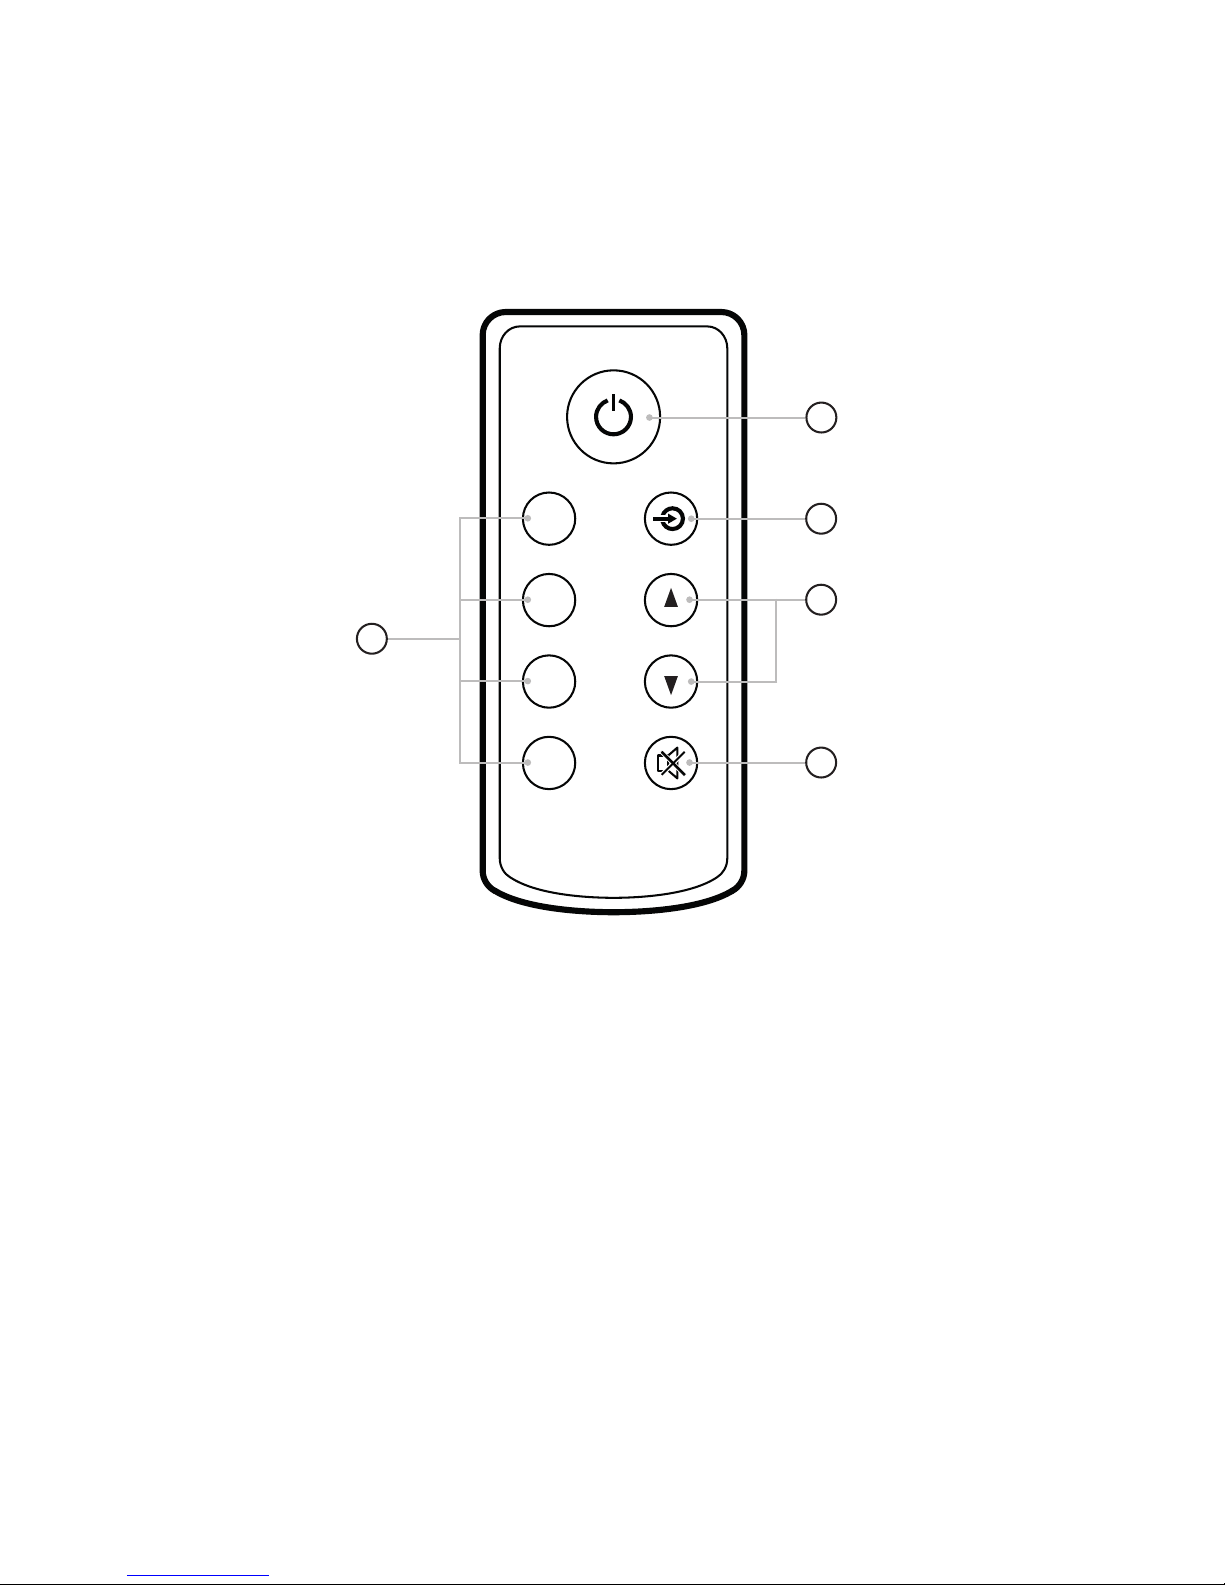
8.0 Infrared handset control
In addition to the front panel controls, the E100 can also be controlled via the
included infrared handset.
1. Pre-sets 1-4
2. Power (standby/on)
3. SOURCE
4. Volume controls
5. Mute
1
2
3
4
1
2
3
4
5
This manual suits for next models
2
Table of contents


