Page 10
4. How to use the Minitimer
4.1. Recharge the internal battery before starting a new timing session.
Minitimer OFF and connected to the power supply HL 540-1 AC/DC: the red LED is ON
while charging. The red LED turns OFF when the battery is completely charged.
Minitimer ON and connected to the power supply HL 540-1
The red LED is ON while charging.
The red LED is OFF when the battery is completely charged.
The green LED is ON (power supply connected)
Without the external power supply, the green LED turns on briefly at power up and then turns off.
When the capacity of the battery reaches 30%, the green LED flashes, indicating that your Minitimer is
operational for approximately 8 hours.
IMPORTANT
Never charge the device under 0°C (32°F) and over 3 0°C (86°F)
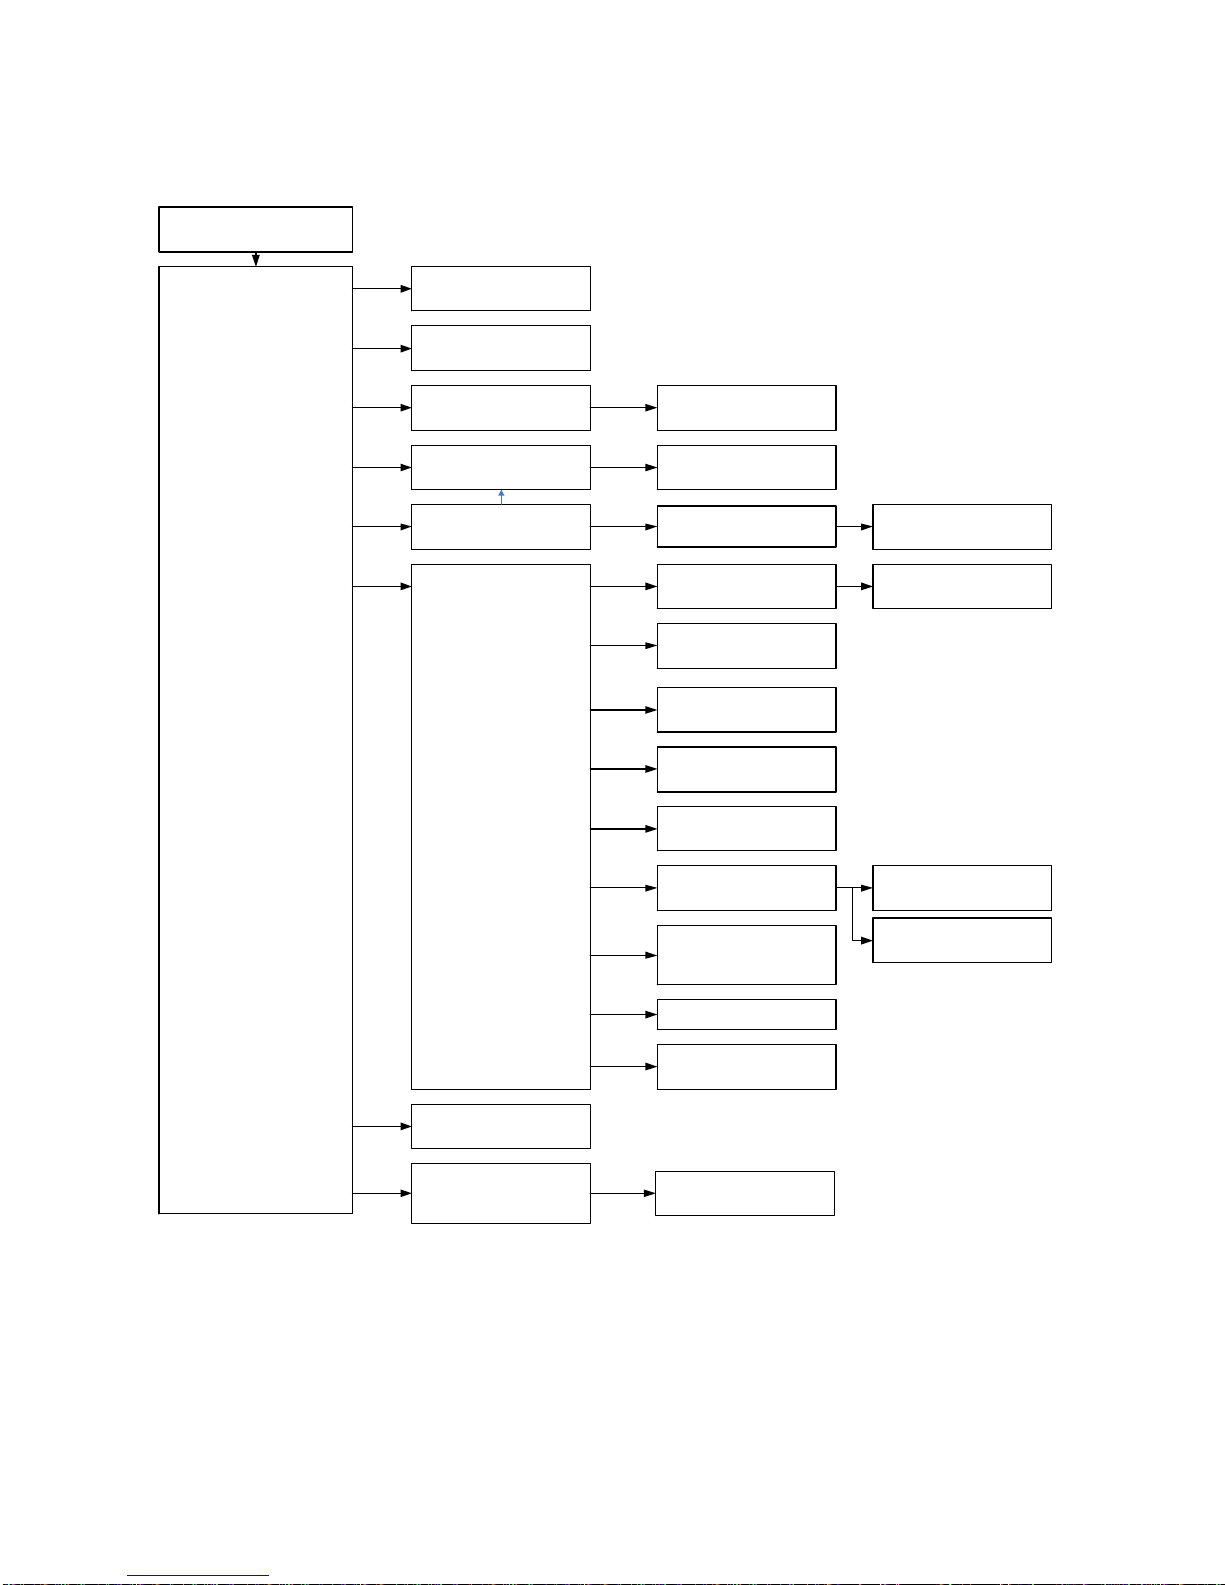
4.2. Switch ON the Minitimer.
Switch ON the Minitimer
The LCD illuminates for 5 seconds
•Minitimer HL 440 and the Firmware version (V.B – 06)
Select how the Serial output should be used
•RS232 TO PRINTER
The data will be configured for a serial printer (HL 200 - Martel).
•RS232 TO AUXILIARY HL440 OR PC.
In this mode, the synchronized data and time-of-day are sent with a “top second” signal. You’ll
be able to adjust the baud rate. We recommend using 9600 Bds.
•Select your synchronizing method :
Synchro Manual
•
Enter the current date and confirm with ◄┘
•
Enter the time-of-day(format HH:MM) and confirm with ◄┘
•
Synchronize the Minitimer with any Green Manual Impulse Key (1 – 4). If the timer is
to be synchronized with another device with an external input (1 – 4), do not forget to
unblock the input (Red key 1 – 4).
The LCD display shows
•Four black bars (▬) which indicate that all the four inputs are blocked,
•The time of the day and the date
Synchro Slave
This will put the Minitimer in Slave mode. The Device will wait for the synchronized time-of-day
information through the serial Input « Printer » from a «master» Minitimer.
For more information, please refer to «configuration» at the end of this user manual.
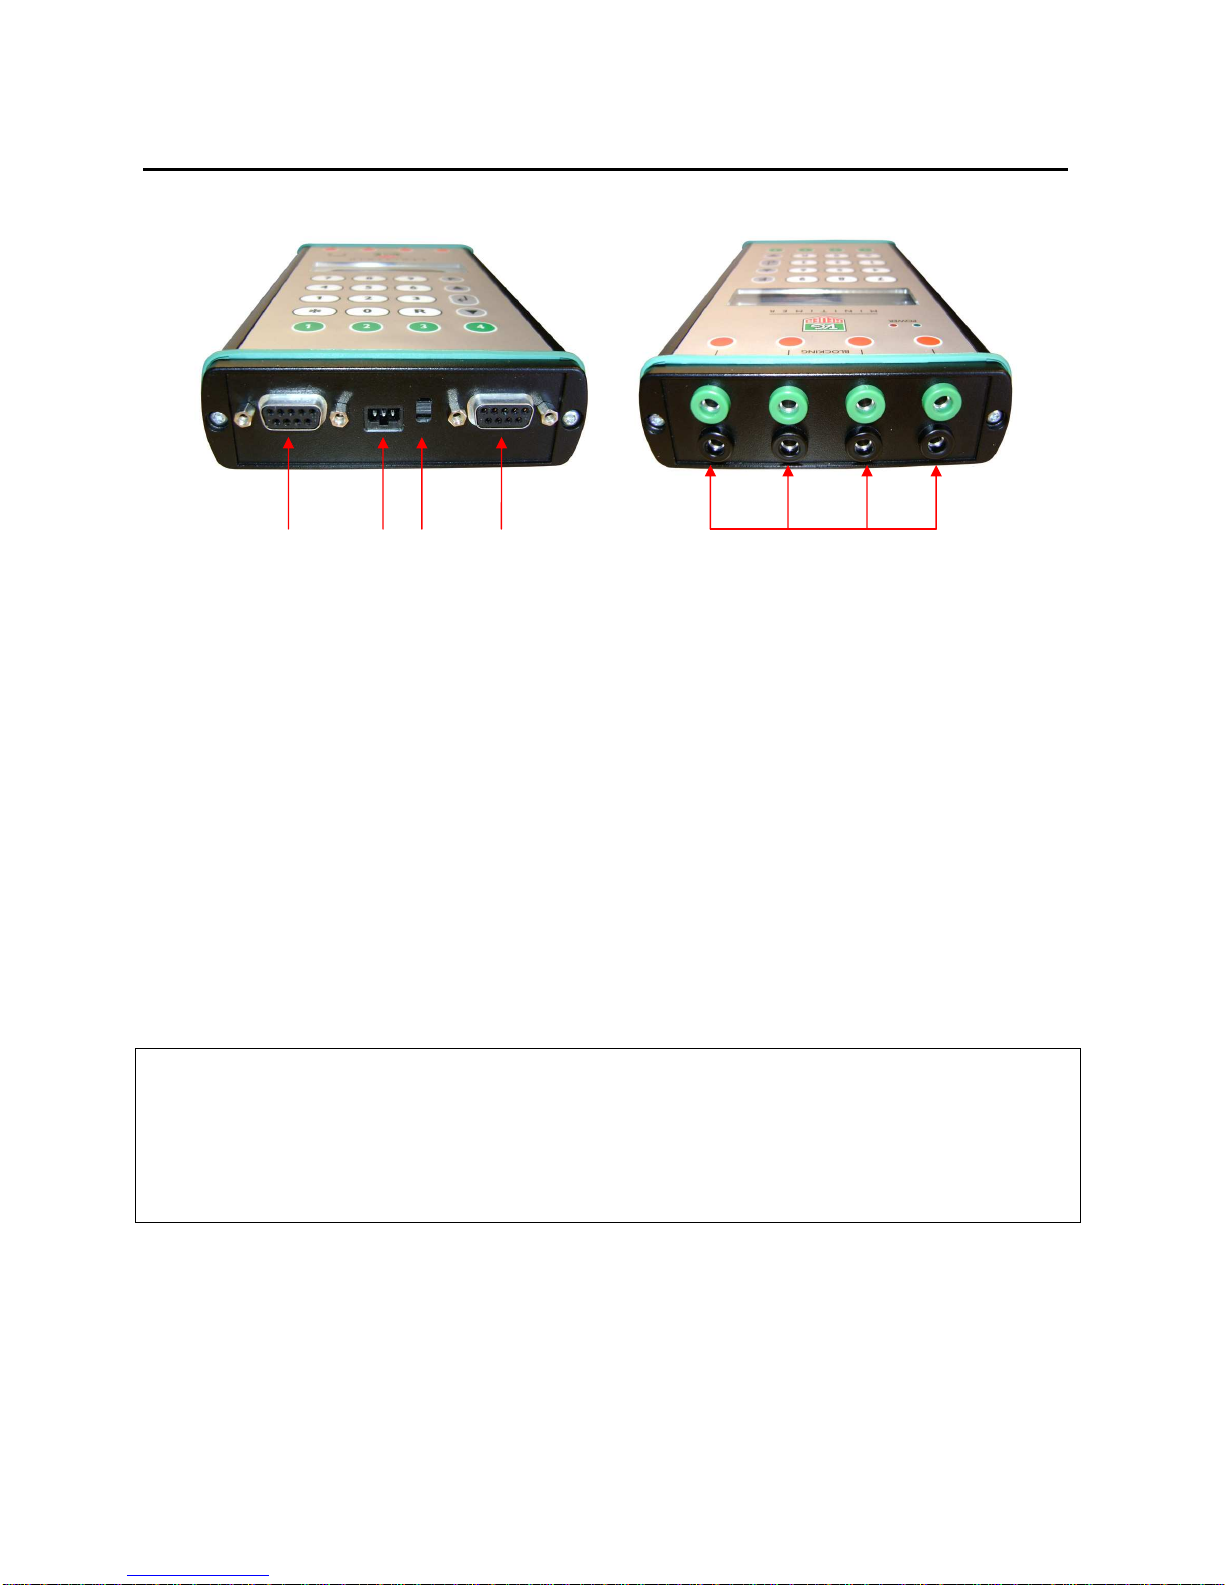
4.3. Connection to the Martel HL 200 Printer
•Read the printer user’s manual carefully.
•Connect the printer to the Sub-D9f on the right.
•First turn on the printer, and then turn on the Minitimer.