Specific Rally Timing Modes
3.
With the Pocket Pro Rally, 3 specific modes are available for all Rally racing.
Mode A: Start Marshal
Objective – assist rally start marshal to ensure reliable, accurate start
indication and recording of start times and jump start times for post event
analysis and results.
Start Marshal Mode enables the user to select either continuous
scheduled starts with pre-determined (1min, 2 min or 4 min) gaps
between competitors or manual starts on the next full minute or half
minute.
Start Marshal retains every scheduled start time along with actual start
time gap (+ or -) depending on whether the competitor started before or
after the scheduled start time.
It is also possible to change (on the fly) the start interval between two
competitors scheduled starts – intervals available are 1, 2, and 4
minutes.
Mode B: Time Check
Objective – Provide the co-driver and driver with an indication of available
time before their next start, stage timing and target timing.
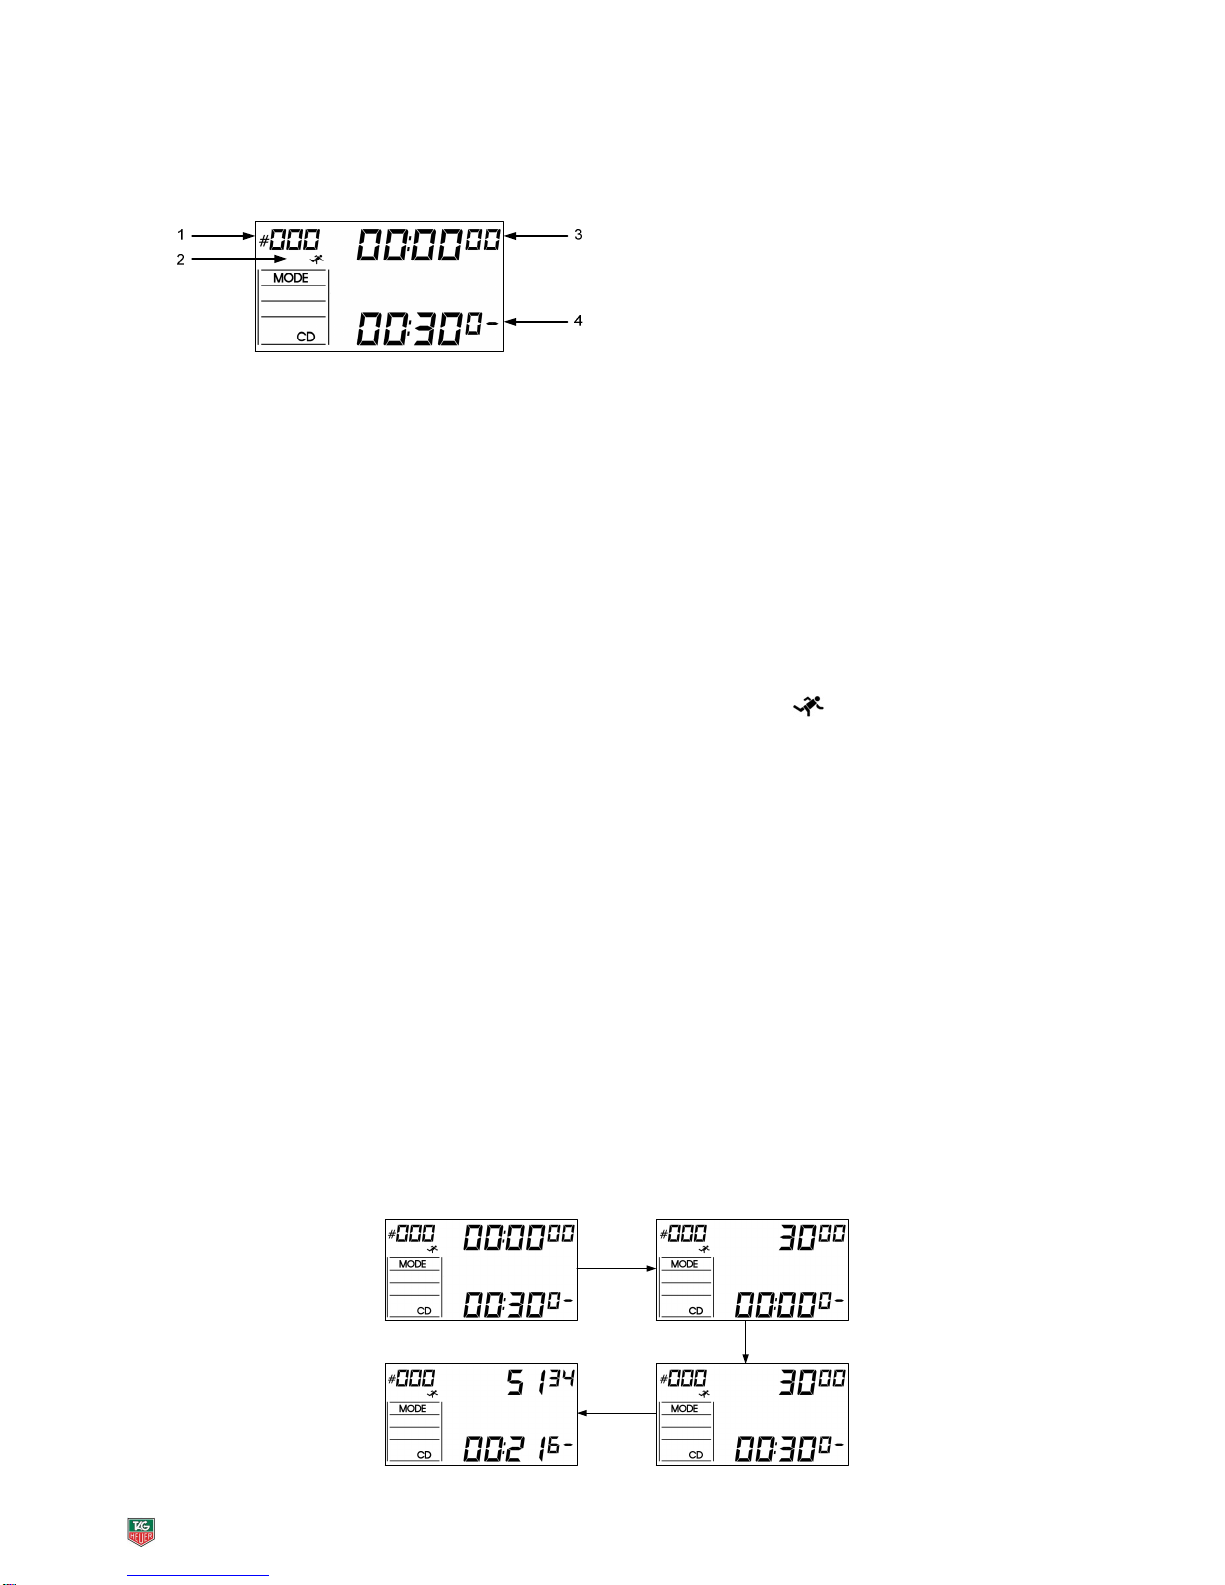
Time Check mode allows the user to select a count-down (with audible
beeps) to the next start occurring on either the next full minute or half
minute. A count-down clock is visible during the count-down phase
which will then change to a count-up clock during the stage. The internal
memory stores the actual start time and stage time for every stage.
Mode C: Stage Timer
Objective – Provide the co-driver and driver with reliable start count-down
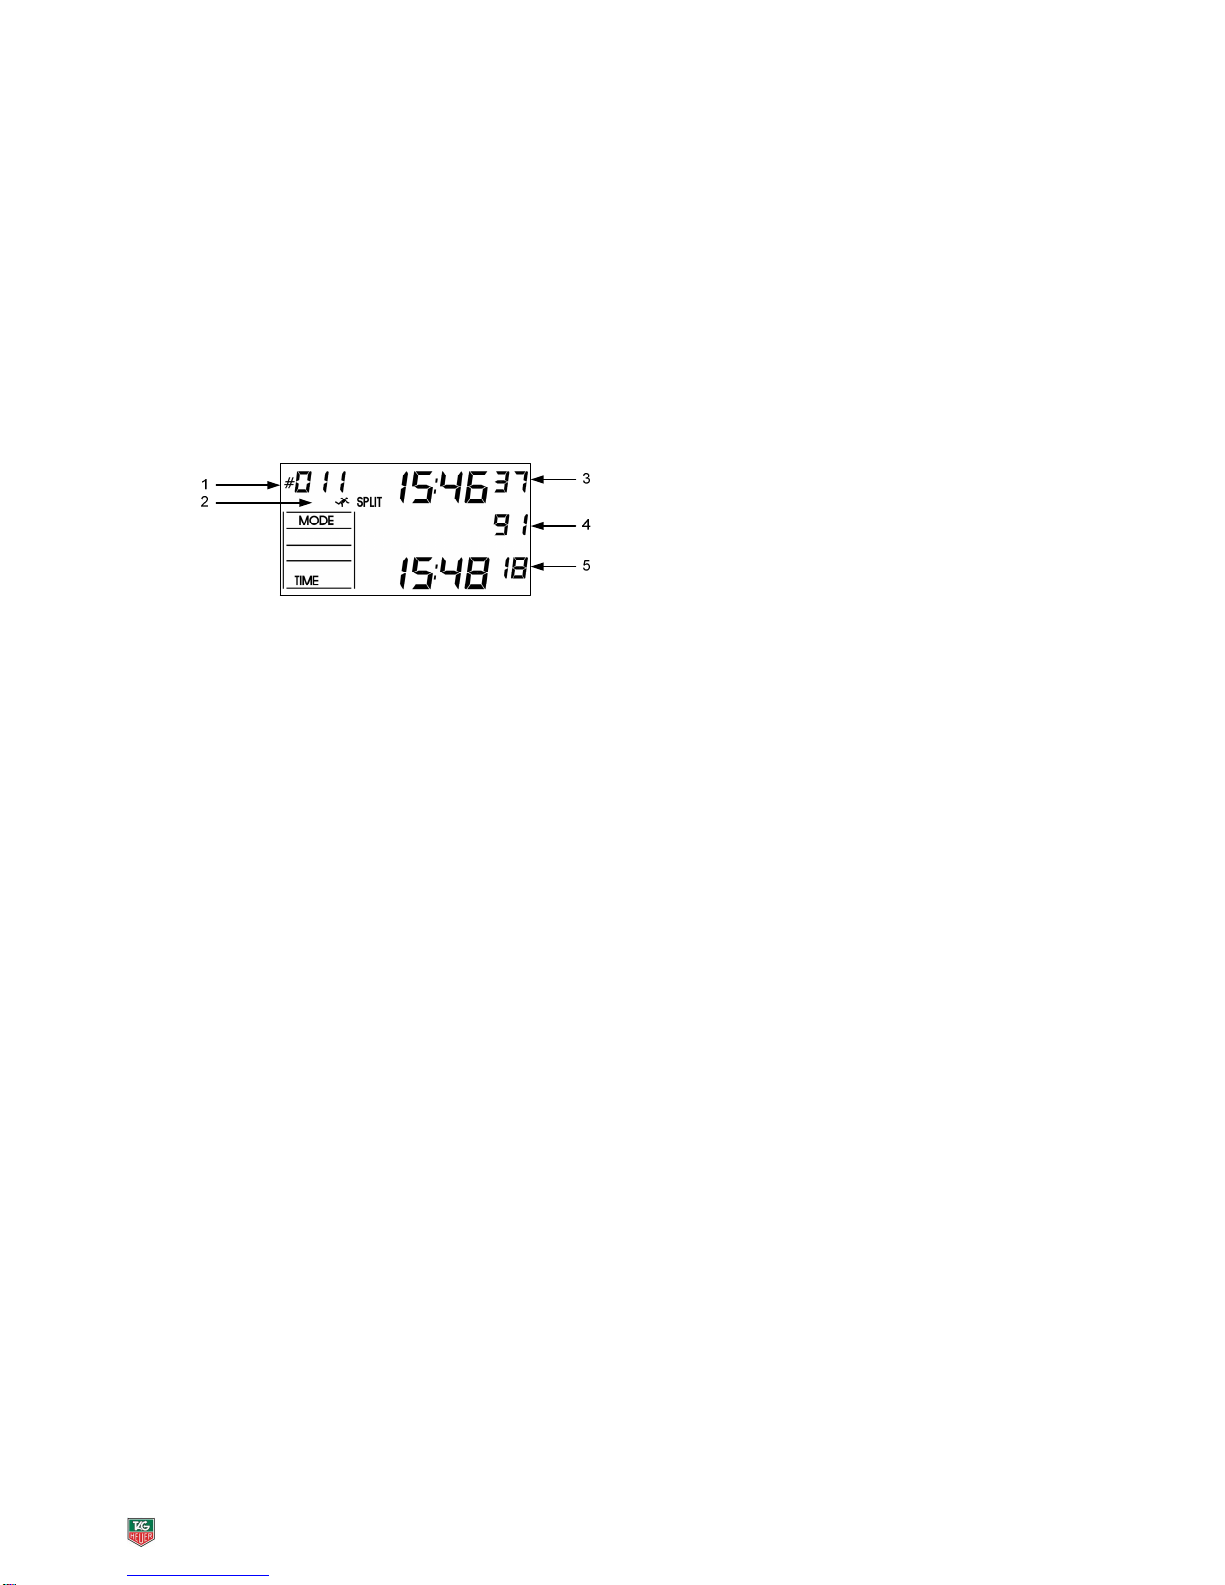
timer and stage timing with unlimited split times.
Stage Timing mode allows the user to select a count-down (with audible
beeps) which will display the time remaining before the next start
occurring on either the next full minute or half minute. A count-down
clock is visible during the count-down phase which then transposes to a
count-up clock during the stage. The user has the ability to make an
unlimited number of split times as needed. The internal memory stores
the actual start time and stage time for every stage.