PA-223A-140 User’s Manual 17
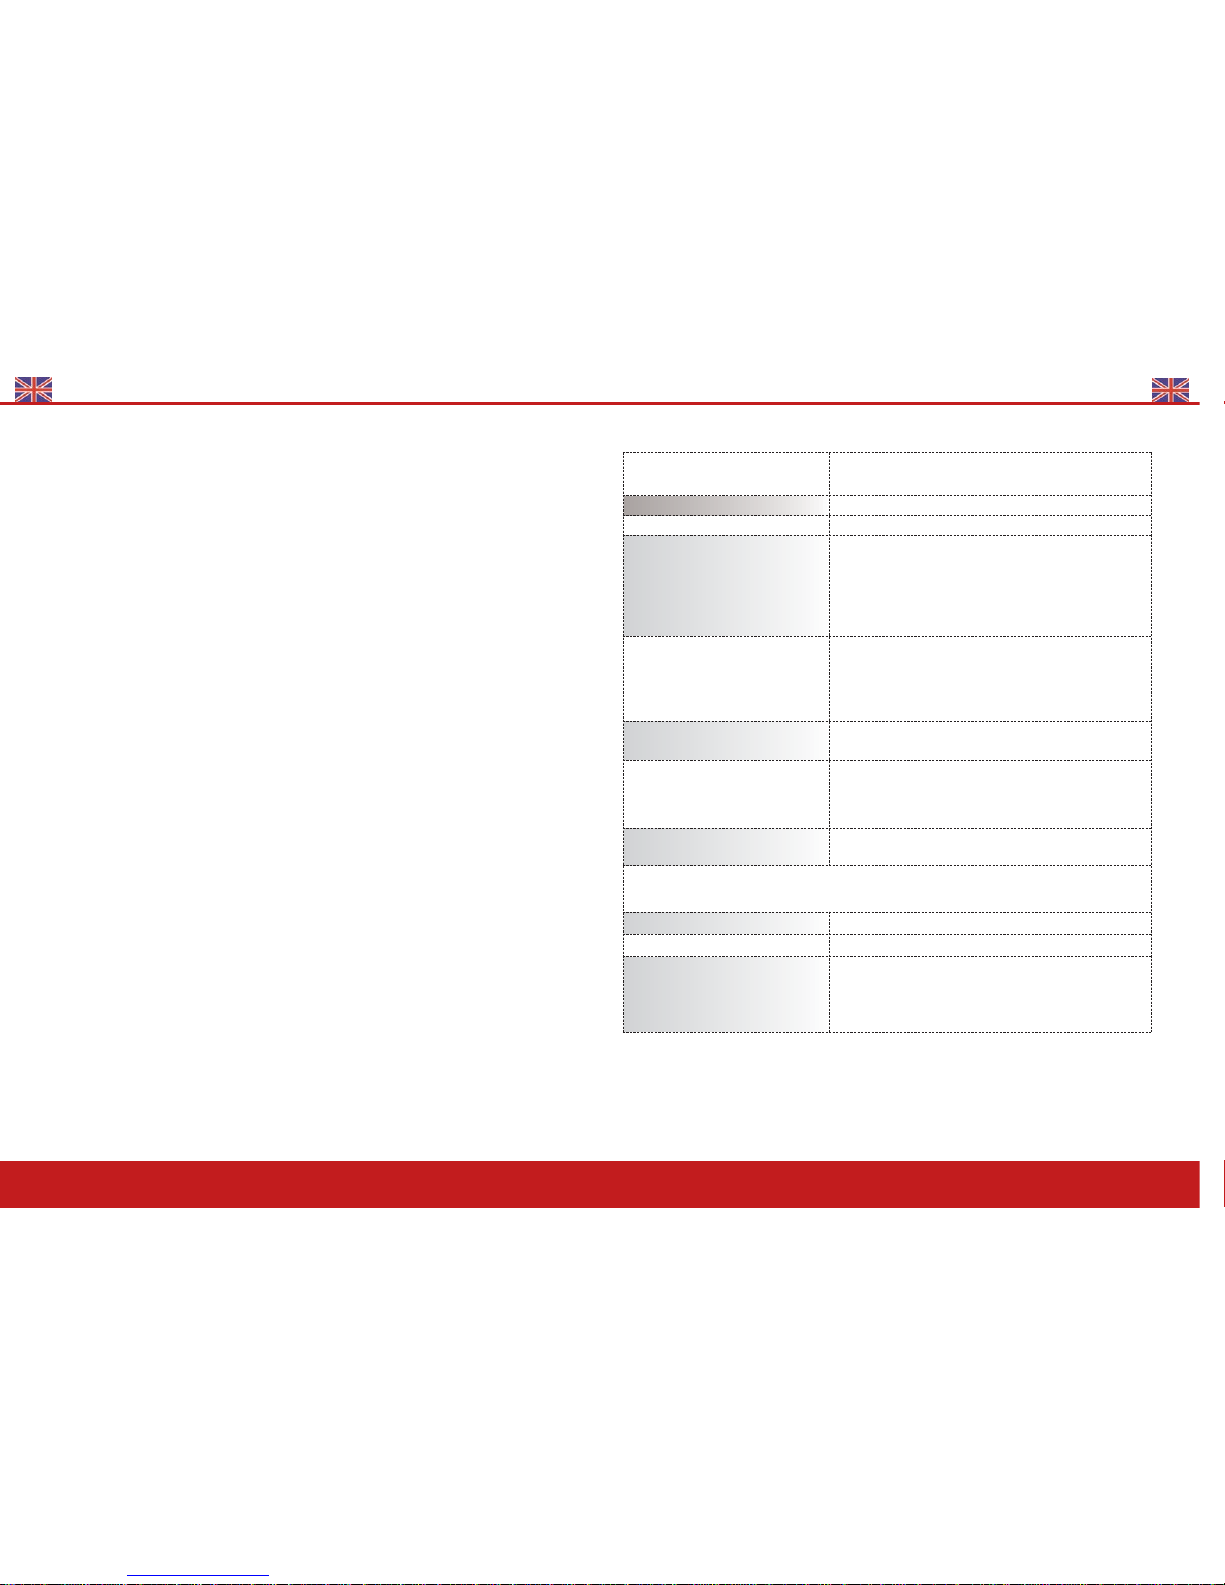
Keys Explanations Front Panel
Player Remote
POWER To switch on or off the player
PLAY/
PAUSE
Play
Pause
STOP
USB/Card
(FUNC)
Stops music
Changes mode
Pitch
Control
Clockwise to increase music speed and anticlockwise to
decrease music speed
UP/CUE
Title Skip
Press briefly to skip to next title. Press a little longer (>0,7s)
to play forwards within a title
Play mode:
The selected title starts automatically
Stop/Pause mode:
The selected title does not start automatically
Program mode:
Enables to skip to next title.
DOWN/
REV
Title Skip
Press briefly to skip to previous title.
Press a little longer (>0,7s) to play backwards within a title.
Play mode:
The selected title starts automatically
Stop/Pause mode:
The selected title does not start automatically
Program mode:
Skips to previous title
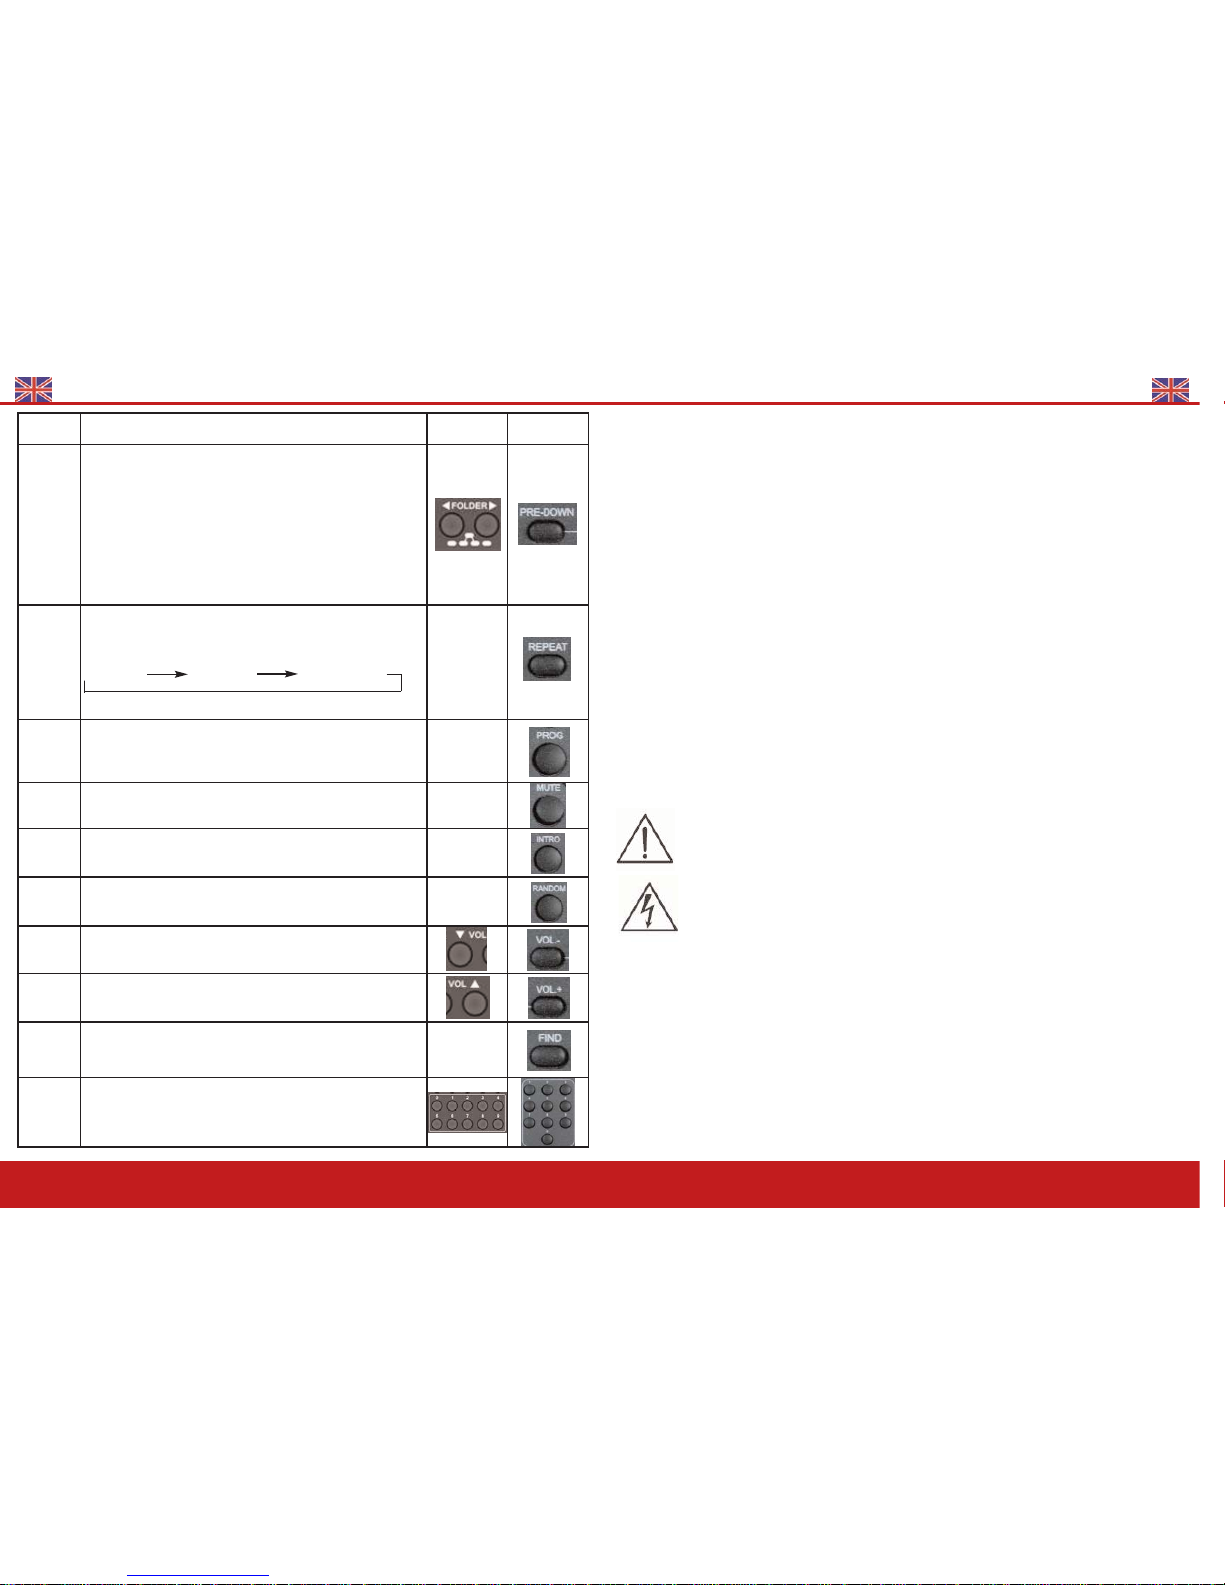
PRE-UP
FOL-
DER>>
Press this to skip to next file
Stop mode : to choose next file
Program mode : to select the first title in next file.
Play mode : to select the first title in next file
PA-223A-140 User’s Manual
8
BELT TRANSMITTER SM-5016 (UHF)
Belt transmitter settings
1. Making changes to CHANNEL / FREQUENCY
Press on Set for 2 seconds to enter into Settings.
Use UP or DOWN button to go to the CHANNEL /FREQUENCY page. The
cursor will flash to allow changes to be made. Pressing UP or DOWN but-
ton will increase or decrease the channel number. The corresponding fre-
quency will change accordingly. When a desired channel(frequency) is being selected, it will be
automatically saved and stored in the memory.
2. Input Level Gain Control Adjustment
Low impedance (Lo-Z) " MT" & high impedance (Hi-Z) " GT" gain controls are situated inside the
transmitter. Gain controls are adjustment ports that enable you touse microphones of differing
output levels and Guitar or instruments with Hi-Z output. To adjust microphone (Lo-Z) input
levels, turn the "MT" control and to adjust the Guitar or instrument (Hi-Z) input, adjust the "GT"
gain control to set the transmitter's desired audio input level.
3. Making changes to Battery selection
Use UP or DOWN button to go to the Battery selection page. Press SET for
about 2 seconds to activate the cursor. Press UP or DOWN button to move
the cursor to either NiMH (rechargeable battery) or AKLN (Alkaline bat-
tery) position.When the desired option has been selected, press SET for about 2 seconds to save
and store the data in the memory.
1. Antenna
2. Battery weak indicator
3. Audio mute switch
4. Mini-XLR connector
5. Power ON / OFF switch
6. LCD display
7. Charging port
8. Cover release button
9. Charging contacts
10. Lavalier microphone
11. Mic clip
12. SET
13. UP
14. DOWN
15. GT
16. MT
2
1
3
4
9
7
8
56
10
11
12
13 14
15 16