5
6
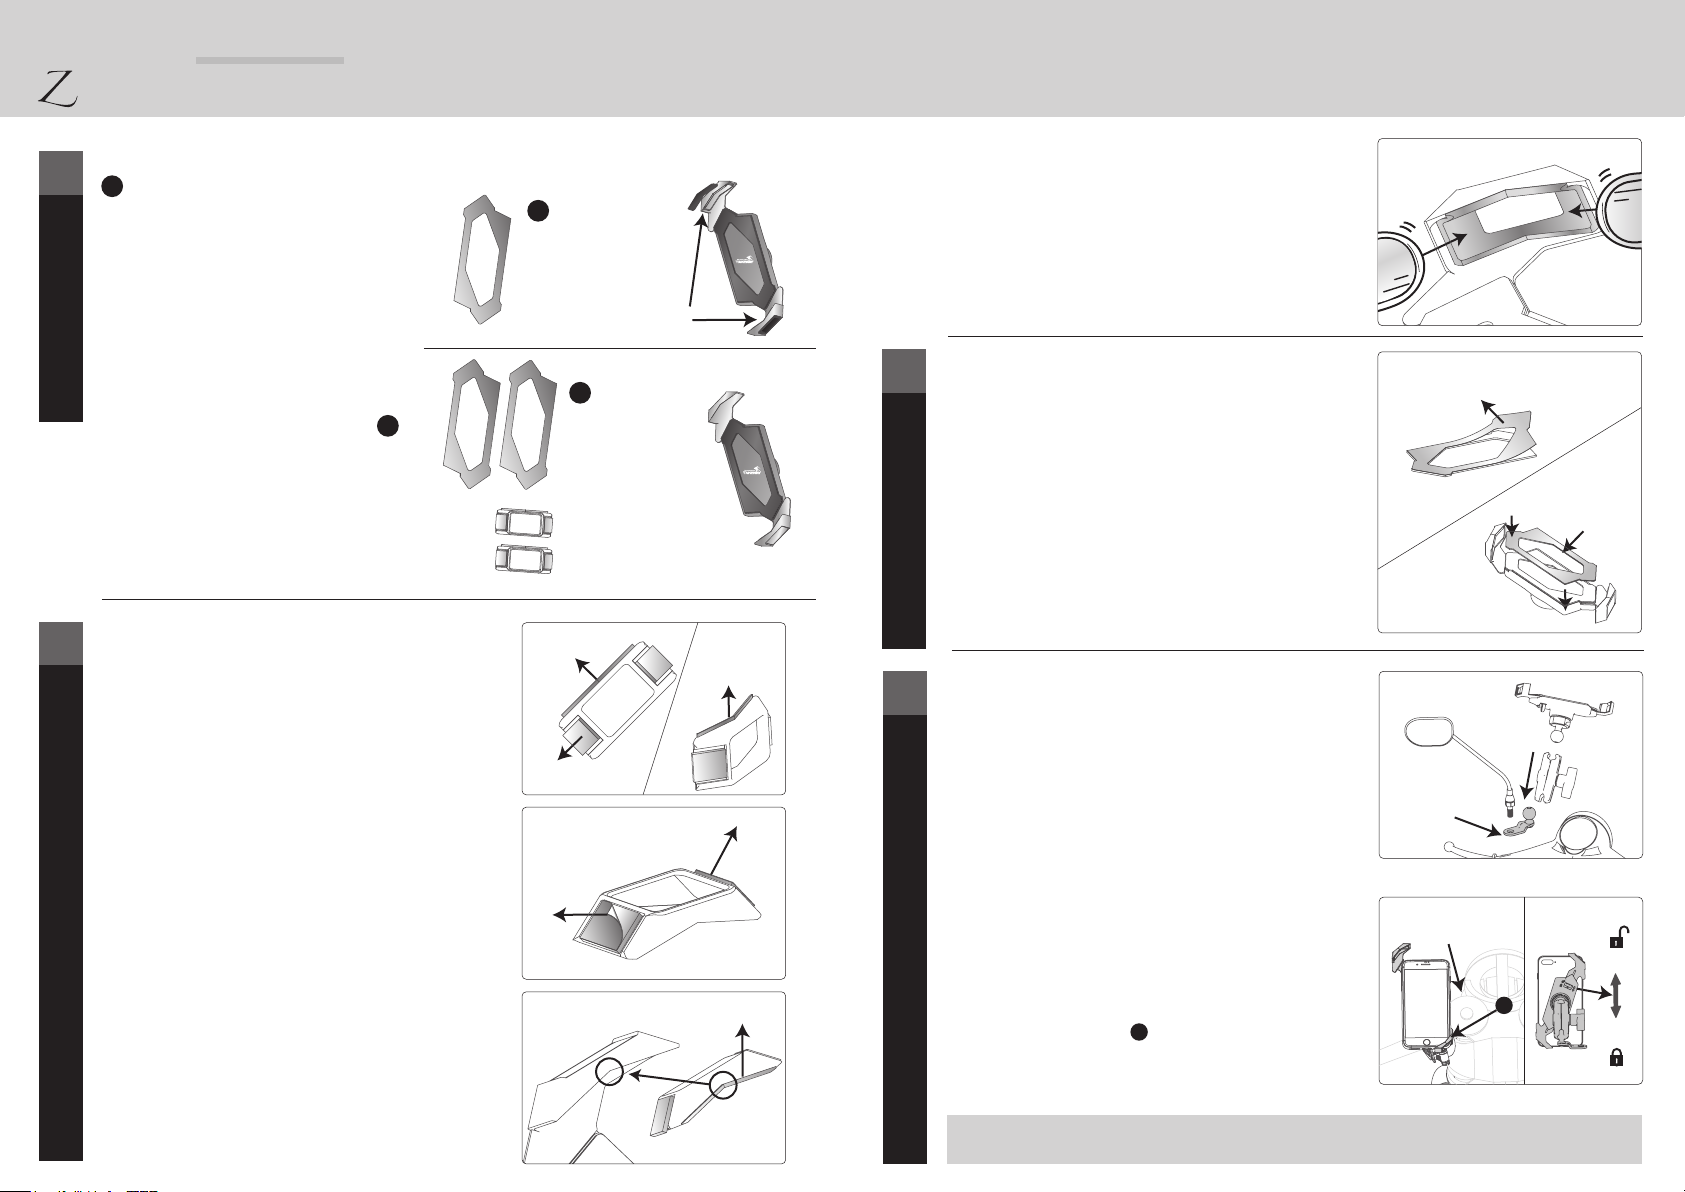
7
Unlock the smart security lock. Use one hand
to push the corner sleeves open by applying
force toward the lower right corner. Once the
corner sleeves are expanded, you can easily
take out your phone.
T-RC04 Quick release Ballhead
for action camera
Put the action camera on
T-RC04 Quick release ballhead.
Quick release universal bracket
(Anti-theft feature):
If the bracket will not be in use for a long time,
you can dismantle it by using the quick release
feature and store the bracket in a safe place.
Instruction: Loosen the bracket knob. Take off
the the ball-shaped mount of the phone holder.
Use fingers to nip the top of the clamping
bracket and the bracket will come off easily.
Take out the smartphone Mount for
Action Camera
※ Optional accessory: T-RC04
※ Optional accessory T-RC05
< Dismantling >
B
A
Mount For Anti-theft Instruction
3 4
1
Socket Arm Washer
Spring
Hexagon
Head Screw
Knob
Bracket 2
Socket Arm Spring M5 Allen key
anti-vibration nut
hexagon socket head
screw
Anti-theft pouch
Place and assemble the spring,
the screw, and the screw nut in the
right position. Use an Allen key to
tighten up the screw.
Note the direction!
The circle of the anti-vibration
hexagonal nut is outward.
T-RC04 T-RC05
1/4"
Universal
Screw
Fig.10
Fig.11
Take out
Loosen
Fig.12
T-RC04
All information described in this user guide is
based on the test standard of Takeway®. Sorry for
the inconvenience caused if there are any errors.
The design and specifications of this product are
subject to change without notice.
TW 02/2020
TEL:04-2406 5031
www.takeway.tw
Simple functional testing
8
The validity period of
the standard limited warranty
9The standard limited warranty is valid for
one year, from the original date of
purchase for a consumer or a private
purchaser (the warranty covers only the
primary phone holder and does not
include the attached accessories).
Please be aware of this condition and
use the phone holder at your discretion.
This product is covered by product
liability insurance. However, any
personal injury and property damage
caused by misuse of and physical abuse
to the product is not covered, and
Takeway® takes no responsibility for
such injury and damage.
Please carefully read the product manual
and correctly use the phone holder.
Patented product,
counterfeiting not allowed
1. Before setting the security lock, use
one hand to pull down the lower sleeve
corner to check whether the gliding is
smooth.
2. Fasten the security lock, while keeping
the sleeve corners open. Check whether
the extended sleeve corners are firmly
fixed and do not glide.
3. Unfasten the security lock. The sleeve
corners will automatically return to their
original positions.
※ Inappropriate testing and use might
damage the phone holder structure. Any
damage due to this inappropriate
handling is not covered by the standard
limited warranty.
※ If you have any concerns about the
product use, please stop using it
immediately and contact our customer
service.
Customer Service E-Mail:
This product is designed to reduce the vibration’s
impact on the smartphone. However, it does not function
as optical image stabilization and cannot completely
eliminate the vibration’s impact on the optical lens.
Please be aware of this condition and use the phone
holder at your discretion.
WARNINGS
!
Before using the product for the first time, please
read through the user guide.
Please use this product correctly after fully
understanding the contents of the user guide.
MANUAL
LA1-PH05
Phone Holder