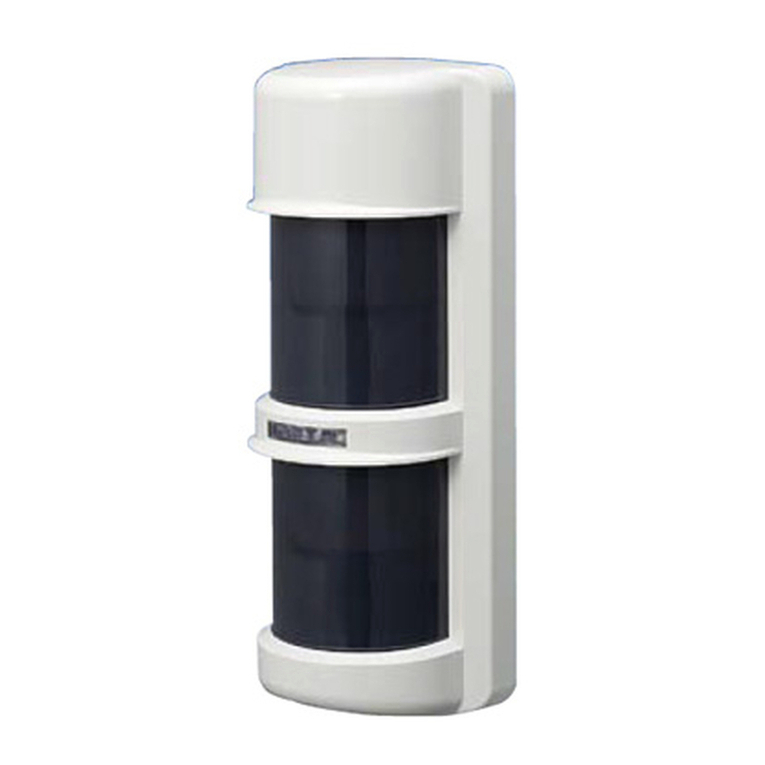
Takex PB-30TK User manual

PHOTOELECTRIC BEAM SENSOR
INSTRUCTION MANUAL
We appreciate your purchase of our photoelectric beam sensor. This sensor will provide long and dependable service when properly
installed. Please read this Instruction Manual carefully for correct and effective use.
Please note: This sensor is designed to detect intrusion and to initiate an alarm ; it is not a burglary-preventing device.
We are not responsible for damage, injury or losses caused by accident, theft, Acts of God (including inductive surge by
lightning), abuse, misuse, abnormal usage, faulty installation or improper maintenance.
PB-30TK Outdoor - 100ft (30m) / Indoor - 200ft (60m)
PB-60TK Outdoor - 200ft (60m) / Indoor - 400ft (120m)
PB-100TK Outdoor - 330ft (100m) / Indoor - 660ft (200m)
[TRANSMITTER]
COVER
COVER
Terminals
Operational
LED
Lens
Lens
View finder
Terminals
Alarm LED
Attenuation
LED
Lens
Lens
View finder
Horizontal
adjustment
Vertical
adjustment
screw
Response time
adjustment
Monitor jack
Horizontal
adjustment
Vertical
adjustment
screw
MOUNTING PLATE
MOUNTING PLATE
[OPTION PARTS]
Pole mounting plate: 2
Pole bracket: 2
[RECEIVER]
Attenuation
sheet: 1
Tapping screw: 4
DO’S AND DONT’S
•Remove all obstructions (trees, clothes
lines, etc.) between Transmitter and
Receiver.
•Do not install the unit on places where it
may be splashed by dirty water or direct
sea spray.
•Avoid strong light from the sun,
automobile headlights etc. directly
shining on Transmitter / Receiver. When
strong light stays in optical axis for a long
time, it does not cause malfunction but
will affect the product life.
•Do not install the unit on unsteady
surfaces.
•The protection distance (between Transmitter / Receiver)
should be placed in the rated range.
PB-30TK : Outdoor : 100’ (30m) / indoor : 200’ (60m)
PB-60TK : Outdoor : 200’ (60m) / indoor : 400’ (120m)
PB-100TK : Outdoor : 330’ (100m) / indoor : 660’ (200m)
Expansion of beam
Expansion of beam can be calculated
as follows:
A=0.03 x l
lA
66’ (20m) 2’ (0.6m)
135’ (40m) 4’ (1.2m)
200’ (60m) 6’ (1.8m)
330’ (100m) 10’ (3.0m)
Transmitter Receiver
Protection distance

POINTS OF INSTALLATION
Heights of installation
Install the sensor at a height of 31" to 39" (80 to
100cm) to catch human pattern.
Position of installation
Using the adjustments, the lens can move
horizontally ( ±90 degrees) and vertically (±10
degrees) allowing the unit to work in all directions.
( example 1 to 3)
Vertical
adjustment
screw
±10˚
±90˚
Horizontal
adjustment
Exemple 1 Exemple 2 Exemple 3
CAUTIONS ON INSTALLATION
•Avoid overhead wiring
•When installing indoors, wiring procedures
similar to those for telephones or intercoms are
acceptable.
Outdoor wires should be placed inside pipes, or
underground cable / metal shielded cable should
be used.
Terminal configuration Connection
Power
10V to 30VDC (non-polarity)
Power
10V to 30VDC
(non-polarity)
[Receiver]
[Transmitter]
Alarm NC NC
COM NO
Alarm output
Dry contact relay
Output 1c
30V (AC/DC) 0.5A
When cover
attached
Tamper output
Dry contact relay
Output N/C 30V
(AC/DC) 0.5A
•Wiring distance
model PB-30TK PB-60TK, PB-100TK
voltage 12V 24V 12V 24V
wire size
AWG22 720’ 6200’ 490’ 4200’
(Dia 0.65mm) (220m) (1890m) (150m) (1280m)
AWG20 1200’ 10500’ 830’ 7200’
(Dia 0.8mm) (366m) (3200m) (250m) (2200m)
AWG18 1800’ 16000’ 1200’ 10500’
(Dia 1.0mm) (549m) (4880m) (366m) (3200m)
AWG17 2200’ 20000’ 1450’ 13500’
(Dia 1.1mm) (670m) (6000m) (442m) (4000m)
Note 1) Maximum wiring distance when two or more sets are connected
is the value above divided by the number of sets.
2) The signal line can be wired to a distance of up to 3,300 ft.
(1,000m) with AWG22 (dia 0.65mm) telephone wire.
•Example connection 1
•Example connection 2
•Example connection 3
Transmitter Receiver
Control panel
(12VDC)
Power
Alarm
signal
TR. RE. TR. RE.
TR. RE. TR. RE.
Control panel
(12VDC)
Power
Alarm
signal
Control panel
(12VDC)
Power
Alarm (1ch.)
Alarm (2ch.)
31" to 39"
(80 to 100cm)

1) Remove cover from
unit and slide the
mounting plate to
detach it.
2) Pull wire through on the installation site.
3) Break grommet on
mounting plate and
pull wire through it.
Secure the plate with
4mm screws.
Pull wire through sensor body (back to front) and attach it to the
mounting plate.
4) When exposed wired, break knockouts (2 positions) on the rear
of unit, pull wire through as the figure and attach it to the
mounting plate.
Wiring from
the top
Grommet
Knockout Knockout
Wiring from
the bottom
5) After wiring is completed, adjust alignment, check operation
and attach cover.
Note Sealing is not required for unit surround due to
rain-proof construction.
*The grommet is compatible with a wire of ø0.12” (ø3mm) to
ø0.24” (ø6mm) outer dia. When a wire of more than ø0.24”
(ø6mm) outer dia. is used, cut off the dotted line portion on the
below figure by pliers or the like. Then make corking to prevent
insects from entering into the unit.
Grommet
()
View finder View finder
Horizontal
adjustment
Vertical adjustment screw
Clockwise: Upward
Counterclockwise: Downward
•Further, fine tune until receiver attenuation LED is OFF.
•When the unit is used outdoors, a tester is advisable to be used for
adjustment. You can confirm the beam level by inserting a tester in
monitor jack of Receiver.
The reference follows:
Monitor output voltage Alignment (outdoor) Alignment (indoor)
700mV or more Best Best
250mV to 700mV Good
60mV to 250mV Good
Less than 60mV Re-adjustment Re-adjustment
Note: The above voltage shows attenuation sheet condition.
•Supply power with cover detached.
•Set Transmitter lens to Receiver lens.
The view finder is placed between 2 lenses.
Look through view finder on either side and line-up optics
horizontally and vertically until the opposite unit is visible.
(Hold the mental portion and change horizontal angle.)
Alarm Led
Attenuation LED
Tester
Receiver
Attenuation sheet
For outdoor use, adjust with
attenuation sheet on until
attenuation LED is OFF.
After adjustment, take out
attenuation sheet.
Adjust response time as follows. The unit does not detect the passing object faster than the response time set. If the response time is set longer, the
unit does not detect human beings. Adjust to a little longer response time in a site where large passing objects, such as birds, newspaper or carton
box may move.
(Testing) Units should be tested on a regular monthly basis. To
test, walk in front of Receiver and watch to see if the
walk test LED lights as the beam is blocked. Relay
function should be confirmed by watching status light
on control panel.
(Maintenance) Our photoelectric beams are virtually maintenance free,
with the exception of units that are located in dusty or
dirty environments. Dirty units should be cleaned off
with a damp cloth as necessary.
Response time (sec.)
0.05 (standard)
(0.3)
0.7
Response 0.05 sec.
Run at full speed
Response 0.3 sec.
Walk with quick steps
Response 0.7 sec.
Walking
Wall Mount

Symptom Possible Cause Remedy
Operation LED 1. No power supply. 1. Turn on the power.
does not light 2. Bad wiring connection or broken wire, short. 2. Check wiring.
Alarm LED does 1. No power supply. 1. Turn on the power supply.
not light when the 2. Bad wiring connection or broken wire, short. 2. Check wiring.
beam is broken 3. Beam is reflected on another object and sent into the receiver. 3. Remove the reflecting object or change beam direction.
4. Two beams are not broken simultaneously. 4. Break two beams simultaneously.
5. The beam interruption time is shorter than the set response time. 5. Set the response time shorter.
Alarm LED continues 1. Beam alignment is out. 1. Check and adjust again.
to light. 2. Shading object between Transmitter and Receiver. 2. Remove the shading object.
3. Optics of units are soiled. 3. Clean the optics with a soft cloth.
Intermittent alarms 1. Bad wiring connection. 1. Check again.
2. Change of supply voltage. 2. Stabilize supply voltage.
3. Shading object between Transmitter and Receiver. 3. Remove the shading object.
4. A large electric noise source, such as power machine, is located 4. Change the place for installation.
nearby Transmitter and Receiver.
5. Unstable installation of Transmitter and Receiver. 5. Stabilize.
6. Soiled optics of Transmitter and Receiver. 6. Clean the optics with a soft cloth.
7. Improper alignment. 7. Check and adjust again.
8. Small animals may pass through the 2 beams. 8. Set the response time longer. (Impossible in a site
where an intruder can run at full speed.)
Model PB-30TK PB-60TK PB-100TK
Detection system Simultaneous breaking of 2 beams
Infrared beam LED pulsed beam, Double modulation
Protection distance
Outdoor 100’ (30m) or less Outdoor 200’ (60m) or less Outdoor 330’ (100m) or less
Indoor 200’(60m) or less Indoor 400’(120m) or less Indoor 660’(200m) or less
Max.beam range
Outdoor 1000’ (300m) or less Outdoor 2000’(600m) or less Outdoor 3300’ (1000m) or less
(Approximation)
Indoor 1000’(300m) or less Indoor 2000’(600m) or less Indoor 3300’(1000m) or less
Response time 50msec.to 700msec. (Variable at pot)
Supply voltage 10V to 30VDC (Non-polarity)
Current 53mA or less 80mA or less
consumption
Dry contact relay output form C
Contact action: Interruption time + delay time
Alarm output (1 to 3 sec.)
Contact capacity: 30V AC/DC, 0.5A or less
Dry contact relay N/C
Tamper output Action :
Activated when cover is detached.
Contact capacity:30V AC/DC, 0.5A or less
Alarm LED Red LED (Receiver)
ON: when an alarm is initiated
Attenuation LED Red LED (Receiver)
ON: when beam is attenuated
Functions
Monitor jack output AGC circuit, Frost proof cover
Ambient temperature -13ºF to +140ºF (-25ºC to +60ºC)
range
Mounting positions Indoor / Outdoor
Wiring Terminals
Weight Transmitter: 13.3oz (380g) Receiver:14oz (400g)
Appearance PC resin (wine red)
Limited Warranty
All TAKEX Products are subject to 5 years warranty.
All other warranty periods agreed are subject to a formal written agreement.
During the warranty period, TAKEX Europe Ltd. will repair or replace, as its sole
option, free of charge, any defective parts returned prepaid.
Our warranty does not cover damage or failure caused by Acts of God, abuse, misuse,
abnormal usage, faulty installation, improper maintenance, unauthorised customer
modifications or any repairs other than those carried out by TAKEX Europe Ltd.
TAKEX EUROPE LTD.
Aviary Court, Wade Road,
Basingstoke,
HANTS RG24 8PE
UK
Tel. +44(0)1256-475555
Fax.+44(0)1256-466268
Webpage: www.takexeurope.com
Knockout
Knockout
Grommet
PB-100TK IM-10/04 (CRI-174)
The specifications are subject to change without notice.
This manual suits for next models
2
Other Takex Security System manuals
Popular Security System manuals by other brands

Schwaiger
Schwaiger hg2000 instruction manual

Pittway
Pittway SYSTEM SENSOR SPECTRAlert SC2415W Installation and maintenance instructions

Honghui Electronic
Honghui Electronic s3523 user manual

Control Products
Control Products miniAlarm instructions

SafetyTracer
SafetyTracer Mopas Lite manual

Smartec
Smartec 484 user manual