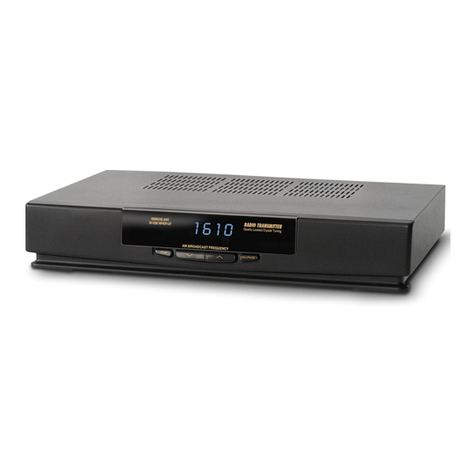
Talking House IAR-17 User manual

Transmitter Installation and Operation
Easy-to-follow instructions on how to program and use your Talking House / i A.M. Radio Transmitter
Questions? Just call (616) 772-2300.

2
Contents
Quick Start.....................................................................................................................................................................3
Front and Rear Panel Controls......................................................................................................................................5
Frequency Selection and Antenna Connections............................................................................................................6
Set the frequency..................................................................................................................................................6
Connect the Antenna.............................................................................................................................................6
Broadcasting Live ..........................................................................................................................................................7
Broadcast live from a microphone.........................................................................................................................7
Broadcast live from a studio or external recorded message..................................................................................7
Broadcast a prerecorded message from the internal “Message Chip” storage.....................................................7
Record Procedure (in detail)..........................................................................................................................................8
Front Panel............................................................................................................................................................8
Technical Specifications and FCC Regulations.............................................................................................................9
Transmitter............................................................................................................................................................9
Applicable FCC and Licence Regulations - FCCID: DLB5LTT98..........................................................................9
FCC Part 15 Rules, Section 15.219 - Operation in Band 510–1705 kHz..............................................................9
Warranty Support and Service Information.........................................................................................................10

3
Quick Start
This Quick Start contains the basic steps necessary to set up and operate your Talking House /i, A.M. Radio Transmitter using
the Indoor Wire Antenna. Please read the detailed procedures in this manual for complete instructions, especially if your set-up
includes an Outdoor Antenna.
1. Make sure the Control Lock Key is inserted in the Control Lock Hole located on the rear of the Transmitter. This key
must be completely inserted to record messages and set the frequency on the transmitter. Also, make sure that the
“ANTENNA SELECT” switch is in the “Basic” position.
2. Connect the Indoor Antenna and be sure to uncoil and fully extend the Wire.
3. Set the "TWO-PART MESSAGE SELECT" Switch to "Part-One." You are now ready to record a message to be broadcast
via the Internal or External Mic or any external input source connected to the "LINE INPUT" Jack.
4. Plug the hand-held Microphone into the "MIC" Jack located on the back of the Transmitter. If you are not using a
hand-held mic, the Transmitter input will default to the Internal Microphone located just under the perforated lid. Or
plug any line-level source (MP3 player, cassette deck) into the "LINE INPUT" Jack on the rear panel.
5. Next, plug the Power Transformer into a grounded wall outlet, and then plug the Power Cord into the "CUSTOM
POWER" Input Jack located on the back of the Transmitter. The Transmitter will then begin calibrating itself. When it
is finished calibrating, a frequency will appear on the front panel display.
6. The "SPEAKER VOLUME" should be turned off when using the Mic to avoid feedback.

4
7. To record, press and hold the "RECORD/PAUSE" Button on the front panel until you see the countdown begin on the
Front Display. Then, release the button and begin recording your message by speaking clearly into the Internal Mic
under the top perforated grill of the unit, or into a hand-held mic plugged in to the "MIC" Jack on the rear of the unit,
or by starting an external source plugged into the "LINE INPUT" Jack on the rear of the unit. The front panel digital
display will count down the total record time available, but you can pause recording at any time by pushing the
"RECORD" Button again. Then, finish the record process by pushing the "PLAY" Button, or continue recording by
pushing the "RECORD/PAUSE" Button again.
8. Next, determine an open frequency in your area and set this frequency on the front panel display using the
"UP/DOWN" Arrow Keys. Please see the “Frequency Selection” page in this manual to select the best frequency.
9. Finally, monitor the radio signal on a good car radio to check coverage and audio quality. You can try different
transmitter locations and frequency selection to improve coverage and minimize noise.

5
Front and Rear Panel Controls

6
Frequency Selection and Antenna Connections
Set the frequency.
Determine an available frequency (preferably on the high end of the band) by using a good quality digital car radio parked in
your primary listening area. Select a channel on your car radio where no other radio station is audible as well as on one channel
above and one channel below. It is advisable to make this listening test at dusk, when radio reception is at best.
Use the front panel "RAISE" and "LOWER" Controls to set this frequency.
Note: When using the Indoor Antenna, the Transmitter will go through an automatic antenna calibration routine after a
frequency has been set. This routine will be automatically repeated once an hour to keep the Transmitter calibrated (an
internal motor sound will be heard.)
Note: When operating the Transmitter, the built-in Speaker can be used to monitor the broadcast signal or manually turned off
or down via the rear panel “SPEAKER VOLUME” Control. The volume level setting of the Speaker volume will not affect the
audio level of the broadcast signal.
Connect the Antenna.
Connect the Indoor Antenna to the rear Panel Lug. Locate the Transmitter by a window and stretch the full length of Antenna
Cable out in as straight a path as possible. Set the “ANTENNA SELECT” to “BASIC.”

7
Broadcasting Live
Broadcast live from a microphone.
Set the Transmit Mode Switch on the Back panel, to “LIVE RADIO.” This immediately and automatically
selects the built-in Microphone (located inside the unit and under the top panel grill) to act as the audio
source for the transmission.
Plugging in a hand-held, high-Z microphone into the “MIC” Jack on the rear panel automatically supersedes
the built-in Mic and selects this Mic as the audio source for the transmission.
Note that the built-in Audio Limiter will keep the signal from distorting, but it is still best to speak directly
into the Microphone and at normal and consistent volume for best sound quality.
Note that when using a microphone, the built-in Speaker must be manually turned off or down via the rear
panel ‘SPEAKER VOLUME” Control to avoid feedback.
Broadcast live from a studio or external recorded message.
Set the "TRANSMIT MODE" Switch on the back panel, to “LIVE RADIO” and plug a line-level signal (.1V to
.5V, unbalanced) into the “LINE INPUT” (1/8” mini phone) Connector on the rear panel. This immediately
and automatically selects this external line input to act as the audio source for the transmission or
recording.
Note that the built-in Audio Limiter will keep the signal from distorting, but it is still best to maintain the
incoming signal level at a consistent volume for best sound quality.
Note that when recording or broadcasting a "LINE INPUT," the built-in Speaker can be used to monitor the
broadcast signal or manually turned off or down via the Rear-Panel “SPEAKER VOLUME” Control. The
volume level of the Internal Speaker will not affect the audio level of the broadcast signal.
Broadcast a prerecorded message from the internal “Message Chip”
storage.
Set the "TRANSMIT MODE" Switch on the back panel, to “Message Chip”. The transmitter will automatically
begin and continue to playback any audio recorded on the internal “Message Chip.” Set the “Two-Part
Message Select” switch in the “Part-1” position to playback only message one.
Set the “Two-Part Message Select” switch in the “Part-2” position to consecutively playback both messages
parts one and two.

8
Record Procedure (in detail)
Front Panel
Recording a message onto the internal “message chip.”
1. Insert the Control Lock Key in the Control Lock Hole located on the back of the Transmitter. Select either Part-1 or
Part-2 on the Two-Part Message Switch located on the back of the Transmitter. Note that you can record or re-record
either message part at any time and select to playback either only Part-1 or Part-1 and Part-2 when transmitting.
Therefore, Part-1 is often used as a “wrap-around” or permanent part of the message; while Part-2 is used for
additional information and topical updates.
2. To record from the internal built-in Mic, speak into the Top Grill of the unit. To record from an external Mic or Line-
Input, plug either device into its corresponding rear-panel Connector.
3. Press and hold the "RECORD/PAUSE" Button on the front of the Transmitter until the Display Panel begins counting
down in seconds (i.e., 300, 299, 298...), and then immediately begin speaking or press the "START" Button on your
external audio source.
4. To pause during recording, press the "RECORD/PAUSE" Button. Push "RECORD/PAUSE" again to continue. Do not use
the "PAUSE" Button to end a recording.
5. When your message is complete, wait a second or two then press and hold the "PLAY" Button located on the front of
the Transmitter until you see the frequency re-display on the front panel. The message will begin to play back and will
repeat in a loop. If desired, repeat the recording procedure for message PART-2 by selecting Part-2 on the "TWO-
PART MESSAGE SELECT" Switch.
6. To protect your message from accidental erasure or tampering, remove the Control Lock Key from the Control Lock
located on the back of the Transmitter and place it in a safe place where it cannot be lost.
Note: You can monitor your recording on the Transmitter’s internal Speaker by turning up the “SPEAKER VOLUME”
Control on the Transmitter rear panel. But doing so when utilizing a mic as the record source may cause feedback.
The setting for this internal speaker volume will not affect audio transmission.

9
Technical Specifications and FCC Regulations
Transmitter
•Frequency agile with front-panel select-ability; frequency range: 520 to 1700 kHz.
•Automatic Tuning: internal automatic servo-operated tuning circuit for range maximization (U.S. Patent No.
6,295,443).
•Audio Inputs: internal microphone plus external mic (mono) and line-level (stereo) inputs (on 1/8” “mini phone”
connector-line-level sensitivity .1 to .5 volts).
•Audio Processing: built in automatic audio limiter / compressor.
•Message Storage: digital voice record/playback solid state memory chip, 5 minutes max.
•Message Length: variable depending upon model of transmitter (see sticker on unit back panel).
•Microphone: built-in or hand-held.
•Size: 8” x 14” x 2.5” (shipping size boxed - 12” x 20” x 6”).
•Weight: 4 lbs. (shipping weight - 7 lbs).
•Indoor Antenna: black, rubberized wire, approximately 8’ in length.
•Power: 110/120VAC via included 18VDC 100mA external transformer / grounded AC plug adapter.
•RF Output Power: 100 mW average.
•Frequency Control: crystal-controlled phase locked loop tuner.
•Frequency Stability: - +/- 30 Hz.
•Range: typically 300-3000 feet (dependent on conditions and use of outdoor range extender).
Applicable FCC and Licence Regulations - FCCID: DLB5LTT98
This device complies with Part 15 of FCC rules. Operation is subject to the following two conditions: 1.) This device may not
cause harmful interference, and 2.) this device must accept any interference received, including interference that may cause
undesired operation.
FCC Part 15 Rules, Section 15.219 - Operation in Band 510–1705 kHz
(a) The total input power to the final radio frequency stage (exclusive of filament or heater power) shall not exceed 100
milliwatts.
(b) The total length of the transmission line, antenna and ground lead (if used) shall not exceed 3 meters.
(c) All emissions below 510 kHz or above 1705 kHz shall be attenuated at least 20 dB below the level of the unmodulated
carrier. Determination of compliance with the 20 dB attenuation specification may be based on measurements at the
intentional radiator’s antenna output terminal unless the intentional radiator uses a permanently attached antenna, in which
case compliance shall be demonstrated by measuring the radiated emissions.

10
Warranty Support and Service Information
90-Day Return / Replacement Policy
Your satisfaction is very important to us. Within the initial General Warranty period (90 days from order date), you may return
to us (in original condition with original packaging) any Talking House or i A.M. Radio product for a full refund, minus freight and
handling.
Product Support
To obtain support, contact us via telephone or email.
By telephone, call 616.772.2300 and press 5, 9 am to 5 pm Eastern Time.
You will receive a response within 24 hours and/or on the next business day.
General Warranty
Information Station Specialists warrants Talking House/i A.M. Radio products against defects in workmanship for 90 days from
the date the products are ordered. Defective components may be returned prepaid to Information Station Specialists for repair
or replacement at no charge during that 90-day period. Damage that occurs after delivery, such as from lightning or other
physical, electrical/digital sources, including improper use or abuse, is not covered by this warranty. The warranty is void should
the configuration of components, hardware or software, including the total system be modified (or modified with respect to
the operating environment) subsequent to delivery.
This is the full and complete warranty for products and services. Information Station Specialists assumes no obligation of
liability for additions or modifications to this warranty unless made in writing and signed by an officer of the company.
Information Station Specialists supplies this warranty in lieu of all other warranties expressed or implied, including warranties of
fitness of the products for a particular purpose. In no event shall Information Station Specialists be liable for incidental or
consequential damage to the full extent that might be disclaimed by law.
Disclaimer
Information Station Specialists disclaims liability for any damage or injuries that result from the following:
• Not using the device as it is intended as it is described in the operation manual.
• Installation of non-original spare parts.
• Unauthorized modification or additions without written approval by Information Station Specialists.
• Use of unauthorized equipment.
Service Information
Please contact us to obtain a Return Merchandise Authorization (RMA) number. We will not accept any service
requests/returns without a RMA number printed on the box. Return should be sent to:
Information Station Specialists
Returns Department - RMA # ______
3368 88th Ave
Zeeland, MI USA 49464-0051
Table of contents
Other Talking House Transmitter manuals