Tamerica Tamerica TPI-4900E User manual

USER MANUAL
Tamerica Products, Inc.
9157 Rochester Ave., Rancho Cucamonga, CA 91730
Tel 800.822.6555 Fax 909.484.5260
www.tamericaproducts.net

Safety Precautions …………………………...………………………………………………………………………………. 3
Assembly …………………..…………………….………………………………………………………………………………...4
Operating functions ………………………………………………………………………………….………………………..5
Machine Operation ……………………………………………………………………………………....................6
Programming in Manual Mode ………………………………………………………………………………………..
Programming in Quick Mode ….…...………………………………………………………………………………..8
Programming in Auto Mode …………………………………………………………………………………………...9
Programming in Repeat Mode ………………………………………………………………………………….10-11
Programming in Calculator Mode ………………………………………………………………………………...12
Settings ………………………………………………………………………………………………………………………...14-15
Blade Adjustment …………………………………………………………………………………….………………………..16
Blade Replacement .…………………………………………………………………………………....................1
Cutting Stick Adjustment & Replacement …………………..…………………………………………………...18
Maintenance & Care ……………………………………………………………………………………………..……...18-19
Schematics …………………………….…………………………………………………………………………………………...20
Troubleshooting ………………………………...……………………………………………………………………………...21
Warranty & Repair Policy …………...……………………………………………….……………………………...22-24
Machine Specifications & Features …………………………………………………………………………..………..24
- 2 -
Contents

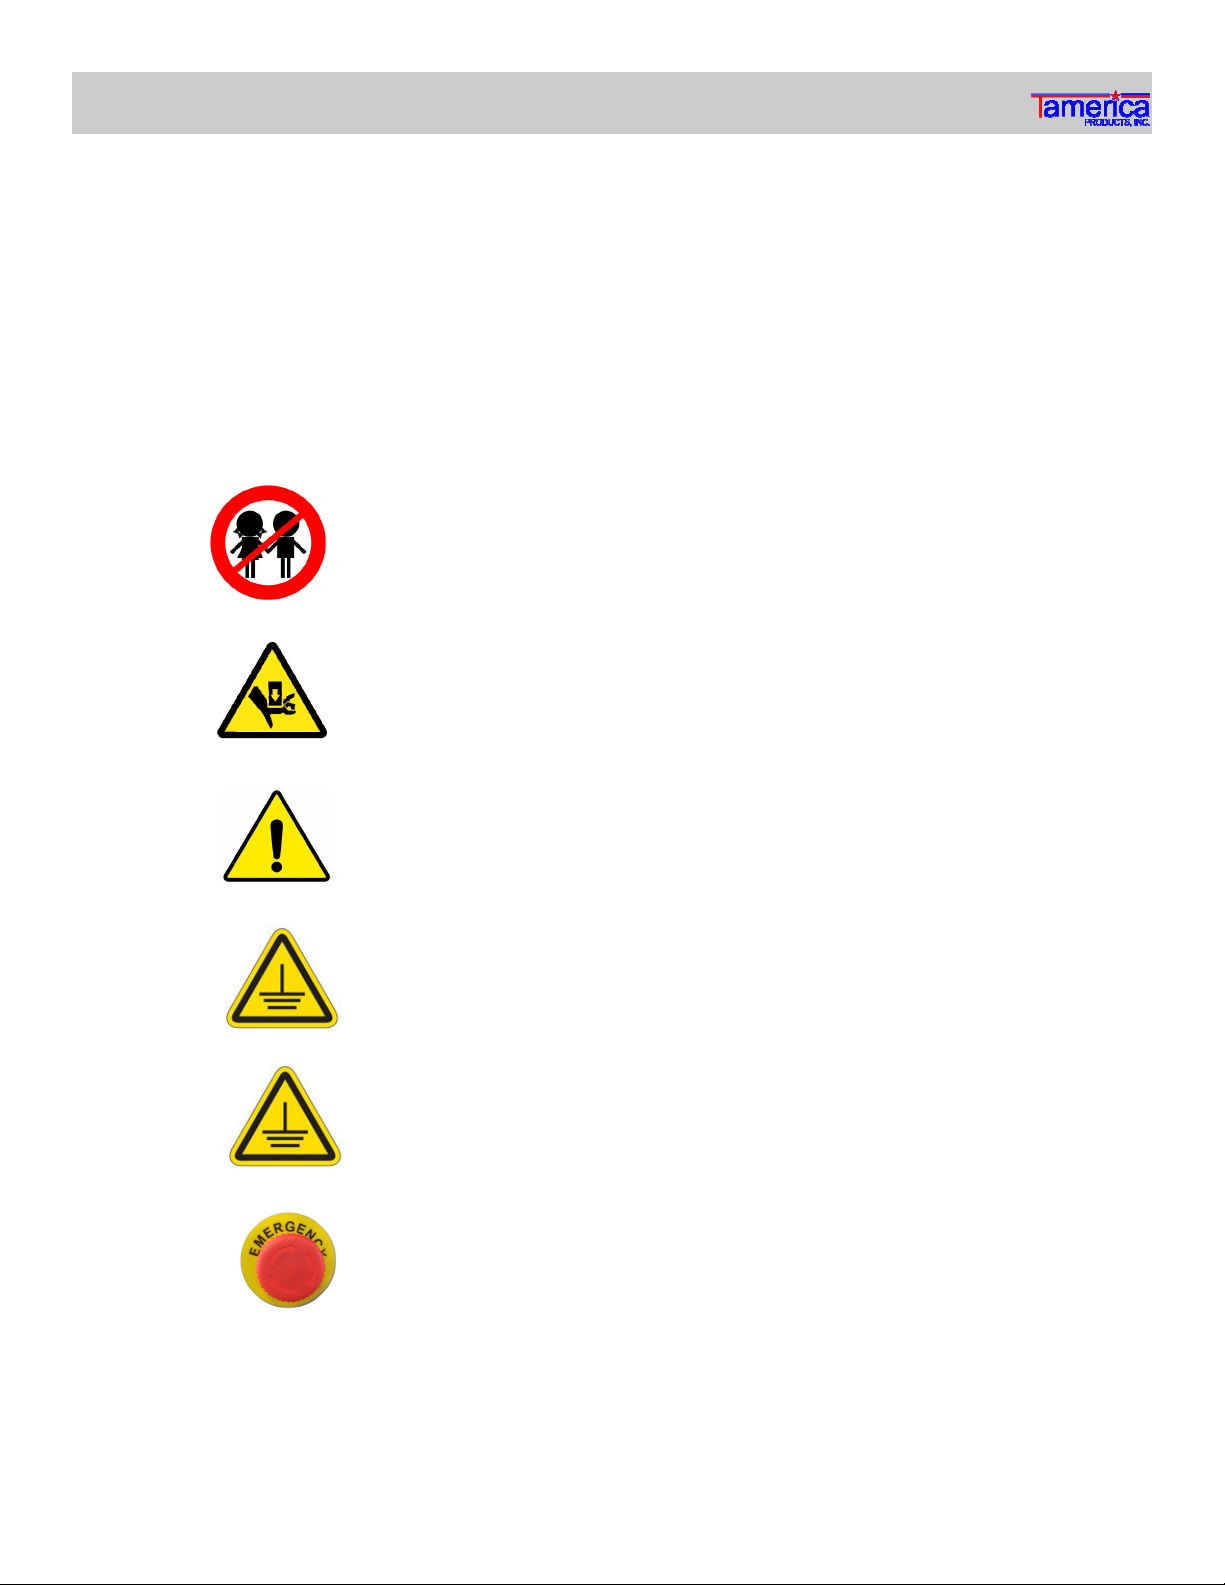
Under no circumstances should children be ever allowed to operate
the machine.
Make sure to keep your hands away from the blade at all times &
handle the blade with care when replacing and use the supplied
blade holder.
Do not use the machine to cut hard materials which may cause in-
jury when splinters & bits are discharged due to the pressure. This
may also damage the blade motor.
Make sure the power cord is properly grounded to a dedicated out-
let. It is important that a steady flow of current is supplied to the
machine for efficiency & the use of a surge protector is highly rec-
ommended.
The machine weighs approximately 350 lbs. Make sure it is posi-
tioned on a clean, dry, flat and stable surface.
Use the emergency stop button to abruptly stop the machine. Turn
the knob clockwise to release it and machine will resume operation.
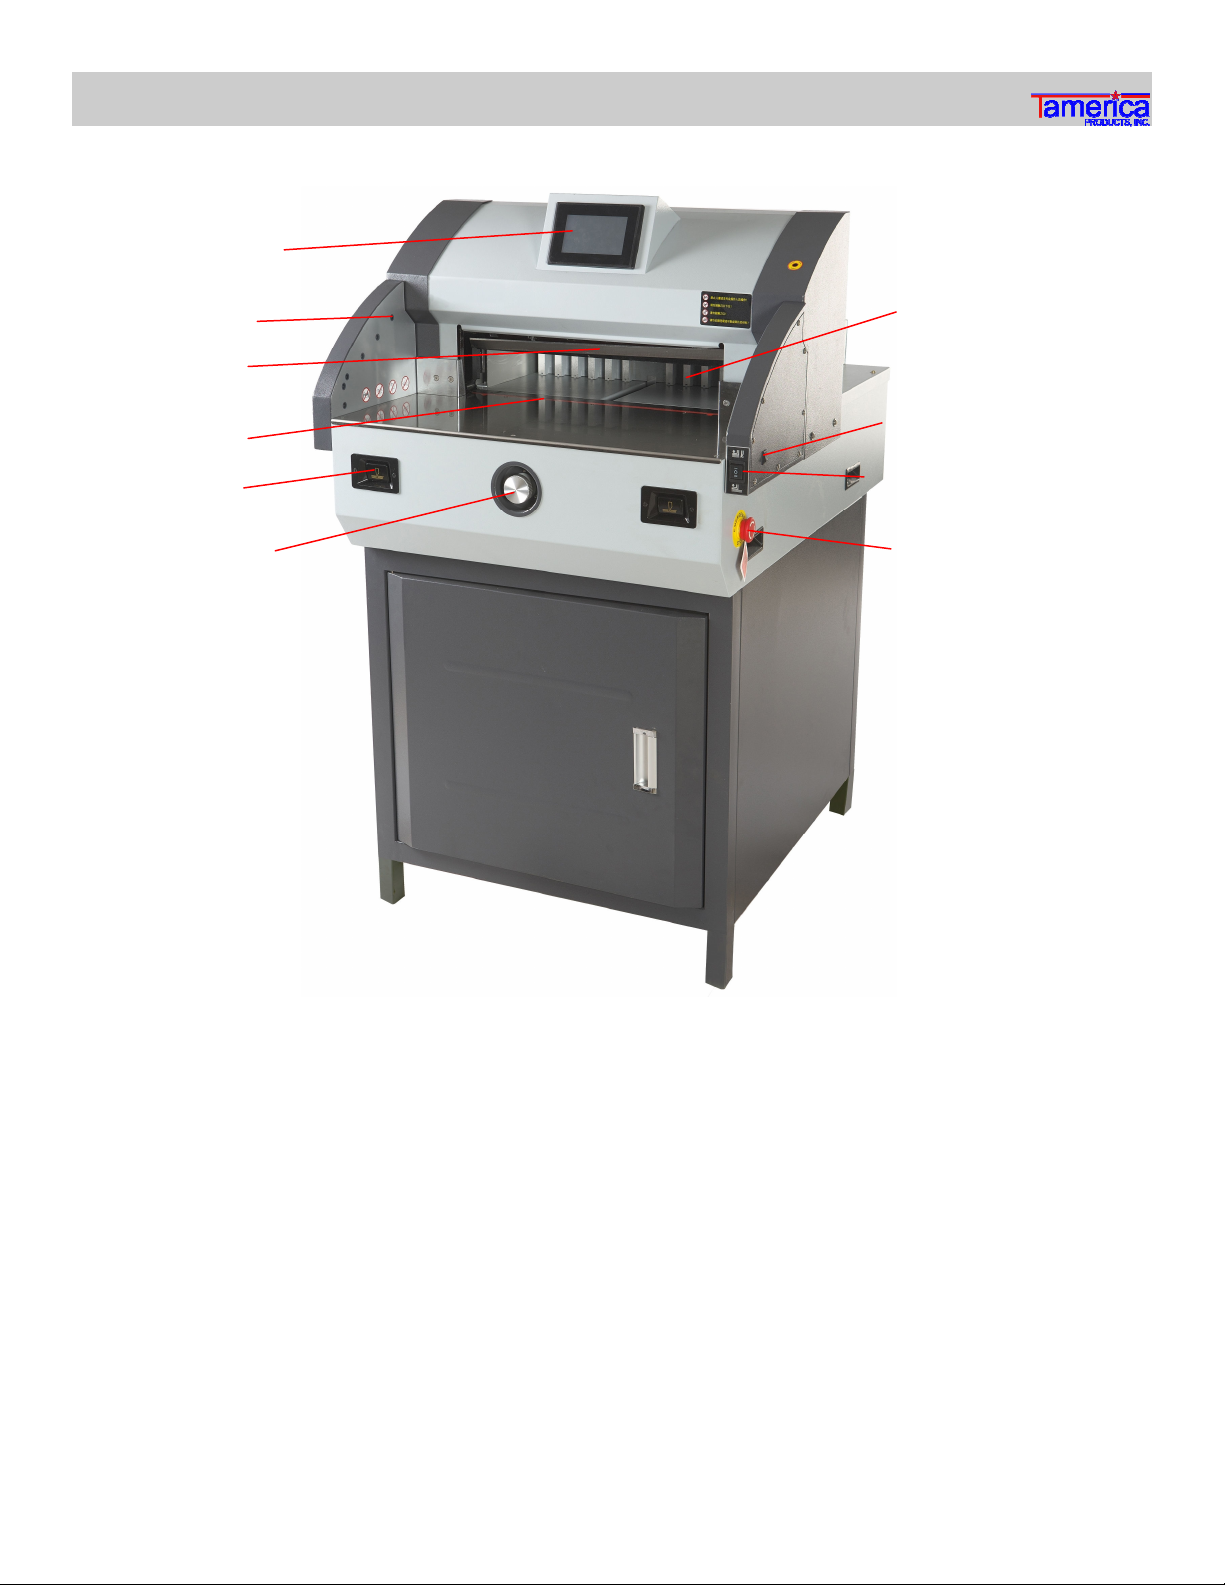
It will be beneficial to first get yourself acquainted with the features of your TPI-4900E be-
fore attempting to use Keep in mind all operational instructions, tips, and safety reminders
every time you use your TPI-4900E to best achieve desirable results
This paper cutter is designed to only cut paper, books, or soft leatherette covers only Never
use the machine to cut any form of metal or other hard objects which may damage the ma-
chine
- 3 -
IMPORTANT Safety Precautions

Assemble the cabinet stand following the illustration below ensuring all connections are tight and
secure. After assembly, position your TPI-4900E on top of the cabinet. This will require 2-3 peo-
ple.
Assembly Instructions
- 4 -

- 5 -
Operating Functions
1 Control Panel
9 Paper Clamp Up/Down
3 Blade
4 Cutting Stick
10 Emergency Stop
5 Cut Switch
6 Hand Wheel
8 Sensor Bypass
2 Safety Sensor
1 Control Panel — use the touch screen to input cut sizes and make other programming adjust
ments
2 Safety Sensors (12) — help keep the user safe from accidents by preventing the machine from
operating when one (or more) of them is blocked
3 Blade — operated by way of pressing the cut switch (1 on the left and 1 on the right)
4 Cutting Stick — helps prolong the life of the blade
5 Cut Switch (2) — press simultaneously to operate the blade
6 Hand Wheel — to manually adjust cut size in small increments (fine-tuning)
7 Back Gauge — helps align the paper and can be programmed to automatically push the paper
out after the cutting process
8 Sensor Bypass — to turn off the 3 sensors on both sides when the document being cut extends
beyond the feed tray. All other sensors will continue to function.
9 Paper Clamp Up/Down — for manual operation of paper clamp. Can also be controlled from
the touch screen (control panel).
10 Emergency Stop — to abruptly stop the cutter from working in the event of an emergency
Back Gauge

- 6 -
1. Securely attach the supplied power cord to the back of the machine and plug the other end into
a properly grounded power outlet.
2. In order to operate the cutter, make sure the emergency stop switch is in the ON position by
moving the knob according to the direction of the arrows (clockwise). Simply push down on the
knob In the event of any emergency where you need to immediately cut power to the cutter.
3. Flip the main toggle switch upwards to the ON position and the control panel display will come
to life. If it does not, go back to step #2. Before operating the cutter, wait for the Back Gauge to
calibrate and check if the blade and paper clamp are in the standby position which should be all
the way up. If not, press UP (=) on paper clamp up/down control until both have retracted after
which you able to proceed to using the cutter.
Machine Operation

- -
On start-up, the cutter will default to 19.29” as denoted by the Real Size value which essentially
is the current size adjustment. To manually program a cut size, simply do the following:
1. Enter the value on the keypad then press OK. This will be displayed on Input Size and the
back gauge will adjust accordingly. Another way of adjusting the cut size is by pressing the Up
and Down arrows or with the use of the Hand Wheel Keep in mind it is able to do so only in
small increments so this should really only be used mainly for fine-tuning.
2. After inputting the cut size, align your document making sure it is square against the left-hand
side of your TPI-4900E and the back gauge.
3. Press the 2 cut buttons simultaneously to operate the blade letting go only after both the
blade and the clamp have retracted after the cut cycle.
4. To push your document out, simply press the Push key. It will remain illuminated which means
the cutter will automatically push your document out on succeeding cuts. Pressing it again
one more time will do the opposite. This will be the same for Manual and Quick Mode.
Programming in Manual Mode
Align documents here Press 2 cut buttons simultaenously

- 8 -
Programming in Quick Mode
This program is used to conveniently cut a large document down to popular US paper sizes such as
Letter (8.5”x11”), Legal (8.5” x 14”), Tabloid (11” x 1 ”) and Ledger (1 ” x 11”) without the
need to input any values. For example, if you want to trim your document to Letter size, simply
press the designated key. Before proceeding to cut, remember to:
1. First check the position of the back gauge to see if it is at 11.00”. In this example, it is cur-
rently at 19.29”. Press the first value to make the TPI-4900E adjust to the correct size then
press the 2 cut buttons to operate the blade.
2. If you want to add another value, press that number followed by Edit then input your value.
3. To push your document out, simply press the Push key. This will remain illuminated meaning
the cutter will automatically push your document out for succeeding cuts. Pressing it again
once will do the opposite.
NOTE: The Back Arrow key will simply return you to the previous screen.
Align documents here Press 2 cut buttons simultaneously

This program is used to store up to 99 projects into the memory bank by doing the following:
1. Press MEMORY or the value next to it then enter the number from 1-99.
2. Enter your cut sizes for each step. In this example, we entered 6 values: 14.50; 11.00; .50;
5.00; 3.50 and 2.00. Do this by pressing EDIT then press 1 for the first value, enter 14.50,
then press OK. Repeat the process until the last value is entered then press EDIT again to
save the entries.
3. Once you are ready to proceed, press RUN to make the back gauge adjust to the first size then
press the 2 cut buttons simultaneously to operate the blade letting go only after both the
blade and the clamp have retracted after the cut cycle.
4. To erase saved values, repeat the above steps but enter 0.00 for each value.
NOTE: You may enter as many as 96 different cut sizes for each project. Use the left or right ar-
row keys to quickly scroll through the different cut sizes.
Programming in Auto Mode
Align documents here Press 2 cut buttons simultaneously
- 9 -

- 10 -
This program is used for repeat cuts with minimal inputs required on the TPI-4900E. In this exam-
ple, we are cutting 12” x 18” cardstock to make full-bleed business cards. NOTE: These meas-
urements are used as an example only and are not meant to be used as a template.
1. Store the values on Memory 1 to cut on the long side. Remember that you can store it from 1-
99. Do this by clicking EDIT followed by MEMORY, then enter the number 1.
2. Trim your document to the optimal size in order to get 6 rows. Keep in mind the cutter can-
not be programmed to cut smaller than 1.5 ” (this can be done manually) hence only 6 rows
can be achieved. So in this example, enter 1 .00 on Total Size to trim your document to 1 ”.
3. Input 2.00 for Size 1 and .50 for Size 2 to program your repeat cuts then press EDIT once
more to save your entered values.
4. Align your document flush on the left-hand side and against the back gauge then press Run
The cutter will adjust to 1 .00 and trim it at that length when you press the cut buttons. On
the next cut, the cutter will adjust to 15” by trimming your entered value for Size 1 (2.00”),
followed by another cut at 14.5” for Size 2 (.50”) which is for your bleed area. Repeat the
process until you collect 6 rows of 12” x 2” sheets.
Programming in Repeat Mode
Align documents here Press 2 cut buttons simultaneously

5. Press EDIT followed by MEMORY then enter the number 2 to store your values to cut on the
short side.
6. Trim your document in order to be able to get 2 rows again keeping in mind the cutter cannot
be programmed to cut smaller than 1.5 ”. For this, we entered 12.00 on Total Size which is
the actual length of the document on the long side.
. Input 2.25 for Size 1 and 3.50 for Size 2 to program your repeat cuts then press Edit once
more to save your entered values.
8. Align your document flush on the left-hand side and against the back gauge then press Run
The cutter will adjust to 12.00 and trim it at that length although nothing really will happen
since the document is already 12.00” in length (this part cannot be skipped). On the next cut,
the cutter will adjust to 9. 5” by trimming your entered value on Size 1 (2.25”) followed by
another cut on 6.25” for Size 2 (3.50”) for your bleed area. Repeat the process until you have
2 stacks of 3.5” x 2” cards.
Align documents here Press 2 cut buttons simultaneously
Programming in Repeat Mode
- 11 -

- 12 -
Calculator Mode
This program can be used to directly add or subtract any number to the actual/real size of the
TPI-4900E and then trim the document at that measurement.
1. In this example, we are cutting the long side of a legal size document 8.5” x 14” to turn it to
letter size 8.5” x 11”. To do so, input the current long side size (14.00) then press OK
2. After the cutter has adjusted to 14.00”, press the minus symbol (-) then enter 3.00”. After-
wards, press OK Pressing the 2 cut buttons will trim the document at 11.00” (14—13 = 11).
3. To add, repeat the process above but press the plus sign instead.
14.00 – 3.00

The Settings tab can be used to review fixed, factory settings as well as adjust some of them.
Settings
1. Press Machine Info to view basic information such as Manufacturing Date as well as the TPI-
4900E’s serial number.
- 13 -

2. Press the Status key to monitor the current state of the TPI-4900E’s sensors and operating func-
tions. If any of the sensors on the left column are OFF, this will indicate that either the specific
sensor is faulty or it is turned off like in the case of the Safety Sensors that have a switch assigned
to it. The status of the operating functions on the right column will change when any of them is
in operation.
3) Options and Troubleshoot are password protected to prevent accidental changes from being
made to certain critical operating functions of the cutter. Contact the Technical Department of
Tamerica Products, Inc. or any of our authorized distributors for more technical assistance.
Settings
- 14 -

4. The TPI-4900E offers two measurement options — inches or mm. Since the U.S. uses the Impe-
rial System of measurement, the cutter will default to “Inch” which will be indicated by way of
the illuminated key until you change your measurement selection. NOTE: You will have to re-
start the cutter when changing the unit measurement via the main switch or emergency stop
switch to effect the change.
5. The RESET key is used in the event the cutting blade, paper clamp or both do not retract. An
easier way to do this would be by way pressing the Paper clamp Up/Down switch (see page 5 & 6)
which can also be used to make the blade retract.
Settings
- 15 -

- 16 -
Blade Adjustment
The TPI-4900E is designed to cut paper and the lifespan of the blade will typically last up to 3,000
cuts. This will vary especially if the cutter is used to cut thick stacks of paper or pasteboard all
the time which will dull out the blade quickly. Sharpening the blade professionally at a local ma-
chine shop is acceptable but it is recommended to have an original replacement blade installed on
the cutter should it start developing cutting accuracy and quality issues.
1. The cutter comes calibrated from factory but some settings may shift or change by the time
the cutter arrives its destination. To check if the blade is still in its optimum position, try to
cut one sheet of paper. If the cutter struggles to cut it completely, adjust the blade depth
which ranges from 2-3mm. If it still is not able to cut the sheet, use a Phillips screwdriver to
remove the screws that hold the upper cover in order to access the cutting blade.
Blade depth adjustment
2. Loosen the seven M6 fasten screws and adjust the screws on the blade carrier until the blade
cuts into the cutting stick by about 0.3 — 0.5mm.
NOTE: If after using the cutter for a while you notice cutting inconsistencies even after making
the above adjustments, it may be time to replace either the blade or cutting stick.

Blade Replacement
- 1 -
1. Use a Phillips head screwdriver to remove the screws that hold the upper cover in order to ac-
cess the cutting blade.
2. Remove the 2 screws (M6 fasten screws) where the Blade Holders will go on the blade carrier.
3. Attach the Blade Holders and securely tighten by hand.
4. Remove the remaining screws that hold the blade in place.
5. Carefully pull the blade outwards then reverse the whole process to replace with a new blade.

Cutting Stick Adjustment & Replacement
1. Use a flathead screwdriver to push the cutting stick towards the left-hand side of the machine
then prop it up to free it from the shim channel.
2. If it is too tight and will not release, you will have to pull the feed tray out by removing the
screws (Phillips) to access the cutting stick holder which will have to be removed as well by
first loosening the allen screws.
NOTE: You may again have to adjust the blade depth after cutting stick rotation/replacement if
you did so prior to this operation. Failure to do so may result in the blade and cutting stick both
wearing out easily.
- 18 -
Follow the instructions below on how to rotate the cutting stick. Keep in mind that it is necessary
to rotate the cutting stick whenever the cut mark or indentation becomes too deep. Otherwise,
your cutter may encounter cutting quality issues even with a razor sharp blade installed. The cut-
ting stick can be rotated a total of 8 times.
Maintenance & Care
1. Designate a specific time to lubricate and clean your TPI-4900E which should be done once
every month. If you schedule it with regularity, the chances of you forgetting to do so will
greatly be minimized.
2. Never use motor oil. Use only Lithium grease for bearings and MOLY grease for parts that rub
each other. (see next page for parts that need regular greasing)
3. Ensure the cutter is in proper adjustment at all times. It makes perfect sense to help ensure
uninterrupted use.
4. Do not allow the blade to cut deep into the cutting stick. It should only be enough to sever
the bottom sheet.
5 Your TPI-4900E is designed to cut paper. Avoid cutting anything thicker and make sure they
are free of staples, wires and other binding materials that may damage the blade.

- 19 -
Lubricate these parts on a regular basis to help ensure hassle-free use of the cutter. Use only
Lithium grease for bearings and MOLY grease for parts that rub each other.

Schematics
- 20 -
Other manuals for Tamerica TPI-4900E
1
Table of contents
Languages:
Other Tamerica Paper Cutter manuals