Tanda AQUATOP User manual

Technics & Applications
Klaus Michael Kuehnelaan 9 Tel. : +32 14 23 74 95 Website: www.t-and-a.be
INSTALLATION GUIDE 2019
AQUATOP SLATTED COVER

Index
A0 –General Instructions
A1 - Constructional preparations: Top Mount
A2-1 - Constructional preparations: Underwater mount - In niche
A2-2 - Constructional preparations: Underwater mount –In pool
A3 - Constructional preparations: Underwater mount –In wall
A4 - Constructional preparations: Underwater mount –On pool floor
A5-1 - Constructional preparations: Underwater mount –In pool floor
A5-2 - Constructional preparations: Underwater mount –In stairs
A6 –Constructional preparations: Underwater mount –Wall duct and motor pit for external
drive
A7 –Constructional preparations: Cable duct for SCUBA-drive®
A8 –Constructional preparations: ECOTOP®
A9 - Constructional preparations: Top’Moov
B1 –Electrical preparations: Top mount
B2 –Electrical preparations: Underwater mount –External electric
B3 –Electrical preparations: Underwater mount - External hydraulic
B4 –Electrical preparations: Underwater mount - SCUBA-drive®
B5 –Electrical preparations: ECOTOP®
C1 –Mounting of mechanism: Top mount
C2-1 –Mounting of mechanism: Underwater mount: External motor –Pool with liner
C2-2 –Mounting of mechanism: Underwater mount: External motor –Pool with tiles or
fiberglass
C3 –mounting of mechanism: Underwater mount: External motor –Pool with thin wall
C4 –Mounting of mechanism: Underwater mount: SCUBA-drive® with wall plates
C5-1 –Mounting of mechanism: Underwater mount: SCUBA-drive® with cable duct with
wall in concrete or brickwork
C5-2 –Mounting of mechanism: Underwater mount: SCUBA-drive® with cable duct with
thin wall (Mono block or element pool)
C6 –Mounting of mechanism: ECOTOP®
C7 –Mounting of mechanism: Top’Moov
D –Slats
E1 –Connecting control: External motor - Electrical
E2 –Connection control: External motor - Hydraulic
E3 –Connecting control: SCUBA-drive®
E4 –Adjusting control: External motor & SCUBA-drive® (Universal control box)
E5 –Connecting control: ECOTOP®
E6 –AQUA-ECB 500Nm

E7 –Connecting control: Top’Moov
F –Use and maintenance
G - Guarantee
O1 - Finishing: Top mount –Bench
O2 - Finishing: Underwater mount - In niche / in pool: Walking platform
O3-1 - Finishing: Underwater mount - In pool: Panel (SCUBA-plates®)
O3-2 - Finishing: Underwater mount - In wall: Panel
O4 - Finishing: Underwater mount –On pool floor: Underwater bench
O5-1 - Finishing: Underwater mount - In pool floor: Fixed underwater panel
O5-2 - Finishing: Underwater mount –In pool floor/stairs: Underwater beam
O6 Finishing: Underwater mount –In pool floor: Movable underwater panel
O7 - Option: Safety - System
O8-1 - Option: Safety –People: Manual
O8-2 - Option: Safety –People: Top’Lock(automatic)
O9 - Option: Preparation and maintenance
Z01 - Connecting control: : Vertical pit motor 300 –450Nm
Z20 –AT-002072 –Scuba plates On floor

MAN-AT-A1 Manual Aquatop (2019) 1
A0 – General Instructions
Manufacturer:
Technics & Applications BVBA
Klaus-Michael Kuehnelaan 9
B-2240 Geel
Belgien
Tel : +32/14 23 74 95
Fax : +32/14 23 74 96
General prescriptions :
The installer should read this manual carefully. The end user of the product needs to read
especially chapter A0, F and. The manual needs to stay with the end user of this product.
T&A manufactures high end automatic covers as per customers specifications and ready to
install. The installation requires to be executed by professionals respecting local quality- and
safety standards. T&A products comply with the European standards EN_16582-1/2/3. The
installer needs to install the product according to tghe instructions in this manual.
A pool cover is a tool to raise the safety , but can never replace the surveillance of a
responsible adult!
The expected life time of the cover heavily depends on way of installation, maintenance and
service.

MAN-AT-A1 Manual Aquatop (2019) 2
Electrical prescriptions :
•The electric motors of AquaTop covers are low voltage DC motors. Nevertheless, the
current supply to the control box is 230V AC and requires to be secured respecting
local laws and norms.
•A differential switch guarantees the protection of people.
•In order to avoid galvanic corrosion because of stray current, T&A strongly advices to
earth the pool. We recommend a separate earth connection (R<30Ω) different from the
earth connection of main building/circuit unless otherwise specified through local
electricity suppliers and/or –regulations.
Influence of water quality on stainless steel components :
•All parts of a submerged cover are manufactured of stainless steel 1.4404 (AISI
316L). Following pool water values need to be respected :
o7 < pH <7,6
o0,5 < Cl < 3 mg/l
oTotal salt content (= Chlorides) < 5000 ppm
oPool water temperature < 35°C
oEC < 2,1 mS/cm
oFe < 0,2 mg/l ! A swimming pool should never be filled with water straight
from a natural well.
Pool water values exceeding the tolerances are the most common cause of
decoloration and/or rust- and corrosion building. Both automatic and manual dosing is
not without errors. Therefor, we recommend frequent control of the measured values.
Moreover, the only way to decrease too high Chloride content is the addition of fresh
tap water; once yearly half of the pool volume is the optimal quantity.
•Parts which are in the direct proximity of the swimming pool are sensitive for rust and
corrosion because of the fact that a combination of splash water, condensate and
evaporation result in higher Chloride concentration (This phenomenon is more
frequent for indoor pools rather than for outdoor pools; the supply of fresh plays an
important role in this process). Equally, submerged parts in areas with lower water
circulation need to be guarded; contaminating parts may set on these parts. A thorough
and frequent cleaning and rinse with fresh (tap) water can avoid problems such as pin
hole corrosion. Never use pool water to rinse stainless steel parts. ATTENTION : the
use of inappropriate cleaning detergents, esp. sulpheric acid containing detergents
need to be avoided !
•Please also avoid :
oDamaging the surface of the stainless steel parts during transport and
installation.
oAny alteration of stainless steel parts without “passivation” afterwards.
oThe use of common steel tools on stainless steel parts →Carbon
contamination.
oExcess dosing of Chlorine or Chlorine tablets/powder in immediate proximity
of stainless steel parts.
•Despite all precautions, surface corrosion might appear. We strongly recommend to
clean affected parts by the use of ScotchBrite © (3M) in combination with appropriate
stainless steel cleaning detergent.
•In case of pin hole corrosion, affected parts must be replaced.
•Corrosion is always caused by uncontrolled water treatment and incorrect use of
materials and is therefor never covered by Manufacturer’s liability !

MAN-AT-A1 Manual Aquatop (2019) 3
Influence of water quality on plastic parts, more specific slats :
•T&A slats are made of high quality PVC and PC. Overdosing Cholrine and/or other
pool related chemicals might shorten the life time of parts and slats.
•All slats, with the exception of white and beige (sand color) PVC, require to be
protected from direct sun exposure at all times when not in contact with the pool
water.
•PVC- as well as PC solar slats require to be cooled at all times whenever the cover is
closed, i.e. on the pool water surface. As such, the pool circultation/filtration pump
needs to be in operation from the moment the cover is closed.
T&A control boxes for covers can easily be used to control the pool circulation/
filtration pump.
ATTENTION : Variable speed pumps require a minimum capacity sufficient to
circulate the water underneath the cover. Otherwise, low circulation might overheat
solar slats. Overheating of slats might cause deformation of the slats which is
irreversible at all times.
•Because of differences in pool water- and ambient temperature, a bi-metal effect might
occur. This will result in having the ends of the slats bend downwards (when the
ambient air is warmer than the pool water) or in having the ends bend upwards (when
the pool water is warmer than the ambient air). This effect occurs more frequent in
case of darker (slat)colors.
•Plastic slats are extruded products. A deviation in straightness (both horizontally and
vertically) of 2 mm/m is within tolerance.
•In case of partial replacement or add-ons at later date, slight color differences might
occur.
•When using a pump with adjustable speed, make sure the water circulation under the
closed cover is still high enough to avoid the slats from burning
•The slats may only be exposed to sunlight when they are in full contact with the water.
Sole exception on this rule : white and sand coloured (beige) slats
The use of natural tropical wood as a finishing material :
•T&A uses premium quality IPE tropical wood which is a 100% natural product. As
such; color differences, minor cracks and deformation are a normal behavior of the
product and impossible to foresee. T&A cannot be held responsible or liable for this
natural process.
•Tropical IPE wood becomes naturally grey because of sun exposure. In case you want
to maintain the original color, it is recommended to treat the wood by professional
products on a regular base.
•Tropical IPE wood contains natural oils which might, in combination with rain or pool
water, mark spots on surrounding surfaces. Cleaning and sanding the wood before
mounting is advisable.
The use of panels and benches made out of fiberglass/composite
•T&A uses fibreglass with different layers of Polyester + Vinylester.
•The standard colour is white but a limlited choice of other colours is available.
•The products made out of fibreglass/composite meet the European standard. For more
details please consult the standard EN 16582-1 annex D.
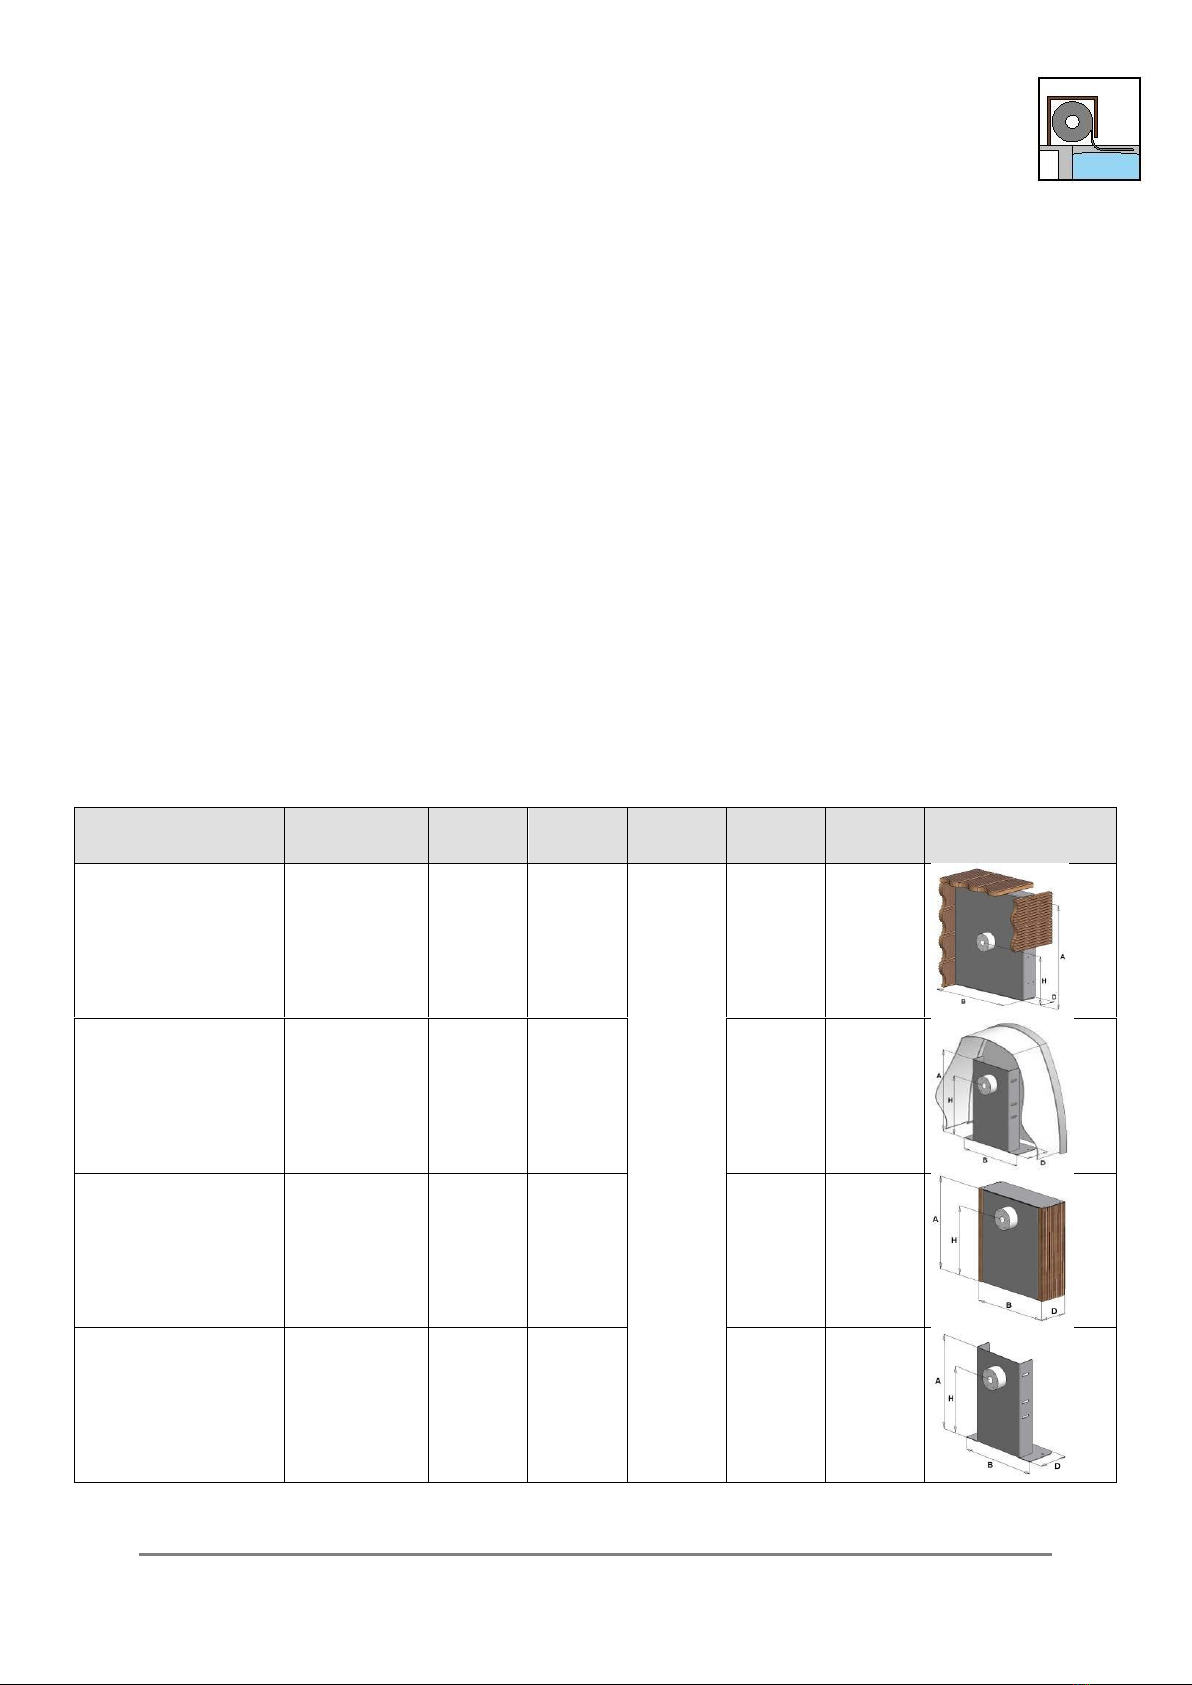
Our standard plugs are made out of polyamide. These need to be fixed in full concrete or
masonry. It is the responsibility of the installer to check the stability and if needed replace with
chemical anchoring.

MAN-AT-A1 Manual Aquatop (2019) 4
A1 - Constructional preparations: Top mount
General:
•Level control is necessary to install and use an automatic slatted cover. Provide an
overflow and a refilling system to guarantee the correct level in case of a skimmer
pool.
•Do not place any obstacles in the back or side walls which can interfere with the slats.
For example: skimmer covers, ladders, etc…
•The area where the supports for the roller have to be installed should be horizontal and
strong enough to hold the fixation.
•In the area where the slats go in and out of the pool, the coping stone should not
overlap the pool wall. If necessary cut the coping stone in this particular area.
•Roman ends, rectangular ends and other particular shapes cannot always be rolled up
completely.
Concept:
•Two SS brackets (1 on each side of the pool) support the roller shaft.
•There are different types of supports depending on the type of cover for the roller
shaft.
Options:
Cover roller shaft
Max. cover
length
A
B
C
D
H
Shape of the
support
WOOD
10 m
15 m
595
745
540
690
Diameter
roll +
50mm
105
105
300
375
PVC + ALU
10 m
15 m
400
450
390
150
300
350
NO COVER:
Finished support
15 m
25 m
440
520
415
440
145
210
350
430
NO COVER:
Unfinished support
15 m
450
390
150
350

MAN-AT-A1 Manual Aquatop (2019) 5
Target values:
Dimensions:
Cover length (m) (stairs incl.)
6
8
10
12
14
16
Diameter (
ø
) Rollo cover ( mm)
Slat dimension : 60 x 14 mm
420
480
520
580
610
640
Diameter (
ø
) Rollo cover ( mm)
Slat dimension : 67,5 x 16,5 mm
440
500
540
600
640
680

MAN-AT-A2-1 Manual Aquatop (2019) 1
A2-1 - Constructional preparations: Underwater mount - In niche
General:
•Level control is necessary to install and use an automatic slatted cover. Provide an
overflow and a refilling system to guarantee the correct level in case of a skimmer
pool.
•Do not place any obstacles in the back or side walls which can interfere with the slats.
For example: skimmer covers, ladders, etc…
•Roman ends, rectangular ends and other particular shapes cannot always be rolled up
completely.
•To comply with the European standard EN_16582-1/2/3, you need to cover the rollo
cover pit.
Concept:
•The Rollo cover is integrated in a niche behind the pool.
•The roller needs to be minimum 3cm under the water level.
•Drive: external electric, external hydraulic or in-roller motor.
Options:
•SCUBA-drive® plates avoid the use of wall duct.
•See chapter “O2 –Finishing: Underwater mount –In niche / in pool”
•The niche can be covered with wooden or plastic gratings in combination with a beam
or adjustable brackets.
•A Coverwash® system can be installed at the backside of the beam.
Target values:
(Valid for pools till 6m width –exact diameter can be found on the quotation of T&A
and the first page of the manual of each project)
* On demand
Cover length (m) (stairs incl.)
6
8
10
12
14
16
20
25
Diameter (
ø
) Rollo cover ( mm)
Slat dimension : 60 x 14 mm
420
480
520
580
610
640
705
780
Diameter (
ø
) Rollo cover ( mm)
Slat dimension : 67,5 x 16,5 mm
440
500
540
600
640
680
720
820
SCUBA wall plates can be used?
YES
YES
YES
YES
YES
*
*
*

MAN-AT-A2-1 Manual Aquatop (2019) 2
Dimensions:
SS beam 100 x 100 x 5 mm (1.4306 - AISI 304)
ALU beam 110 x 65 mm (anodized 25µm)

MAN-AT-A2-1 Manual Aquatop (2019) 3
Adjustable brackets
Cover length (m) (stairs incl.)
6
8
10
12
14
16
20
25
Diameter (
ø
) Rollo cover ( mm)
Slat dimension : 60 x 14 mm
420
480
520
580
610
640
705
780
Diameter (
ø
) Rollo cover ( mm)
Slat dimension : 67,5 x 16,5 mm
440
500
540
600
640
680
720
820
Depth (d) versus pool wall (mm)
500
500
500
550
550
600
600
600

MAN-AT-A2-2 Manual Aquatop (2019) 1
A2-2 - Constructional preparations: Underwater mount – In pool
General:
•Level control is necessary to install and use an automatic slatted cover. Provide an
overflow and a refilling system to guarantee the correct level in case of a skimmer
pool.
•Do not place any obstacles in the back or side walls which can interfere with the slats.
For example: skimmer covers, ladders, etc…
•Roman ends, rectangular ends and other particular shapes cannot always be rolled up
completely.
•To comply with the European standard EN_16582-1/2/3, you need to cover the rollo
cover pit.
•A panel between cover and pool according to the drawing is necessary to comply with
the European standard EN_16582-1/2/3!
•Standard width of the panel is B2 –14mm. The panel should be mounted
symmetrically to limit the gap between the panel and the side walls of the pool. Width
of the gap/side ≤ 8mm.
Concept:
•The Rollo cover is integrated in the swimming pool.
•Drive: external electric, external hydraulic or in-roller motor.
Options:
•SCUBA-drive® plates avoid the use of wall duct.
•See chapter “O2 –Finishing: Underwater mount –In niche / in pool”
•The niche can be covered with wooden or plastic gratings in combination with a beam
or adjustable brackets.
•A Coverwash® system can be installed at the backside of the beam.
•See chapter “O3-1 –Finishing: Underwater mount –In pool: Panel”
•The front of the cover pit can be covered with a fibreglass or PVC separation wall
•On demand, the panel/wall can be ordered ready to be tiled.
Target values:
(Valid for pools till 6m width –exact diameter can be found on the quotation of T&A
and the first page of the manual of each project)
* On demand
Cover length (m) (stairs incl.)
6
8
10
12
14
16
20
25
Diameter (
ø
) Rollo cover ( mm)
Slat dimension : 60 x 14 mm
420
480
520
580
610
640
705
780
Diameter (
ø
) Rollo cover ( mm)
Slat dimension : 67,5 x 16,5 mm
440
500
540
600
640
680
720
820
SCUBA wall plates can be used?
√
√
√
√
√
√
*
*

MAN-AT-A2-2 Manual Aquatop (2019) 2
Dimensions:
SS beam 100 x 100 x 5 mm (1.4306 - AISI 304)
ALU beam 110 x 65 mm (anodized 25µm)

MAN-AT-A2-2 Manual Aquatop (2019) 3
Adjustable bracket

MAN-AT-A3 Manual Aquatop (2019) 1
A3 - Constructional preparations: Underwater mount – In wall
General:
•Level control is necessary to install and use an automatic slatted cover. Provide an
overflow and a refilling system to guarantee the correct level in case of a skimmer
pool.
•Do not place any obstacles in the back or side walls which can interfere with the slats.
For example: skimmer covers, ladders, etc…
•Roman ends, rectangular ends and other particular shapes cannot always be rolled up
completely.
•A panel between cover and pool according to the drawing is necessary to comply with
the European standard EN_16582-1/2/3!
•Standard width of the panel is B2 –14mm. The panel should be mounted
symmetrically to limit the gap between the panel and the side walls of the pool. Width
of the gap/side ≤ 8mm.
•In the closed position of the cover: It’s necessary to have slats into the pit!
•Not compatible with prefab liner because of the radius in the corners.
Concept:
•The Rollo cover is integrated in a niche in the back wall of the swimming pool.
•Every 70 cm rollers have to be mounted to guide the slats.
•Drive: external electric, external hydraulic or in-roller motor.
Options:
•See chapter “O3-1 –Finishing: Underwater mount –In pool: Panel”
•The front of the cover pit can be covered with a fibreglass or PVC separation wall.
•On demand, the panel can be ordered ready to be tiled.
Target values:
(Valid for pools till 6m width –exact diameter can be found on the quotation of T&A
and the first page of the manual of each project)
Cover length (m) (stairs incl.)
6
8
10
12
14
16
20
25
Diameter (
ø
) Rollo cover ( mm)
Slat dimension : 60 x 14 mm
420
480
520
580
610
640
705
780
Diameter (
ø
) Rollo cover ( mm)
Slat dimension : 67,5 x 16,5 mm
440
500
540
600
640
680
720
820
B in mm
600
600
700
700
800
800
900
900
Dimensions: C = X = B/ 2 A = C + (R/2) R =
ø
+
100

MAN-AT-A3 Manual Aquatop (2019) 2

MAN-AT-A4 Manual Aquatop (2019) 1
A4 - Constructional preparations: Underwater mount – On pool floor
General:
•Level control is necessary to install and use an automatic slatted cover. Provide an
overflow and a refilling system to guarantee the correct level in case of a skimmer
pool.
•Do not place any obstacles in the back or side walls which can interfere with the slats.
For example: skimmer covers, ladders, etc…
•Roman ends, rectangular ends and other particular shapes cannot always be rolled up
completely.
•To comply with the European standard EN_16582-1/2/3, you need to cover the rollo
cover pit.
•A bench is necessary to comply with the European standard EN_16582-1/2/3!
•Standard width of the bench is B2 –14mm. The bench should be mounted
symmetrically to limit the gap between the bench and the side walls of the pool. Width
of the gap/side ≤ 8mm.
•The bench should not be used as an entry tot he pool. If you decide to use the bench as
an entry to the pool, you need to comply with the European standard EN_16582-1
•Not compatible with prefab liner because of the radius in the corners.
•In case of skimmer: Thickness max 10mm rounded (d1)
•In case of overhanging coping stone: min. 30mm between copingstone and waterlevel
(d2)
Concept:
•The Rollo cover is mounted on the pool floor.
•Drive: external electric, external hydraulic or in-roller motor.
Options:
•See chapter “O4 –Finishing: Underwater mount –On pool floor: Bench”
•The Rollo cover can be covered with a single piece fibreglass bench (< 7m).
•The bench will be made in 2 parts when poolwidth exceeds > 7m.

MAN-AT-A4 Manual Aquatop (2019) 2
Target values:
(Valid for pools till 6m width –exact diameter can be found on the quotation of T&A
and the first page of the manual of each project)
Dimensions:
Width pool <7m Width > 7m
Max diameter 610mm
Width pool < 5m
Max diameter 610mm
Cover length (m) (stairs incl.)
6
8
10
12
14
16
20
25
Diameter (
ø
) Rollo cover ( mm)
Slat dimension : 60 x 14 mm
420
480
520
580
610
640
705
780
Diameter (
ø
) Rollo cover ( mm)
Slat dimension : 67,5 x 16,5 mm
440
500
540
600
640
680
720
820

MAN-AT-A5-1 Manual Aquatop (2019) 1
A5-1 - Constructional preparations: Underwater mount – In pool floor
General:
•Level control is necessary to install and use an automatic slatted cover. Provide an
overflow and a refilling system to guarantee the correct level in case of a skimmer
pool.
•Do not place any obstacles in the back or side walls which can interfere with the slats.
For example: skimmer covers, ladders, etc…
•Roman ends, rectangular ends and other particular shapes cannot always be rolled up
completely.
•To comply with the European standard EN_16582-1/2/3, you need to cover the rollo
cover pit. The gaps between the cover and the pool wall and the gaps between the
different cover panels should not be bigger than 8mm.
•Not compatible with prefab liner because of the radius in the corners.
•In case of skimmer: Thickness max 10mm rounded (d1)
•In case of overhanging coping stone: min. 30mm between copingstone and waterlevel
(d2)
Concept:
•The Rollo cover is mounted in a pit integrated in the pool floor.
•Drive: external electric, external hydraulic or in-roller motor.
Options:
•See chapter “O5-1 –Finishing: Underwater mount –In pool floor: Fixed
underwater panel”
•The Rollo cover can be covered with PVC plates or a fiberglass moveable panel.
•Different beams and supports are available, without the panel.
Target values:
(Valid for pools till 6m width –exact diameter can be found on the quotation of T&A
and the first page of the manual of each project)
Cover length (m) (stairs incl.)
6
8
10
12
14
16
20
25
Diameter (
ø
) Rollo cover ( mm)
Slat dimension : 60 x 14 mm
420
480
520
580
610
640
705
780
Diameter (
ø
) Rollo cover ( mm)
Slat dimension : 67,5 x 16,5 mm
440
500
540
600
640
680
720
820

MAN-AT-A5-1 Manual Aquatop (2019) 2
Dimensions:
Table of contents
Popular Lighting Equipment manuals by other brands

Modern Forms
Modern Forms Neo Series installation instructions

Artecta
Artecta Aviano 20 CCT V1 user manual

ADJ
ADJ Diversa Ray User instructions

Regent Lighting Solutions
Regent Lighting Solutions Acer installation instructions

Soltech
Soltech BROADWAY PLUS installation manual

Chauvet
Chauvet CH-750 user guide