Tandy Discovery2 User manual

TABLE OF CONTENTS INTRODUCTION
Welcome to the fascinating and rewarding world of Treasure Hunting! Now, with
Discovery 2, you and your whole family can open up a whole new world of fun
and excitement as you go prospecting and beachcombing.
It is said that almost all money lost or hidden in the world has yet to be
discovered. Relics, jewelry, silver, gold...vduables can be found just about any-
wherel You'll be amazed at what you may find beneath the ground where you
live. So, in the true spirit of adventure, Happy Treasure
O Tandy Corpomtion.
All Rights Reserved.
Radio Shack is a registered trademark used by Tandy Corporation.

ASSEMBLY
The Discovery2 Metal Detector is easy to assemble and requires no special
tools.
Follow these steps to assemble your metal detector.
1. Insert the lower stem into the upper stem.
2. Press the adjustment button on the lower
stem as you push the lower stem into the
upper stem. The adjustment button clicks into
place as it reaches an adjustment hole. Ad-
just the stem of the detector to a length that
enables you to maintain a comfortable upright
posture. (You should be able to hold the
detector with your arm relaxed at your side,)
As you adjust the length of the stem, keep in
mind that the searchcoil should be approxi-
mately llz lo 2 inches above the ground.
3. After you set the adjustment, wind the
searchcoil cable around the stem. Be sure to
provide enough slack in the cable to accom-
modate angle adjustments.
4. Place the searchcoil plug (which does the
detection) into the plug connection at the
base of the control housing. Be sure the
holes and pins line up correctly. Push the
plug in untilthe plug is secure.
Caution: Do not force the plug or you may
damage it.
Note: When disassembly is required, remove
the plug by pulling at the connection point.

THE SEARCHCOIL
Adjust the searchcoil so it is level with the
ground. Tighten the knob at the end of the sear-
chcoil to keep the searchcoil from rotating or
wobbling.
The searchcoil is waterproof. You can put it in
fresh or saltwater up to the control housing.
After you use the searchcoil in saltwater, rinse it
with fresh water to prevent corrosion of the me-
tal parts.
INSTALLING THE BATTERIES
Your metal detector requires two 9-Volt bat-
teries. We recommend alkaline batteries such
as Radio Shack Cat. No. 23-553.
Follow these steps to installthe batteries.
1. Press the battery compartment covers in the
direction of the arrows.
2. Snap one battery into each of the terminals.
Place the batteries inside the bailery compad-
ments.
3. Replace the battery compartment covers.
Notes:
r lf the Low Battery indicator flashes momen-
tarily when you turn ofi POWER, you know it is
working properly and the batteries are good.
'-""tdis L<
3-*..3

. lf the Low Battery indicator lights and stays on, replace the batteries.
. Approximately 90% of metal detector problems are caused by weak, dead or
improperly connected batteries. lf the unit does not come on, comes on but
has weak volume, will not tune properly, or has erratic operation or drifts, re-
place the batteries.
. When you install a fresh set of 9-Volt alkaline batteries, keep track of your
operating time. After about four or five hours of use, switch the batteries.
Put the left battery into the right compartment, and the right battery into the left
compartment. The audio draws one battery down slightly faster than the oth-
er, and switching them helps insure equal drain.
. You can extend battery life by using headphones, which require less power.
. Remove the batteries if you do not plan to use the detector for a week or
more.
USING HEADPHONES
Using headphones with your Discovery2 Metal Detector will not only increase the
life of your batteries, it will increase your ability to identify subtle changes in the
threshold tones for better detection results.
To use headphones with your detector, insert the headphones's 1i+-inch plug into
the headphone jack located at the top of the control housing. Then proceed with
your search.
Hearing Comfort and Your Health
To protect your hearing, follow these guidelines when you use headphones.
. Set the volume to the lowest setting before you begin listening. After you be-
gin listening, adjust the volume to a comfortable level.
. Do not listen at extremely high volume levels. Extended high-volume listening
can lead to permanent hearing loss.
. Once you set the volume, do not increase it. Over time, your ears adapt to the
volume level, so a volume level that does not cause discomfort might still dam-
age your hearing.

OPERATION
warning: Do not wear headphones while operating your detector in traffic
areas. This can create a traffic hazard.
Even though some headphones are designed to let you hear some outside
sounds when listening at normal volume levels, they still present a traffic ha-
zard.
HOW TO USE YOUR METAL
DETECTOR
Now that your metal detector is assembled, it's
time to learn how to use it. The steps in this
section explain each control on the control hous-
ing and handle, and how to use your metal
detector. Take a moment to become familiar
with the position and use of the controls before
using your metal detector.
The Viewmeter
The Viewmeter is located at the top of the con-
trol housing and measures the approximate
depth of coin-sized objects, in inches. The
Viewmeter only registers depth measurements
when ALL METAL is used. Volumo Control
10 11

Turning On Your Detector
Hold the detector in a position comfortable for
you, then turn it on by rotating SETTING to ALL
METAL.
Setting the Controls
The detector is now set to ALL METAL. This set-
ting has the greatest detection level and has no
discrimination between different types of metals.
GROUND adjusts detection balances between
elements normally found in the ground and me-
tal objects.
Follow these steps to set GROUND.
1. Rotate VOLUME two{hirds of the way toward
MAX.
2. Hold the searchcoil at least waist high and ro-
tate GROUND toward NORM.
3. Push and immediately release TUNE.
You should barely hear a threshhold tone.
I
t
t
Adjusting the Controls in the Field
The tuning skills you will learn while preparing
your detector will be put to good use during your
actual search. You will know how each control works so you can fine-tune your
detector quickly.
lf you wish to test the accuracy of your tuning at your current location in the field,
take a few samples of different kinds of metal with you. Note that some metals,
when left exposed to the elements, become corroded. So it is always wise to
carry along a piece of corroded metal.
BALAI{CE
12 13

4. Drop the searchcoil to within 1/z inch of the ground. lf you correcily set
GROUND, the threshold tone should not change significantly. lf it does
change, either gaining or losing tone, repeat the steps above until you find a
setting where the sound does not vary significantly when held from 1/z-inch to
1-inch above the ground.
Note: Setting GROUND may take a little time, but it is critical for accurate opera-
tion.
when you are satisfied that GRoUND is set for peak performance, there is no
need to reset it until the detector is used at a different site.
Setting the Saltwater Balance
To balance the effects of saltwater, use the same general procedures as used
for ground balancing, but slowly rotate cRouND toward sALT in step 2 under
"Setting the Controls."
14 15
Sensitivity
To get the best results in your detection efforts,
you need to adjust SENSITIV|TY. SENStTtVtTy is
used in the ALL METAL, DISC, and PULL TAB
REJECT settings. (See "Fine Tuning" for infor-
mation on the DISC and PULL TAB REJECT con-
trols.)
To adjust the searchcoil's ability to detect lower
level signals, rotate sENstilvtry in a clockwise direction, from Low to HtcH. For
maximum performance, set sENstilvtry as high as possible. lf the detector
makes a "chattering" noise, decrease SENSITIVITY untilthe "chatter" stops.

Sweeping Hints
Keep the searchcoil in a constant parallel position to the ground throughout the
sweep. Move the searchcoil slowly from side to side, covering about a 3-foot
area, overlapping each sweep. The threshold tone should peak as you pass the
target center. (Hurrying will cause you to miss targets.)
Note: The searchcoil will not detect without motion.
A@
Be careful not to swing the searchcoil upward at the end of each sweep. The
swing up can cause the detector to emit false signals. Keep the searchcoil paral-
lel to the ground at all times but don't touch the ground. Hitting the ground may
cause a false signal.
16 't7
Detection Hints
No detector is 100 percent accurate. Various conditions and objects may ad-
versely influence metal detection. lts reaction depends on a number of things:
. the angle at which the object rests in the ground
. the size of the object
. the amount of iron in the object
It is helpful to hunt areas twice; the second time, go at right angles to the first
time, making an "X" pattern.
Note: The target will be directly beJ.ow the "X" at the point of the loudest
response.
This allows you to detect some targets that were hidden the first time due to the
sweep direction. lf trash in an area is so heavy that you are getting false signals,
slow your sweep speed and use shorter sweeps.

Notes:
. A good detection has a consistent rise and drop of threshold tone. A poor
detection has irregular highs and lows in threshold tones. lf the metal is in the
shape of a circle, like a watch or loop of wire, opposite reactions may occur.
. There are ways to tell whether threshold tones are good deep signals or trash.
A good target response repeats as you swing the searchcoil over the suspect-
ed target. Trash-induced signals tend to not repeat.
. Recently buried coins might not respond the same as coins buried for a long
period of time.
. Some nails, nuts, bolts, and other iron objects (such as old bottle caps) oxidize
and create a halo effect around these objects.
A halo effect is caused by a mixture of natural elements in the ground and the
oxidization created by different metals. Because of the metal mixtures, target
signals may not be in a "fixed" position. This effect makes these objects very
hard to reject. (See "Fine Tuning.")
18 19
FINE TUNING
Once you become familiar with how your metal detector works, you can fine-tune
it to be more selective in what it finds. You can make it tune out undesirable ob-
jects and tune in precious metals. For example, you can set it to distinguish
between iron and gold. With the D|SCRIMINATE and PULL TAB REJECT SETTTNG
controls, you can determine an even greater distinction between these metals.
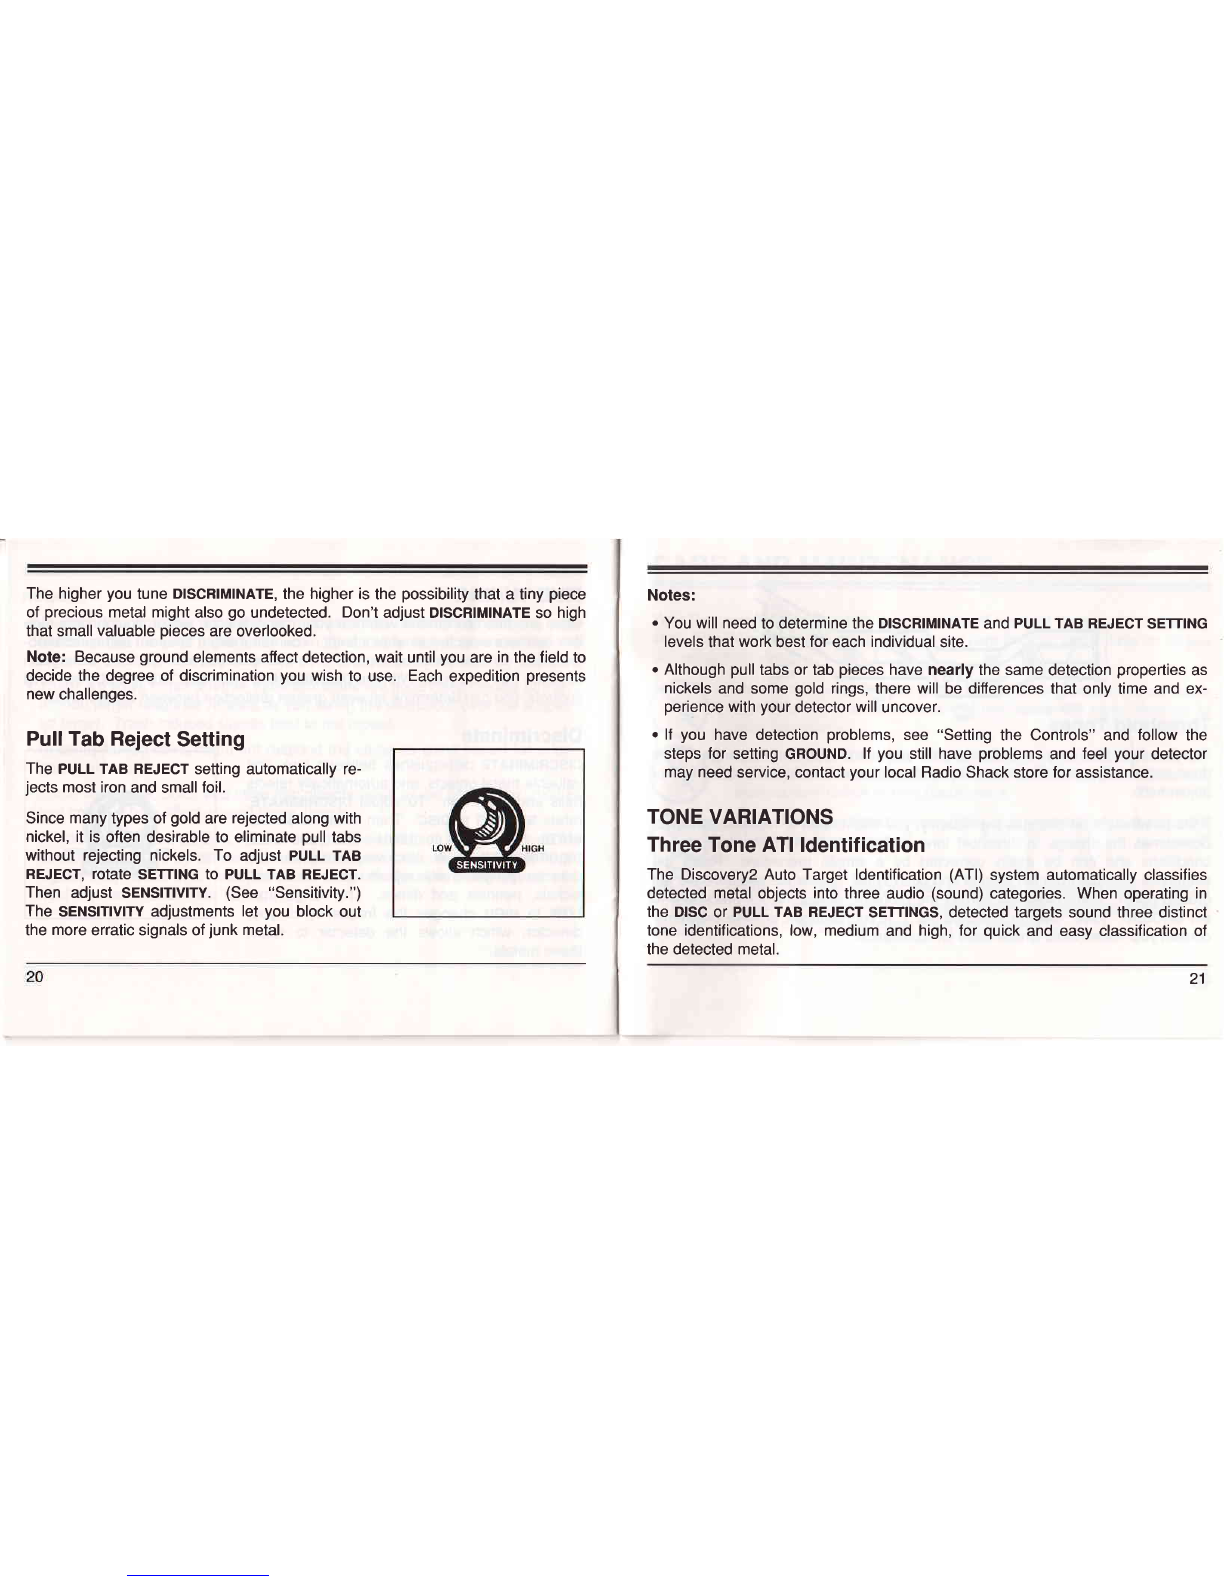
Discriminate
DISCRIMINATE distinguishes between junk and
valuable metal objects, and automatically rejects
nails and most iron. To adjust D|SCRIM|NATE,
rotate SETTING to DISC. Then. rotate DISCRIM-
INATE from LOW to HlcH. As you rotate
DISCRIMINATE in a clockwise direction, the
detector progressively rejects other iron, foil,
nickels, pennies and dimes. The range from
LOW to HlcH changes the frequency of your
detector, which allows the detector to reject
these metals.

The higher you tune DISCRIMINATE, the higher is the possibility that a tiny piece
of precious metal might also go undetected. Don't adjust DISCRIMINATE so high
that small valuable pieces are overlooked.
Note: Because ground elements affect detection, wait until you are in the field to
decide the degree of discrimination you wish to use. Each expedition presents
new challenges.
Pull Tab Reject Setting
The PULL TAB REJECT setting automatically re-
jects most iron and smallfoil.
Since many types of gold are rejected along with
nickel, it is often desirable to eliminate pull tabs
without rejecting nickels. To adjust PULL TAB
REJECT, Totate SETTING to PULL TAB REJECT.
Then adjust SENSlTlvlTY. (See "Sensitivity.")
The SENSITIVITY adjustments let you block out
the more erratic signals of junk metal.
Notes:
. You will need to determine the DISCRIMINATE and PULL TAB REJECT SETTING
levels that work best for each individual site.
. Although pull tabs or tab pieces have nearly the same detection properties as
nickels and some gold rings, there will be differences that only time and ex-
perience with your detector will uncover.
. lf you have detection problems, see "Setting the Controls" and follow the
steps for setting GROUND. lf you still have problems and feel your detector
may need service, contact your local Radio Shack store for assistance.
TONE VARIATIONS
Three Tone ATI ldentification
The Discovery2 Auto Target ldentification (ATl) system automatically classifies
detected metal objects into three audio (sound) categories. When operating in
the DISC or PULL TAB REJECT SETTINGS, detected targets sound three distinct
tone identifications, low, medium and high, for quick and easy classification of
the detected metal.
21

Resoonse Lry
Threshold Tones rone
The threshold tone may vary slightly while you search due to soil changes. This
does not usually affect the sensitivity of the unit and should not require further
adjustment.
lf the threshold tone changes significantly, you might need to readjust GROUND.
Sometimes the change in threshold tone is due to reasons other than ground
conditions and can be easily corrected by a simple procedure. Raise the
searchcoil one foot from the ground and push TUNE. Lower the searchcoil to the
ground again. lf this does not correct the problem, repeat the full procedure to
set GROUND. (See "Setting the Controls.") lf you continue to have problems,
contact your local Radio Shack store for assistance.
22 23
CARE AND MAINTENANCE
Your Discovery2 Metal Detector is an example of superior'design and craftsman-
ship. The following suggestions will help you care for your metal detector so you
can enjoy it for years.
Handle the metaldetector gently and carefully. Dropping it can dam-
age circuit boards and cases and can cause the metal detector to
work improperly.
Use and store the metal detector only in normal temperature en-
vironments. Temperature extremes can shorten the life of electronic
devices and distort or melt plastic parts.
Keep the metal detector away from dust and dirt, which can cause
premature wear of parts.
Wipe the metal detector with a damp cloth occasionally to keep it
looking new. Do not use harsh chemicals, cleaning solvents, or
strong detergents to clean the metal detector.
@
@
@
@
Table of contents
Popular Metal Detector manuals by other brands

Minelab
Minelab F3 Mine Detector Operation manual

Garrett
Garrett Sea Hunter Mark II None owner's manual

Minelab
Minelab Musketeer Colt user manual

White’s Electronics
White’s Electronics coinmaster 3900/D Professional Operator's manual

Powerfix Profi
Powerfix Profi KH 2902 operating instructions

Bounty Hunter
Bounty Hunter Platinum owner's manual