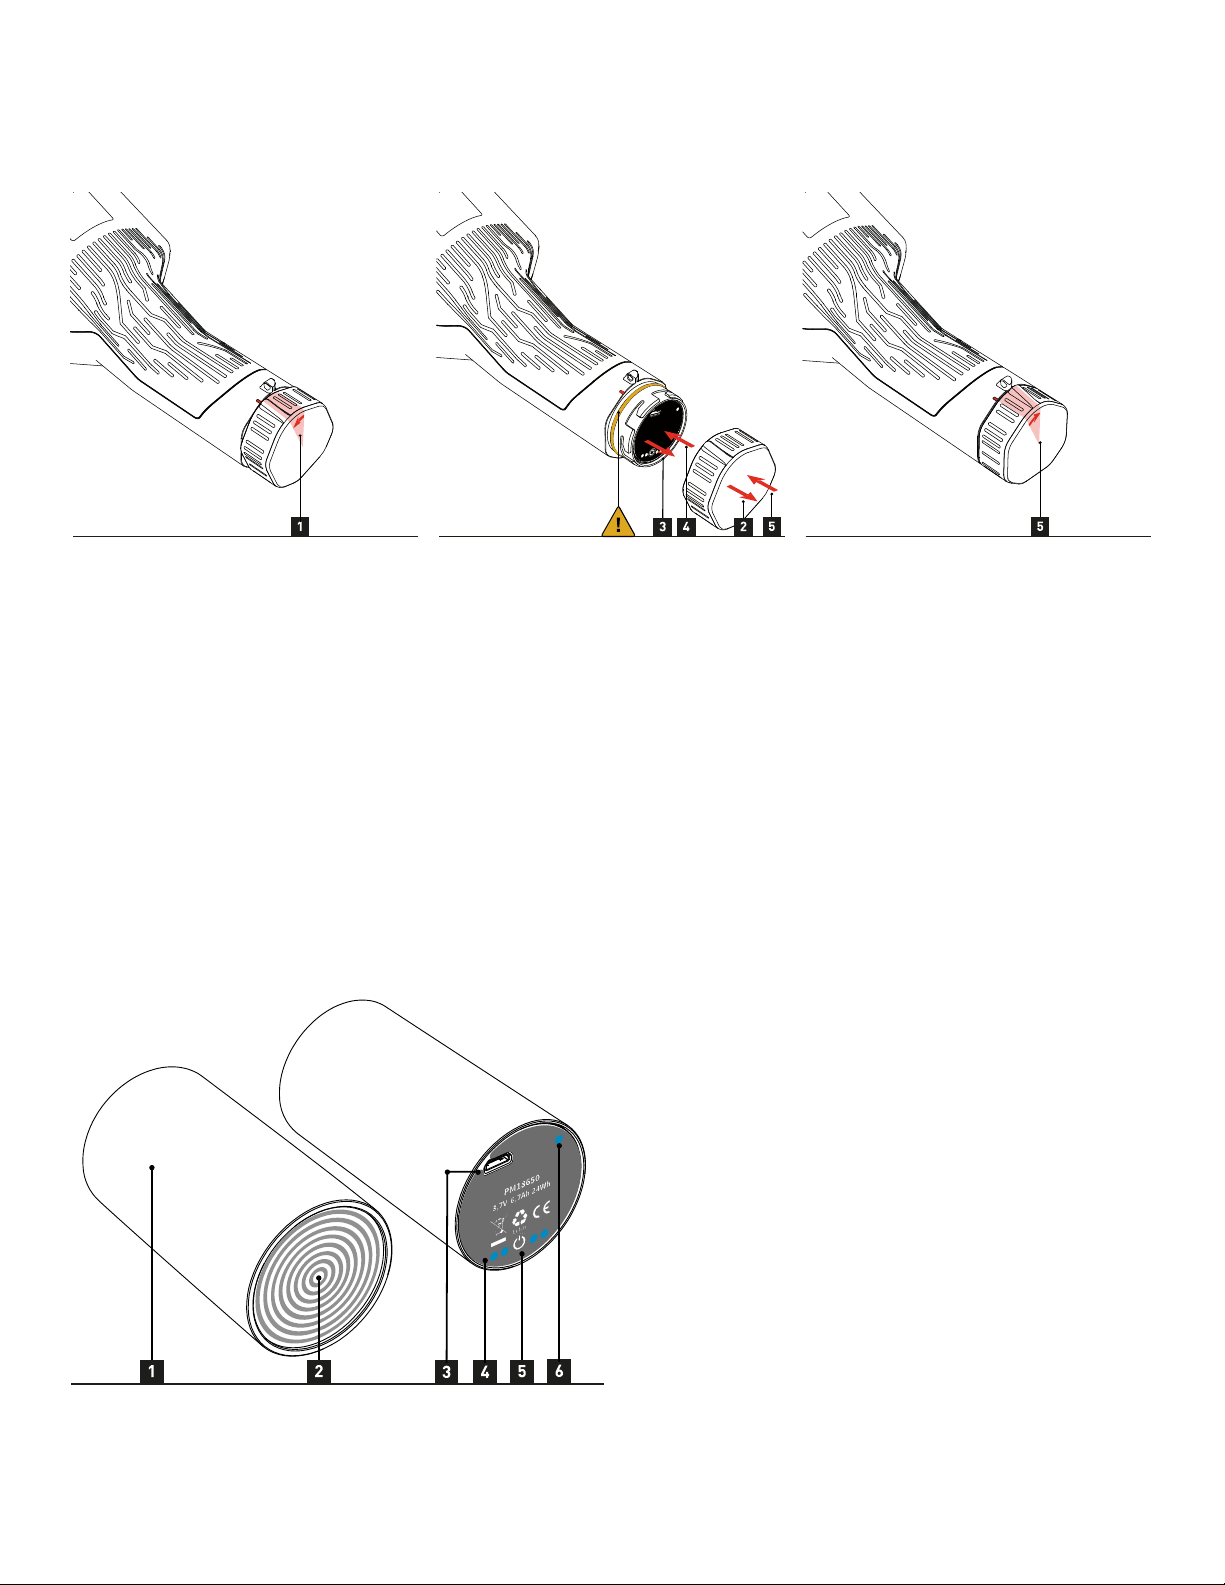
Target F501 User manual

1 / 7
Target F501
Quick Start Guide
20.23.3 build-20230627-3485-705d3ffd

2 / 7
OVERVIEW
CONGRATULATIONS ON THE ACQUISITION OF THE TARGET F501.
The Target F501 is one of the most powerful Radionuclide Identification Devices (RID) on the market. It is suitable for the
detection of gamma, beta, neutron, and cosmic radiation emitted from natural and man-made sources, identification of
special nuclear material, industrial, medical, and natural radioactive sources and measurement of x-ray gamma
exposure rate or ambient dose equivalent (H*(10)).
This document is intended to give you a quick start on the initial use of Target F501. For further information, please
refer to the full user manual that is part of the Target F501 software and can be accessed via the integrated web
interface.
This document describes, among other things, how to access the web interface and reach the user manual.
1. Battery cover
2. Battery compartment
3. Operating keys
4. Display
5. Serial number
6. Detector positioning marks
7. USB-socket
8. Detector label
The Target F501 complies with the EMC Directive 2004/108/EC and the harmonized European standard DIN EN 61326.

3 / 7
CHECK THE BATTERY
Make sure that the Target F501 is switched off before opening the battery compartment.
1. Hold the Target F501 with one hand and with the other hand turn the battery lid counter-clockwise for about 20°
degrees.
2. Pull off the battery lid.
3. Tilt the instrument until the power module slips out.
Inspect the sealing ring. Make sure that the seal is sufficiently lubricated. In case of any damage replace the
sealing ring with a new one.
4. Insert a fresh power module with the contact plate pointing to the instrument.
5. Pull on the battery lid and turn it clockwise until lanyard connector and the bulge on the lid fall in line.
We recommend charging the batteries of the Target F501 after unpacking prior to first time use.
THE POWER MODULE PM18650.
The PM18650 is a power module with rechargeable
Litium-ion batteries.
1. Battery capacity LEDs (4)
2. Status LED (1)
3. Test button
4. Power module housing
5. Contact plate
6. USB power socket
To check for the remaining capacity of the power module press the test button. The four capacity LEDs will indicate the
remaining battery capacity; the status LED is always off.

4 / 7
75 - 100 % capacity
50 - 75 % capacity
25 - 50 % capacity
10 - 25 % capacity
below 10% capacity
A fast flashing status LED means, that the state of charge of this power module is too low to be used.
To charge the PM18650 connect the included USB charger with a power line and the USB plug of the charger with the
USB socket of the power module.
The status LED is blinking while charging, the four capacity LEDs indicate the battery capacity.
The power module has already 50% capacity and is still charging
The power module has 100% capacity, charging has stopped
The power module PM18650 has no serviceable or removable parts inside. Under no circumstances should the
housing be tampered with, penetrated, or otherwise removed.
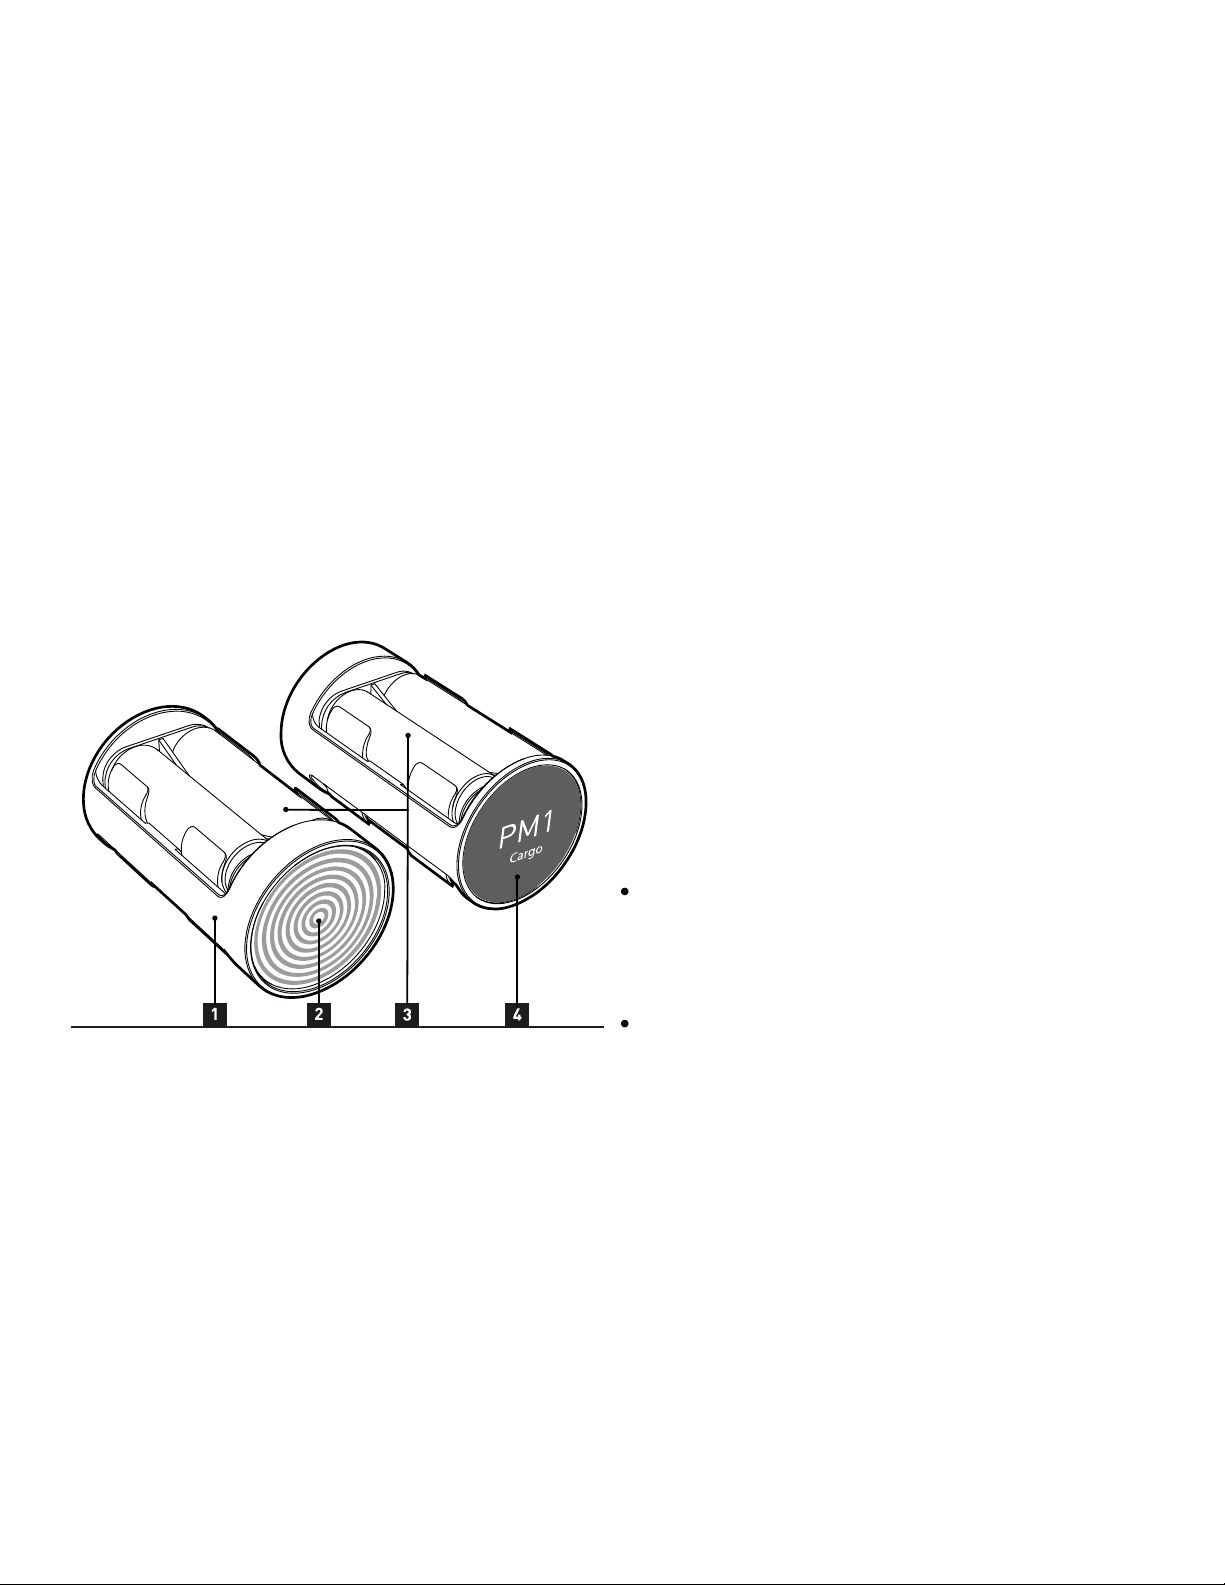
THE PM1 CARGO (OPTIONAL).
The PM1 Cargo is a holder for four commercially available
AA batteries.
1. Housing
2. Contact plate
3. AA battery cells
4. Front label
Compatible AA batteries are:
1.5 V Lithium/Iron Disulfide such as Energizer®
Ultimate Lithium™ or equivalent. Energizer®
Ultimate Lithium™ is a registered trademark of
Energizer Brands of St. Louis, Missouri.
1.2 V Nickel–metal hydride (NiMH)
Always replace all four battery cells with fresh ones. If you do not want to use the freshly assembled battery module
immediately, place a strip of non-conductive plastic, which is easy to remove, between the contact of a battery and the
contact surface in the battery holder.
If NiMH batteries are used in the PM1 Cargo, they must be charged in an external, commercially available charger. If the
Target F501 is operated with a PM1 Cargo, it cannot be operated permanently with a USB power supply unit.
Don't use 3.6V Lithium batteries and don't mix different types of batteries.
The use of alkaline batteries is not recommended, as they only have a runtime of 10 minutes and can become very
hot inside the Target F501.
Do not short-circuit the battery contacts and be careful when placing the power modules somewhere with the
contact plate pointing downwards. Batteries may be damaged by a short-circuit.

5 / 7
STARTING THE TARGET F501
After making sure that the Target F501 is loaded with a power module with sufficient capacity, you can start the Target
F501 by pressing the power button.
While displaying the company logo the Target F501 loads it’s software and does some startup quality checks.
This may take up to 60 seconds.
The moment the dose rate screen appears the Target F501 is ready for operation.
The Target F501 is usually operated with the hardware buttons and the onboard user-interface, but it can also be
operated via the web-interface. Apart from being able to remotely operate the Target F501 with the web-interface, it is
the main tool to set up and administer the instrument. The web-interface is where you will find a lot of information
about the device and also the onboard user manual.
To view the web-interface and the user manual therein you have to first connect a computer to the Target F501.

6 / 7
CONNECTING TO A COMPUTER
1. Open the USB socket by lifting the plug.
2. Connect the computer to the Target F501 with the supplied USB cable.
3. The Target F501 will immediately show a screen with the URL of the instrument. The URL is always of following
scheme: http://(name)-(serial).local/
4. Open a web browser on the connected computer and enter the displayed URL.
You should now see the web-interface of the Target F501.
If the browser displays an error message or you are redirected to the result page of your web search engine, please
check the URL carefully and re-enter. On the start page of the web-interface follow the link to the user manual for more
information and help to operate the Target F501.
Have fun.
Table of contents
Other Target Measuring Instrument manuals