TAS 780200T User manual

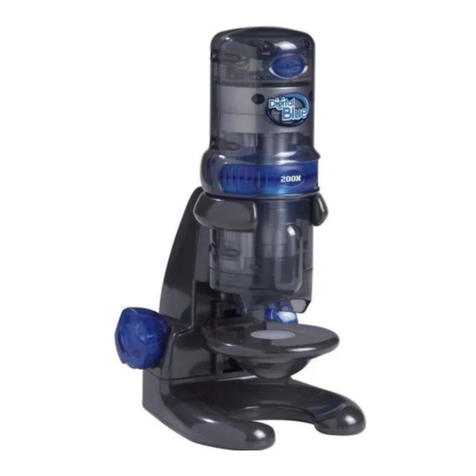
DIGITAL MICROSCOPE
Model#: 780200T Lit#: 93-0599 / 12-10
INSTRUCTION MANUAL
manuel d'instructions
Manual de instrucciones
Bedienungsanleitung
Manuale di istruzioni
Manual de instruções

Pollen Apple Hydrilla Leaf Broad Bean Leaf Onion Bulb Skin
Pollen Pomme Feuille d’Hydrilla Feuille de fève Pelure d’Oignon
Polen Manzana Hoja de Hydrilla Hoja de haba Piel de cebolla
Blütenstaub Apfel Blatt der
Grundnessel
Blatt der
Saubohne Zwiebelhaut
Polline Mela Foglia di hydrilla Foglia grande
fagiolo
Pelle bulbo di
cipolla
Pólen Maçã Folha da Hydrilla Folha de Favas Epiderme do
Bulbo da Cebola
Sea Salt Brine Shrimp
Eggs Gum Media Eosin Dye
Sel de mer Oeufs d’artemia Milieu de
gomme Colorant éosine
Sal marina
Huevos de
gamba en
salmuera
Medio gomoso Tinte de eosina
Meersalz Salzwasser-
Garneleneierl Gum-Media Eosin-Farbe
Sale marino Uova di gambero
in salamoia
Elemento in
gomma Colore eosina
Sal Marinho Ovos de Artémia
Meio Resinoso
(Bálsano do
Canadá)
Corante Eosina

3
Content Page
Safety Information 4
Technical Data 4
System Requirements 5
Included Items 5
Parts Guide 6
Assembly 7
Software Installation 7
Selecting the Lighting 8
Setting the Magnication 8
Basic“Live”Observation 8
Capturing a Photo or Video 9-10
Application Menus 10-11
Using the Microscope Tube
O the Base
11
Prepared Slide Specimens 12
Making Your Own Slides 12
Breeding Brine Shrimp 12
Storage 12
Cleaning 12
Warranty 13
FCC Note 13
TABLE OF CONTENTS
ENGLISH

4
CONGRATULATIONS ON YOUR PURCHASE !
Thank you for purchasing the Tasco USB Digital Microscope. By combining optics with
electronics, this device will help you explore the natural world around you by allowing you to
view the microscopic details of plants, animals and minerals on your PC computer monitor.
Before you begin using the USB Microscope, please take the time to read these operating
instructions completely, including all special notes and safety guidelines. This will increase
your enjoyment of the Microscope, and reduce the risk of personal injury and/or damage to
the environment.
Safety Information
This microscope is designed for observing preparations on slides at magnication levels of
between 10x to 120x. The enclosed software allows digital recording of the preparations in
photo and video format.
Use the USB Microscope only for the purpose described above.
This product is intended by the manufacturer for use by persons 13 years of•
age or older.
Keep packing foil and bags out of reach of babies and small children - danger of•
suocation!
The microscope should be connected to computers with USB interface version 1.1•
or later. Only use the USB cable supplied. Install the cable in such a way that nobody
can trip over it.
Remove the USB cable from the USB port of the computer when not using the•
microscope, and prior to any cleaning of the microscope.
Regularly check all cables and electrical components for any defects or wear.•
Damaged cables, plugs or other components represent a safety hazard.
Always position the device on a stable, vibration-free and dry surface.•
Do not expose the device to direct sunlight or heat sources.•
Only use the device inside. Do not use near liquids or in humid rooms.•
Do not use the supplied experimenting materials with objects coming in contact•
with food. Do not eat, drink or smoke at the place where experiments are carried
out.
The supplied Eosin dye can cause irritation when coming into contact with the•
eyes (R36). Do not inhale the dust. If agent comes into contact with the eyes, rinse
thoroughly with water and consult a doctor!
Take care when handling the dye, as it can cause discoloration of textiles, furniture•
and other surfaces.
Microscope Technical Data
Power supply USB connection version 1.1 or later (5V)
Data transfer USB connection version 1.1 or later
Magnication 10x, 60x,120x selectable
Image resolution RGB 1280 x 1024 pixels
Video resolution RGB 640 x 480 pixels (with connection to USB 2.0 port)

5
System Requirements (for PC computer)
Pentium® III 800 MHz or higher is recommended for DV (Digital Video);•
Microsoft® Windows 98 SE, Windows Me, Windows 2000, Windows XP, Windows Vista•
or Windows 7 (software is not Mac compatible);
128 MB RAM (256 MB or higher is recommended)•
5400 rpm or higher speed hard drive•
CD-ROM or DVD-ROM drive;•
Monitor capable of displaying thousands or millions of colors (1024 x 768 pixels);•
Windows pointing device (mouse, etc.);•
USB 2.0 interface for highest possible video resolution (connection via USB 1.1 allows•
a maximum resolution of 320 x 240 pixels per frame)
Included Items
USB Microscope, consisting of the base stand and removable microscope tube•
USB cable•
CD with USB 2.0 PC Camera application/driver• (Windows only)
Instruction Manual•
(SHOWN BELOW)
Box of 12 slides (5 prepared and 7 empty slides)•
4 Sample asks (gum media (• adhesive), Eosin dye, sea salt, brine shrimp eggs)
Storage container and culture dish•
Plastic tweezers•

6
PARTS GUIDE
Microscope tube unit1.
Light button2.
Ready light3.
Control card with image converter4.
Snapshot button5.
Magnication dial6.
Lens changer7.
Light: Top light8.
Slide retaining clamps9.
Microscope stage10.
Light: Backlight11.
Microscope base (including stand)12.
Focus knob (on both left & right sides)13.
USB cable14.
Port for USB cable (rear)15.
PARTS GUIDE

7
ASSEMBLY and SOFTWARE INSTALLATION
Assembly
Remove the Microscope Tube (top section, has Magnication Dial) and Base (lower section,
has dual Focus Knobs) from the packaging and place the base on a straight, stable and clean
surface. Slide the tube from the top into the cradle arms on the base, until the wide section
around the Magnication Dial rests against the cradle arms (as shown in the parts guide
photo). The metal terminals at the rear of the microscope tube should be in contact with the
corresponding terminals at the rear of the cradle on the base. These terminals carry power
from the USB Port to the light in the microscope base.
Software Installation
The microscope’s camera will not be recognized by your computer until the driver and
application software have been installed on your PC from the included CD, and the computer
is restarted. Follow these steps to install the software:
Quit any programs that are running on your PC before beginning the installation.1.
Make sure you are logged in to the computer with an administrator account.
Place the supplied software CD into the CD or DVD drive. The installation application2.
on the CD will normally open automatically, soon after the CD starts running. If the CD
does not start up automatically, open Windows Explorer and select the drive containing
the CD. To start the install menu double click on “AutoRun.exe“.
Click “Install PC Cam“ on the opening screen (3. Fig. 1). You will get a pop-up window
with the message“Please plug in the PC-Cam and click [OK]”.
Connect the microscope to your PC with the supplied USB cable by connecting the4.
cable rst to the microscope (Fig. 2) and then to the USB port of your PC. Be sure to
connect it to a USB port located directly on the computer, so it will receive power via
the USB cable. Do not connect the microscope to an unpowered USB“hub”, keyboard
USB port, etc. The microscope should be connected to a computer with ports supporting
USB version 1.1 or later. For the highest possible video resolution (640x480), connect to a
computer with a USB 2.0 port.
After connecting the microscope, click OK on the pop-up window. The InstallShield5.
Wizard welcome screen will appear (Fig. 3).The language for all installation screens is
automatically selected based on the language preference setting of your computer.
Click on “Next“, then Click “Install” on the screen that follows to start the installation
(Fig. 4). If you experience a “File Error” popup warning (Fig. 6) at any point during the
install process, click “Abort” and eject the CD. You must be logged in to the computer
using an administrator account with permission to install software. After logging back in
with administrator privileges, reinsert the CD and begin the installation again.
Once the installation has nished, you’ll see the “InstallShield Wizard Complete”6.
screen (Fig. 5). As it directs, eject the installation disk from the computer’s CD drive,
then click “Finish” to restart your computer. You have the option of restarting your
computer later if you prefer, but you must restart your PC before you begin using the
microscope, so it will be properly recognized by the driver.
After your computer restarts, you are now ready to begin using the USB Microscope.7.
Note: If possible, always connect the USB microscope to the same USB port of your PC every
time you use it, to avoid additional installation steps and multiple installations of drivers.

8
Fig. 3
Fig. 4
Fig. 5
Fig. 2
Fig. 6
Fig. 1
SOFTWARE INSTALL SCREENS

9
USING the MICROSCOPE
Selecting the Lighting
Make sure the Microscope is connected to a USB port located directly on the1.
computer, to ensure it will receive adequate power via the USB cable (used for the
microscope’s lighting, as well as the digital imaging system).
Place a slide from the kit under the clips on top of the microscope stage (you can start2.
out with one of the prepared slides).
Switch on the microscope’s lighting system by pushing the3. Light button one or more
times. Your lighting options are:
Press 1x: the object is illuminated from above (top lighting). This setting should•
be used for examining non-transparent objects.
Press 2x: the object is illuminated from below (back lighting). This setting should•
be used for examining transparent objects.
Press 3x: the object is illuminated from below and above. Use this setting to show•
internal and surface structures of semi-transparent objects.
Press 4x: Illumination is switched o completely.•
Setting the Magnication
The inside of the microscope unit contains 3 optical systems with dierent magnication
factors (10x, 60x, 120x), selected by the Magnication Dial at the center of the main tube.
The dial can be turned in any direction until it engages. The currently selected magnication
is shown on the dial. Note: Always start your observations on the lowest magnication (10X).
This makes it easier to initially center and focus the object. ”Finding” the tiny subject on a
slide is much more dicult at higher powers, and focusing requires more precision.
Basic “Live” Observation
As described above, make sure the Microscope is connected to your PC via USB, a1.
slide is on the stage ready to view, at least one of the light sources is turned on, and
the magnication is set to10x to start.
Launch the application which allows you to view and capture images from2.
the microscope by double clicking the “BOP App” icon on your desktop.
You can also start the application by clicking on the “Camera STI” icon in your
Windows system tray (bottom right of screen).
Once the microscope is ready, the3. Ready light comes on. The magnied
image of the specimen on the slide now appears in the preview area of
the program window.
Adjust the image focus by turning the4. Focus dial (on either side).
If necessary, move the slide until the subject is fully lit and at the center of the5.
image.
You can select a higher magnication if desired. You will normally then need to re-6.
adjust the focus to get a sharp image again.
Capturing a Photo or Video
In the le menu at the top of the application window, click the File menu and select1.
“Set snapshot le Folder”. Choose a folder (for example, “My Pictures”) where you
would like to save any photos from the microscope you capture with the application.
Next, select “Set capture le Folder” from the File menu and choose a folder to store
videos you capture with the application.
BOP App
Icon
Camera STI
Icon

10
To take a still photo, go to the Capture menu and select “Still Image Capture”. This2.
opens a new window showing the captured photo. This window has its own File
menu-select Save to store the photo in the folder you choose in the previous step
(you can rename the photo, or accept the default le name). Select Exit to close the
capture preview window. Note-you can also take a still photo by pressing the Capture
button on the front of the microscope tube (just below the green light). However,
it may be dicult to avoid handling vibration, resulting in blurry photos-especially
above 10x magnication settings.
Tocapturea video clip,select“Start Capture”to beginrecordingavideo clip.Recording3.
will automatically stop when the time limit is up (to change the default time, select
“Record time limit” in the Capture menu), or you can manually stop recording video
sooner by clicking the “Capture” menu again and selecting “Stop Capture”. The .avi
video clips are saved to the folder you set up in step #6 above.
That’s it!When nished using the application, select“Exit”in the File menu. If you want4.
to make adjustments to the still photo or video image quality (this is normally not
necessary to obtain good results), explore the options found in the application menus
under Option>Video Capture Filter, Option>Video Capture Pin, and Capture>Set
Frame rate. These are described in the following Application Menus section.
APPLICATION MENUS:
File
Set capture le Folder• -allows you to specify default location for video les (created
after selecting “Start Capture” in the Capture menu
Set snapshot le Folder• -allows you to specify default location for still photo les
(created after selecting“Still image Capture” in the Capture menu
File index reset• -starts le numbering over with “Still0001” etc. Previous les with same
name will be replaced with newer ones.
Exit• -quit application
Device: the “USB PC Camera” (your microscope) should be the only device currently using
the driver, so normally there is no need to use this menu. However, if you are not getting
an image from the microscope (assuming it is connected properly), make sure that “USB PC
Camera”is checked in this menu.
USB PC Camera•
Option
Preview• -leave checked normally. Unchecking and checking again will refresh the“live”
image from the camera.
Video Capture Filter• -options in the “General Setting” tab allows you to ip the image
horizontally (“mirror”) or vertically, view the image in black & white, adjust the color
saturation, sharpness and brightness and other variables. Note any adjustments you
make here will also aect captured still images, not just video clips. The “Special Eect”
tab has a variety of entertaining visual eects that can be applied to the microscope
image, as well as a digital zoom slider for additional magnication (the “Zoom Enable”
box must be checked rst).Click “Reset” to restore the original default settings. Click
“Apply”to see the Preview image with your current settings. Click OK to keep and switch
to your new settings. Click“Cancel” to leave this screen without making any changes.
USING the MICROSCOPE

11
Video Capture Pin• -the video frame rate and output size may be adjusted here if desired
to reduce the le size of captured video clips. Normally the frame rate can be left at
30.00 and the output size at the default setting of 1280x1040, unless you nd a specic
need to change them.
Capture
Still image capture• -opens a new window showing the captured still photo, with le
menu options allowing you to:
Save- Saves photo to default folder you set in “Set snapshot le Folder”. The next
default le name is used (to default folder you set in “Set snapshot le Folder”).
Files are numbered in a series beginning with “…0001” and continuing unless you
use“File index reset”to start over.
Save As- use this instead of “Save” when you want to give your le a name you
create (instead of the numbered default name). Using a previous le name again
will replace the original, older le with the current captured image.
Exit-select this after you have saved the photo, or use it to cancel if you change
your mind or clicked image capture by mistake.
Start Capture/Stop Capture• -select “Start Capture” to begin recording a video clip.
Recording will automatically stop when the time limit is up (you can set the limit-see
below), or you can manually stop recording video sooner by clicking the “Capture”
menu again and selecting “Stop Capture”.
Video format>AVI• -this is already selected, and is the only choice of video format. The
captured .avi videos may be viewed with Widows Media Player and most other video
software.
Record Audio• -this will not aect videos captured by your microscope, so leave it
unchecked.
Set Frame rate• -Maximum setting is 30 frames per second. Higher frame rates produce
smoother video, setting lower rates will generate smaller video les that take up less
storage space (but may look“jumpy”).
Record time limit• -allows you to set the maximum time for each video clip that begins
recording when you select“Start Capture”. Recording will automatically stop at the end
of the time limit (unless you end it early with“Stop Capture”).
Enable BPC> Y or UV• -This should be left on the default settings, with both checked.
Help
About Cam App• -displays software version number
Using the Microscope Tube “O the Base” (Optional)
The Microscope main tube (top section) may be used independently of the base. This
provides the option of examining details on larger subjects or objects that cannot physically
t on the slide stage area of the base. To use the tube away from the base, simply reverse the
assembly process and carefully slide the tube straight up away from the base. Make sure the
USB cable remains attached, and that you have enough slack in the cable to safely move
the tube towards your subject without risk of damage to the computer. As the focus knobs
are part of the base, you will need to focus by slowly moving the tube closer to or away from
the subject until it appears sharp (using the 10X magnication setting is recommended). Be
careful not to touch the subject with the surface of the lens to avoid scratches or other
damage. Note that only the top light is available when using the tube alone.
USING the MICROSCOPE

12
USING the ACCESSORIES
Your Tasco USB Digital Microscope is a versatile instrument. To start o beginning science
enthusiasts, the set contains also some accessory materials to help them perform basic
observation without the need for additional specialized equipment.
Prepared Slide Specimens
The following ready-made slides are part of the contents of the box and can be analyzed
under the microscope without further preparation:
- Apple
- Plant pollen
- Leaf of water thyme (Hydrilla verticillata)
- Leaf of broad bean (Vicia faba)
- Onion skin (Allium cepa)
Making Your Own Slides
The following accessories have been provided for preparing your own slides:
•Slide: Using a sharp blade cut a very ne sample from the material to be examined
and place it on the clear slide.
•Adhesive (Rubber Arabicum): This substance is water-soluble and is used to attach
preparations to the slide.
•Eosin coloring: Eosin is a strong dye for coloring preparations, making it easier to
see details (such as cell walls or cell nuclei).The use of minute amounts together with
a drop of water suces.
Caution !
The supplied Eosin dye can cause irritation when coming into contact with the eyes. Do
not inhale the dust! If agent comes into contact with the eyes, rinse thoroughly with
water and consult a doctor! Use care when handling the dye. It can cause discoloration of
textiles, furniture and other surfaces.
Breeding Brine Shrimp
An interesting experiment is observing the development of brine shrimp (Artemia Salina)
under the microscope. Multiple sources of information describing in detail the process of
hatching and raising brine shrimp are readily available on the internet.
To observe the animals always place them in a salt-water droplet on the slide or place them
under the microscope in a Petri dish lled with salt water.
Storage
When not in use, store your USB Digital Microscope in a dry location free from dust. If the
device is not used for some time it is recommended that it be returned to the original
packaging for secure storage and also transportation.
Cleaning
Your USB Microscope is a high-quality optical device. Avoid contact with dust and humi-
dity. Avoid ngerprints on all optical surfaces. First remove dirt or dust using a soft brush.
Next, clean the soiled area with a soft, lint-free cloth (e.g. linen) and some alcohol. Do not
use any other solvents or aggressive or abrasive cleaning agents as these could damage the
surface.

13
FCC NOTE
This equipment has been tested and found to comply with the limits for a Class B digital device,
pursuant to Part 15 of the FCC Rules. These limits are designed to provide reasonable protection against
harmful interference in a residential installation. This equipment generates, uses and can radiate radio
frequency energy and, if not installed and used in accordance with the instructions, may cause harmful
interference to radio communications. However, there is no guarantee that interference will not occur
in a particular installation. If this equipment does cause harmful interference to radio or television
reception, which can be determined by turning the equipment o and on, the user is encouraged to try
to correct the interference by one or more of the following measures:
•Reorientorrelocatethereceivingantenna.
•Increasetheseparationbetweentheequipmentandreceiver.
• Connect the equipment into an outlet on a circuit dierent from that to which the receiver is
connected.
•Consultthedealeroranexperiencedradio/TVtechnicianforhelp.
Shielded interface cable must be used with the equipment in order to comply with the limits for a digital
device pursuant to Subpart B of Part 15 of FCC Rules.
Specications and designs are subject to change without any notice or obligation on the part of the
manufacturer.
ONE YEAR LIMITED WARRANTY
Your Tasco® product is warranted to be free of defects in materials and workmanship for one year after
the date of purchase. In the event of a defect under this warranty, we will, at our option, repair or replace
the product, provided that you return the product postage prepaid. This warranty does not cover
damages caused by misuse, improper handling, installation, or maintenance provided by someone
other than a Tasco Authorized Service Department.
Any return made under this warranty must be accompanied by the items listed below:
1) A check/money order in the amount of $10.00 to cover the cost of postage and handling
2) Name and address for product return
3) An explanation of the defect
4) Proof of Date Purchased
5) Product should be well packed in a sturdy outside shipping carton, to prevent damage in
transit, with return postage prepaid to the address listed below:
IN U.S.A. Send To: IN CANADA Send To:
Tasco Outdoor Products Tasco Outdoor Products
Attn.: Repairs Attn.: Repairs
9200 Cody 25A East Pearce Street, Unit 1
Overland Park, Kansas 66214 Richmond Hill, Ontario L4B 2M9
For products purchased outside the United States or Canada please contact your local dealer for
applicable warranty information. In Europe you may also contact Tasco at:
Tasco Germany GmbH
European Service Centre
Mathias-Brüggen-Str. 80
D-50827 Köln
GERMANY
Tel: +49 221 995568-0
Fax: +49 221 995568-20
This warranty gives you specic legal rights.
You may have other rights which vary from country to country.
©2010 B.O.P.

14
FRANçAIS
TABLE DES MATIÈRES
Nom Page
Informations concernant la sécurité 15
Fiche technique 15
Conguration minimale requise 16
Inclus 16
Guide des Pièces 17
Assemblage 18
Installation du logiciel 18-19
Choix de l’éclairage 20
Réglage du grossissement 20
Observation“ sur le vif “ de base 20
Photographier et lmer 20
Menus de L’application 21-22
Utilisation du tube du microscope
“sans le pied”
22
Lames spécimens préparées 23
Pour préparer votre propres lames 23
Élevage d’Artémies 23
Entreposage 23
Nettoyage 23
Garantie 24

15
FÉLICITATIONS POUR VOTRE ACHAT !
Nous vous remercions de votre achat d’un Microscope numérique USB Tasco. En combinant
l’optique et l’électronique, cet appareil vous aidera à explorer le monde naturel autour de
vous en vous permettant de visionner les détails microscopiques des plantes, des animaux
et des minéraux sur l’écran de votre ordinateur portable PC.
Avant d’utiliser le Microscope USB, veuillez prendre le temps de lire cette notice d’utilisation
dans sa totalité, y compris toutes les remarques particulières et les directives concernant
la sécurité. Ceci vous permettra d’apprécier encore plus votre microscope et diminuera les
risques de blessures personnelles et/ou de dommages à l’environnement.
Informations concernant la sécurité
Ce microscope est conçu pour observer des préparations sur des lames porte-objets à des
grossissements de 10x à 120x. Le logiciel inclus permet un enregistrement numérique des
préparations en format photo et vidéo.
Veuillez utiliser le microscope USB uniquement aux ns indiquées ci-dessus.
L’aptitude de ce produit à son usage prévue par le fabricant est limitée aux•
personnes âgées de 13 ans ou plus.
Veuillez conserver l’emballage et le conditionnement hors de portée des bébés et•
des jeunes enfants - danger d’asphyxie !
Le microscope devra être connecté à des ordinateurs disposant d’une interface USB•
version 1.1 ou plus récente. Utilisez uniquement le câble USB fourni. Veuillez installer
le câble de telle manière à ce qu’il ne puisse faire trébucher personne.
Enlevez le câble USB du port USB de l’ordinateur lorsque vous n’utilisez pas le•
microscope et avant de le nettoyer.
Inspectez régulièrement tous les câbles et composants électriques pour détecter•
toute anomalie ou signe d’usure. Les câbles, prises ou autres composants
endommagés constituent un danger.
Veuillez toujours placer l’appareil sur une surface stable, sèche et à l’abri des•
vibrations.
Conservez l’appareil à l’abri des rayons solaires directs ou des sources de chaleur.•
Utilisez l’appareil uniquement à l’intérieur. Ne l’utilisez pas à proximité de liquides ou•
dans des pièces humides.
N’utilisez pas les produits fournis dans le but de conduire des expériences avec des•
objets qui pourront entrer en contact avec des produits comestibles. Veuillez ne pas
manger, boire ou fumer dans les endroits où vous faites des expériences.
L’éosine (colorant) founie peut causer des irritations si elle entre en contact avec•
les yeux (R36).Veuillez ne pas inhaler les poussières. Si le colorant entre en contact
avec les yeux, rincez abondemment à l’eau et consultez une médecin !
Prenez toutes les précautions nécessaires lorsque vous manipuler le colorant car•
il peut causer la décoloration du tissus, des meubles et autres surfaces.
Fiche technique du microscope
Alimentation électrique par connexion USB version 1.1 ou plus récente (5 V)
Transfert de données par connexion USB version 1.1 ou plus récente
Grossissement 10x, 60x, 120x au choix
Résolution photo RGB 1280 x 1024 pixels
Résolution vidéo RGB 640 x 480 pixels (avec connexion à un port USB 2.0)

16
Conguration minimale requise (pour les ordinateurs PC)
Pentium® III 800 MHz ou plus récent est recommendé pour la DV (Digital Video)•
Microsoft® Windows 98 SE, Windows Me, Windows 2000, Windows XP, Windows Vista•
ou Windows 7 (le logiciel n’est pas compatible avec Mac OS)
128 Mo RAM (256 Mo ou plus est recommandé)•
Disque dur 5400 tr/min ou plus•
Lecteur de CD-ROM ou de DVD-ROM•
Moniteur capable d’acher des milliers ou des millions de couleurs (1024 x 768•
pixels)
Appareil de navigation Windows (souris, etc.)•
Interface USB 2.0 pour obtenir la plus haute résolution vidéo possible (une connexion•
par USB 1.1 permet un maximum de 320 x 240 pixels par image)
Inclus
Microscope USB, comprenant un pied et un support, et un tube de microscope•
amovible
Câble USB•
CD avec application/logiciel pilote de caméra PC USB 2.0 (uniquement Windows)•
Notice d’utilisation•
(INDIQUÉE CI-DESSOUS)
Boîte de 12 lames porte-objets (5 lames préparées et 7 vides)•
4 acons échantillon (gomme arabique ( adhésif ), éosine (colorant), sel marin, œufs•
d’artémies)
Récipient de rangement et boîte de culture•
Pince ne en plastique•

17
GUIDE DES PIÈCES
Tube du microscope1.
Bouton d’éclairage2.
Voyant“Prêt”3.
Carte de contrôle avec convertisseur4.
d’images
Déclencheur photo5.
Molette de grossissement6.
Changement d’objectif7.
Éclairage : Éclairage supérieur8.
Pince pour lames porte-objets9.
Platine du microscope10.
Éclairage : Rétro-éclairage11.
Pied du microscope (et support)12.
Molette de mise au point (à la fois sur13.
le côté gauche et le côté droit)
Câble USB14.
Port pour câble USB (à l’arrière)15.
GUIDE DES PIÈCES

18
ASSEMBLAGE et INSTALLATION DU LOGICIEL
Assemblage
Enlevez le tube du microscope (la partie supérieure, qui comprend la molette de grossissement) et
le pied (la partie inférieure, qui comprend les deux molettes de mise au point) du conditionnement
et placez le pied sur une surface plane, stable, et propre. Faites glisser le tube par le haut dans les bras
récepteurs du pied, jusqu’à ce que la partie large autour de la molette de grossissement repose contre
les bras récepteurs (selon indiqué sur la photo du guide des pièces). Les prises métalliques à l’arrière
du tube du microscope devront être en contact avec les terminaux correspondants à l’arrière des bras
récepteurs sur le pied. Ces terminaux transportent l’électricité du port USB vers la lampe dans le pied
du microscope.
Installation du logiciel
La caméra du microscope ne sera pas reconnue par votre ordinateur tant que le pilote et le logiciel n’est
pas installé sur votre PC à partir du CD inclus, et tant que vous n’avez pas redémarré votre PC. Suivez ces
étapes pour installer le logiciel :
Fermez tous les logiciels en cours d’utilisation sur votre PC avant de commencer l’installation.1.
Assurez-vous de vous connecter à votre ordinateur en utilisant un compte administrateur.
Placez le CD du logiciel fourni dans le lecteur de CD ou de DVD. Le programme d’installation2.
du CD s’ouvrira normalement automatiquement peut après que le CD ait démarré. Si le CD ne
démarre pas automatiquement, ouvrez Windows Explorer et sélectionnez le lecteur contenant le CD.
Pour démarrer le menu d’installation, cliquez deux fois sur “AutoRun.exe”.
Cliquez sur “Installer Cam PC” sur le premier écran3. (Fig. 1). Une bulle d’information apparaît
alors avec le message“Veuillez brancher la Cam PC et cliquer sur [OK]”.
Connectez le microscope à votre PC grâce au câble USB fourni en connectant d’abord le câble4.
au microscope ( Fig. 2) puis au port USB de votre PC. Assurez-vous de le connecter à un port
USB situé directement sur l’ordinateur pour qu’il recevoive son alimentation par le câble USB.
Ne connectez pas le microscope à un concentrateur USB non alimenté, au port USB d’un clavier,
etc. Le microscope devra être connecté à un ordinateur comprenant des ports acceptant la version
USB 1.1 ou plus récente. Pour obtenir la résolution vidéo la plus haute possible (640x480), connectez
à un ordinateur avec port USB 2.0.
Après avoir connecté le microscope, cliquez sur la bulle d’information. L’écran de bienvenue5.
de l’InstallShield Wizard apparaîtra (Fig. 3). La langue de tous les écrans d’installation est
sélectionnée automatiquement suivant la préférence de langue choisie pour votre ordinateur.
Cliquez sur“ Continuer“, puis cliquez sur“ Installer”sur l’écran qui suit pour démarrer l’installation
(Fig. 4). Si vous voyez apparaître une bulle d’avertissement “Erreur dossier” (Fig. 6) à n’importe quel
moment au cours du processus d’installation, cliquez sur “Abandonner” et éjectez le CD. Vous devez
être connecté à l’ordinateur en utilisant un compte administrateur autorisé à installer des logiciels.
Après vous être reconnecté avec des privilèges administrateur, réinsérez le CD et recommencez
l’installation.
Une fois l’installation terminée, l’écran “InstallShield Wizard a terminé l’installation” apparaîtra6.
(Fig.5). Suivez les instructions, éjectez le disque d’installation du lecteur de CD de l’ordinateur,
puis cliquez sur “Terminer” pour redémarrer votre ordinateur. Vous pouvez redémarrer votre
ordinateur plus tard si vous le désirez, mais vous devez redémarrer votre PC avant de pouvoir
utiliser le microscope pour qu’il soit correctement identié par le logiciel pilote.
Après avoir redémarré votre ordinateur, vous êtes désormais prêt à utiliser le microscope USB.7.
Remarque : Si possible, connectez toujours le microscope USB au même port USB de votre PC chaque fois
que vous l’utilisez, pour éviter d’eectuer des étapes d’installation supplémentaires et des installations
multiples de logiciels pilote.

19
Fig. 3
Fig. 4
Fig. 5
Fig. 2
Fig. 6
Fig. 1
INSTALLATION DU LOGICIEL

20
UTILISATION du MICROSCOPE
Choix de l’éclairage
Faites attention à ce que le microscope soit connecté à un port USB situé directement sur1.
l’ordinateur, pour assurer qu’il reçoit une alimentation électrique susante via le câble USB
(utilisé pour l’éclairage du microscope, ainsi que le système d’image numérique).
Placez une des lames du kit sous les pinces sur la platine du microscope (vous pouvez2.
commencer avec une des lames préparées fournies).
Allumez le système d’éclairage du microscope en appuyant une fois ou plus sur le bouton3.
Éclairage. Vos choix pour l’éclairage sont les suivants :
Appuyez x1 : l’objet est éclairé du dessus (éclairage par le haut). Ce réglage devra être utilisé•
pour observer les objets non-transparents.
Appuyez x2 : l’objet est illuminé du dessous (éclairage par le bas). Ce réglage devra être•
utilisé pour observer les objets transparents.
Appuyez x3 : l’objet est éclairé du dessous et du dessus. Utilisez ce réglage pour observer les•
structures internes et la surface des objets semi- transparents.
Appuyez x4 : L’éclairage est complètement éteint.•
Réglage du grossissement
L’intérieur de l’unité du microscope contient 3 systèmes optiques ayant diérents facteurs de
grossissement (10x, 60x, 120x), que l’utilisateur peut choisir grâce à la molette de grossissement
située au centre du tube principal. La molette peut tourner dans n’importe quelle sens jusqu’à ce
qu’elle s’enclenche. Le grossissement utilisé à un moment donné est indiqué sur la molette. Remarque
: Commencez toujours vos observations en utilisant le grossissement le plus bas (10x). De cette manière
il est plus facile de centrer et de mettre au point sur l’objet. “Trouver” un sujet minuscule sur une lame
est bien plus dicile si des grossissements plus élevés sont utilisés, et la mise au point exige plus de
précision.
Observation “ sur le vif “ de base
Comme nous l’avons décrit ci-dessus, assurez-vous que le microscope soit connecté à votre PC1.
par USB, qu’une lame soit prête à être observée sur la platine, qu’au moins l’une des sources
d’éclairage soit allumée, et que le grossissement soit sur 10x pour commencer.
Lancez l’application qui vous permet de visionner et de capter les images à partir2.
du microscope en cliquant deux fois sur l’icône “BOP App” sur votre bureau. Vous
pouvez également démarrer l’application en cliquant sur l’icône “Camera STI” sur le
plateau du système Windows (en bas et à droite de l’écran).
Une fois que le microscope est prêt, le3. voyant “Prêt” s’allume. L’ image grossie
du spécimen qui se trouve sur la lame apparaît à présent dans la zone de
prévisualisation de la fenêtre du logiciel.
Réglez la mise au point de l’image en tournant la4. molette de mise au point (de
chaque côté).
Si nécessaire, bougez la lame jusqu’à ce que le sujet soit complètement éclairé et5.
au centre de l’image.
Vous pouvez choisir un plus grand grossissement si vous le désirez. Vous devrez alors6.
normalement re-régler la mise au point pour obtenir de nouveau une image claire.
Photographier et lmer
Dans le menu chier en haut de la fenêtre de l’application, cliquez sur le menu Fichier et1.
choisissez “Set snapshot le Folder”. Choisissez un dossier (par exemple, “Mes photos”) où
vous désirez enregistrer les photos que vous capturez avec le microscope grâce à l’application.
Ensuite, choisissez “Set capture le Folder” sur le menu Fichier et choisissez un dossier pour
enregistrer les vidéos que vous capturez grâce à l’application.
Pour prendre une photo, dirigez-vous vers le menu Capturer et choisissez“Still Image Capture”.2.
BOP App
Icon
Camera STI
Icon
Table of contents
Languages:
