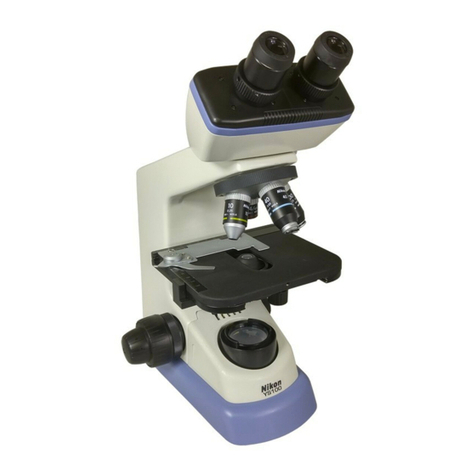
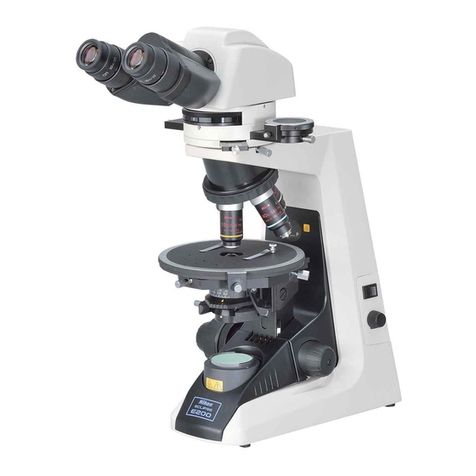
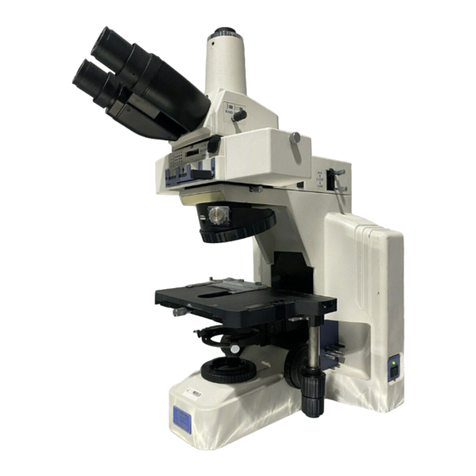
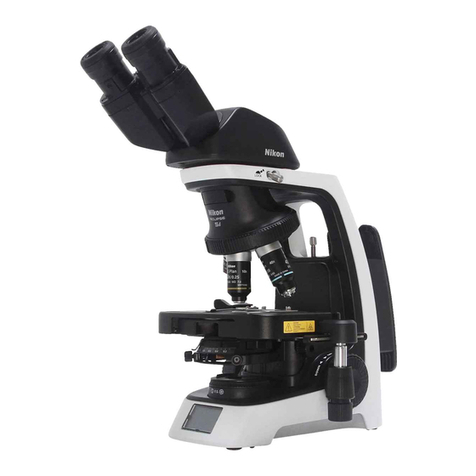
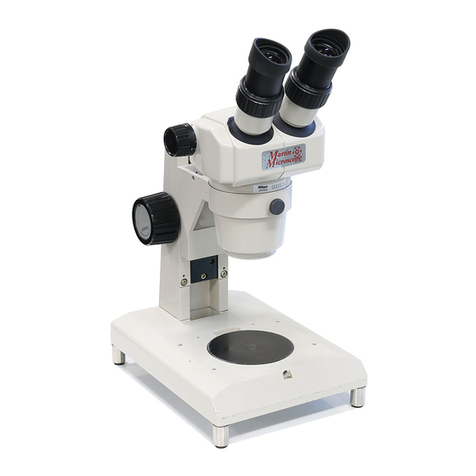
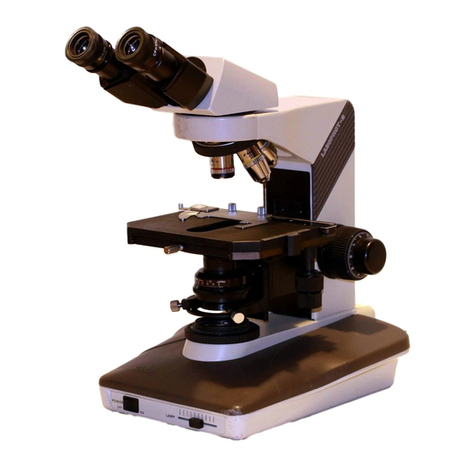
Nikon eclipse E200 User manual

ECLIPSE E200
Instructions
M313E 04.2.CF.2


1
Thank you for purchasing the Nikon products.
This instruction manual is written for the users of the Nikon’s microscope “ECLIPSE E200” and describes
the basic operations of the microscope.
To ensure correct usage, read this manual carefully before operating the instrument.
• It is prohibited to reproduce or transmit this manual in part or whole without Nikon's
expressed permission.
• The contents of this manual are subject to change without notice.
• Although every effort has been made to ensure the accuracy of this manual, if you note
any points that are unclear or incorrect, contact your nearest Nikon representative.
• Some of the products described in this manual may not be included in the set you have
purchased.
• Be sure to read the instruction manual for any other products used in combination with
the microscope.

Contents
2
Contents
Safety Precautions .............................................................................................. 4
English ...................................................................................................................4
German .................................................................................................................. 8
French.................................................................................................................. 12
Spanish ................................................................................................................ 16
Italian .................................................................................................................. 20
Dutch ................................................................................................................... 24
Danish.................................................................................................................. 28
Portuguese............................................................................................................ 32
Finnish ................................................................................................................. 36
Greek ................................................................................................................... 40
Notes on Handling the System .............................................................................44
Chapter 1 Nomenclature of Each Part ..................................................................46
Chapter 2 Switches and Controls ........................................................................48
Chapter 3 A Quick Microscopic Procedure.............................................................50
Chapter 4 Microscopy (Detailed Procedure) ..........................................................54
Chapter 5 Miscellaneous Operations ....................................................................62
1 Oil-Immersion Observation................................................................................. 62
2 Adjusting the Torque of the Coarse Focus Knob..................................................... 64
3 Upper Limit Bolt................................................................................................ 64
4 Eye Level Raiser................................................................................................ 65
5 Photomicrography and TV Microscopy .................................................................. 65
6 ND Filter for the Objective.................................................................................. 66
7 Cord Hangers ................................................................................................... 67
Chapter 6 Assembly..........................................................................................68
1 Assembly of Standard Set .................................................................................. 68
2 Assembly of Additional Components .................................................................... 70
1) Condenser.................................................................................................... 70
2) Objectives.................................................................................................... 71
3) Specimen Holder........................................................................................... 71
4) Eyepiece and Eyepiece Pointer ........................................................................ 71
5) Other Accessories ......................................................................................... 71
3 Replacement of Consumable Materials ................................................................. 72
1) Replacing the Lamp....................................................................................... 72
2) Replacing the Fuse ........................................................................................ 74
Chapter 7 Optical Characteristics ........................................................................75

Contents
3
Chapter 8 Troubleshooting Tables .......................................................................77
Chapter 9 Care and Maintenance ........................................................................84
Chapter 10 Technical Specifications ......................................................................85

Safety Precautions
English 4
Safety Precautions
Warning / Caution symbols used in this manual
Although Nikon products are designed to provide you with the utmost safety during use, incorrect usage
or disregard of the instructions can cause personal injury or property damage and will lead to the
forfeiture of all claims against warranty. For your safety, read the instruction manual carefully and
thoroughly before using the instrument. Do not discard this manual but keep it near the product for easy
reference.
In this manual, safety instructions are indicated with the symbols shown below. Be sure to follow the
instructions indicated with these symbols to ensure correct and safe operation.
Symbol Meaning
Disregarding instructions marked with this symbol may lead to death or serious injury.
Disregarding instructions marked with this symbol may lead to injury or property
damage.
WARNING
CAUTION

Safety Precautions
5 English
Meaning of symbols used on the equipment
The symbol appearing on the product indicates the need for caution at all times during use.
Always refer to the instruction manual and read the relevant instructions before manipulating any part to
which the symbol has been affixed.
Symbol Meaning
Caution! Biohazard
This symbol label attached on the stand reminds you of the following:
• WARNING: Contact of a sample to the microscope, presents a biohazard risk.
• To avoid biohazard contamination, do not touch the contaminated portion with your bare
hands.
• Decontaminate the contaminated portion according to the standard procedure for your
laboratory.
Caution for heat
This symbol label attached near the field lens unit (the lamp is set underneath the field lens
unit) reminds you of the following:
• Lamp and its surrounding areas (including the field lens unit) become very hot during and
immediately after illumination.
• Risk of burns. Do not touch the lamp or surrounding areas during and immediately after
illumination.
• Make sure the lamp and its surrounding areas has cooled sufficiently before attempting to
replace the lamp.
Caution
This symbol label attached near the AC inlet reminds you of the following:
• Check the input voltage before turning on the microscope.
(The input voltage is given on the "nameplate" and above the AC inlet.)
• If the input voltage shown differs from the local voltage level, do not turn on the microscope.
Do the following instead:
Different voltage on the nameplate Contact your nearest Nikon representative.
Different voltage above the AC inlet Change the input voltage setting; refer to P.68.

Safety Precautions
English 6
1. Intended use of the equipment
This microscope is intended mainly for use in microscopic observation of cells and tissue fixed on the
slide using diascopic (transmitted) and episcopic (reflected) illumination.
It is designed for the main purposes of experimentation and observation, in hospitals or other
laboratories, of such cells and tissue within the fields of pathology, cytology.
2. Do not disassemble.
Disassembly may cause malfunction and/or electrical shock, and will lead to the forfeiture of all claims
against warranty. Do not disassemble any part other than those described in this manual. If you
experience any problem with the microscope, notify your nearest Nikon representative.
3. Check the Input Voltage.
The input voltage is indicated in two places at the rear of the microscope: on the nameplate and above
the AC inlet. Confirm that these input voltage indications correspond to the voltage provided in your
region. If not, follow one of the instructions below. The use of microscopes with the different input
voltage indications will cause overcurrent and overheating, which may result in fire or severe damage
to the microscope.
• If the voltage indication on the nameplate differs:
ÎDo not plug in the microscope. Contact your nearest Nikon representative.
• If the voltage indication above the AC inlet differs:
ÎRefer to p. 68 and change the input voltage
setting before turning on the power switch.
For the microscope with the nameplate showing
[100/110/120 V ~]:
The voltage can be set to: AC 100 V, 110 V or 120 V.
For the microscope with the nameplate showing
[220/230/240 V ~]:
The voltage can be set to: AC 220 V, 230 V or 240 V.
4. Use the Specified Lamp, Fuse, and Power Cord.
Use the specified lamp and fuse. Use the power cord provided. Using an incorrect lamp, fuse, or power
cord may damage the instrument or cause a fire. (Also see p. 85 on power cord.)
If using an extension cord, only use a cord that includes a protective earth (PE) wire.
• Specified Lamp
Halogen lamp 6V-20W (PHILIPS 7388 or OSRAM HLX64250) or
Halogen lamp 6V-30W (PHILIPS 5761)
• Specified Fuse
250 V, 1A, time-lag low-breaking type, 5×20 miniature fuse ×2
Input Voltage
Indications
WARNING

Safety Precautions
7 English
5. Heat at the Light Source
The lamp becomes hot during use. Do not remove the field lens unit while the lamp is on, and be sure
the lamp has been off for 30 minutes before touching it.
• When changing the lamp bulb, make sure that the lamp is cool enough to touch (the light should be
off at least 30 minutes).
• Do not touch the lamp while it is on or until the lamp has been off for 30 minutes, as doing so could
result in burns.
• Never bring cloth, paper or flammable volatile substances such as gasoline, petroleum benzine,
acetone, thinner, or alcohol near a hot lamp, as a fire could result.
6. Hazardous Sample
This microscope is mainly for use in microscopic observation of cells and tissue fixed on the slide.
When handling a sample, check to determine whether the sample is hazardous.
Handle hazardous samples according to the standard procedure for your laboratory.
If the sample is of an infectious nature, wear rubber gloves to avoid infection, and be careful not to
touch a sample. In the event of contact of a sample to the microscope, decontaminate the
contaminated portion according to the standard procedure for your laboratory.
1. Turn Off Power Switch before Assembling the Microscope, Replacing the Lamp or Fuse,
and Plugging in or Unplugging the Power Cord.
Turn off the power switch before you plug or unplug the power cord to prevent electrical shock or fire.
Also turn off the power switch and then unplug the power cord before assembling the microscope, and
before changing the lamp or fuse. To turn off the power, turn the power switch to {.
2. Keep the Microscope Free of Moisture and Foreign Matter.
Keep the microscope free of moisture to prevent short circuiting that could result in overheating or
other malfunctions. If water splashes on the microscope, immediately turn off the power switch (turn
the switch to {) and unplug the power cord. Then, wipe off the water with a dry cloth. Short circuiting
can also result when foreign matter is trapped inside the microscope. If foreign matter or water has
entered the microscope, do not use the microscope and contact your nearest Nikon representative.
3. Stage Rack
The rack for the stage protrudes during use.
Be careful not to hit the rack with your hand or other parts of your body when handling the microscope
as you may get hurt by an edge of the rack.
4. Disposal of the Microscope
To avoid biohazard risk, dispose of the microscope as the contaminated equipment according to the
standard procedure for your laboratory.
WARNING
CAUTION
Rack

Safety Precautions
German 8
Sicherheitsmaßnahmen
In dieser Anleitung verwendete Warn/Vorsicht-Symbole
Obwohl die Nikon Produkte dazu entworfen wurden, Ihnen eine maximale Sicherheit beim Gebrauch zu
bieten, kann falscher Gebrauch oder Missachtung der Anleitungen zu Personen- oder Sachschäden führen
und resultiert im Verlust aller Garantieansprüche. Lesen Sie diese Anleitungen im Sinne Ihrer eigenen
Sicherheit gründlich durch, bevor Sie das Instrument einsetzen. Diese Anleitung nicht wegwerfen,
sondern aus Sicherheitsgründen stets in der Nähe des Produktes aufbewahren, um bei Bedarf schnell
darin nachschlagen zu können.
In dieser Anleitung werden Sicherheitshinweise mit den folgenden Symbolen gekennzeichnet. Achten Sie
darauf, die mit diesen Symbolen gekennzeichneten Anleitungen zu berücksichtigen, um einen
ordnungsgemäßen und sicheren Gebrauch zu gewährleisten.
Symbol Bedeutung
Missachtung von mit diesem Symbol gekennzeichneten Anleitungen kann zu tödlichen
Unfällen oder schweren Verletzungen führen.
Missachtung von mit diesem Symbol gekennzeichneten Anleitungen kann zu
Verletzungen oder Sachschäden führen.
VORSICHT
WARNUNG

Safety Precautions
9 German
Bedeutung der auf dem Gerät verwendeten Symbole
Die auf den Gerät erscheinenden Symbole weisen darauf hin, dass bei dessen Gebrauch stets Vorsicht
geboten ist. Beziehen Sie sich immer erst auf die entsprechenden Abschnitte in der Bedienungsanleitung,
bevor Sie mit diesen Symbolen gekennzeichnete Teile manipulieren.
Symbol Bedeutung
Vorsicht! Biogefährdung
Dieses am Stativ angebrachte Symbol weist Sie auf folgendes hin:
• WARNUNG: Das mit Proben in Berührung kommende Mikroskop stellen eine Biogefährdung
dar.
• Die kontaminierten Abschnitte nicht mit den bloßen Händen berühren, um eine biogefährliche
Kontaminierung zu vermeiden.
• Entseuchen Sie die kontaminierten Abschnitte entsprechend der Standardprozedur in Ihrem
Labor.
Vorsicht Heiß
Der in der Nähe der Kollektivlinseneinheit angebrachte Aufkleber (die Lampe ist unterhalb der
Kollektivlinseneinheit angebracht), macht Sie auf folgendes aufmerksam:
• Die Lampe und deren Umgebung (einschließlich der Kollektivlinseneinheit) werden während
und unmittelbar nach der Beleuchtung sehr heiß.
• Verbrennungsgefahr. Die Lampe und deren Umgebung nicht während oder unmittelbar nach
der Beleuchtung berühren.
• Achten Sie darauf, dass sich die Lampe und deren Umgebung ausreichend abgekühlt hat,
bevor Sie versuchen, die Lampe ersetzen.
Vorsicht
Dieser in der Nähe des Netzanschlusses angebrachte Symbolaufkleber macht Sie auf folgendes
aufmerksam:
• Prüfen Sie vor Einschalten des Mikroskops die Eingangsspannung.
(Die Eingangsspannung wird auf dem Typenschild und über dem Netzanschluss angegeben.)
• Das Mikroskop nicht einschalten, wenn sich die Eingangsspannung von der lokalen
Netzspannung unterscheidet. Machen Sie statt dessen folgendes.
Bei Angabe einer anderen Spannung auf dem Typenschild:
Setzen Sie sich mit Ihrer nächsten Nikon Vertretung in Verbindung.
Andere Spannung über dem Netzanschluss:
Ändern Sie die Einstellung für die Eingangsspannung; siehe Seite 68.

Safety Precautions
German 10
1. Verwendungszweck
Dieses Mikroskop ist hauptsächlich für mikroskopische Beobachtungen von Zellen und fixierten
Gewebeproben mit Hilfe diaskopischer (durchscheinender) und episkopischer (reflektierter)
Beleuchtung konzipiert.
Es ist hauptsächlich für Experimente und Beobachtungen derartiger Zellen oder Gewebeproben in
Krankenhäusern oder anderen Laboratorien in den Bereichen Pathologie und Zytologie gedacht.
2. Nicht auseinanderbauen
Auseinanderbauen kann zu Störungen und/oder elektrischen Schlägen führen und resultiert darüber
hinaus im Verfall aller Garantieansprüche. Keine anderen als die in der vorliegenden Anleitung
beschriebenen Teile auseinanderbauen. Wenn Sie Schwierigkeiten mit dem Mikroskop haben, wenden
Sie sich bitte an Ihren nächsten Nikon Händler.
3. Eingangsspannung prüfen
Die Eingangsspannung ist an zwei Stellen an der Rückseite des Mikroskops angegeben: dem
Typenschild und über dem Netzanschluss. Achten Sie darauf, dass die angegebene Eingangsspannung
der Spannung der regionalen Stromversorgung entspricht. Wenn dies nicht der Fall ist, befolgen Sie
bitte die nachstehenden Anleitungen. Der Gebrauch des Mikroskops mit falscher Eingangsspannung
kann zu Überströmen und Überhitzung führen, was wiederum zu Feuerentwicklung oder auch einer
Beschädigung des Mikroskops führen könnte.
• Bei Angabe einer anderen Spannung auf dem Typenschild:
ÎDas Mikroskop nicht anschließen. Setzen Sie sich mit der nächsten
Nikon Vertretung in Verbindung.
• Andere Spannung über dem Netzanschluss:
ÎBeziehen Sie sich auf Seite 68 betreffs Änderung
der Einstellung der Eingangsspannung bevor Sie
den Strom einschalten.
Bei Mikroskopen, bei denen das Typenschild
[100/110/120 V ~] anzeigt:
Die Spannung kann auf 100 V, 110 V oder 120 V
Wechselstrom eingestellt werden.
Bei Mikroskopen, bei denen das Typenschild
[220/230/240 V ~] anzeigt:
Die Spannung kann auf 220 V, 230 V oder 240 V
Wechselstrom eingestellt werden.
4. Vorgeschriebenen Lampen, Sicherungen und Netzkabel verwenden
Verwenden Sie die vorgeschriebenen Lampen und Sicherungen und das mitgelieferte Netzkabel. Bei
Verwendung falscher Lampen, Sicherungen und Netzkabel kann es zur Beschädigung des Instruments
oder Feuerentwicklung kommen. (Beziehen Sie sich hinsichtlich des Netzkabels auch auf Seite 85.)
Bei Verwendung eines Verlängerungskabels nur Kabel mit Schutzerdung verwenden.
• Vorgeschriebene Lampe
Halogenlampe 6 V 20 W (PHILIPS 7388 oder OSRAM HLX64250) oder Halogenlampe 6 V 30 W
(PHILIPS 5761)
• Vorgeschriebene Sicherung
250 V 1 A träge Sicherung, 5x20 Miniatursicherungen x 2
Angabe der
Eingangsspannung
WARNUNG

Safety Precautions
11 German
5. Hitzeentwicklung der Lichtquelle
Die Lampe wird im Betrieb sehr heiß. Die Kollektivlinseneinheit nicht entfernen, während die Lampe
eingeschaltet ist und vor deren Berührung darauf achten, dass diese für mindestens 30 Minuten
ausgeschaltet ist.
• Achten Sie bei Ersatz der Lampe darauf, dass diese zum Anfassen ausreichend weit abgekühlt ist
(die Beleuchtung sollte für mindestens 30 Minuten ausgeschaltet sein).
• Die Lampe nicht berühren, wenn diese eingeschaltet ist, oder für mindestens 30 Minuten
ausgeschaltet ist, da es sonst zu Verbrennungen kommen kann.
• Niemals Stoff, Papier oder brennbare, flüchtige Substanzen wie Benzin, Petroleumbenzin, Aceton,
Verdünner oder Alkohol in die Nähe einer heißen Lampe bringen, da dies zur Feuerentwicklung
führen könnte.
6. Gefährliche Proben
Dieses Mikroskop ist hauptsächlich für mikroskopische Beobachtungen von auf Objektträgern fixierten
Zellen und Gewebeproben gedacht. Prüfen Sie beim Umgang mit den Proben, ob diese gefährlich sind.
Gefährliche Proben entsprechend der Standardprozeduren in Ihrem Labor behandeln. Wenn es sich bei
der Probe um infektiöses Material handelt, Gummihandschuhe tragen, um Infektionen zu vermeiden
und sorgfältig darauf achten, die Probe nicht zu berühren. Wenn Proben mit dem Mikroskop in
Berührung kommen, die kontaminierten Abschnitte entsprechend der Standardprozedur in Ihrem Labor
entseuchen.
1. Vor Zusammenbau, Ersatz von Lampe oder Sicherung, sowie Anschließen oder Lösen des
Netzkabels den Netzschalter ausschalten
Vor Anschließen oder Lösen des Netzkabels den Netzschalter ausschalten, um elektrische Schläge und
Feuerentwicklung zu vermeiden. Vor Zusammenbau des Mikroskops oder Ersatz von Lampe oder
Sicherung ebenfalls den Netzschalter ausschalten und den Stecker aus der Steckdose ziehen. Den
Netzschalter in die “{” Stellung drücken, um den Strom auszuschalten.
2. Das Mikroskop vor Feuchtigkeit und Fremdkörpern schützen
Schützen Sie das Mikroskop vor Feuchtigkeit, um Kurzschlüsse zu vermeiden, die durch Überhitzung
oder andere Störungen hervorgerufen werden könnten. Wenn Wasser auf dem Mikroskop verschüttet
wird, sofort den Strom ausschalten (den Netzschalter in die “{” Stellung bringen) und den Stecker aus
der Steckdose ziehen. Anschließend das Wasser mit einem Stück trockenen Tuch abwischen.
Kurzschlüsse können auch durch in das Mikroskop eingedrungene Fremdkörper hervorgerufen werden.
Wenn Wasser oder Fremdkörper in das Mikroskop eingedrungen sind, benutzen sie dieses nicht mehr
und setzen sich mit Ihrer nächsten Nikon Vertretung in Verbindung.
3. Zahnstange für den Objekttisch
Beim Gebrauch tritt die Zahnstange für den Objekttisch über
diesen hinaus. Achten Sie darauf, beim Umgang mit dem
Mikroskop nicht mit der Hand oder anderen Körperteilen
dagegenzustoßen, da Sie sich sonst an den Kanten der
Zahnstange verletzen könnten.
4. Entsorgen des Mikroskops
Entsorgen Sie das Mikroskop als kontaminiertes Gerät entsprechend der Standardprozeduren in Ihrem
Labor, um biologische Gefahren zu vermeiden.
Zahnstan
g
e
WARNUNG
VORSICHT

Safety Precautions
French 12
Règles de sécurité
Symboles Avertissement/Attention utilisés dans ce manuel
Bien que les produits Nikon soient conçus pour une sécurité extrême pendant l'emploi, un emploi
incorrect ou la négligence des instructions peut provoquer des blessures ou dégâts matériels, ce qui se
traduira par la perte par déchéance de tout droit sous garantie. Pour votre sécurité, lisez attentivement
et entièrement ce mode d'emploi avant l'utilisation de l'appareil. Ne le jetez pas, conservez-le à proximité
du produit pour toute référence ultérieure.
Dans ce mode d'emploi, les instructions concernant la sécurité sont indiquées par les symboles
ci-dessous. Suivez bien les instructions marquées par ces symboles pour assurer un fonctionnement
correct et sûr.
Symbole Signification
La négligence des instructions marquées de ce symbole peut entraîner le décès ou des
blessures graves.
La négligence des instructions marquées de ce symbole peut entraîner des blessures
ou des dégâts matériels.
ATTENTION
AVERTISSEMEN
T

Safety Precautions
13 French
Signification des symboles utilisés pour cet appareil
Le symbole apparaissant sur le produit indique le besoin de précautions à tout moment pendant
l’utilisation.
Reportez-vous toujours au mode d’emploi et lisez les instructions pertinentes avant de manipuler toute
partie à laquelle le symbole est attaché.
Symbole Signification
Attention! Risque biologique
Cette étiquette de symbole attachée sur le socle vous rappelle ce qui suit:
• AVERTISSEMENT: Le contact d’un échantillon et du microscope peut présenter un risque
biologique.
• Pour éviter la contamination biologique, ne touchez pas la partie contaminée les mains nues.
• Décontaminez la partie contaminée conformément à la procédure standard appliquée dans
votre laboratoire.
Attention à la chaleur
Cette étiquette de symbole placée près de la lentille de champ (la lampe est placée sous la
lentille de champ) vous rappelle ce qui suit:
• La lampe et ses environs (lentille de champ y compris) deviennent très chauds pendant et
immédiatement après l’illumination.
• Risque de brûlures. Ne touchez pas la lampe ou ses environs pendant et immédiatement
après l’illumination.
• Vérifiez que la lampe et ses environs sont suffisamment refroidis avant d’essayer de
remplacer l’ampoule.
Attention
Cette étiquette de symbole placée près de l’entrée CA vous rappelle ce qui suit:
• Vérifiez la tension d’entrée avant de mettre le microscope sous tension.
(La tension d’entrée est indiquée sur la “plaque du fabricant” et au-dessus de l’entrée CA.)
• Si la tension d’entrée indiquée diffère du niveau de tension local, ne mettez pas le microscope
sous tension.
Procédez comme suit à la place:
Tension différente sur la plaque du fabricant Contactez l’agent Nikon le plus proche.
Tension différente au-dessus de l’entrée CA Modifiez le réglage de tension d’entrée; voir la
page 68.

Safety Precautions
French 14
1. Emploi prévu pour le produit
Ce microscope est principalement prévu pour l’observation microscopique de cellules et tissus fixés sur
une lame porte-objet par illumination diascopique (transmise) et épiscopique (réfléchie).
Il est conçu essentiellement pour l’expérimentation et l’observation, dans les hôpitaux ou laboratoires,
de telles cellules et tissus dans les domaines de la pathologie et de la cytologie.
2. Ne le démontez pas.
Le démontage peut provoquer un dysfonctionnement et/ou une décharge électrique, et conduira à la
perte par déchéance de tout droit sous garantie. Ne démontez aucune pièce autre que celles indiquées
dans ce mode d’emploi. En cas de problème avec le microscope, adressez-vous à l’agent Nikon le plus
proche.
3. Vérifiez la tension d’entrée.
La tension d’entrée est indiquée à deux emplacements à l’arrière du microscope: sur la plaque du
fabricant et au-dessus de l’entrée CA. Confirmez que ces indications de tension correspondent à la
tension fournie dans votre région. Si ce n’est pas le cas, suivez les instructions ci-dessous. L’emploi
d’un microscope à indication de tension d’entrée différente provoquera une surtension ou la surchauffe,
ce qui pourra entraîner un incendie ou des dommages graves pour le microscope.
• Si l’indication de tension sur la plaque du fabricant diffère:
ÎNe branchez pas le microscope. Contactez l’agent Nikon le
plus proche.
• Si l’indication de tension au-dessus de l’entrée CA diffère:
ÎConsultez la page 68 pour modifier le réglage de
tension d’entrée avant de mettre sous tension.
Pour un microscope à plaque du fabricant indiquant
[100/110/120 V ~]:
La tension est réglable à 100 V, 110 V ou 120 V CA.
Pour un microscope à plaque du fabricant indiquant
[220/230/240 V ~]:
La tension est réglable à 220 V, 230 V ou 240 V CA.
4. Emploi de l’ampoule, du fusible et du cordon secteur spécifiés
Utilisez l’ampoule et le fusible spécifiés. Utilisez le cordon secteur fourni. L’emploi d’une ampoule, d’un
fusible ou d’un cordon d’alimentation incorrects peut endommager l’instrument ou provoquer un
incendie. (Rapportez-vous aussi à la page 85 pour le cordon secteur.)
Si vous utilisez une rallonge, utilisez seulement un cordon avec fil de mise à la terre de protection (PE).
• Ampoule spécifiée
Ampoule halogène 6 V-20 W (PHILIPS 7388 ou OSRAM HLX64250) ou
Ampoule halogène 6 V-30 W (PHILIPS 5761)
• Fusible spécifié
250 V, 1 A, type à action retardée à coupure basse, fusible miniature 5x20 x2
Indications de
tension d’entrée
AVERTISSEMEN
T

Safety Precautions
15 French
5. Chaleur émise par la source lumineuse
La lampe devient très chaude pendant l’emploi. Ne retirez pas la lentille de champ quand la lampe est
allumée, et vérifiez que la lampe est éteinte depuis 30 minutes avant de la toucher.
• Au remplacement de l’ampoule, vérifiez que la lampe est suffisamment refroidie pour la toucher (la
lumière doit être éteinte depuis au moins 30 minutes).
• Ne touchez pas la lampe quand elle est allumée ou avant qu’elle ne soit restée éteinte pendant 30
minutes, sinon des brûlures sont possibles.
• N’approchez jamais du tissu, du papier ou des matériaux volatils inflammables tels que l’essence,
benzine, acétone, diluant ou alcool de la lampe chaude, sinon un incendie est possible.
6. Echantillons dangereux
Ce microscope est essentiellement destiné à l’observation microscopique de cellules et tissus fixés sur
des lames porte-objet.
A la manipulation d’un échantillon, déterminez s’il est dangereux.
Manipulez les échantillons dangereux conformément à la procédure standard de votre laboratoire.
Si l’échantillon est de type infectieux, portez des gants en caoutchouc pour éviter l’infection, et prenez
garde de ne pas le toucher. En cas de contact de l’échantillon avec le microscope, décontaminez la
partie contaminée conformément à la procédure standard de votre laboratoire.
1. Mettez hors tension avant l’assemblage du microscope, le remplacement de l’ampoule ou
du fusible, et le branchement/débranchement du cordon secteur.
Mettez hors tension avant de brancher ou débrancher le cordon secteur pour éviter toute décharge
électrique ou incendie. Mettez aussi hors tension, puis débranchez le cordon secteur avant d’assembler
le microscope, et avant de remplacer l’ampoule ou le fusible. Pour mettre hors tension, basculez
l’interrupteur sur {.
2. Maintenez le microscope exempt d’humidité et de matières étrangères.
Maintenez le microscope exempt d’humidité pour éviter tout court-circuit pouvant résulter en
surchauffe ou un autre dysfonctionnement. Si le microscope est éclaboussé d’eau, mettez
immédiatement hors tension (basculez l’interrupteur sur {) et débranchez le cordon secteur. Puis,
éliminez l’eau avec un chiffon sec. Un court-circuit peut aussi survenir de matières étrangères piégées
dans le microscope. Si des matières étrangères ou de l’eau ont pénétré dans le microscope, ne l’utilisez
pas et contactez l’agent Nikon le plus proche.
3. Pignon de la platine
Le pignon de platine saillit pendant l’emploi.
Prenez garde de ne pas heurter le pignon de la main ou avec une
autre partie du corps pendant la manipulation du microscope, car
vous pourriez vous blesser sur son extrémité.
4. Mise au rebut du microscope
Pour éviter tout risque biologique, jetez le microscope en tant qu’appareil contaminé conformément à la
procédure standard de votre laboratoire.
Pi
g
non
AVERTISSEMEN
T
ATTENTION

Safety Precautions
Spanish 16
Precauciones de Seguridad
Símbolos de Advertencia / Precaución de este manual
Pese a que los productos Nikon están diseñados para garantizar la máxima seguridad durante su uso, el
uso incorrecto o al no respetarse las precauciones, puede causar lesiones personales o daños materiales.
Las averías y los daños debidos a estos actos pueden quedar excluidos del derecho a todos los reclamos
contra la garantía. Para su seguridad, lea cuidadosa y enteramente el manual de instrucciones antes de
usar el instrumento. Se ruega no descartar este manual sino guardarlo cerca del producto para que
pueda consultarse en cualquier momento.
Las instrucciones de seguridad de este manual están marcadas con los símbolos que se indican a
continuación. Se ruega respetar las instrucciones indicadas con estos símbolos para asegurar la
operación correcta y segura.
Símbolo Significado
Al no respetar las instrucciones indicadas con este símbolo, puede causar la muerte o
lesiones serias.
Al no respetar las instrucciones indicadas con este símbolo, puede causar lesiones o
daños materiales.
ADVERTENCI
A
PRECAUCI
Ó
N

Safety Precautions
17 Spanish
Significado de los símbolos utilizados en este equipo
Los símbolos que aparecen en el producto indican la necesidad de tomar las debidas precauciones en
todo momento durante su uso.
Consulte siempre el manual de instrucciones y lea las indicaciones antes de manipular cualquier parte
donde estén adheridos los símbolos.
Símbolo Significado
Precaución contra el peligro biológico
El rótulo con este símbolo adherido en el soporte le recuerda lo siguiente:
• ADVERTENCIA: El contacto entre la muestra y el microscopio, puede constituir un riesgo
biológico.
• Para evitar la contaminación del peligro biológico, no toque las partes contaminadas con sus
manos descubiertas.
• Descontamine la parte contaminada según los procedimientos normales de su laboratorio.
Precaución contra el calor
El rótulo con este símbolo adherido cerca de la unidad de la lente de campo (la lámpara está
debajo de la unidad de la lente de campo) le recuerda lo siguiente:
• La lámpara y sus alrededores (incluyendo la unidad de la lente de campo) se tornan muy
calientes durante e inmediatamente después de la iluminación.
• Existe el riesgo de quemaduras. No toque la lámpara ni sus alrededores durante e
inmediatamente después de la iluminación.
• Asegúrese que la lámpara y sus alrededores se hayan enfriado lo suficiente antes de intentar
el reemplazo de la lámpara.
Precaución
El rótulo con este símbolo adherido cerca de la entrada de CA le recuerda lo siguiente:
• Verifique la tensión de entrada antes de conectar el microscopio.
(La tensión de entrada está indicada en la “plaqueta de características” y sobre la entrada de
CA.)
• Si la tensión de entrada indicada difiere del nivel de la tensión local, no conecte el
microscopio. En ese caso, proceda como sigue:
Tensión que difiere de la plaqueta de características
Tome contacto con el representante Nikon más próximo.
Tensión que difiere de la indicación de la entrada de CA
Cambie el ajuste de la tensión de entrada: Vea la Pág. 68.

Safety Precautions
Spanish 18
1. Objeto del uso del equipo
Este microscopio tiene como uso principal la observación microscópica de células y tejidos fijados en el
portaobjetos, utilizando la iluminación diascópica (transmitida) y episcópica (reflejada).
Está diseñado para el objeto principal de experimentación y observación de células y tejidos del área de
la patología y citología en los hospitales u otros laboratorios.
2. No lo desarme
El desarme puede causar desperfectos y/o descargas eléctricas y quedar excluido del derecho a todos
los reclamos contra la garantía. No desarme ninguna parte fuera de lo que se describe en este
manual. En el caso de encontrar algún problema en su microscopio, se ruega notificar al
representante de Nikon más próximo.
3. Verifique la tensión de entrada
La tensión de entrada está indicada en dos lugares de la parte trasera del microscopio: en la plaqueta
de características y sobre la entrada de CA. Confirme que estas indicaciones de la tensión de entrada
correspondan a la tensión suministrada en su región. En el caso contrario, siga una de las siguientes
instrucciones. El uso del microscopio con tensiones de entrada diferentes a las indicadas, puede
producir la sobrecorriente y el sobrecalentamiento que pueden causar el incendio o daños severos al
microscopio.
• Cuando difiere la tensión de la indicación de la plaqueta
de características:
ÎNo conecte el microscopio. Tome contacto con el
representante Nikon más próximo.
• Cuando difiere la tensión de la indicación de tensión sobre la entrada de CA:
ÎVea la Pág. 68 y cambie el ajuste de la tensión de
entrada antes de conectar la llave de energía.
Para el microscopio con la plaqueta de características
que indique
[100/110/120V ~]:
La tensión puede ajustarse a: 100V, 110V o 120V CA.
Para el microscopio con la plaqueta de características
que indique
[220/230/240V ~]:
La tensión puede ajustarse a: 220V, 230V o 240V CA.
4. Use la lámpara, fusible y cable de energía especificados
Use la lámpara y fusible especificados. Use el cable de energía especificado. El uso de la lámpara,
fusible o cable de energía incorrectos, puede dañar el instrumento o causar el incendio. (Vea también
la página 85 sobre el cable de energía.)
En el caso de utilizar el cable de extensión, utilice solamente el cable que incluya el conductor a tierra
de protección (PE).
• Lámpara especificada
Lámpara halógena de 6V-20W (PHILIPS 7388 u OSRAM HLX64250) o
Lámpara halógena de 6V-30W (PHILIPS 5761)
• Fusible especificado
250V, 1A, tipo de fusión retardada con baja capacidad de interrupción, fusible en miniatura 5×20 ×2
Indicaciones de
la tensión de
entrada
ADVERTENCI
A
Other manuals for eclipse E200
1
Table of contents
Other Nikon Microscope manuals

Nikon
Nikon Eclipse TE200 User manual

Nikon
Nikon ECLIPSE Ni-E User manual

Nikon
Nikon SMZ-U User manual

Nikon
Nikon Eclipse L200 User manual

Nikon
Nikon TSM User manual

Nikon
Nikon LABOPHOT-2 User manual

Nikon
Nikon P-400R User manual

Nikon
Nikon SMZ1000 User manual

Nikon
Nikon E800 User manual

Nikon
Nikon SMZ25 User manual

Nikon
Nikon DS-L4 User manual

Nikon
Nikon A1+ Manual

Nikon
Nikon A1R Series Service manual

Nikon
Nikon Eclipse E600 User manual

Nikon
Nikon A1R User manual

Nikon
Nikon ECLIPSE 80i User manual

Nikon
Nikon Eclipse Ci-E User manual

Nikon
Nikon SMZ645 User manual

Nikon
Nikon Eclipse E400 POL User manual

Nikon
Nikon Eclipse L150 User manual