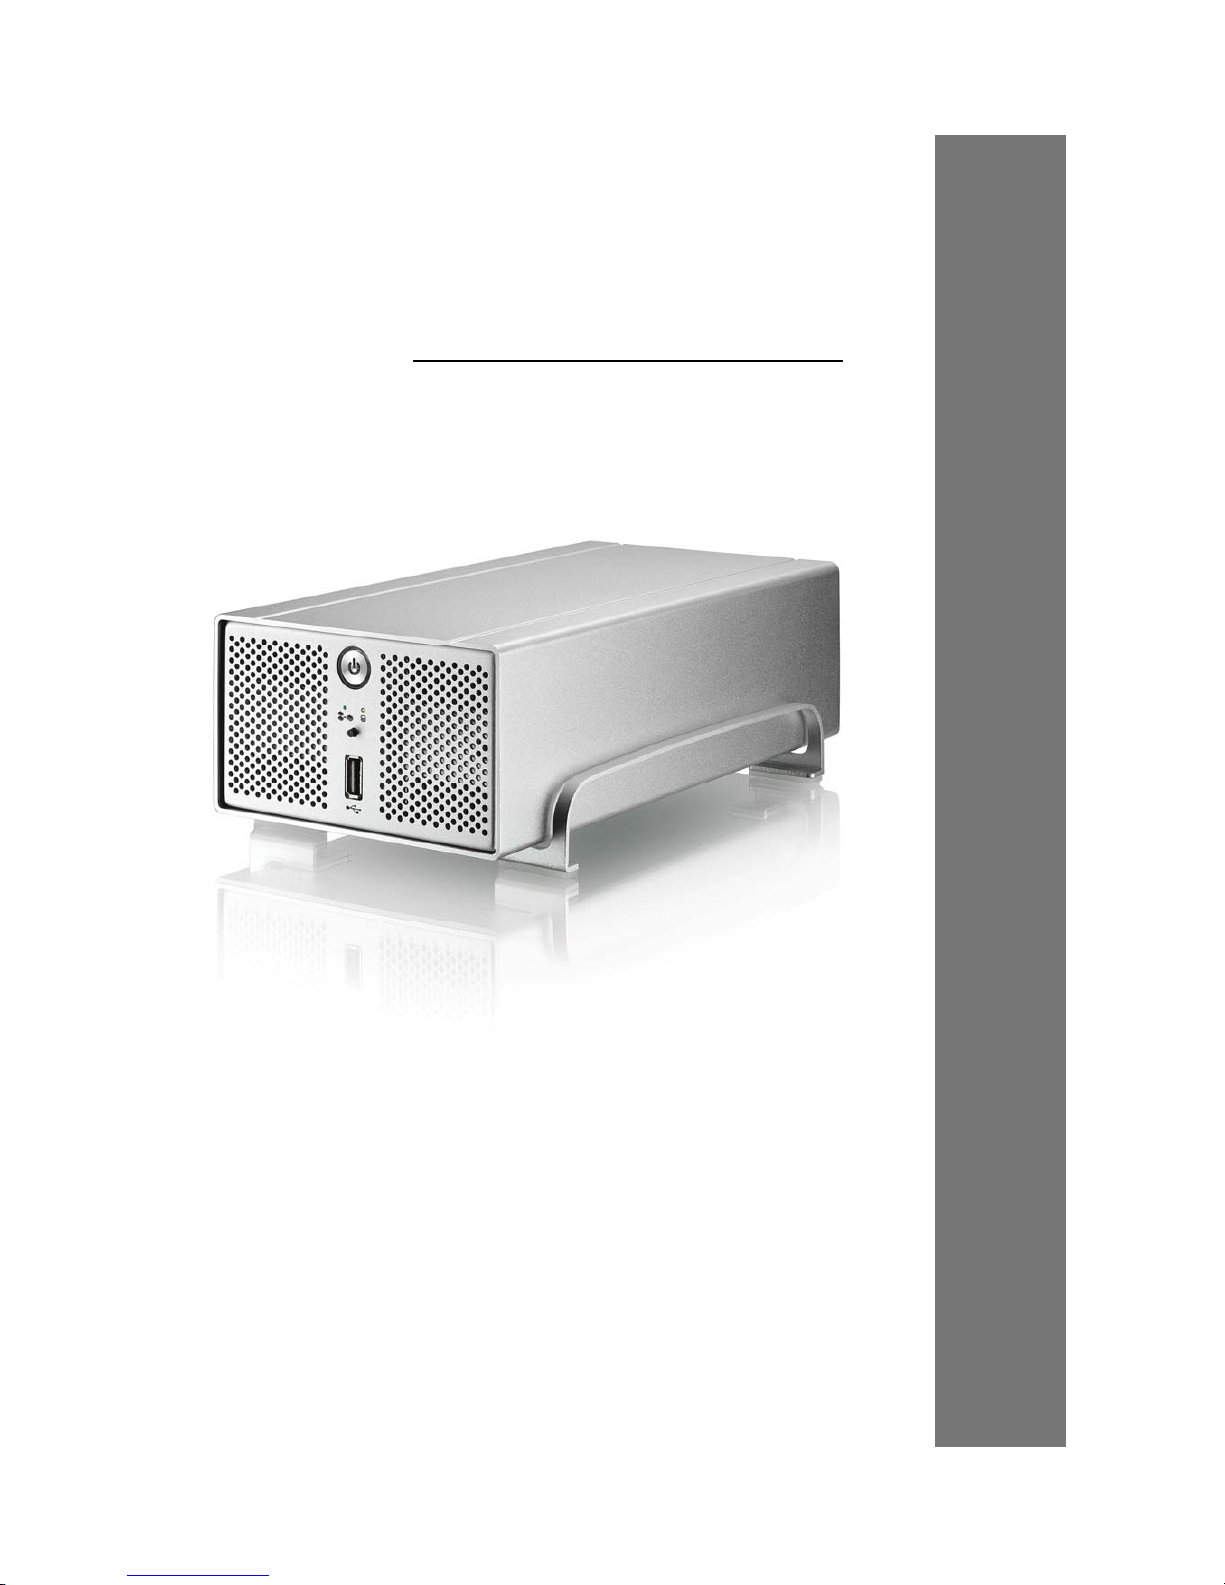
Taurus - USB User Guide
Always connect
the power adapter
to your device
before you plug it
into the wall
socket.
Changing the
JBOD setting will
require you to re-
format the drives.
Make sure you
backup all data
before doing so!
We recommend
leaving the fan
speed set to
automatic.
Chapter 3 - System Set Up
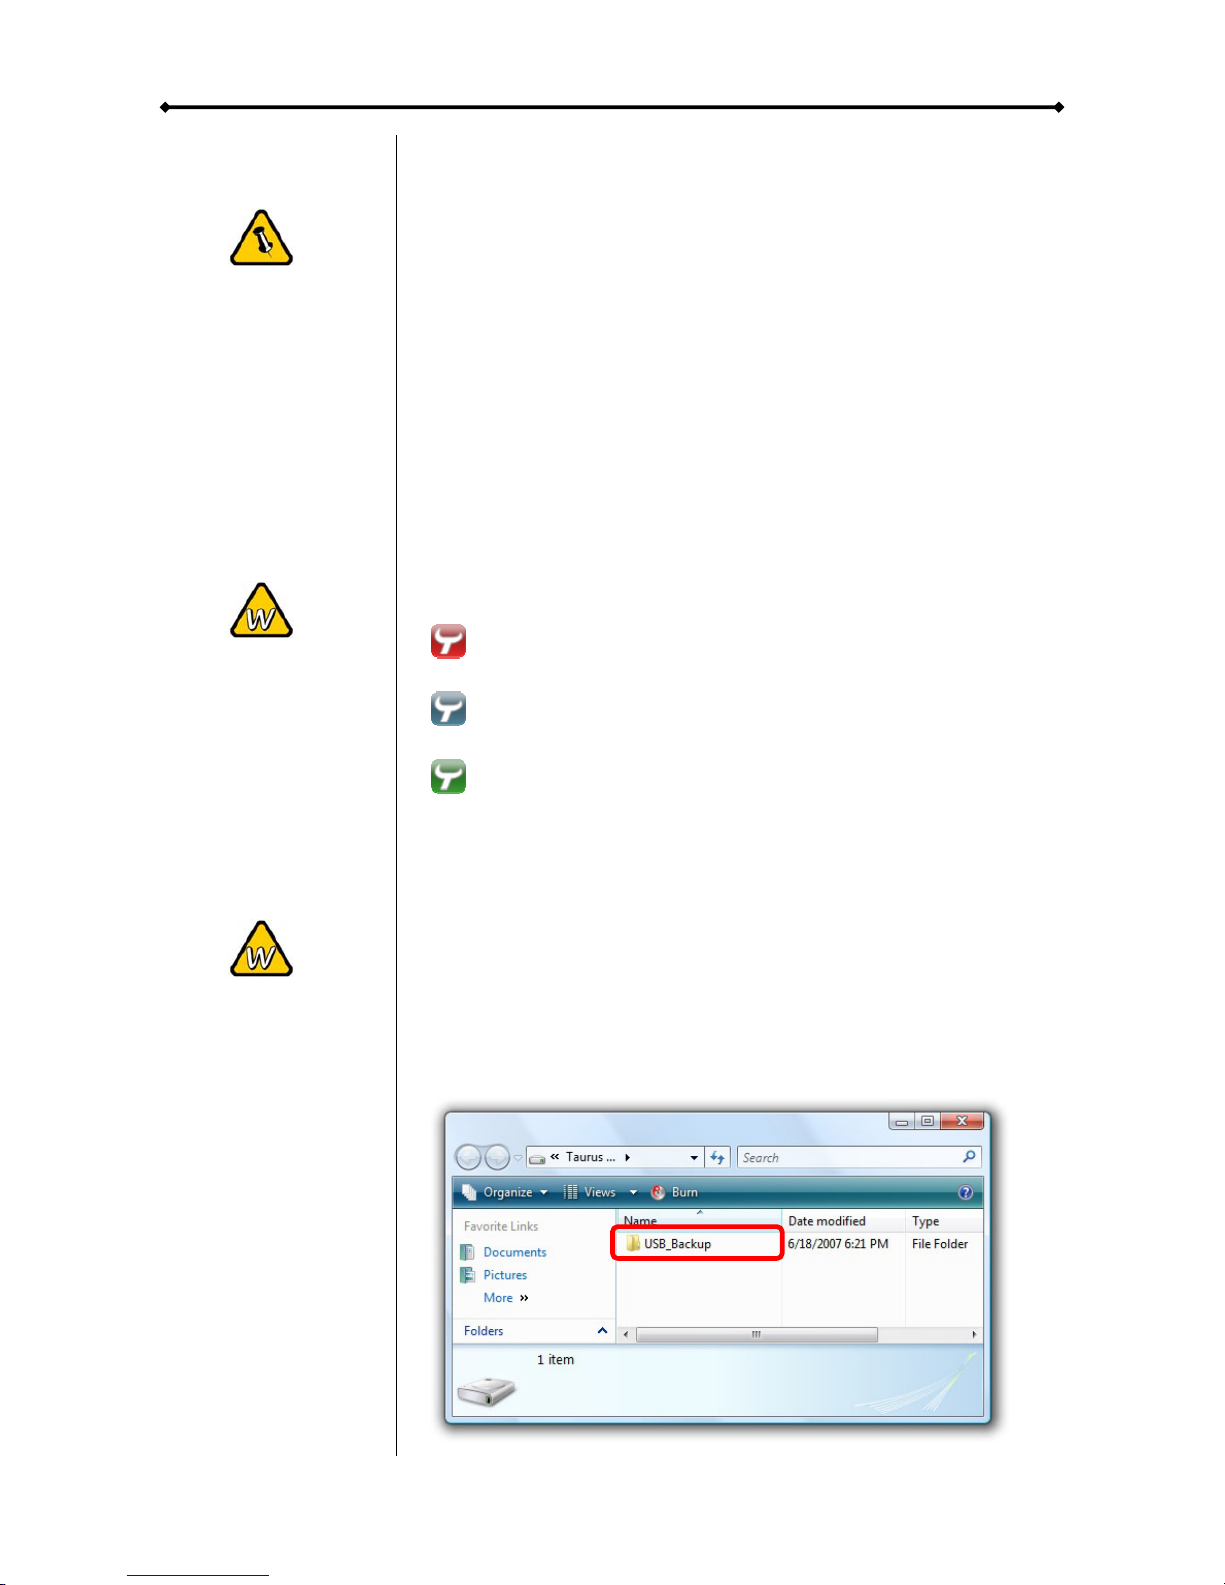
Connection to your Computer
A few tips on how to use your external storage enclosure:
•Check the cables for visible damage before turning it on
•Do not expose the product to water or humid conditions
•Do not cover the enclosure’s ventilation holes
•Use self-powered USB devices when connecting them to
the USB hub
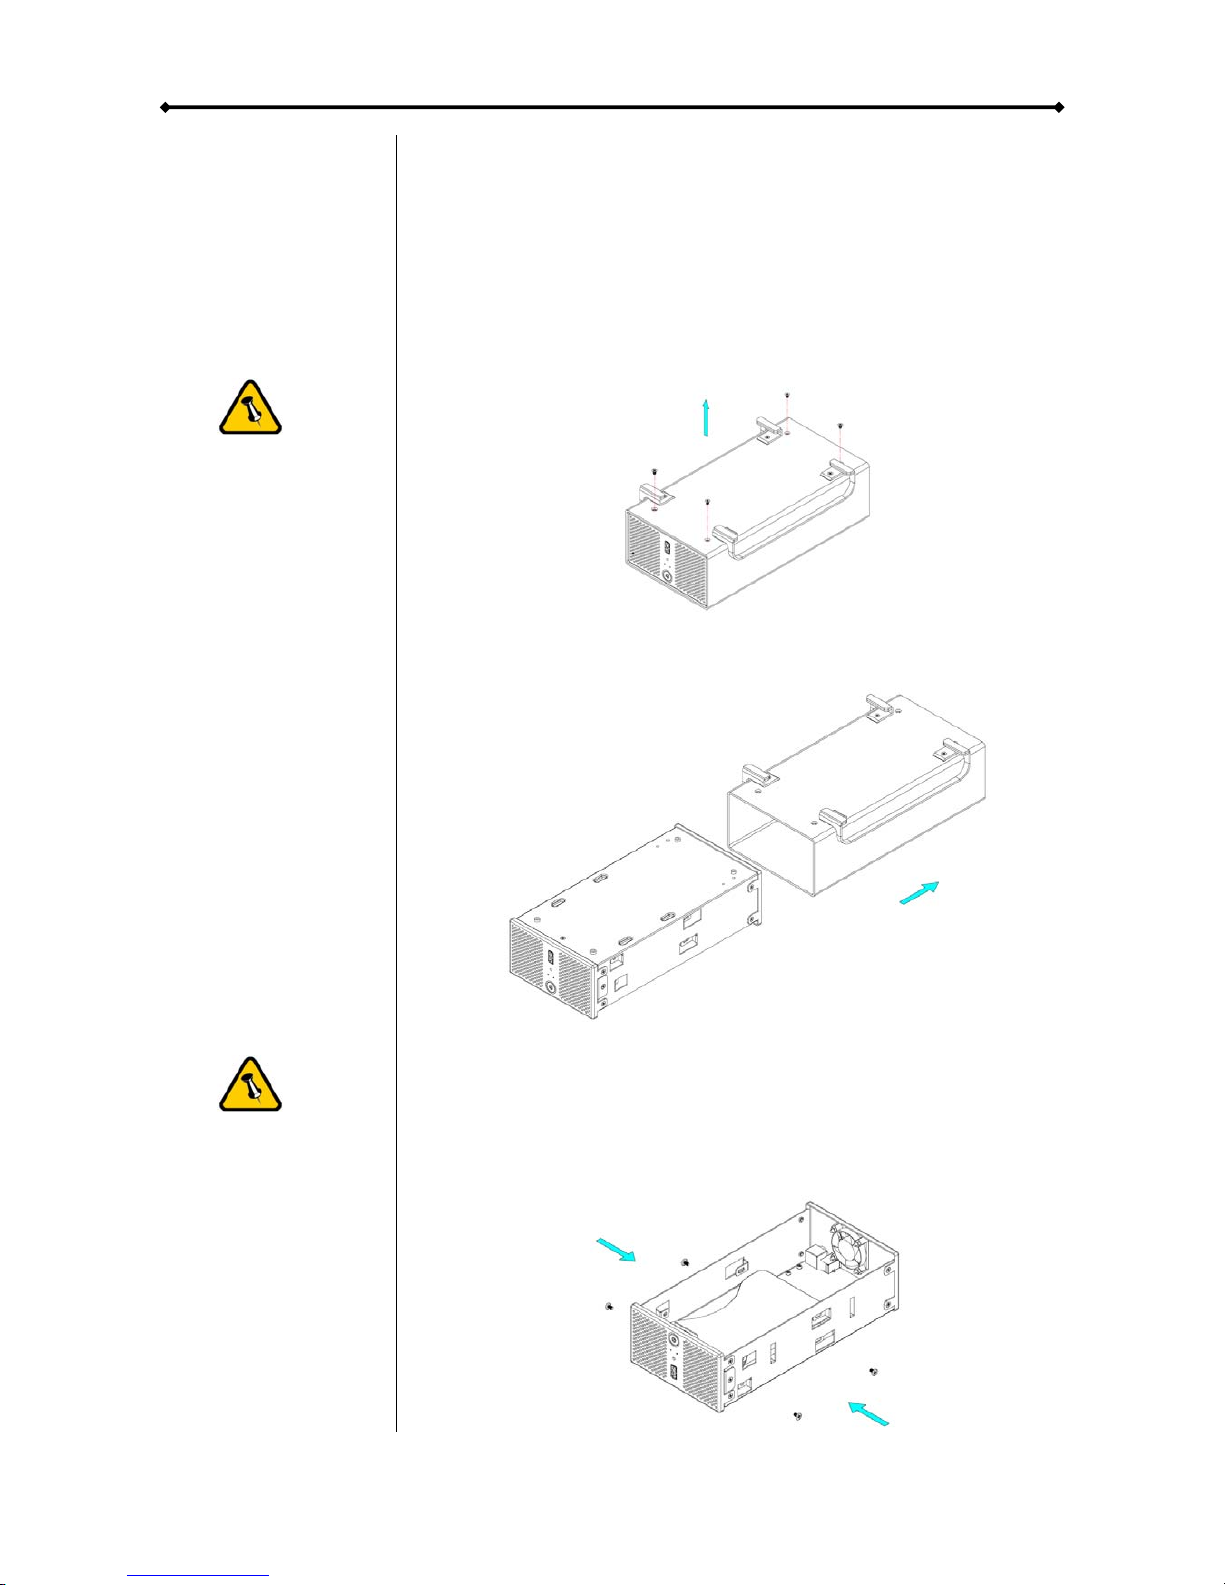
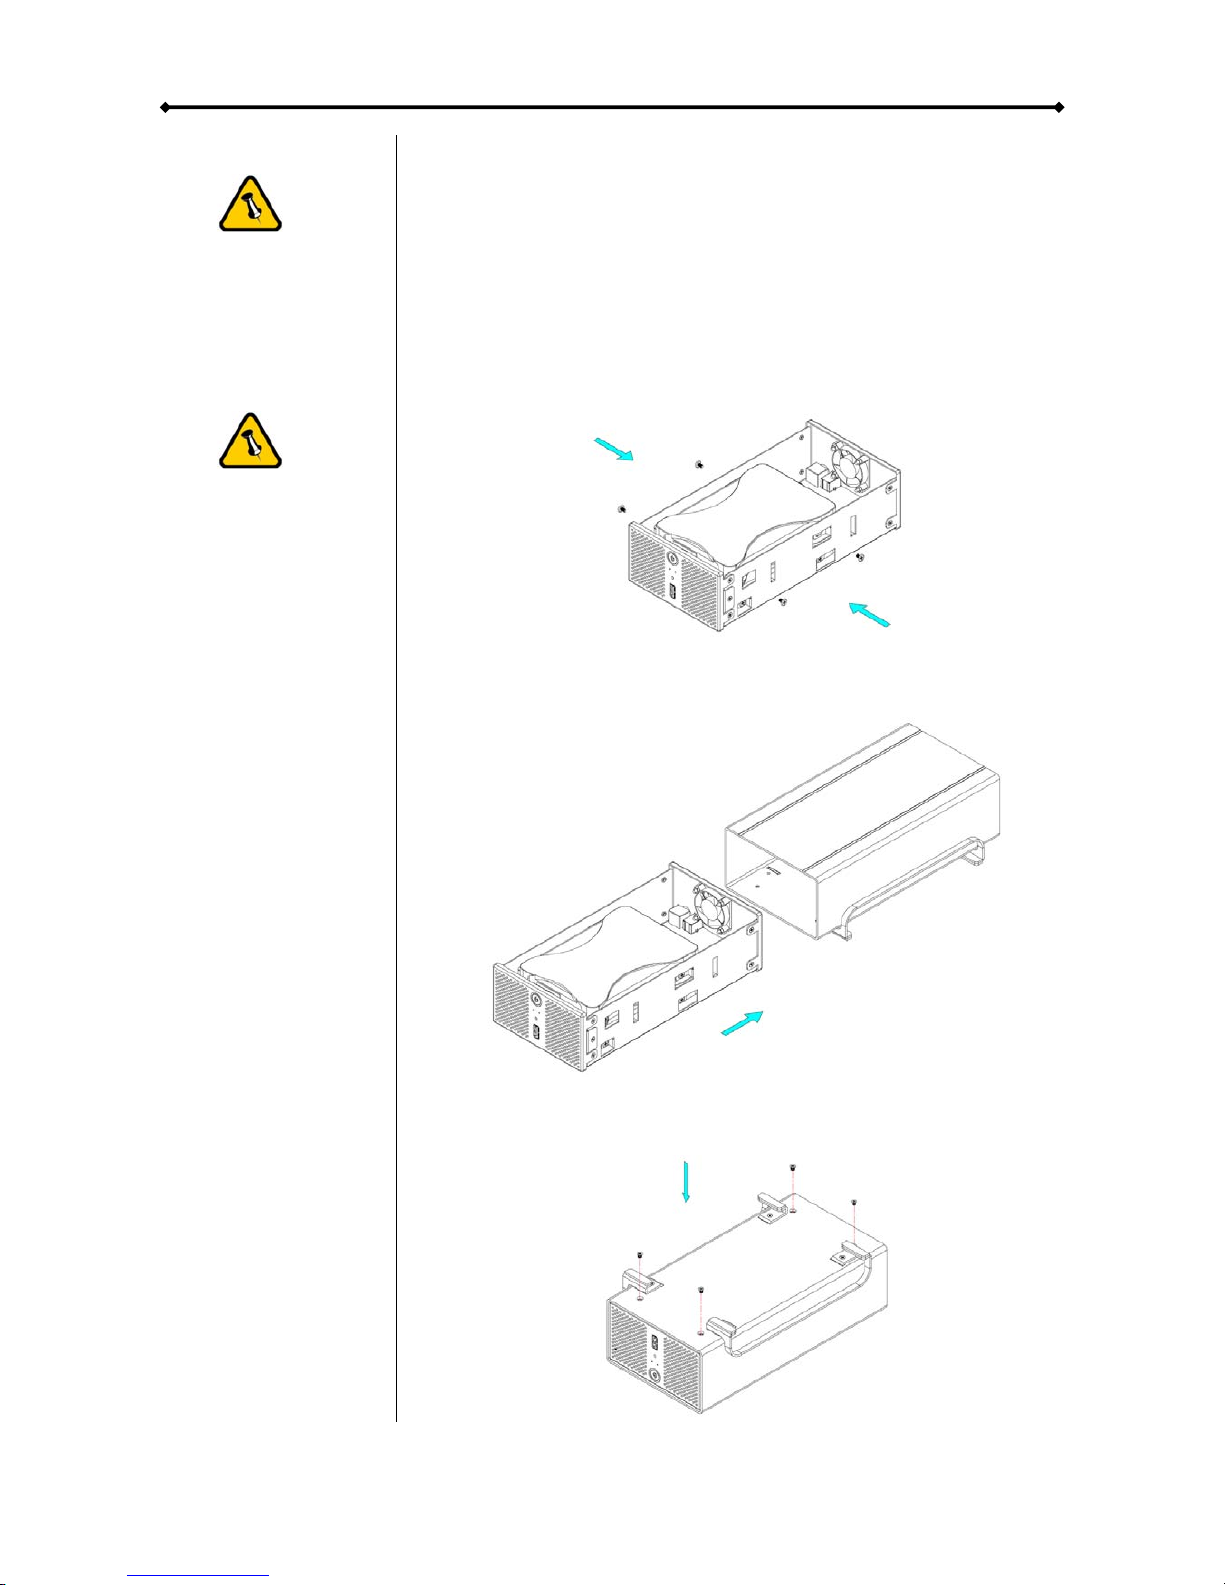
JBOD Setup
By default, the drives will show up as two independent drives.
Use this setting if you have only one hard drive installed or
prefer the two hard drives to show up as separate drives.
For JBOD, the two drives show up as one large single drive. To
use JBOD, remove the jumper that is located at J1 on the
bridge board inside your enclosure. Changing this will require
you to re-format the drives.
Fan Setup
By default, the fan is set to adjust the speed automatically
according to the temperature of the hard drives. When the
sensor measures temperatures above 45 degrees Celsius, it
will turn on the fan. The speed will be increased every 5
degrees until 60 degrees when it will be at full power.
To manually set the fan speed, remove the jumper that is
located at J7 on the bridge board inside your enclosure. To set
it at high speed, place that jumper on the pin at J8 or leave it
off for the fan to run at low speed.
Page 6 / Chapter 3 - System Set Up


 user manual")


