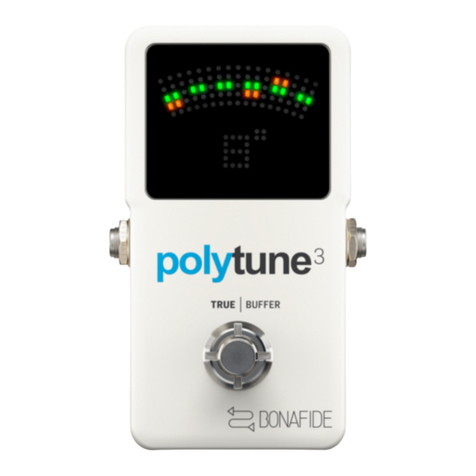
TC Electronic POLYTUNE 3 MINI User manual

Quick Start Guide
POLYTUNE 3 MINI
Visit musictribe.com to download the full manual
V 1.0
(1)
(2)
(4)
(7)
(5)
(6)
(3)

(EN) Controls
(1) Display - Pick one string
for single-string tuning, or strum all
of the strings for polyphonic tuning.
(2) Output
(3) Footswitch - Turns the tuner on
and o. Press and hold the footswitch
to toggle between standard and
drop-D tuning.
(4) Tuning Mode - Select between
standard “E” or one of the dropped
tuning or capo modes. Press and hold
to switch between chromatic and
strobe mode.
(5) Power Input - Connect a 9 V / >100
mA power supply.
(6) Input
(7) True Bypass / Buered Bypass -
Choose between Bypass modes:
Switch configuration Mode
Bothswitches
set to OFF
True Bypass
Switch 1 set to ON
Switch 2 set
to OFF position
Buered Bypass
Both switches
set to ON
Buered Bypass,
Display Always On
(ES) Controles
(1) Display - Elija una cuerda para
la anación de una sola cuerda, o
rasguee todas las cuerdas para una
anación polifónica.
(2) Output
(3) Footswitch - Enciende y apaga el
sintonizador. Mantén pulsado el
conmutador de pedal para alternar
entre la anación estándar y drop-D.
(4) Tuning Mode - Seleccione entre
“E” estándar o uno de los modos de
anación o cejilla. Mantenga pulsado
para cambiar entre el modo cromático
y estroboscópico.
(5) Power Input - Conecte una fuente
de alimentación de 9 V /> 100 mA.
(6) Input
(7) True Bypass / Buered Bypass -
Elija entre los modos Bypass:
Switch configuration Mode
Ambos interruptores
en OFF
Verdadero bypass
Cambie 1 juego a ON
Interruptor 2 en
posición OFF
Bypassconbúfer
Ambos interruptores
en ON
Bypass en búfer,
pantalla siempre
encendida
(FR) Réglages
(1) Display - Choisissez une corde
pour l’accordage à une seule corde
ou grattez toutes les cordes pour
l’accordage polyphonique.
(2) Output
(3) Footswitch - Active et désactive
le tuner. Appuyez sur la pédale et
maintenez-la enfoncée pour basculer
entre l’accord standard et drop-D.
(4) Tuning Mode - Choisissez entre
«E» standard ou l’un des modes de
réglage abandonné ou capo. Appuyez
et maintenez pour basculer entre le
mode chromatique et stroboscopique.
(5) Power Input - Branchez une
alimentation 9 V /> 100 mA.
(6) Input
(7) True Bypass / Buered Bypass -
Choisissez entre les modes
de contournement:
Switch configuration Mode
Les deux interrupteurs
sont réglés sur OFF
Véritable
contournement
Commutateur 1
réglé sur ON
Commutateur
2 en position OFF
Bypass tamponné
Les deux
commutateurs sont
réglés sur ON
Bypass tamponné,
achage toujours
activé
(DE) Bedienelemente
(1) Display - Wählen Sie eine Saite
für die Einzelsaitenstimmung
oder spielen Sie alle Saiten für die
polyphone Stimmung.
(2) Output
(3) Footswitch - Schaltet den Tuner ein
und aus. Halten Sie den Fußschalter
gedrückt, um zwischen Standard- und
Drop-D-Abstimmung umzuschalten.
(4) Tuning Mode - Wählen Sie zwischen
Standard-E oder einem der Drop-
Tuning- oder Capo-Modi. Halten Sie
gedrückt, um zwischen Chromatik-
und Strobe-Modus zu wechseln.
(5) Power Input - Schließen Sie eine 9 V
/> 100 mA Stromversorgung an.
(6) Input
(7) True Bypass / Buered Bypass -
Wählen Sie zwischen Bypass-Modi:
Switch configuration Mode
Beide Schalter stehen
auf OFF
Echte Umgehung
Schalter 1 auf
ON stellen
Schalter 2 auf
OFF stellen
Gepuerter Bypass
Beide Schalter
stehen auf ON
Gepuerter Bypass,
Anzeige immer an

(PT) Controles
(1) Display - Escolha uma corda para
anação de uma corda ou toque todas
as cordas para anação polifônica.
(2) Output
(3) Footswitch -Liga e desliga o
sintonizador. Pressione e segure o
pedal para alternar entre a anação
padrão
e drop-D.
(4) Tuning Mode - Selecione entre “E”
padrão ou um dos modos de anação
ou capo. Pressione e segure para
alternar entre o modo cromático e
estroboscópico.
(5) Power Input - Conecte uma fonte de
alimentação de 9 V /> 100 mA.
(6) Input
(7) True Bypass / Buered Bypass -
Escolha entre os modos de desvio:
Switch configuration Mode
Ambos os
interruptores estão
em OFF
True Bypass
Chave 1 denida
para ON
Chave 2 denida para
a posição DESLIGADA
Bypass com Buer
Ambos os
interruptores
denidos para ON
Bypass com buer,
display sempre
ativado
(IT) Controlli
(1) Display - Scegli una corda
per l’accordatura a corda singola
o suona tutte le corde per
l’accordatura polifonica.
(2) Output
(3) Footswitch -Accende e spegne
l’accordatore. Tieni premuto il pedale
per passare dall’accordatura standard
a quella drop-D e viceversa.
(4) Tuning Mode - Scegli tra la “Mi”
standard o una delle modalità di
accordatura ridotta o capotasto.
Tenere premuto per passare dalla
modalità cromatica a quella strobo.
(5) Power Input - Collegare un
alimentatore da 9 V /> 100 mA.
(6) Input
(7) True Bypass / Buered Bypass -
Scegli tra le modalità Bypass:
Switch configuration Mode
Entrambi gli
interruttori sono
impostati su OFF
True Bypass
Interruttore 1
impostato su ON
Interruttore 2
impostato sulla
posizione OFF
Bypass tamponato
Entrambi gli
interruttori sono
impostati su ON
Bypass buerizzato,
visualizzazione
sempre attiva
(NL) Bediening
(1) Display - Kies een snaar voor het
stemmen met één snaar, of tokkel alle
snaren voor een polyfone stemming.
(2) Output
(3) Footswitch - Zet de tuner aan en uit.
Houd de voetschakelaar ingedrukt
om te wisselen tussen standaard en
drop-D afstemming.
(4) Tuning Mode - Kies tussen standaard
“E” of een van de drop-tuning of
capo-modi. Ingedrukt houden om te
schakelen tussen chromatische en
stroboscoopmodus.
(5) Power Input - Sluit een 9 V /> 100
mA voeding aan.
(6) Input
(7) True Bypass / Buered Bypass -
Kies tussen Bypass-modi:
Switch configuration Mode
Beide schakelaars
staan op OFF
Echte bypass
Schakelaar 1 ingesteld
op AAN
Schakelaar 2 staat in
de UIT-stand
Gebuerde bypass
Beide schakelaars
staan op ON
Gebuerde bypass,
weergave altijd aan
(SE) Kontroller
(1) Display - Välj en sträng för
enkelsträngning eller strumma alla
strängar för polyfonisk avstämning.
(2) Output
(3) Footswitch - Slår på och av tunern.
Tryck och håll ned fotpedalen för
att växla mellan standard- och
drop-D-inställning.
(4) Tuning Mode - Välj mellan standard
“E” eller något av de inställda lägena
för tuning eller capo. Håll intryckt
för att växla mellan kromatisk och
strobläge.
(5) Power Input - Anslut en 9 V />
100 mA strömförsörjning.
(6) Input
(7) True Bypass / Buered Bypass -
Välj mellan bypasslägen:
Switch configuration Mode
Båda omkopplarna är
inställda på OFF
True Bypass
Växla 1 till ON
Ställ omkopplare 2 i
OFF-läge
Burad
förbikoppling
Båda omkopplarna är
inställda på ON
Buered Bypass,
Display Always On

(PL) Sterownica
(1) Display - Wybierz jedną strunę
do strojenia jednej struny lub
wybierz wszystkie struny do
strojenia polifonicznego.
(2) Output
(3) Footswitch - Włącza i wyłącza tuner.
Naciśnij i przytrzymaj przełącznik
nożny, aby przełączać się między
strojeniem standardowym i drop-D.
(4) Tuning Mode - Wybierz między
standardowym „E” lub jednym z
wyłączonych trybów strojenia lub
trybu kapodasterującego. Naciśnij
i przytrzymaj, aby przełączać się
między trybem chromatycznym
i stroboskopowym.
(5) Power Input - Podłącz zasilanie 9 V
/> 100 mA.
(6) Input
(7) True Bypass / Buered Bypass -
Wybierz pomiędzy trybami Bypass:
Switch configuration Mode
Oba przełączniki
ustawione w
położeniu WYŁ
True Bypass
Przełącznik 1
ustawiony na ON
Przełącznik 2
ustawiony w
pozycji OFF
Buforowane
obejście
Oba przełączniki
ustawione w
pozycji ON
Buforowane
obejście,
wyświetlacz
zawsze włączony
FEDERAL COMMUNICATIONS
COMMISSION COMPLIANCE INFORMATION
Responsible Party Name: Music Tribe Commercial NV Inc.
Address: 5270 Procyon Street,
Las Vegas NV 89118,
United States
Phone Number: +1 702 800 8290
POLYTUNE 3 MINI
This equipment has been tested and found to comply with the limits for a Class B digital device,
pursuant to part 15 of the FCC Rules. These limits are designed to provide reasonable protection against
harmful interference in a residential installation. This equipment generates, uses and can radiate radio
frequency energy and, if not installed and used in accordance with the instructions, may cause harmful
interference to radio communications. However, there is no guarantee that interference will not occur
in a particular installation. If this equipment does cause harmful interference to radio or television
reception, which can be determined by turning the equipment o and on, the user is encouraged to try
to correct the interference by one or more of the following measures:
TC Electronic
POLYTUNE 3 MINI

•• Reorient or relocate the receiving antenna.
•• Increase the separation between the equipment and receiver.
•• Connect the equipment into an outlet on a circuit dierent from that to which the receiver is
connected.
•• Consult the dealer or an experienced radio/TV technician for help.
This device complies with Part 15 of the FCC rules. Operation is subject to the following two conditions:
(1) this device may not cause harmful interference, and
(2) this device must accept any interference received, including interference that may cause undesired
operation.
Important information:
Changes or modications to the equipment not expressly approved by Music Tribe can void the user’s
authority to use the equipment.
Hereby, Music Tribe declares that this product is in compliance with Directive 2014/30/EU, Directive
2011/65/EU and Amendment 2015/863/EU, Directive 2012/19/EU, Regulation 519/2012 REACH SVHC
and Directive 1907/2006/EC.
Full text of EU DoC is available at https://community.musictribe.com/
EU Representative: Music Tribe Brands DK A/S
Address: Ib Spang Olsens Gade 17, DK - 8200 Aarhus N, Denmark
Table of contents
Other TC Electronic Tuner manuals

TC Electronic
TC Electronic PolyTune Clip User manual

TC Electronic
TC Electronic UNITUNE CLIP User manual

TC Electronic
TC Electronic PolyTune User manual

TC Electronic
TC Electronic PolyTune User manual

TC Electronic
TC Electronic POLYTUNE 3 User manual

TC Electronic
TC Electronic PolyTune Clip User manual

TC Electronic
TC Electronic UNITUNE CLIP User manual

TC Electronic
TC Electronic POLYTUNE 3 User manual
Popular Tuner manuals by other brands

Adastra
Adastra MM321 user manual

Scott
Scott SMV122 owner's manual

Fzone Music Technology Co., Ltd
Fzone Music Technology Co., Ltd FMT-331 user manual

Griffin Technology
Griffin Technology iFM quick start guide

Leak
Leak Through Line 3 Installation operation & maintenance

Kenwood
Kenwood KT-6040 Service manual