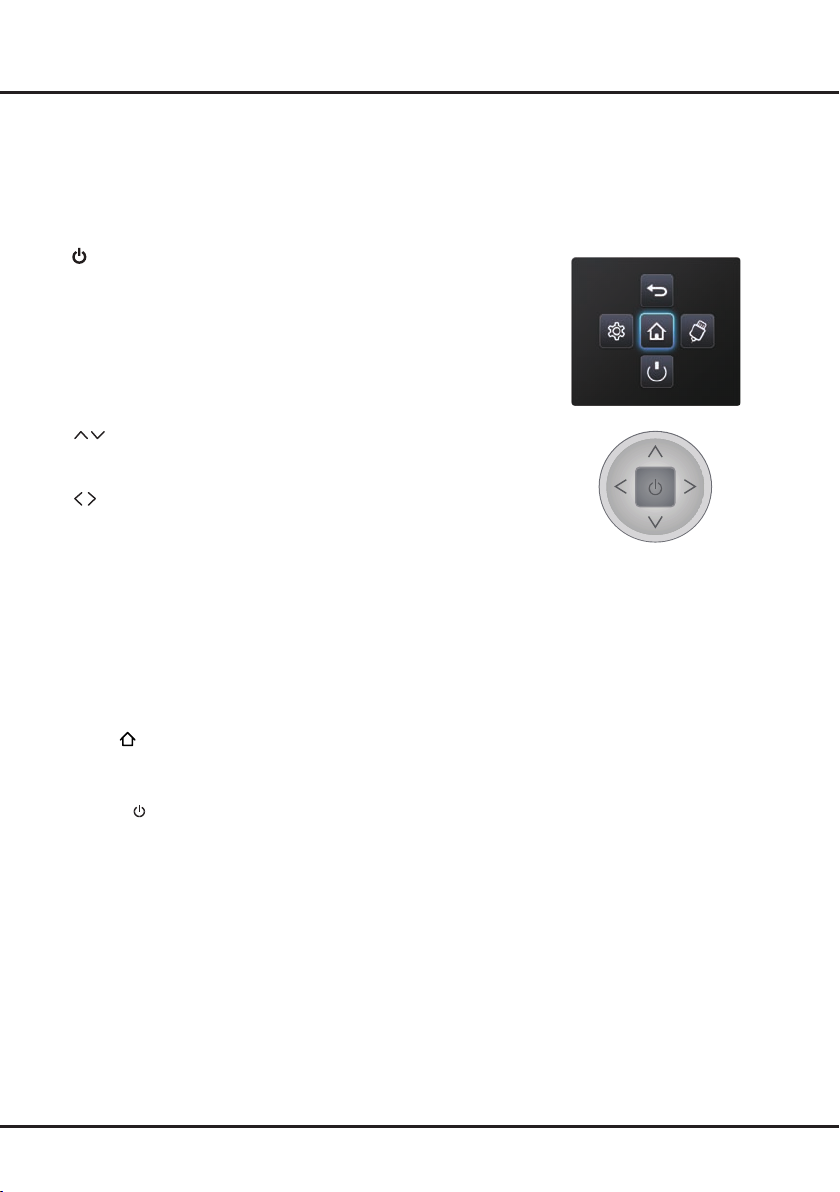
3
Chapter 1 Safety Information
Precautions
Read all of the instructions before operating the set.
Keep these instructions well for future use.
Product
• Do not block or cover the ventilation openings on
the back cover.
• Do not push objects of any kind into this unit through
the cabinet slots as they could touch current carrying
partsorshort-circuitparts,resultinginre,electric
shock, or damage to the unit.
• Do not attempt to open the cabinet as this may
cause damage. There are no parts inside you can
servicebyyourself.Referallservicingtoqualied
personnel.
• Donottouchthescreensurfacewithngersasthis
may scratch or mark the TV screen.
• Do not impact the TV screen with hard pressure as
this may damage the TV screen severely.
• The appliance is not intended for use by young
childrenorinrmpersonswithoutsupervision.
Young children should be supervised to ensure that
they do not play with the appliance.
Power and Plug
•Unplug the set under the following conditions:
- If the set will not be used for a long period of time.
- If the power cord or the power outlet/plug is
damaged.
- Follow the instructions to install and adjust the
product. Adjust those controls that are covered
in these operating instructions as improper
adjustment of other controls may result in damage.
If this happens, unplug the set and refer to the
service personnel.
- If the set is subject to impact or has been dropped
and the cabinet has been damaged
•Where the mains plug or an appliance coupler is
used as disconnect device, the disconnect device
shall remain readily operable.
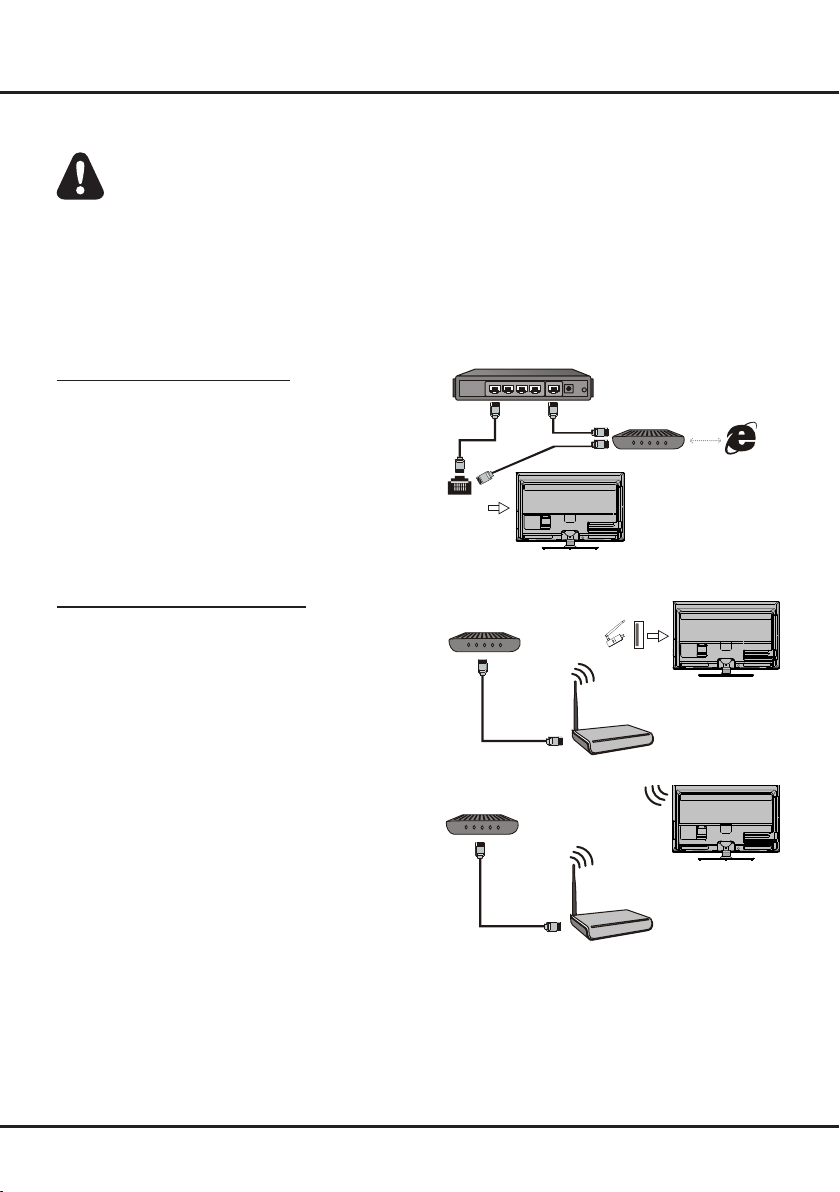
Power Cord and Signal Cable
• Donotallowanythingtorestonorrolloverthe
power cord and the signal cable.
• Protectthepowercordandthesignalcablefrom
being trampled.
• Donotoverloadthepowercordorthepoweroutlet.
• Donotexposethepowercordandthesignalcable
to moisture.
Use Environment
• Donotplacethesetonanunstablecart,stand,or
table.
• Placethesetonaplacethatallowsgoodventilation.
• Donotusethesetneardamp,andcoldareas.
Protect the set from overheating.
• Keepthesetawayfromdirectsunlight.
• Theapparatusshallnotbeexposedtodrippingor
splashingandnoobjectslledwithliquids,such
as vases, shall be placed on the apparatus.
• Do not use the set in dusty environments.
• Operating Temperature: 5℃to 35℃(41°F to 95°F)
Operating Humidity: 20% to 80%,non-condensing
Storage Temperature: -15℃to 45℃(5°F to 113°F)
Storage Humidity: 10% to 90%,non-condensing
Cleaning
•Dust the set by wiping the screen and the cabinet
with a soft, clean cloth or some special liquid
cleaner.
• Donotapplyexcessiveforcetothescreenwhen
cleaning.
• Do not use water or other chemical cleaners to
clean the screen as this may damage the surface of
the TV screen.
Hanging the TV Set on the Wall
Warning: This operation requires two people.
To ensure a safe installation, observe the following
safety notes:
•Check that the wall can support the weight of the TV
set and wall mount assembly.
• Follow the mounting instructions provided with the
wall mount.
• The TV set must be installed on a vertical wall.
• Make sure to use only screws suitable for the
material of the wall.
• Make sure that the TV set cables are placed so that
there is no danger of tripping over them.
All other safety instructions about our TV sets are also
applicable here. Wall Mount Bracket not included. (Note:
Certain TV models are not designed to be mounted to
the walls.)
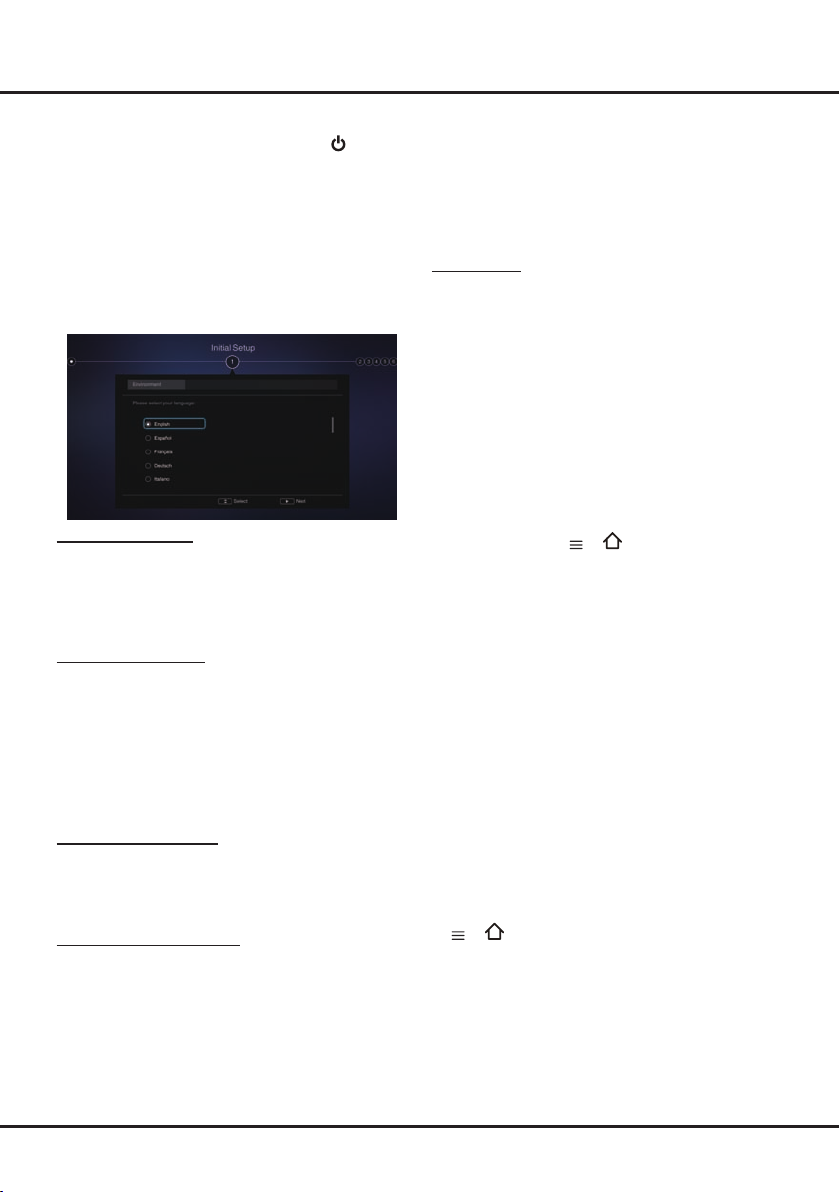
Important Information
Ifatelevisionisnotpositionedinasufcientlystable
location, it can be potentially hazardous due to falling.
Many injuries, particularly to children, can be avoided
by taking simple precautions such as:
• Using cabinets or stands recommended by the
manufacturer of the television.
• Only using furniture that can safely support the
television.
• Ensuring the television is not overhanging the edge
of the supporting furniture.
• Not placing the television on tall furniture (for
example,cupboardsorbookcases)without
anchoring both the furniture and the television to a
suitable support.
• Not standing the television on cloth or other
materials placed between the television and
supporting furniture.
• Educating children about the dangers of climbing on
furniture to reach the television or its controls.
Note: Graphics contained within this publication
are for presentation only.