TDR S161 User manual

11111111
1
APPENDI XI- SPECIFICATION
1.Varies with user weight, terrain type, battery amp-hour(Ah), battery charge,
battery condition, tire type and tire condition. This specification can be subject to a
variance of (+ or -) 10%
2.Due to manufacturing tolerances and continual product improvement, this
specification can be subject to a variance of (+ or -) 3%
3.Approximate overall inflated dimensions.
4.AGM or Gel-Cell type required. See IV. ”Batteries and Chagrining.”
5.Tested in accordance withASN/RESNA, WC Vol 2, Section 4& ISO 7176-4
standards. Results derived from theoretical calculation based on battery
specifications and drive system performance.Test conducted at maximum weight
capacity.
NOTE: This product conforms to all applicable ANS L-RESNA testing
requirements and ISO 7176 EN12184 Standards. All specifications subject to
change without notice.
S161 Mobility Scooter
Operating Instruction

11111
CONTENTS
I. INTRODUCTION……………………………………………………………… 1
II. SAFETY ……………………………………………………………………… 2
III. YOUR TRAVEL SCOOTER ………………………………………………… 17
IV. BATTERIES AND CHARGING……………………………………………… 23
V. OPERATION…………………………………………………………………… 30
VI. COMFORTADJUSTMENTS………………………………………………… 33
VII. DISASSEMBLY AND ASSEMBLY………………………………………… 35
VIII. BASIC TROUBLESHOOTING……………………………………………… 36
IX. CARE AND MAINTENANCE………………………………………………… 38
X. WARRATY……………………………………………………………………… 42
APPENDI XI-SPECIFICATIONS………………………………………………………28
SAFETY GUIDELINES
Dear users, thank you for using our mobility scooter, we hope it can bring convenience
for your work and life. In order to correctly use and operate the product, keep it in good
condition, prolong its service life. Please read the instructions carefully before using the
product.
Manual. The symbols below are used throughout this owner’s manual and on the scooter
to identify warnings and important information. It is very important for you to read them
and understand them completely.
or malfunction. On the product, this icon is represented as left figure.
Please fill out the following information for quick reference:
Provider:
Address:
Phone Number
Purchase Date:
Serial Number:
NOTE: This Owner’s manual is compiled from the latest specifications and product
information available at the time of publication. We reserve the right to make changes as
they become necessary. Any changes to our product you have purchased. The
latest/current version of this manual is available on our website.
1
WARNING! And authorized provider or qualified technician must perform
the initial setup of this scooter and must perform all of the procedures in this
WARNING! Indicates a potentially hazardous condition. Failure to follow
designated procedures can cause either personal injury, component damage,
MANDATORY! These actions should be performed as specified. Failure to
perform mandatory actions can cause personal injury / equipment damage on
the product, this icon is represented as left figure.

11111
I. INTRODUCTION
SAFETY
Welcome to our company. The product you have purchased combines
state-of-the-art components with safety, comfort, and styling in mind. We are
confident that the design features will provide you with the conveniences you
expect during your daily activities. Understanding how to safely operate and care
for this product should bring your free operations and service.
Read and follow all instructions, warnings, and notes in this manual and all other
accompanying literature before attempting to operate this product for the first time.
In addition, your safety depends upon you as well as your provider, caretaker,
health-care professional in using good judgement.
If there is any information in this manual which you do not understand, or if you
require additional assistance for set up or operation, please contact your
Authorized provider. Failure to follow the instructions, warnings, and notes in this
manual and those located on you our product can result in personal injury or
product damage and will void our product warranty.
PURCHASER’S AGREEMENT
By accepting delivery of this product, you promise that you will not change, alter,
or modify this product or remove or render inoperable or unsafe any guards,
shields, or other safety features of this product; fail, refuse or neglect to install any
retrofit kits from time to time provided by us to enhance to preserve the safe use of
this product.
SHIPPING AND DELIVERY
Before using your scooter, make sure your delivery is complete as some
components may be individually packaged. If you do not receive a complete
delivery, please contact your authorized provider immediately. When damage has
been caused during transportation, please contact the delivery company to take
responsibility.
INFORMATION EXCHANGE
We want to hear your questions, comments, and suggestions about this manual.
We would also like to hear about the safety and reliability of your new travel
scooter, and about the service you received from your authorized provider. Please
notify us of any change of address, so we can keep you apprised of important
information about safety, new products and new options that can increase your
2
ability to use and enjoy your travel scooter, please feel free to contact us at the
address below:
NOTE: If you ever lose or misplace your product registration card or your copy of
this manual, contact us and we will be glad to send you a new one immediately.
II. SAFETY
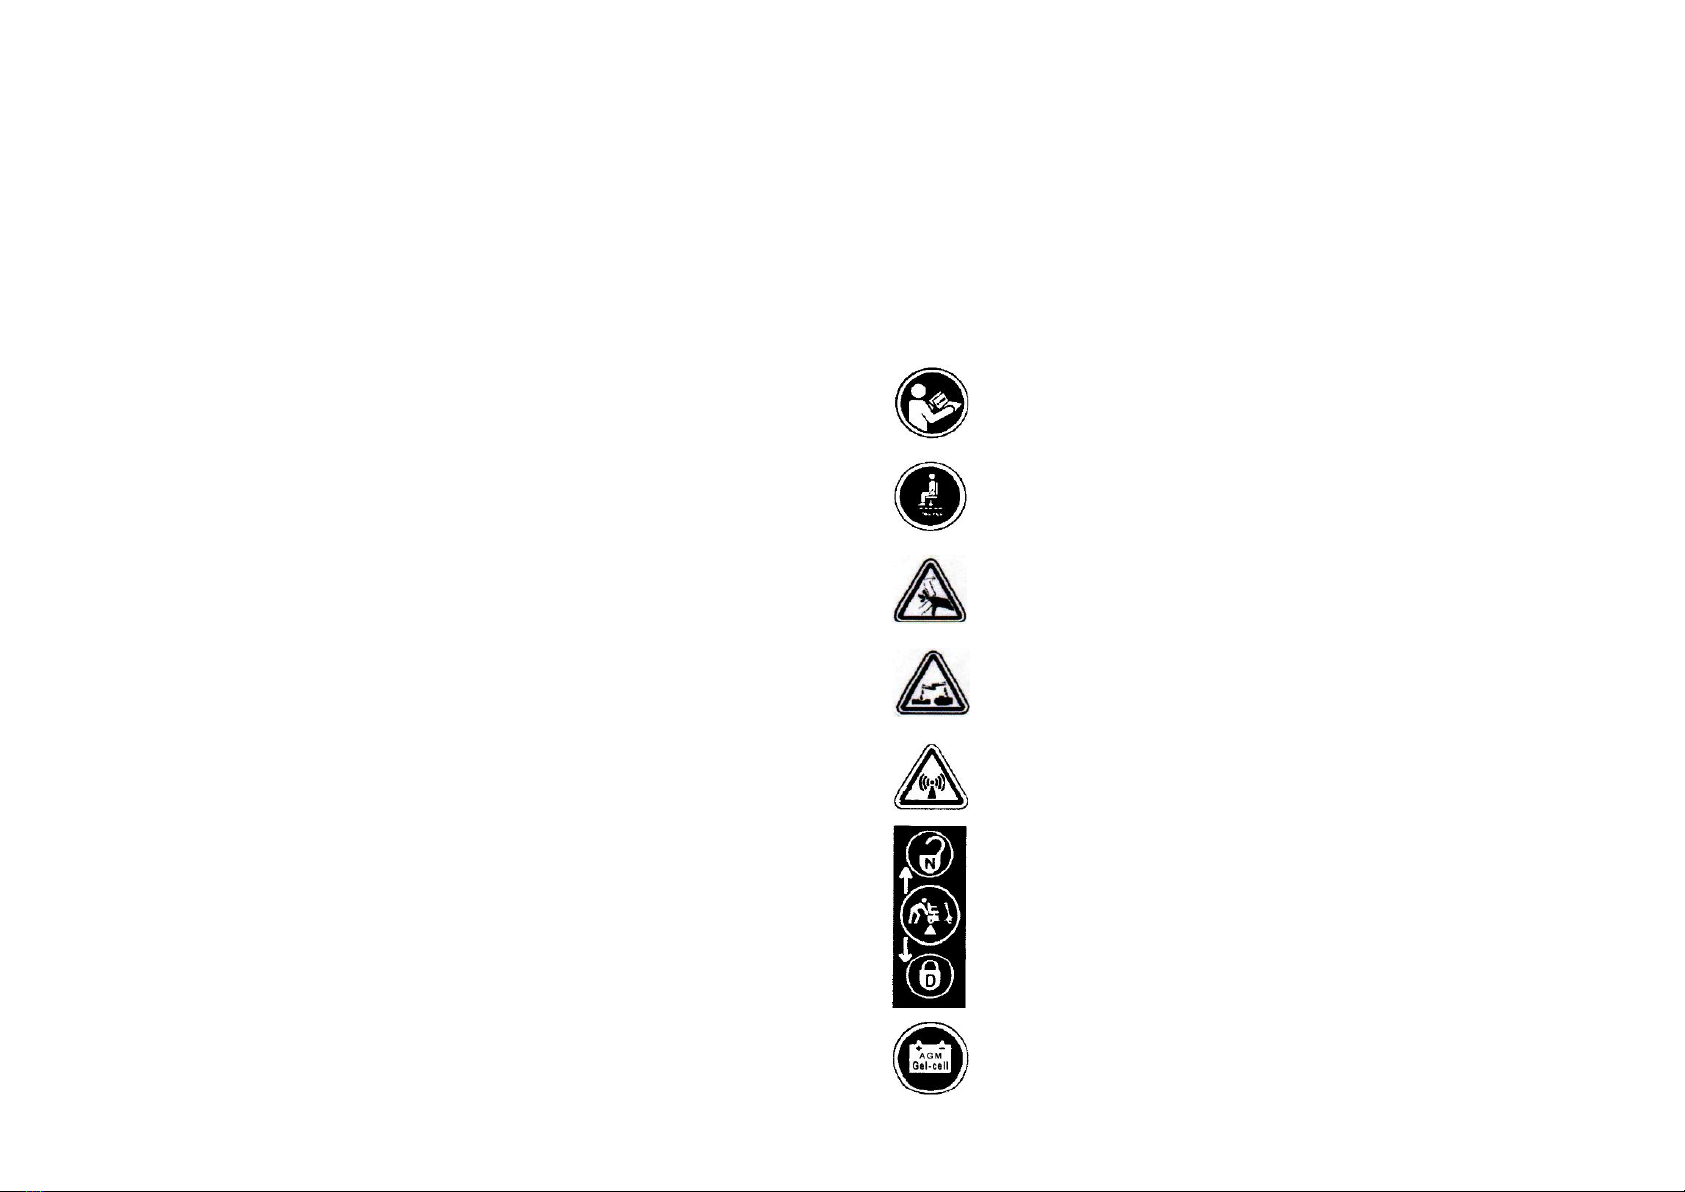
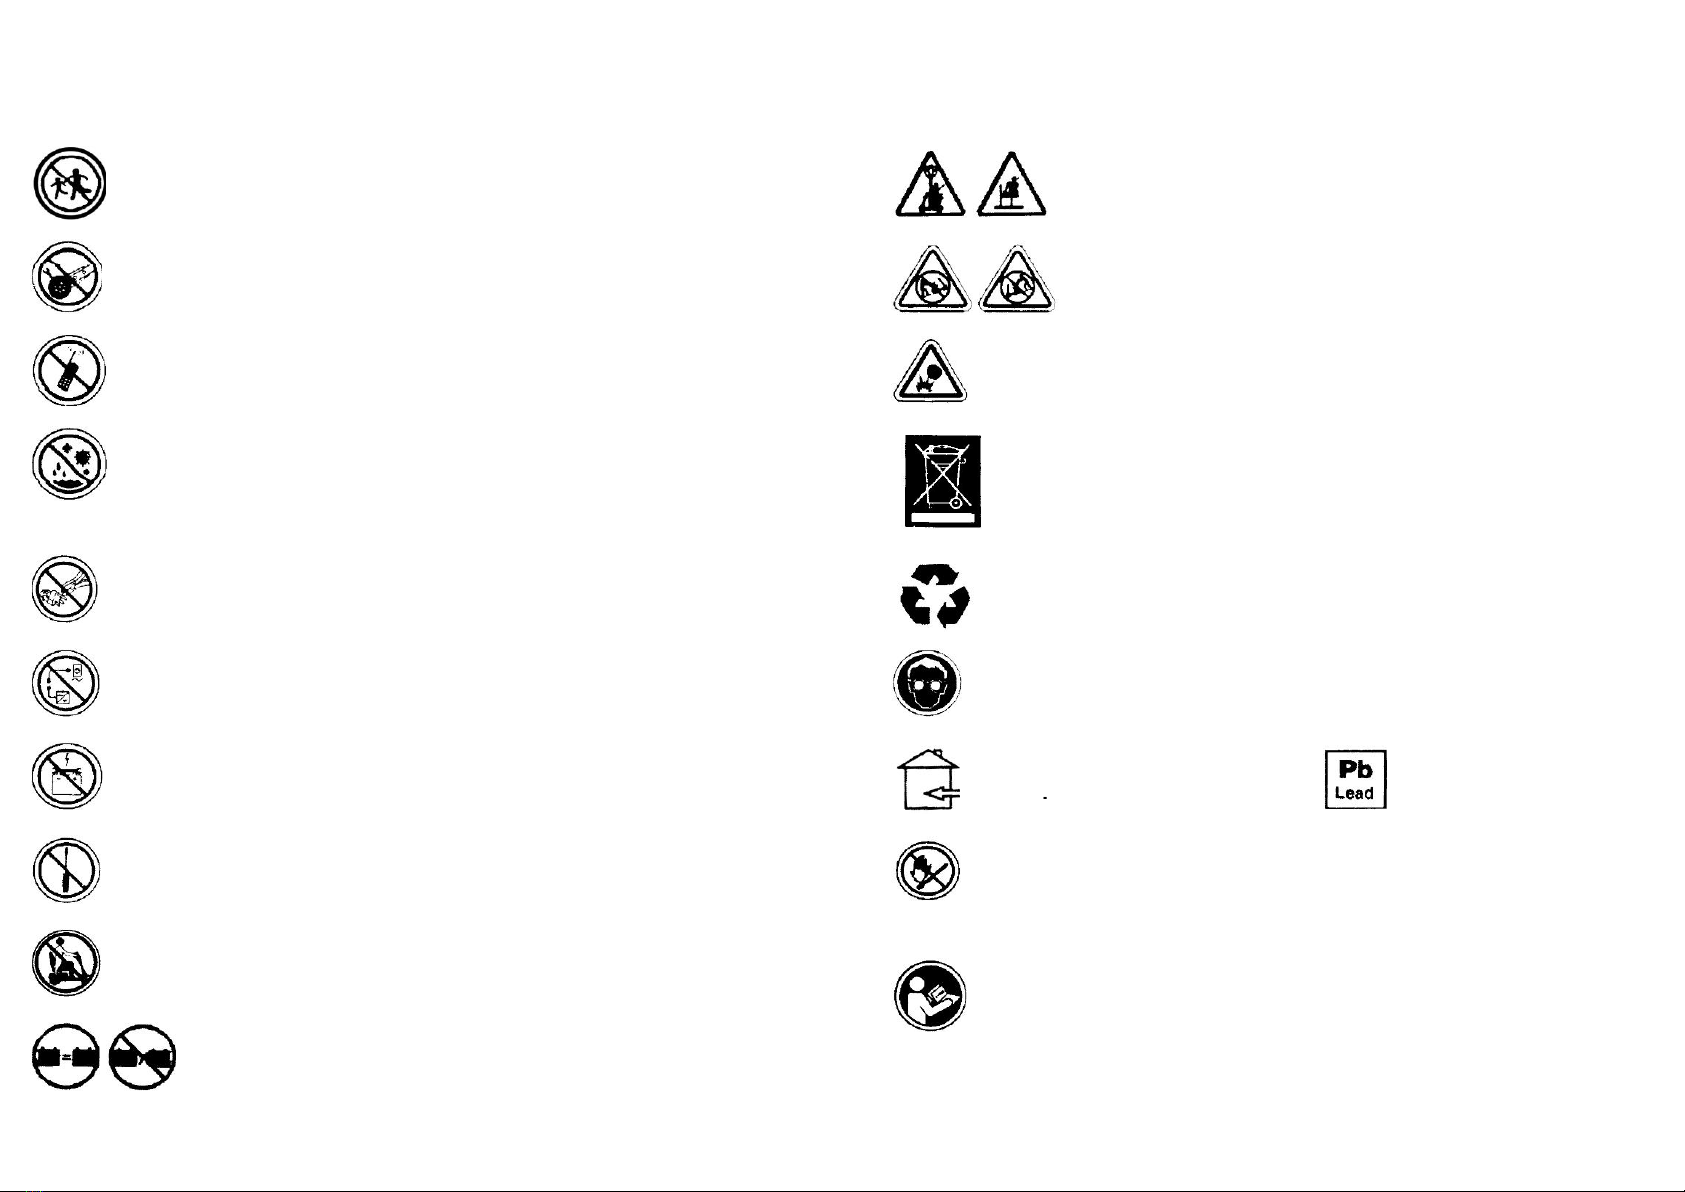
PRODUCT SAFETY SYMBOLS
The symbols below are used on the travel scooter to identify warnings
mandatory actions and prohibited actions. It is very important for you to read and
understand them completely.
3
Read and follow the information in the owner’s manual
Maximum seating weight
Pinch/Crush points created during assembly
Corrosive chemicals contained in battery
EMI-RFI This product has been tested and passed at the an
immunity level of 20V/M
Unlocked and in freewheel mode. Place unit on level ground
and to one side when changing from drive mode to freewheel
mode or freewheel mode to drive mode.
Locked and in drive mode
Use only AGM or Gel-Cell batteries to reduce the risk of leakage
or explosive conditions

1
II. SAFETY
4
3
II. SAFETY
GENERAL
Your Travel Scooter is a state-of-the art life-enhancement device designed to
increase mobility. We provide and extensive variety of products to best fit the in
individual needs of the Travel Scooter user. Please be aware that the final
5
Do not allow unsupervised children to play near the Travel
Scooter while the batteries are charging
Do not remove anti-tip wheels.
Do not use a cell phone, walkie/talkie, laptop or other radio
transmitter while operation
Avoid exposure to rain, snow, ice, salt or standing water
whenever possible. Maintain and store in a clean and dry
condition
Removal of grounding prong can create electrical hazard
If necessary, properly install an approved 3-pronged adapter
to an electrical outlet having 2-pronged plug access.
Do not connect an extension cord to the AC/DC converter or the
battery charger.
Keep tools and other metal objects away from battery terminals.
Contact with tools can cause electrical shock.
Do not open the battery pack until you have read the instructions
within the Owner’s manual on how to do so.
Keep your hands away from the tires when driving. Be aware
that loose fitting clothing can become caught in the drive tires.
Do not use batteries with different amp-hour (Ah)
capacities. Do not Mix old and new batteries. Always
replace both batteries at the same mime.
Do not sit on the mobility product when it is being used
in connection with any type of lift / elevation product.
When on any sort of an incline or decline, never place the
travel scooter in free wheel mode while seated on it or
standing next to it.
Explosive conditions exist!
Disposal and recycling-contact your authorized
Provider for information on proper disposal of
your product and its packaging.
Waste and packaging process
Wear safety goggles
Contains lead
Battery charger for indoor
use only
Flammable material. Do not expose to open
flame
MANDATORY! Do not operate your new Travel Scooter
for the first time without completely reading and
understanding this owner’s manual.

1
II. SAFETY
selection and purchasing decision regarding the type of Travel Scooter to be used
is the responsibility of the Travel Scooter user who is capable of making such a
Decision and his /her healthcare professional (i.e.,medical doctor, physical
therapist, etc)
The contents of this manual are based on the expectation that a mobility device
expert has properly fitted the Travel Scooter to the user and has assisted the
prescribing healthcare professional / the authorized Provider in the instructions
process for the use of the product.
There are certain situations, including some medical conditions, where the Travel
Scooter user will need to practice operating the Travel Scooter in The presence of
a trained attendant.A trained attendant can be defined as a family member or care
Professional specially trained in assisting a Travel Scooter user in various daily
Living activities.
As you begin using your Travel Scooter during daily activities, you will probably
encounter situations in which you will need some practice. Simply take your time
And you will soon be in full and confident control as you maneuver through door-
ways, on and off lifts, up and down ramps and over moderate terrain.
Below are some precautions, tips and other safety considerations that will help
you become accustomed to operating the Travel Scooter safely.
MODIFICATIONS
Our scooter has designed and engineered your Travel Scooter to provide
maximum mobility and utility. However, under no circumstances should you
modify, add, remove or disable any feature, part or function of your Travel Scooter.
tested of approved for our products REMOVABLE PARTS
PRE-RIDE SAFETY CHECK
Get to know the feel of your Travel Scooter and its capabilities. We recommend
6
II. SAFETY
that you perform a safety check before each use of make sure your Travel Scooter
Operates smoothly and safely.
Perform the following inspections prior to using your scooter:
Check all electrical connections. Make sure they are tight and not corroded
Check all harness connections. Make sure they are secured properly.
Check the brakes.
Check battery charge.
If you discover a problem, contact your authorized provider for assistance.
WEIGHT LIMITATIONS
Your scooter is rated for a maximum 150KG weight capacity. Refer to the
specifications table for information.
will not be held responsible for injuries / property damage resulting from
failure to observe Weight limitations.
center of gravity, resulting in a tip or a fall.
INCLINE INFORMATION
More and more building have ramps with specified degrees of inclination, designed for easy and
safe access. Some ramps may have turning switchback (180-Degree turns) that require you
to have good cornering skills on your scooter.
Proceed with extreme caution as you approach the downgrade era ramp or other incline
Take wide swings with your scooter around any tight corners. If you do that, the scooter’s rear
wheels will follow a wide arc, not cut the corner short, and not bump into or get hung up on any
railing corners.
When driving down a ramp, keep the scooter’s speed adjustment set to the slowest speed
setting to ensure a safely controlled descent.
Avoid sudden stops and starts. When climbing in incline, try to keep your Travel Scooter
moving. If you must stop, start up again slowly, and then accelerate
7
WARNING! Do not modify your Travel Scooter in any way not
authorized by us. Do not use accessories if they have not been
WARNING! Do not attempt to lift or move your Travel Scooter by
any of its removable parts, including the armrests, seat.
MANDATORY! Stay within the specified weight capacity for your
scooter. Exceeding the weight capacity voids your warranty. We
WARNING! Do not carry passengers on your scooter.
Carrying passengers on your scooter may affect the

1
II.SAFETY
affected by your weight, your Travel Scooter’s speed, your Travel Scooter’s speed
your angle of approach to the incline, and your Travel Scooter setup.
Figure 1. Maximum Recommended Incline Angel
position and cause it to tip.
WARNING! Never carry an oxygen tank weighing than 15lbs(6.8kg). Never fill
the front or rear basket with contents exceeding15 lbs(6.8kg).
When you approach an incline, it is best to lean forward. See figures 2 and
2A.This shifts the center of gravity of you and your Travel Scooter toward the
front of the Travel Scooter for improved stability.
NOTE: When negotiating ramps, if the throttle control lever is released while
Moving forward, the powered Travel Scooter may “rollback”approximately
1 foot (30.5cm) before the brake engages. If the throttle control lever is
released while moving in reverse, the powered Travel Scooter may
“rollback”approximately 3 feet (one meter) before the brake engages.
Figure2. Normal Driving Position Figure 2A. Increased stability Driving
position
9
II.SAFETY
cautiously. When driving down an incline, do so by setting the speed adjustment
dial to the slowest setting and driving in the forward direction only. If your Travel
Scooter starts to move down the incline faster than you anticipated or desired,
allow it to come to a complete stop by releasing the throttle control lever. Then
push the throttle control lever forward slightly to ensure a safely controlled
descent.
it or standing next to it.
WARING! When climbing an incline, do not zigzag or drive at an angle up the
face of the incline. Drive your Travel Scooter straight up the incline.This
greatly reduces the possibility of a tip or a fall. Always exercise extreme
caution when negotiating an incline.
If possible, while driving up or down an incline.
WARNING! You should not travel up or down a potentially hazardous incline
(i.e., areas covered with snow, ice, cut grass, or wet leaves).
WARNING! Even though your Travel Scooter is capable of climbing slopes
greater than those illustrated in Figure 1. Do not ,under any circumstances,
exceed the incline guidelines or any other specifications presented in this
manual. Doing so could cause instability in your Travel Scooter.
Handicap public access ramps are not subject to government regulation in all
Countries, and therefore do not necessarily share the same standard percent of
slope. Other inclines may be natural or, if man-made, not designed specifically for
Travel Scooters. Figure 1 illustrates your Travel Scooter’s stability and its ability to
climb grades under various weight loads and under controlled testing conditions.
These tests were conducted with the Travel Scooter’s seat in the highest position
and adjusted rearward on the seat base to its farthest rearward position. Use this
Information as a guideline. Your Travel Scooter’s ability to travel up inclines is
8
WARING! When on any sort of an incline or decline, never
place the Travel Scooter in freewheel mode while seated
on
WARNING! Do not drive your Travel Scooter across the side of an
incline or diagonally up or down an incline. Do not stop,
WARNING! Any attempt to climb or descend a slope steeper than
what is shown in figure may put your Travel Scooter in an unstable

1
II. SAFETY
PUBLIC STREETS AND ROADWAYS
to see you when you are seated on your Travel Scooter. Obey all local
pedestrian traffic rules. Wait until your path is clear to traffic, and then
proceed with extreme caution.
STATIONARY OBSTACLES(STEPS, CURBS, etc.)
WARNING! Do not attempt to have your Travel Scooter climb or descend and
Obstacle that is inordinately high.
WARNING! Do not attempt to have your Travel Scooter proceed backward
down an step, curb, or other obstacle. This may cause the Travel Scooter to
tip
WARNING! Be sure your Travel Scooter is traveling perpendicular to any curb
you may be required to ascend or descend see figures 3 and 4.
WARNING! Do not attempt to negotiate a curb that has a height greater than 2
In (5cm)
Figure3. Correct Curb Approach Figure 4. Incorrect Curb Approach
INCLEMENT WEATHER PRECAUTIONS
Exposure of your Travel Scooter to inclement weather conditions should be
11
II. SAFETY
CORNERING INFORMATION
Excessively high cornering speeds can create the possibility of tipping. Factors
which affect the possibility of tipping include, but are not limited to, cornering
speed, steering angle (how sharply you are turning uneven road surfaces, inclined
road surfaces, riding from an area of low traction To an area of high traction (such
as passing from a grassy area to a paved area especially at high speed while
turning), and directional changes. High cornering speeds are not recommended. If
you feel that you may tip over in a corner, reduce your speed and steering angle
(i.e., lessen the sharpness of the turn) to prevent your Travel Scooter from tipping .
BRAKING INFORMATION
Your Travel Scooter is equipped with these powerful brake systems:
Regenerative: Uses electricity to rapidly slow the vehicle when the throttle
control lever returns to the centre/stop position.
Disc Park Brake:Activates mechanically after regenerative braking slows the
vehicle to near stop, or when power is removed from the system for any reason.
OUTDOOR DRIVING SURFACES
Your Travel Scooter is designed to provide optimum stability under normal driving
Condition-dry, level surfaces composed of concrete, blacktop, or asphalt. However
we recognizes that there will be times when you will encounter other surface
types. For this reason, your Travel Scooter is designed to perform admirably on
packed soil, grass, gravel, feel free to use your Travel Scooter safely on lawns and
in park areas.
Reduce your Travel Scooter’s speed when driving on uneven terrain / soft
surfaces.
Avoid tall grass that can become tangled in the running gear.
Avoid loosely packed gravel and sand.
If you feel unsure about a driving surface, avoid that surface.
10
WARNING! When cornering sharply, reduce your speed and
maintain a stale center of gravity. When using your Travel
Scooter at possibility of a tip or fall. Always exercise
common sense when cornering.
Higher speeds,do not corner sharply .This greatly reduces
the
WARNING! You should not operate your Travel Scooter on public
Streets and roadways. Be aware that is may be difficult for traffic
WARNING! Do not drive near raised surfaces, unprotected ledges,
/drop-offs (curbs, porches, stairs, etc.)

1
II. SAFETY
“push-too-fast”operates differently depending on which of two conditions exists:
If the key is switched “off “while in freewheel mode, the Travel Scooter’s
controller activates regenerative braking when the Travel Scooter is pushed faster
than a maximum threshed which has been reprogrammed. In this case, the
controller is acting as a speed governor.
If the key is switched “on”while in freewheel mode, you will encounter
considerable resistance at any speed. This prevents the Travel Scooter from
gaining unwanted momentum should the manual free wheel lever inadvertently be
released while driving the Travel Scooter.
STAIRS AND ESCALATORS
Travel Scooter are not designed to travel up or down stairs or escalators.Always
use that by an elevator.
DOORS
Determine if the door opens toward or away from you .
Use your hand to turn the knob or push the handle or push-bar.
Drive your Travel Scooter gently and slowly forward to push the door open.Or
Drive your Travel Scooter gently and slowly rearwards to pull the door open.
Elevators
Modem elevators have a door edge safety mechanism that, when pushed,
reopens the door(s).
If you are in the doorway of an elevator when the door(s) begin to close, push
on the rubber door edge or allow the rubber door edge to contact the Travel
Scooter and the door will reopen.
Use care that pocketbooks, packages, or Travel Scooter accessories do not
become caught in elevator doors.
NOTE: If your Travel Scooter’s turning radius is greater than 60 in.(1500
ram) it may be difficult to maneuver in elevators and building entrances. Use
caution 13
II. SAFETY
avoided whenever possible. If suddenly caught up in rain, snow, severe cold or
heat while operating your Travel Scooter,proceed to shelter at the earliest
opportunity. Thoroughly dry your Travel Scooter before storing, charging, or
operating your travel Scooter.
Scooter in a dry and clean condition.
On the Travel Scooter,possibly resulting in skin irritation. Exercise caution
when using your Travel Scooter in extremely hot or cold conditions or when
Exposing your Travel Scooter to direct sunlight for prolonged periods of
time .
FREEWHEEL MODE
Your Travel Scooter is equipped with a manual freewheel lever that, when pushed
forward, allows the Travel Scooter to be pushed. For more information about how
to place your Travel Scooter into and out of freewheel mode, see III “Your Travel
scooter”.
Disengage the drive motors only on a level surface.
Ensure the key is removed from the key switch.
Stand beside the Travel Scooter to engage or disengage freewheel mode.
never sit on a Travel Scooter to do this.
After you finished pushing your Travel Scooter, always return it to the
drive mode to lock the brakes.
An added feature built into the Travel Scooter is “push-too-fast”protection which
Safeguards the Travel Scooter against gaining excessive speed while in
freewheel mode. 12
PROHIBITED! Operating in rain, snow, salt, mist / spray
conditions, and on icy slippery surfaces can have an adverse
affect on the electrical system. Maintain and store your Travel
WARNING! Prolonged exposure to hot or cold conditions may
affect the temperature of upholstered and non-upholstered items
WARNING! When your Travel Scooter is in freewheel mode, the
braking system is disengaged.
WARING! Do not use your Travel Scooter to negotiate steps or
escalators.

1
II. SAFETY
plastic bag and contact your local waste disposal agency or authorized provider
for instructions on disposal and battery recycling, which is our recommended
course of action.
MOTOR VEHICLE TRANSPORT
We recommends that you do not remain seated in your Travel Scooter while
traveling in a motor vehicle. The Travel Scooter should be stowed in the trunk of a
car or in the back of truck or van with the batteries removed and properly secured
In addition, all removable Travel Scooter parts, including the armrests, seat and
shroud should be removed and/or properly secured during motor vehicle transport
during motor vehicle transport. Anyone travelling in a motor vehicle should
be properly secured in the motor vehicle seat with safety belts fastened
securely.
WARNING! Do not sit on your Travel Scooter while it is in a moving vehicle.
WARING! Always be sure your Travel Scooter and its batteries are properly
secured when it is transported. Batteries should be secured in an upright
position, and protective caps should be installed on the battery terminals.
Batteries should not be transported with any flammable or combustible
items.
POSITIONING BELTS
Although your Travel Scooter may be equipped with a positioning belt, this belt is
not designed to provide proper restraint during motor vehicle transport.Anyone
traveling in a motor vehicle should be properly secured in the motor vehicle seat
with safety belts fastened securely.
WARNING! Ensure your travel scooter and its batteries are properly secured
When being transported
PREVENTING UNINTENDED MOVEMENT.
15
II. SAFETY
when attempting to turn or maneuver your Travel Scooter in small spaces,
and avoid areas that might pose a problem.
LIFT / ELEVATION PRODUCTS
If you will be traveling with your Travel Scooter, you may find it necessary to use a
Lift / elevation product to aid in transportation. We recommend that you closely
review the instructions, specifications, and safety information set forth by the
manufacture of the lift / elevation product before using that product.
product. Your Travel Scooter was not designed with such use in mind and
any injury incurred from such use is not be responsibility of us.
BATTERIES
In addition to following the warning below, be sure comply with
all other battery handling information.
goggles and wash hands after handing.
proper lifting techniques and avoid lifting beyond your capacity.
WARNING! Always protect the batteries from freezing and never charge a
frozen battery,
WARNING! Connect the battery harnesses in the proper manner. RED(+)
cables must be connected to positive(+) battery terminals/posts. BLACK(-)
cables must be connected to negative(-)battery terminals/ posts. REPLACE
Cables immediately if damaged. Protective caps must be installed over all
Battery terminals.
NOTE: If you encounter a damaged or cracked battery, immediately enclose it in a
14
WARNING! Never sit on your Travel Scooter when it is
being used in connection with any type of lift / elevation
MANDATORY! Battery posts, terminals, and related
accessories contain lead and lead compounds. Wear
WARNING! Scooter batteries are heavy. See specifications table. If
you are unable to lift that much weight, be sure to get help. Use
WARNING! Although your Travel Scooter may be equipped with a
positioning belt. this belt is not designed to provide. Restraint
WARNING! Do not sit on your Travel Scooter while it is in a
moving vehicle.

1
II. SAFETY
the Travel Scooter. Movements such as these may change your center of
gravity and the weight distribution of the Travel Scooter and cause your
Travel Scooter to tip.
caught in drive tires.
PRESCRIPTION DRUGS/PHYSICAL LIMITATIONS
The Travel Scooter user must exercise care and common sense when
Operating his/her Travel Scooter. This includes awareness of safety
issues when taking prescribed or over-the-counter drugs or when the
user has specific physical limitations.
ELECTROMAGNETIC AND RADIO FREQUENCY INTERFERENCE
(EMI/RFI)
Electromagnetic and Radio Frequency Interference can come from sources such
as cellular phones,mobile two-way radios(such as walkie-talkies), radio stations,
TV stations, TV stations amateur radio (HAM) transmitters, wireless computer
links, microwave signals, paging transmitters and medium-range mobile
transceivers used by emergency vehicles. In some cases, these waves can cause
unintended movement or damage to the control system. Every
electrically-powered mobility vehicle has an immunity (or resistance) to EMI.The
higher the immunity level, the greater the protection against EMI. This product has
been tested and has passed at an immunity level of 20V/M.
17
II. SAFETY
unexpected motion from inadvertent throttle control lever contact.
GETTING ONTO AND OFF OF YOUIR TRAVEL SCOOTER
Getting onto and off of your Travel Scooter requires a good sense of balance.
Please observe the following safety tips when getting onto and off of your Travel
scooter:
Remove the key from the key switch.
Ensure that your Travel Scooter is not in freewheel mode. See III. ”Your Travel
Scooter.”
Ensure that the seat is secured into place .
Pivot the armrests up to make getting onto and off of the Travel Scooter easier.
causing injury.
WARNING! Avoid putting all of your weight on the Travel Scooter armrests
And do not use the armrests for weight bearing purposes, such as transfers.
Such use may cause the Travel Scooter to tip, resulting in a fall from the
Travel Scooter personal injury.
WARNING! Avoid putting all of your weight on the floorboard. Such use may
cause the Travel Scooter to tip.
REACHING AND BENDING
Avoid reaching or bending while driving your Travel Scooter. Bending
forward creates the risk of accidental throttle control lever contact.
Bending to the side while seated created the risk of tipping. It is
important to maintain a stable centre of gravity and keep the Travel
Scooter from tipping. We recommends that the Travel Scooter user
determine his/her personal limitations and practice bending and
reaching in the presence of a qualified attendant.
16
WARNING! If you anticipate being seated in a stationary position
for an extended period of time, turn off the power. This will prevent
WARNING! Position yourself as far back as possible in the Travel
Scooter seat to prevent the Travel Scooter from tipping and
WARNING! Do not bend, lean, or reach for objects if you have to
pick them up from the Travel Scooter deck or from either side of
PROHIBITEND! Keep your hands away from the tires when driving
when driving. Be aware that loose fitting clothing can become
WARNING! Laboratory tests have shown that electromagnetic and
radio frequency waves can have an adverse affect on the
performance of electrically-powered mobility vehicles.

1
III. YOUR TRAVEL SCOOTER
not attempt to operate your Travel Scooter until the tiller console has dried
thoroughly.
Key Switch
Insert the key into the key switch and turn it clockwise to power up (turn
on )your Travel Scooter.
Turn the key counterclockwise to power down (turn off) your Travel Scooter.
Although the key can be left in the sky switch when the Travel Scooter is powered
down. We recommend removing it to prevent unauthorized use of your Travel
scooter.
your Travel Scooter will come to an abrupt stop!
Throttle Control Lever
This lever allows you to control the forward speed and the reverse speed of your
Travel Scooter up to the maximum speed you preset with the speed adjustment
dial.
Place your right hand on the right handgrip and your left hand on the left
handgrip.
Use your right thumb to push the right side of the lever to disengage your
Travel Scooter’s brakes and move forward.
Release the lever and allow your Travel Scooter to come to a complete stop
Before pushing the other side of the lever to move in reverse.
when the throttle is completely released, it automatically returns to the center
“stop”position and engages your Travel Scooter’s brakes.
Horn Button
This button activates a warning horn. Your Travel Scooter must be turned on for
the horn to be operational. Do not hesitate to use the warning horn when doing so
may prevent accident to injury.
Speed Adjustment Dial
19
II. SAFETY
of your electrically-powered mobility vehicle due to EMI. Exercise caution
when using any of these items while operating your mobility vehicle and
avoid coming into close proximity of radio and TV stations.
the vehicle to EMI. Do not modify your Travel Scooter in any way not
authorized by us.
WARNING! The electrically-powered mobility vehicle itself can disturb the
performance of other electrical devices located nearby, such as alarm
systems.
III. YOUR TRAVEL SCOOTER
TILLER CONSOLE
The tiller console houses all controls needed to drive your Travel
Scooter, including the key switch, turn lamp ,horn button, speed
adjustment dial, drive control lever and the battery condition meter
See figure 5.
Figure5. Tiller Console
18
WARNING! Be aware that cell phones, two-way radios, laptops, and
other types of radio transmitters may cause unintended movement
WARNING! The addition of accessories or components to the
electrically powered mobility vehicle can increase the susceptibility
of
PROHIBITED! Do not expose the tiller console to moisture. In the
event that the tiller console does become exposed to moisture, do
WARNING! If the key is moved of the “OFF”position while your
Travel Scooter is in motion, the electronic brakes will engage and

1
III. YOUR TRAVEL SCOOTE
Disengage the drive motors only on a level surface.
Ensure the key is removed from the key switch
Stand to the side of the Travel Scooter of engage of disengage freewheel
mode. Never sit on a Travel Scooter to do this.
After you have finished pushing your Travel Scooter, always return ti to the
drive mode to lock the brakes.
Anti- Tip Wheels.
The anti-tip wheels are an integral and important safety feature of your Travel
Scooter. They are bolted to the frame at the rear of the Travel Scooter.
Motor /Transaxle Assembly
The motor/transaxle assembly is an electrical mechanical unit that converts
electrical energy from your Travel Scooter’s batteries into the controlled
mechanical energy that drives the Travel Scooter’s wheels.
BATTERY PACK
Your Travel Scooter is equipped with an innovative, easy to remove battery pack.
A handle on the top of the battery pack makes it easy to lift the pack off of the
Travel Scooter with one hand. The battery pack contains two batteries (standard
20 Ah), the charger power cord receptacle, the main circuit breaker(reset button),
and the battery pack fuse. See figure 7.
Charger Power Cord Receptacle
The 3-pin end of the charger power cord plugs into this receptacle.
Main Circuit Breaker(Reset Button)
When the voltage in your Travel Scooter’s batteries becomes low or the Travel
Scooter is heavily strained because of excessive loads or steep inclines, the main
Circuit breaker may trip to protect the motor and electronics from damage.
21
III. YOUR TRAVEL SCOOTER
This dial allows you to preselect and limit your Travel Scooter’s top speed.
The image of the tortoise represents the slowest speed setting .
The image of the hare represents the fastest speed setting.
Battery Condition Meter
When the key is fully inserted into the key switch, this meter indicates approximate
Battery strength. For further information on the battery condition meter, see IV.
“Batteries and Charging”
REAR SECTION
The manual freewheel lever, anti-tip wheels, and motor/transaxle assembly are
located on the rear section of your Travel Scooter. See figure 6.
on Travel Scooter when it is in freewheel model. Never put a Travel Scooter
in freewheel mode on any incline.
Manual Freewheel Lever
Whenever you need or want to push your Travel Scooter for short distances, you
can put it in freewheel mode.
1.Locate the manual freewheel lever at the top right of the rear section.
2.Push forward on the manual freewheel lever to disable the drive system and the
brake system.
3.You may now push your Travel Scooter.
4.Push the manual freewheel lever rearward to reengage the drive and the brake
Systems. This takes your Travel Scooter out of freewheel mode.
Figure 6.Rear Section
20
WARNING! Before placing your Travel Scooter into or taking it out
Of freewheel mode, remove the key from the key switch. Never sit
WARNNG! When your Travel Scooter is in freewheel mode, the
braking system is disengaged.
PROHIBITED! Do not remove the anti-tip wheels or modify your
Travel Scooter in any way that is not authorized by us

1
III. YOUR TRAVEL SCOOTER
OFF-BOARD BATTERY CHARGER
The off -board battery charger, when plugged into the charger power cord
receptacle ( located on the battery pack) and a standard electrical outlet, charges
the Travel Scooter’s batteries, See figure 9.
Figure 9. Off- Board Battery Charger
SHROUD PANELS
You can change the color of your Travel Scooter by removing the colored plastic
shroud panel pieces and replacing then with one of the other supplied sets.The
panels are held in place by a hook and loop reusable fastener.
To remove the shroud panel pieces:
1.Use your finger to locate the push hole behind each shroud piece.
2.Push through the hole to separate the piece from the Travel Scooter.
See figures 10,11.
Figure 10 Front Fender panel Figure 11.Rear Fender Panel
23
22
III. YOUR TRAVEL SCOOTER
The main circuit breaker reset button pops out when the breaker trips.
When the breaker trips, the entire electrical system of your Travel Scooter shuts
down.
Allow a minute or two for your Travel Scooter’s electronics to “rest”.
Push in the reset button to reset the main circuit breaker.
If the main circuit breaker trips frequently, you may need to charge your
batteries more often.you may also need to have your authorized provider perform
a load test on your Travel Scooter’s batteries.
If the main circuit breaker trips repeatedly, see your authorized our provider for
Service.
TILLER CONSOLE FUSE
The fuse located under the battery pack protects the tiller console
electronics. See figure 8.
In the event any component of the tiller console is not responding,
check this fuse. See VIII. “Basic Troubleshooting”for fuse replacement
instructions.
22
Figure 7. Battery Pack(20AH)
Pack Shown
Figure 8. 3-Amp Tiller
Console Fuse

1
IV. BATTERIES AND CHARGING
adapter to an electrical outlet having 2-pronged plug access.
that you do not charge the batteries while the Travel Scooter is occupied.
sources of ignition such as flames or sparks and provide adequate
ventilation when charging the batteries.
WARNING! You must recharge your Travel Scooter with the supplied off-
board charger. Do not use an automotive- type battery charger.
WARNING! Do not attempt to open the battery charger case. If the battery
charger does not appear to be working correctly, contact your authorized
provider.
25
III. YOUR TRAVEL SCOOTER
To re-install the shroud pieces
Place each piece in its appropriate location and push with slight pressure to
secure the reusable fastener.
NOTE: When installing the front and rear fender panels,make sure the tab at the
bottom of each panel is inserted into the tab opening before securing the panel.
See figure10
IV. BATTERIES AND CHARGING
Your Travel Scooter requires two long-lasting, 12-volt, deep-cycle batteries that
are sealed and maintenance free. They are recharged by supplied off-board
charging system.
Charge your Travel Scooter’s batteries for 8 to 14 hours prior to using it for the
first time .
Keep the batteries fully charged to keep your Travel Scooter running smoothly.
READING YOUR BATTERY VOLTAGE
The battery condition meter on the tiller console indicates approximate strength of
your batteries, yellow a draining charge, and red indicates that an immediate
recharge is necessary. See figure 12. To ensure the highest accuracy, the battery
condition meter should be checked while operating your Travel Scooter at full
speed on a dry level surface.
Figure 12. Battery Condition Meter
CHARGING YOUR BATTERIES
NOTE: The battery pack can be charged on or off the Travel Scooter.
24
PROHIBITED! Removal of grounding prong can create electrical
hazard. If necessary, properly install an approved 3-pronged
PROHIBITED! Never use an extension cord to plug in your battery
charge directly into a properly wired standard electrical outlet.
PROHIBITED! Do not allow unsupervised children to play near the
Travel Scooter while the batteries are charging. We recommends
MANDATORY! Read the battery charging instructions in this
manual and supply with the battery charger before charging
the batteries.
WARNING! Explosive gases may be generated while charging the
batteries. Keep the Travel Scooter and battery charger away from
WARNING! Inspect the battery charger, wiring, and connectors
for damage for damage before each use. Contact your authorized
provider if damage is found.
WARNING! If the battery charger is equipped with cooling slots,
then do not attempt to insert objects through these slots.

1
IV. BATTERIES AND CHARGING
meter will not operate while the batteries are charging (when pack
is being charged on the Travel Scooter).
FREQUENTLY ASKED QUESTIONS
How does the charger work?
When your Travel Scooter’s battery voltage is low, the charger works
harder, sending more electrical current to the batteries to bring up their
charge. As the batteries approach a full charge, the charger sends less
and less electrical current. When the batteries are fully charged, the
current sent from the charger is at nearly zero amperage. Therefore,
when the charger is plugged in, it maintains the charge on you Travel
Scooter’s batteries, but does not overcharge them. We do not
recommend that you charge your Travel Scooter’s batteries for more
than 24 consecutive hours.
What if my Travel Scooter’s batteries will not charge?
Ensure that the fuse on the battery pack is in working condition.
Ensure both ends of the charger power cord are inserted fully.
Can I use a different charger?
Chargers are selected precisely for particular applications and are especially
matched to the type, size and chemical formulation of specific batteries. For the
safest and most efficient charging of your Travel Scooter’s batteries, we
recommend use of the charger supplied as original equipment with your scooter
product only. Any charging method resulting in batteries being charged
individually
is especially prohibited.
How often must I charge the batteries?
Two major factors must be considered when deciding how often to charge your
Travel Scooter’s batteries:
All day use on a daily basis.
Infrequent or sporadic use.
With these considerations in mind, you can determine how often and for how long
you should charge your Travel Scooter’s batteries. The battery charger was
designed so that it will not overcharge your Travel Scooter’s batteries. However
you may encounter some problems if you do not charge your batteries
27
IV. BATTERIES AND CHARGING
extreme weather conditions. If the battery charger is exposed to adverse of
extreme weather conditions, then it must be allowed to adjust to the
different environmental conditions before used indoors. Refer to the manual
supplied with the battery charger for more information.
Follow these easy steps to charge your batteries safely:
1.Position your Travel Scooter or battery pack close to a standard
electrical outlet. See figure13.
2.Remove the key from the key switch.
3.Make certain that the manual freewheel lever is in the drive(rearward)
4.Plug the charger power cord into the charger power cord receptacle
on your Travel Scooter, then into the electrical outlet. We recommend
that you charge the batteries for 8 to 12 hours.
NOTE: The LED lights on the charger indicate different charger
conditions at various times. Refer to the operating instructions
supplied with the charger for a complete explanation of these
indicators.
5.When the batteries are fully charged, unplug the charger power cord
from the electrical outlet and then from the charger power cord
receptacle.
NOTE: There is a charger inhibit function on your Travel Scooter.
The Travel Scooter will not run and the battery condition
26
WARNING! If your battery charger has not been tested and
approved for outdoor use, then do not expose it to adverse of
Figure 13. Charging The
Batteries
(Battery Pack Removed)

1
IV. BATTERIES AND CHARGING
often enough and if you do not charge them on a regular basis. Following the
guidelines below will provide safe and reliable battery operation and charging.
If you use your Travel Scooter daily, charge its batteries as soon as you finish
using it for the day. Your Travel Scooter will be ready each morning. We
recommend that you charge your Travel Scooter’s batteries for 8 to 12 hours after
Daily use.
If you use your Travel Scooter once a week or less, charge its batteries at least
once a week for 12 to 14 hours at time.
keep your Travel Scooter’s batteries fully charged.
Avoid deeply discharging your Travel Scooter’s batteries.
How can I ensure maximum battery life?
Fully charged deep -cycle batteries provide reliable performance and extended
battery life. Keep your Travel Scooter’s batteries fully charged whenever possible.
Protect your Travel Scooter and batteries from extreme heat or cold. Batteries that
are regularly and deeply discharged, infrequently charged stored in extreme
temperatures, or stored without a fully charge may be permanently damaged,
causing unreliable performance and limited service life.
How can I get maximum range or distance per charge?
Rarely would you have ideal driving conditions --- smooth, flat hard driving
surfaces with no wind or curves. Often you will face hills, pavement cracks,
uneven and loosely packed surfaces curves and wind. All of these affect the
distance of running time per battery charge. Below are a few suggestions for
obtaining the maximum range per battery charge.
Always fully charge your Travel Scooter’s batteries prior for daily use.
Limit your baggage weight to essential items.
Try to maintain an even speed while your Travel Scooter is in motion.
Avoid stop-and-driving.
What type and size of battery should I use?
Your Travel Scooter requires two deep cycle batteries. We recommend only
sealed maintenance-free types such as AGM or Gel-Cell. Do not use we-cell
batteries, which have removable. Refer to the specifications table for size as
batteries differ depending on manufacture.
28
IV. BATTERIES AND CHARGING
NOTE: Sealed batteries are not serviceable. Do not remove the caps.
specifications table in this manual and in the manual supplied with the
battery charger for recommended type and capacities.
WARNING! Contact your Provider if you have any questions regarding the
batteries in your Travel Scooter.
WARNING! Do not replace the batteries while the Travel Scooter is occupied
WARNING! The batteries on your Travel Scooter should only be serviced or
replaced by an authorized provider or a qualified technician.
How do I change a battery in my Travel Scooter?
1.Remove the battery pack from the Travel Scooter.
2.Carefully turn the pack upside down.
3.Remove the eight(8) screws from the perimeter of the battery pack.
4.Carefully turn the pack right side up and remove the lid.
5.Disconnect the black (-) and red (+) battery cables from the battery terminals of
each of battery: See figure14
6.Remove the old batteries.
7.Place the new batteries into battery pack.
8.Connect the red battery cable to the positive (+) battery terminal of each battery.
29
WARNING! Corrosive chemicals are contained in batteries
Use only AGM or Gel-Cell batteries to reduce the risk of
leakage or explosive conditions.
MANDATORY! Battery posts, terminals, and related
accessories contain lead compounds. Wear goggles and
gloves when handling batteries and wash hands.
WARNING! Always use two batteries for the exact same
type, chemistry, and amp-hour(Ah)capacity. Refer to the
WARNING! Do not mix old and new batteries. Always replace both
batteries at the same time.

1
IV. BATTERIES AND CHARGING
Figure 14.Battery replacement.
9.Connect the black battery cable to the negative (-) battery terminal of each
battery.
10.Position the lid back onto the battery pack ensuring all wires are inside the
pack so they don’t become pinched.
11.Carefully turn t he pack upside down.
12.Re-install all screws and tighten.
NOTE: 17Ah batteries require the removal of a nut and bolt when
disconnecting the battery cable from the battery terminal.
NOTE: If you encounter a damaged or cracked battery, immediately enclose
it in a Plastic bag and contact your local waste disposal agency or
authorized Provider for instructions on disposal and battery recycling which
is our recommended course of action.
Why do my new batteries seem weak?
Deep-cycle batteries employ a different chemical technology than that used in car
batteries, nickel-cadmium batteries(Ni-cads), and other common battery types.
Deep-Cycle batteries are specifically designed to provide power, drain down their
charge, and then accept a relatively quick recharge(8 to 12 hours).
We work closely with your battery manufacture to provide batteries that best suit
your Travel Scooter’s specific electrical demands. Fresh batteries are shipped
fully
charged to our customers during shipping. The batteries may encounter
temperature extremes that can influence their initial performance. Heat diminishes
the charge on the battery; cold slows the available power and extends the time
needed to recharge the battery.
30
IV. BATTERIES AND CHARGING
It may take a few days for the temperature of your Travel Scooter’s batteries to
stabilize and adjust to their new room or ambient temperature. More importantly,
It takes a few charging cycles (partial draining followed by full recharging) to
establish the critical chemical balance that is essential to a deep-cycle battery’s
peak performance and long life.
Follow these steps to properly break in your Travel Scooter’s new batteries for
maximum efficiency and service life.
1.Fully recharge any new battery prior to its initial use.This charging cycle brings
the battery up to about 88% of its peak performance level.
2.Operate your new Travel Scooter in familiar and safe areas. Drive slowly at first
and do not travel too far from your home or familiar surroundings until you have
become accustomed to your Travel Scooter’s controls and have properly broken
in your Travel Scooter’s batteries.
3.Fully recharge the batteries.They should be at over 90% of their peak
performance level.
4.Operate your Travel Scooter again.
5.Fully recharge the batteries again.
6.After four or five charging cycles, the batteries are able to receive a charge of
100% of their peak performance level and are able to last for an extended period
of time.
What about public transportation?
If you intend to use public transportation with your Travel Scooter ,you must
contact the transportation provider in advance to determine their specific
requirements.
V. OPERATION
BEFORE GETTING ONTO YOUR TRAVEL SCOOTER
Have you fully charged the batteries? See IV. ”Batteries and Charging”
Is the manual freewheel lever in the drive (rearward) position?
31
Never leave the manual freewheel lever in the forward position unless you are

1
WARNING!Always use two batteries fo
the exact same type,chemistry,and
amp-hour(Ah)capacity,Refer to the
V. OPERATION
GETTING ONTO YOUR TRAVEL SCOOTER.
1.Make certain that the key is removed from the key switch.
This will prevent the Travel Scooter from moving if accidental throttle
control lever contact is made.
2.Stand at the side of your Travel Scooter.
3.Disengage the seat rotation lever and rotate the seat until it is facing you .
4.Make certain that the seat is secured into position.
5.Position yourself comfortably and securely in the seat.
6.Disengage the seat rotation lever and rotate the seat until you are facing forward
7.Make certain that the seat is secured into position.
8.Make certain that your feet are safely on the floorboard.
PRE-RIDE ADJUSTMENTS AND CHECKS
Is the seat at the proper height? See VI.”Comfort Adjustments”
Is the seat secured into place?
Is the tiller at a comfortable setting and secured into place? See VI.”Comfort
Adjustments”
Is the key fully inserted into the key switch and turned clockwise to the “on”
position?
Does the Travel Scooter’s horn work properly?
Is your proposed path clear of people, pets and obstacles?
Have you planned your route to avoid adverse terrain and as many inclines as
possible?
OPERATING YOUR TRAVEL SCOOTER
Holding onto or attaching a leash to walk your pet.
Carrying passengers (including pets).
Hanging any article from the tiller.
32
V. OPERATION
Towing or being pushed by another motorized vehicle. Such practices
could cause loss of control and / or tipping, resulting in personal injury.
Keep both hands on the tiller and your feet on the floorboard at all times while
operating your Travel Scooter. This driving position gives you the most control
over your vehicle.
Set the speed adjustment dial to your desired speed.
Press your thumb against the appropriate side of the throttle control lever.
The electrical mechanical disc park brake automatically disengages and the
Travel Scooter accelerates smoothly to the speed you pres-elected with the speed
adjustment dial.
Pull on the left handgrip to steer your Travel Scooter to the left.
Pull on the right handgrip to steer your Travel Scooter to the right.
Move the tiller to the center position to drive straight ahead.
To stop, slowly release the throttle control lever. The electronic brakes will
automatically engage your Travel Scooter to stop.
NOTE: Your Travel Scooter’s reverse speed is slower than that of the forward
speed you preset with the speed adjustment dial.
GETTING OFF OF YOUR TRAVEL SCOOTER
1.Bring your Travel Scooter to a complete stop.
2.Remove the key from the key switch.
3.Disengage the seat rotation lever and rotate the seat until you are facing toward
the side of your Travel Scooter.
4.Make certain that the seat is secured into position.
5.Carefully and safely get out of the seat and stand of the side of your Travel
Scooter.
6.You can leave the seat facing to the side to facilitate boarding your Travel
Scooter next time.
POWER DOWN TIMER FEATURE
Your Travel Scooter is equipped with an energy saving automatic power down
timer feature designed to preserve your Travel Scooter’s battery life. If you
mistakenly leave the key in the key switch and in the “on “position but do not use
your Travel Scooter for approximately 20 minutes ,the Travel Scooter’s controller
33
WARNING! Never attempt to get onto or off of your Travel Scooter
without first removing the key from the key switch.
WARNING! The following can adversely affect steering and
stability while operating your Travel Scooter.

1
V.OPERATION
shuts down automatically. If the power down timer feature takes effect, perform the
following steps to resume normal operation.
1.Remove the key from the key switch.
2..Reinsert the key and power up your Travel Scooter.
VI. COMFORT ADJUSTMENTS
TILLER ANGLE ADJUSTMENT
while the Travel Scooter is in motion.
Your Travel Scooter is equipped with an adjustable pivoting tiller.
1.While supporting the tiller, turn the tiller adjustment knob counterclockwise to
loosen the tiller. See Figure 15.
2.Move the tiller to a comfortable position.
3.Turn the tiller adjustment knob clockwise to secure the tiller in position.
Figure 15. Tiller Adjustment Knob. Figure 16. Seat
NOTE: In order to fully lover the tiller, you must first remove the seat and
battery pack. Remove the seat by pulling it straight up and off the Travel
Scooter.
SEAT ROTATION ADJUSTMENT
The seat rotation lever, located on the fight side of the seat
34
VI. COMFORT ADJUSTMENTS
base, secures the seat into several positions.
1.Pull up on the seat rotation lever to disengage the seat.
2.Rotate the seat to the desired position.
3.Release the lever to secure the seat into place
ARMREST WIDIH ADJUSTMENT
The armrest width can be adjusted inward or outward
1.Loosen the armrest adjustment knobs .See figure 16.
2.Use the attached ring to pull and remove pins.
3.Slide the armrests in or out to the desired width.
4.Align the adjustment holes on the seat frame and armrest, then reinsert pins.
5.Tighten the armrest adjustment knobs.
NOTE: Pivot the armrests upward to aid in getting onto and off of your
Travel Scooter.
Seat HEIGHT ADJUSTMENT
The seat can be positioned to different heights See figure17.
Figure 17. Seat Height Adjustment Figure 18. Front Storage Area.
1.Remove the seat and battery pack from your Travel Scooter.
2.Use the attached ring to pull and remove the pin from the lower seat post.
3.Raise or lower the upper seat post to the desired seat height.
4.While holding the upper seat post at that height,align the adjustment holes of the
upper and lower seat post.
5.Fully insert the pin
6.Replace the battery pack and seat.
WARNING! Remove the key from the key switch before adjusting
the tiller or the seat. Never attempt to adjust the tiller or the seat

1
VI. COMFORT ADJUSTMENTS
FRONT STORAGE AREA
Your Travel Scooter is equipped with a front storage area that can be removed if
additional leg or foot room is needed. See figure 18. Remove the screws to
separate the small basket from the Travel Scooter.
NOTE: As a precaution, avoid placing wallets, keys, or valuable items in the
storage area.
VII. DISASSEMBLY AND ASSEMBLY
DISASSEMBLY
You can disassemble the Travel Scooter into four pieces:the seat the frame, the
basket, and the battery pack. See figure 19.
Figure 19. Disassembled Travel
No tools are required to disassemble or assemble your Travel Scooter.Always
disassemble or assemble your Travel Scooter on a level, dry surface with
sufficient room for you to work and move around--about five feet (1.5 meters) in all
directions. Remember that some Travel Scooter components are heavy and you
may need assistance when lifting them.
36
VII. DISASSEMBLY AND ASSEMBLY
1.Remove the seat by lifting it straight up and off of the Travel Scooter. If you
encounter resistance when removing the seat, disengage the seat rotation lever
and swivel the seat back and forth while lifting up on the seat.
2.Remove the battery pack from the Travel Scooter.
Frame Separation
1.Lower the tiller and tighten the taller adjustment knob.
ASSEMBLY
1.Raise the tiller and fully tighten the tiller adjustment knob.
2.Reinstall the battery-pack.
3.Reinstall the seat and rotate is until it is secured into place.
VIII. BASIC TROUBLESHOOTING.
Any electrical mechanical device occasionally requires some trouble-shooting.
However most of the problems that may arise can usually be solved with a bit of
thought and common sense. Many of these problems occur because the batteries
are not fully charged or because the batteries are worn down and can no longer
hold a charge.
DIAGNOSTI BEEP CODES
The diagnostic beep codes for your Travel Scooter are designed to help you
perform basic troubleshooting quickly and easily.A diagnostic beep code will
sound in the event one of the conditions listed below develops.
NOTE: Your Travel Scooter will not run unless the beep code condition is resolved
and the Travel Scooter has been turned off then turned back on.
What if all the systems on my Travel Scooter seem to “dead”?
Make certain that the key is in the “on “position.
Check that the batteries are fully charged .
Push in the main circuit breaker reset button. See III.”Your Travel Scooter.”
Be sure the power down timer feature has not been activated
. 37
WARNING! Do not lift weight beyond your physical capability.
Ask for assistance when necessary while disassembling or
assembling your Travel Scooter.
Table of contents