Skutis Corporation Anoa EX+ User manual

1 | ANOA EX+ User Manual
ANOA EX+
© Skus Corporaon Pte. Ltd.
Revolutionizing
Your Personal Mobility
USER MANUAL
Brand Introducon
Company Introducon
The Anoa EX+ is Skus Corporaon's flagship skus. It is since 2017 distributed in
Southeast Asia and since 2019 assembled in Indonesia. The striking design of the ANOA
EX+ is the impressive result of more than 18 years of experience in the electric kick-
scooter/skus industry. It has various features that were especially added for the
tropical Southeast Asian market. As a result, traffic, speed bumps, steep or bumpy
roads, high temperature, longer distances, and rain are no threat for the ANOA.
The ANOA got its brand name from the smallest species of buffalo in the world. The
anoa buffalo weighs anything from 150 to 300 kg. It inhabits mainly the mountains
and lowland rainforest of Sulawesi, Indonesia. It matches the power, colour, and
uniqueness of the ANOA skus brand.
Skus Corporaon (SC) is one of the leading distributors for e-scooters (skus)
and accessories in Southeast Asia as well as the first skus manufacturer in
Indonesia. Under the “Skus Tours” brand, SC is also organizing guided skus
sightseeing tours and running a skus rental business.
Originally from Singapore, SC embodies the latest technical innovaon, offering
an efficient, praccal and environmentally friendly way of transportaon. SC is
determined to provide its customers a complete range of
service, which includes maintenance and provision of
various modern accessories. Sustainability and social
responsibility count to SC's highest values, which is why SC is
also engaged in social and environmental projects in
Indonesia.
Designed for Indonesia
© Skus Corporaon Pte. Ltd.
3 | ANOA EX+ User Manual
ANOA EX+
2 | ANOA EX+ User Manual © Skus Corporaon Pte. Ltd.
ANOA EX+
Contents
5. For safety reasons, beginners should practice in a wide area and in slow mode first.
6. This product is designed for one person and it is unsafe to ride with an infant or to ride with
two adult passengers. It can cause accidents and break the product.
7. Keep both hands on the steering handle at all times.
8.
9.
General Safety Guidelines and Restrictions
The skutis is not waterproof. Never use it, when it rains or snows or if the road
is wet or icy. Electric devices, motor or battery could get damaged, which can
result in malfunction or fire. Water damages will not be reimbursed; even
during the warranty period.
If parts of the body, as a finger or hair, get caught in the spinning or folding
parts of the product, this may lead to severe injuries. Before riding, insure that
no loose clothing or shoe lace will be caught in the wheels to prevent
accidents.
Do not open or tune the electric parts (battery, controller or motor system).
This can cause malfunction or fire. In such a case, damages will not be
reimbursed; even during the warranty period.
All vehicles involve risks and require certain safety measures. Make sure to
wear a helmet and further protective gear (e.g. knee and elbow protection)
and follow the local road traffic law.
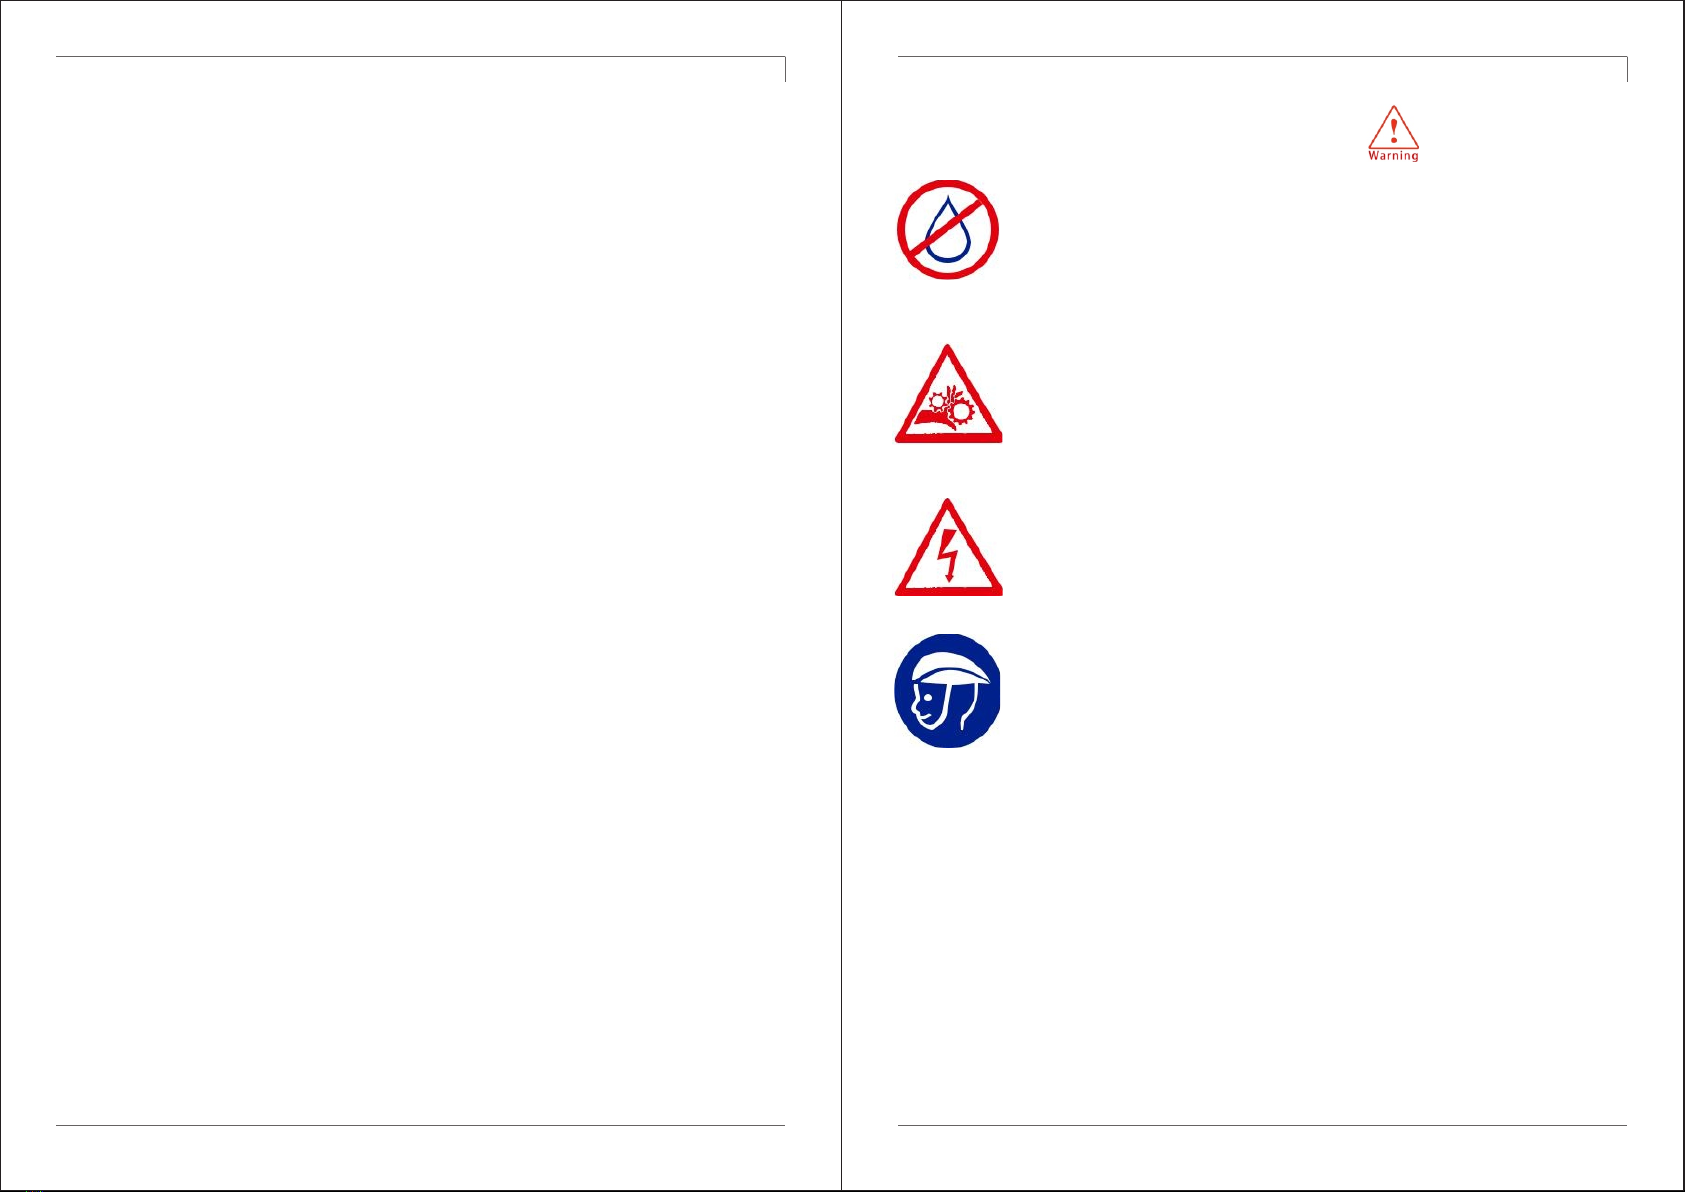
1. Beware of water!
2. Beware of folding and spinning parts!
3. Don't tune by yourself. Electric shocks can occur!
4. Wear safety equipment and abide by the local road traffic law!
Check the operating condition of the brakes regularly and do not use your skutis,
when you are noticing any abnormality.
Do not stop the skutis with your foot without using the brakes. Always use the rear
brake. Be careful, as there is a risk of overturning when the front brake is applied
suddenly while riding.
General safety guidelines and restrictions………………………..........3
Safety precautions for lithium-ion battery…………..……........5
Product Components…………..........................................................7
How to use your Anoa Ex+………………………………....….........9
(1) How to assemble your skutis……....……………….................…….9
(2) How to unfold your skutis………………....………...……….....10
(3) How to fold your skutis…...............…………………….…….....11
(4) How to charge your skutis………………………………….....12
(5) Memo space……………………………………………...........14
(6) Checklist before using your skutis………………………….........15
(7) How to start your skutis……………………………….…….17
(8) How to stop your skutis.…..………………………….…….18
(9) How to control the dashboard / P settings…………......19
Maintenance……………………………………………………….………21
Technical Specications……………………………………...…........25
Maintenance Record………………………………………..…….....26

© Skus Corporaon Pte. Ltd.
5 | ANOA EX+ User Manual
ANOA EX+
© Skus Corporaon Pte. Ltd.
4 | ANOA EX+ User Manual
ANOA EX+
10. While braking, lean a little bit backwards. While accelerating, lean slightly towards the
front.
11. Make sure to keep the tire pressure high, as it may get punctured otherwise while
riding. A tire pressure of 45 to 50 PSI is recommended. The tire pressure should get
checked every two weeks.
12. Never ride your skutis in a crowded area, on a steep slope, or on uneven or slippery
surfaces.
13. Slow down before speed bumps or other obstacles to prevent accidents or
damaging the product.
14. The handlebar is designed to change direction and balance. Do not push or pull it
with excessive force. If the handle bar feels loose, stop riding and check the head
bearing. Fasten the bolt or nut if needed, before you continue riding your skutis.
15. Please, only charge your skutis with the dedicated charger provided. A non-compliant
charger will damage the circuit or battery. Such damages will not be reimbursed;
even during warranty period.
16. If your skutis was flooded, disconnect it from the power supply inside the battery box
and do not try to charge it. Your maintenance provider will need to check the skutis
for you. Note that water damage is not covered by any warranty.
17. Do not apply excessive force to the kickstand. Only ride with the kickstand folded up.
18. Children under the age of 14 are prohibited from using the Anoa.
19. Do not do stunts or jumps on the product. Exposing the battery to excessive shock
may result in fire. In case of a crash, remove the battery from the product to check
whether it is still undamaged and working well.
1. Only use the charger that was supplied with your skutis to charge the lithium-
ion battery. Using an unauthorized charger could cause fire or serious
damage to the battery.
2. Charge the lithium-ion battery within 0-45 C and discharge within -20-60 C. Charging
and discharging the battery not within the appropriate temperature may damage the
lithium-ion battery.
3. Do not leave the lithium-ion battery in any place exposed to direct sunlight or high
temperature. Always store it in dry places.
4. Charge the lithium-ion battery in a dry, open and well-ventilated place. Do not charge
the battery near inflammable goods.
5. If you bring your skutis in winter from outside to inside, the change of temperature may
cause dew condensation. In this case, do not charge immediately but wait for the
battery to cool down. Otherwise, the battery's lifetime and capacity might get reduced.
6. If the battery protection circuit is damaged, the battery emits an unusual smell, or the
battery leaks, contact an authorized service center immediately and get technical
support.
7. Keep the lithium-ion battery in a safe place out of the reach of children and pets.
8. Do not reverse the polarity of the battery. This may lead to a short-circuit.
9. Connecting the charger while the skutis is waterlogged creates a very high risk of fire or
electric shocks. In this case, the battery should get checked by an expert, before it gets
charged again.
10. Do not disassemble or incinerate the lithium-ion battery. Dispose the battery as
industrial waste and be careful that no short-circuit occurs in the terminals.
11. If the battery requires replacement after long-term use, replace it with a new one
through an authorized dealer. The discharge capacity of the lithium-ion battery
normally decreases more than 15 % after 300 times of cycle use.
12. You can increase the lifetime of your lithium battery if you charge or discharge it in
temperatures between 18 and 25 C°. To avoid damage to your battery, it is also
recommended to fully charge your battery at least once per month as long as your
battery is still installed inside your skutis.
Safety Precautions for Lithium-Ion Battery
How to manage your lithium battery

© Skus Corporaon Pte. Ltd.
7| ANOA EX+ User Manual
ANOA EX+
© Skus Corporaon Pte. Ltd.
6 | ANOA EX+ User Manual
ANOA EX+
Product Components
What's inside the box?
1 x Skutis
1 x Charger (2A or 3A) with charging cable
1 x Manual Book (might not be included if soft copy was provided)
2 x Ignition Keys
1 x Allen Key Tool Set (only occasionally included)
Please, check if all the components listed above are inside your box immediately. If you
need assistance assembling the product, please contact your authorized service center.
After your skutis was unfolded Check your product serial number
External temperature has great impact on the battery. The performance of the battery
degrades with lower temperature, which leads to decreased power and riding
distance. However, the battery usually returns to its original state, when the weather
or surrounding temperature gets warmer again.
14. When the product needs to be stored for a long time without using (e.g. two months
or more), have the battery charged around 80% and ask an authorized service
centre to remove it from your skutis. If the lithium battery is stored outside of your
skutis for longer than six months, you should ask an authorized service centre to
charge it every six months for you.
If a lithium-ion battery product overheats, smokes, or burns, you must stop charging
and using the product immediately. In such a case, move the product outdoors as
quick as possible, and use a fire extinguisher or sand to extinguish any fire. Do not use
water to extinguish fire on the product, since this can create additional danger!
13.
15.
Battery maintenance in summer
1. Avoid rain or wet roads. The battery and core components may get damaged by
flooding or strong water splashing, which can result in malfunction or fire.
2. Avoid direct sunlight in summer and do not store or charge it in a car trunk or hot room.
Battery maintenance in winter
1. Avoid snowy, frozen or wet roads. Battery and core components may get damaged
by flooding, which can result in malfunction or fire.
2. Store the battery in a dry place at room temperature (10 – 20 °C).
3. In winter, after riding wait for at least two hours to let the battery cool down before
charging.
After your skutis was unpacked, note the
serial number and keep it to recognize
your personal skutis easily. In case
your skutis gets stolen, the serial
number might help you to prove your
ownership.
© Skus Corporaon Pte. Ltd.
9 | ANOA EX+ User Manual
ANOA EX+
© Skus Corporaon Pte. Ltd.
8 | ANOA EX+ User Manual
ANOA EX+
Important
*To start your skutis put the ignition key into the keyhole, turn the key to the right
side until the voltmeter is on and now push the on/off button for 3 seconds until
your LCD is on too.
How to use your ANOA EX+
1. How to Assemble Your Skutis
(1) Unpacking Your Skutis
1. Lift the skutis a little bit on the handlebar
first. Then lift the body (deck part) with
both hands slowly.
2. Caution: The inner shaft of the folding
mechanism may get damaged due to
heavy load, when you lift your skutis only
by grabbing the handlebar. Always have
at least one hand under the whole skutis
body.
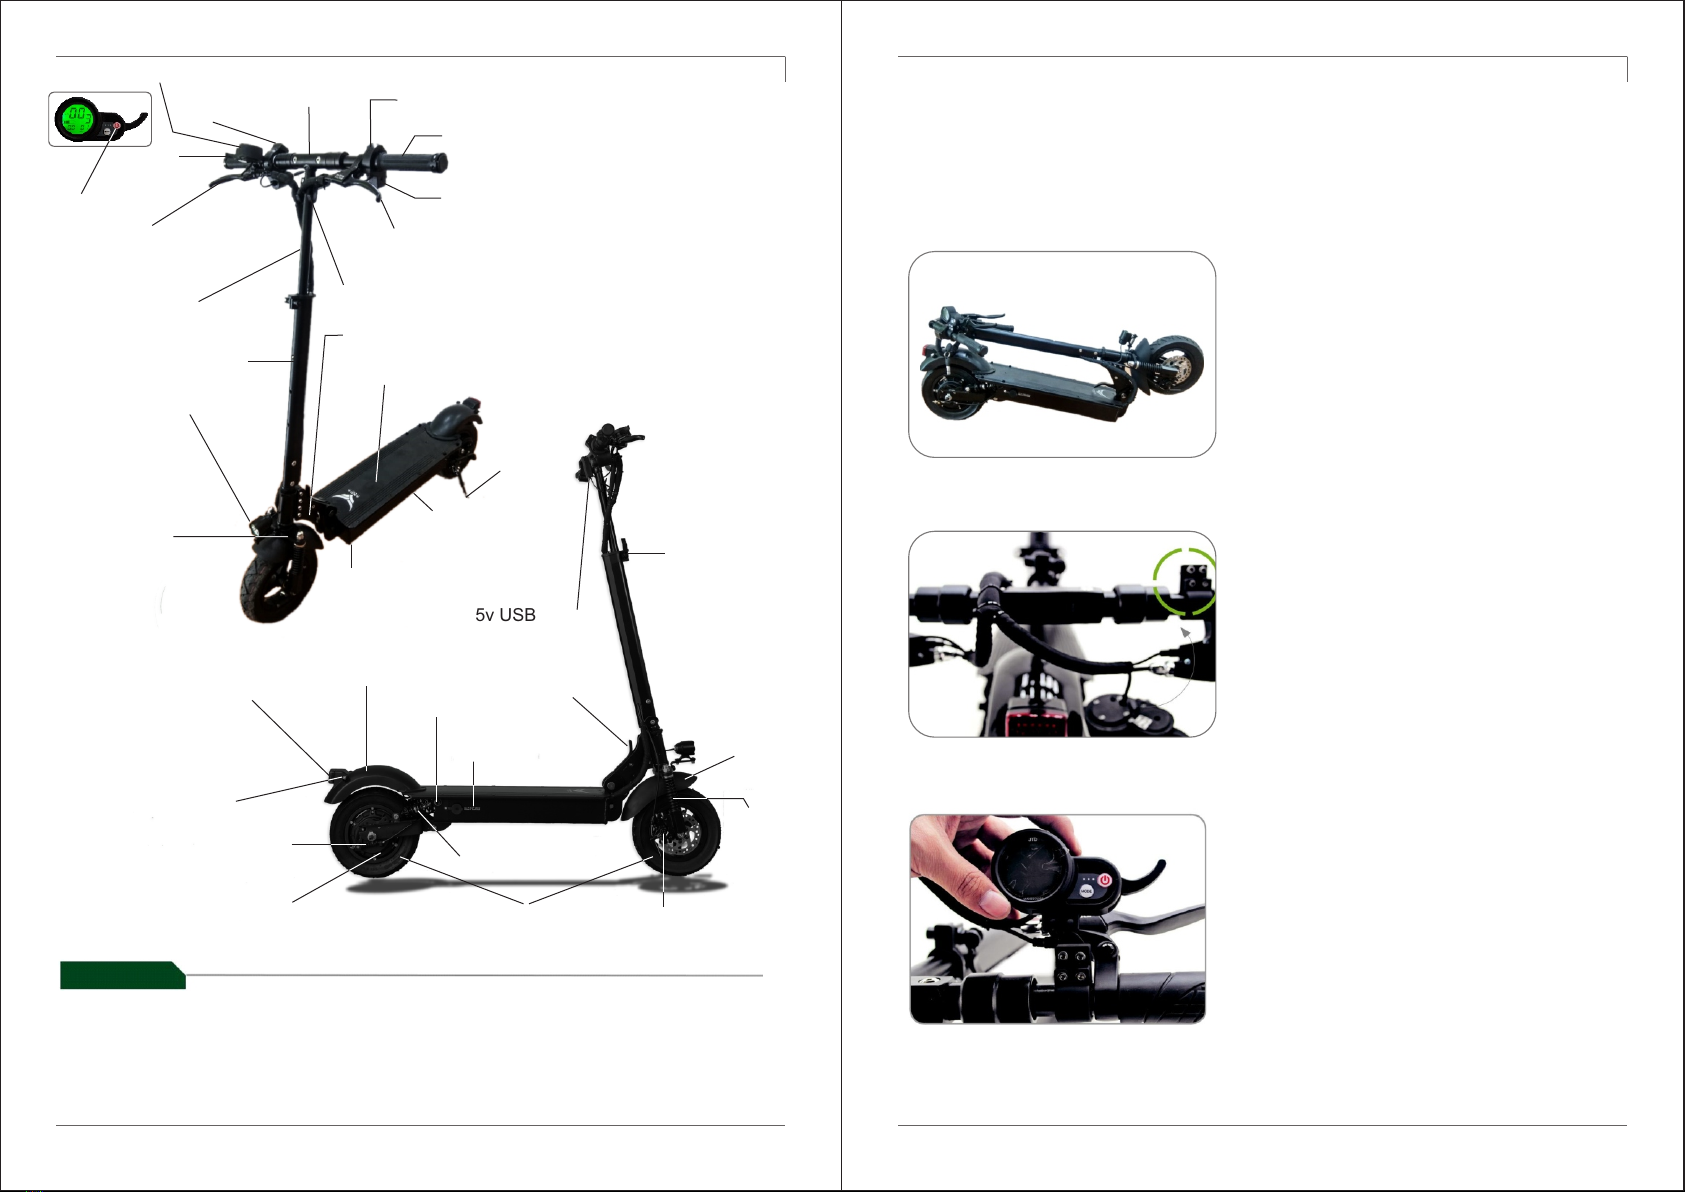
(2) Installation of LCD
1. The LCD is not attached to the product at
first.
2. Use an Allen key inside the dotted circle to
release the screws.
3. Adjust the position of the LCD as shown
in the picture. Make sure that there is
sufficient space between the finger
throttle and the front wheel disc brake
lever so that you can use both quickly
and conveniently. Then tighten the
screws again with the Allen key to finish.
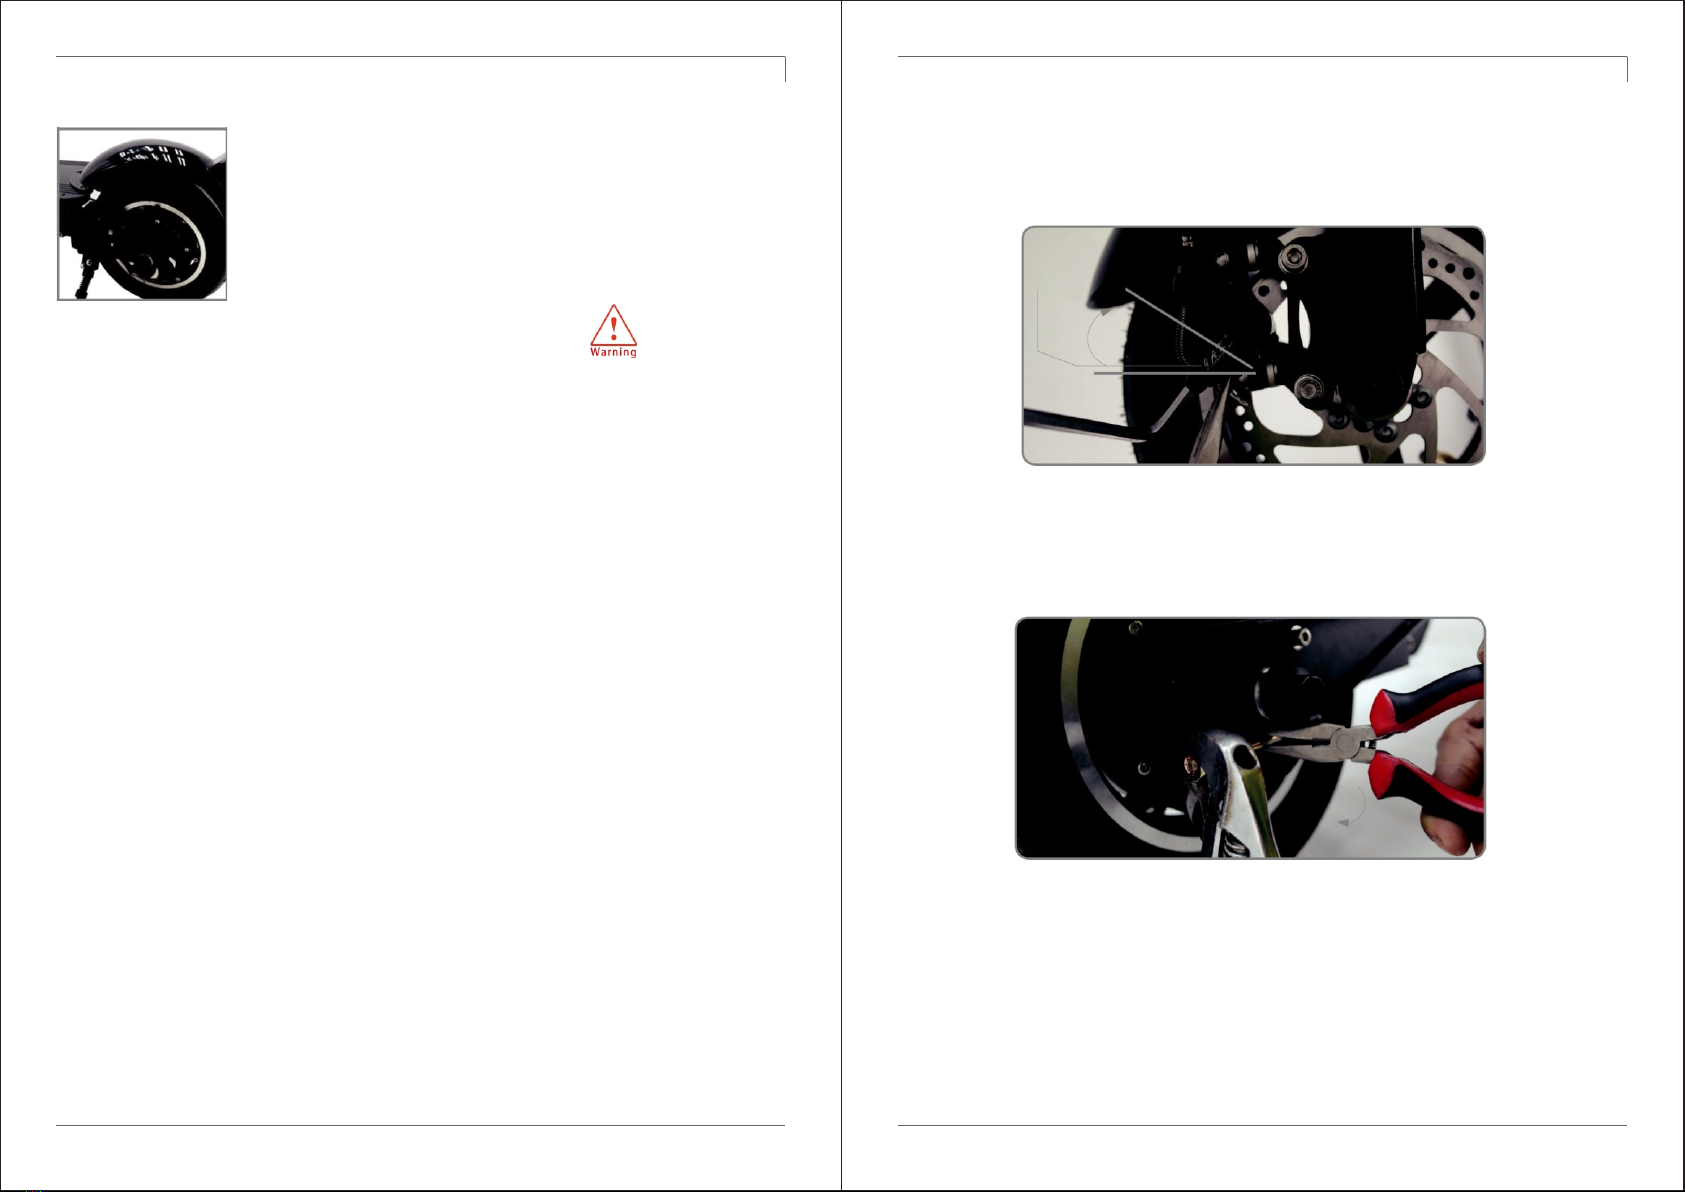
Rear fender/
rear drum brake
Direction indicator
Rear dream brake
(electric brake)
52V 1000W motor
Folding lock
Front
suspension
Front disk brake
Front fender
5v USB charger
(accessory)
Rear
suspension
10” wide tube tire
Charging port
Skutis serial
number
Tailight (brake
light / direction
indicators)
Adjustment lever
(QR lever)
Light control panel
(incl. direction indicators)
Lithium ion
battery (inside)
Kickstand
LCD dashboard
Finger
throttle
Front wheel
disk brake lever
Handle grip
Rear wheel servo
brake lever (electric brake)
Mounting part
Handle extension
Handle, bottom pole
One touch folding lever
Headlight / Electric horn
On/off button
Bag holder (max 10 kg)
Voltmeter Light control panel
Deck (footrest)
Front fork
Controller
(inside)

© Skus Corporaon Pte. Ltd.
11 | ANOA EX+ User Manual
ANOA EX+
© Skus Corporaon Pte. Ltd.
10 | ANOA EX+ User Manual
ANOA EX+
(1) Raising the Front Bar
To unfold your skutis, push the folding
lever down and pull the front bar up until
you hear a click. After the front bar is
unfolded, raise the folding lock in the
direction of the arrow and fix it firmly.
(2) Adjusting Height of Handlebar
Unlock the height adjustment lever (QR
lever) and use one finger to push the
metal ball inside the height adjustment
hole into the front stem. Now you can
choose between two different heights.
After you chose your favorite height, the
QR lever must be locked and the metal
ball must be fixed in one of the height
adjustment holes again.
(3) Unfold the Handlebar
To unfold the handlebar, raise it in the
direction of the arrow until it is locked
automatically. After unfolding, make sure
that the folding lock of the front bar is
properly inserted as shown in the picture.
2. How to Unfold Your Skutis
(1) Handlebar Folding / Opening of Folding
Lock
Fold the handlebar first.To fold the
handlebar put your first hand on the end
of the handle bar grip and use the second
hand to push the automatic handlebar
locking mechanism in the direction of
your first hand. Now push the respective
handle bar down and repeat the process
with the second side of the handlebar.
Afterwards, pull the folding lock in the
direction of the arrow (see photo) to
release it.
(3) Folding of the Front Bar
Fold the front bar by pushing it towards
the deck while pressing down the folding
lever.
How to use your ANOA EX+
3. How to Fold Your Skutis
(2) Pushing the Handlebar Down
After releasing the QR lever as shown in
the picture, push the small metal ball
stopper inside the front bar, while
pushing the handlebar down.

© Skus Corporaon Pte. Ltd.
13 | ANOA EX+ User Manual
ANOA EX+
© Skus Corporaon Pte. Ltd.
12 | ANOA EX+ User Manual
ANOA EX+
3. Make sure to close the charging port cap before riding or storing your skutis.
Only open it for charging purposes. Never let the charging port get in touch with
any kind of liquid!
4. When connecting the charger to the charging port, metallic sparks due to the
voltage difference may occur, but it is not fully charge.
5. Make sure to only use the genuine 2A / 3A charger. If you are using a non-
standard charger, it can cause electrical malfunctions and serious damage to the
battery.
4) How to Charge Your Skutis
(1) Standard Charging Method
1. Connect the charger into a standard household power
socket then afterwards open the charging port cap and
connect the charger to the charging port.
2. If the charger's LED light is red, your skutis is getting
charged, but not fully charged yet. If the light is green, your
skutis is either already fully charged or your charger is not
properly connected to either your skutis or to the power
socket.
1. Do not use the charger and contact your authorized service center if the lamp of the
charger is not turning on, if an external shock occurred, or if the cable or cable cover of
the charger is damaged.
2. Do not use the charger if the charging port or charging cable ends are corroded.
3. While charging, do not put any drink or other liquids that can be easily spilled next to the
charger.
4. While charging, do not operate the motor of the skutis or any other electric devices that
are connected to the battery.
5. Do not use the charger in places with high humidity or flammable materials.
6. Do not modify the charger.
7. A charger failure may cause fire, while charging. Hence, you should disconnect the
charger before you leave the charging place for a long time.
8. If the charging process is not completed after a long time (e.g. more than 14 hours), do
not continue using the charger and contact an authorized service center.
9. Children may only use the charger under the supervision of a guardian.
10. Do not insert metal into the charging hole.
11. After unplugging the charger, do not touch the plug for about 10 seconds.
12. Do not attempt to disassemble, open, crush, bend, deform, perforate, shred or
submerge the charger.
13. Avoid dropping the charger or exposing it to any other kind of excessive shocks.
(2) General Safety Advice for Using the Charger

© Skus Corporaon Pte. Ltd.
15 | ANOA EX+ User Manual
ANOA EX+
© Skus Corporaon Pte. Ltd.
14 | ANOA EX+ User Manual
ANOA EX+
MEMO How to Use Your ANOA EX+
6) Checklist Before Using Your Skutis
Before each ride, you have to check, whether your front and rear brake
is operat ing normally. If you notice any problems, adjust the brake(s)
first. If a brake is damaged or worn, bring it to an authorized service
center.
(1) Wear Safety Equipment
This product bears the risk of danger due to high speed.
Safety equipment must be put on before use. All users
must wear a helmet, additional protectors (knee, elbow,
palm), and closed shoes.
(2) For Beginners, Elderly People and Pregnant Women
Beginners and elderly people should only use slow mode
as there is a high risk of causing accidents, when using
high speed. Pregnant women should not ride skutis.
(3) Do Not Accelerate and Lean Backwards While Riding Downhill
If you accelerate while riding downhill, the braking
distance might become too long, which causes danger. If
you are riding downhill for a very long distance, the
brakes may overheat and stop working properly. For
these reasons, you should not accelerate, while riding
downhill. To avoid turning over the front, you should lean
a bit backwards, while braking, and focus on using the
rear brake.
(4) Caution: Motor and Brakes May Cause Fire
The motor and brakes (especially the
disc rotor) increase in temperature
while running which may result in fire.

© Skus Corporaon Pte. Ltd.
17 | ANOA EX+ User Manual
ANOA EX+
© Skus Corporaon Pte. Ltd.
16 | ANOA EX+ User Manual
ANOA EX+
(5) Always Lift with Two Hands
Always lift your skutis from the body (deck) with both
hands. The folding part may get damaged if the product
is only lifted by the handle or front bar.
(6) Check Whether All Parts Are Fixed Before Riding
Before riding, always check that the bolts
and nuts are tightened. This is especially
important for the steering bolt on the
bottom of the front fenders, where the front
bar is connected to the front wheel as well
as for the big nuts on the side of your motor.
Parts may loosen due to vibration from
continuous riding. If you lost any part, stop
riding immediately and replace the part or
visit the nearest authorized service center.
(7) Check Whether the QR Levers Are Fixed Before Riding
Make sure that the QR levers
are correctly fixed (as shown in
the picture) before riding. If any
QR lever is loose, the front bar
may suddenly fold while riding,
which may lead to an accident.
* Stop Riding Immediately, If…
1. …the skutis creates an unusual noise. Consult the nearest authorized service center in
this case.
2. …you feel there is a problem with the operation of the skutis. This may include an error
message on the dashboard, an extraordinary hot motor, malfunction of the brakes, etc.
Please, consult the nearest authorized service center in this case.
How to Use Your ANOA EX+
7) How to Start Your Skutis
(1) Activate the Current Cycle
The first step to start your skutis is to
insert the ignition key into the
keyhole and turn it right. Now you
can activate the LCD (see next step).
(2) Turning on the LCD/ Speed Modes
Press the red power (on/off) button
on the LCD for three seconds to turn
it on. The speed mode can be altered
by pressing the power button once
and then using the MODE-button to
switch between mode 1, 2 and 3
(fastest). To confirm, press the power
button once again.
(3) Correct Riding Position
After pivoting the kickstand up, find a
stable position on the deck and hold
the handle grip comfortably with both
hands. You need to figure out if you
prefer having your left or right foot in
the front.
(4) Acceleration and Deceleration
Accelerate by using the throttle of the
LCD after your standing with both
your feed on the deck. Usually, you
can only accelerate if you already
made the rear wheel moving a bit by
manually pushing the skutis to the
front. Decelerate and stop by using
both brakes. While accelerating,
lean slightly to the front. While
braking, lean slightly backwards.

© Skus Corporaon Pte. Ltd.
19 | ANOA EX+ User Manual
ANOA EX+
© Skus Corporaon Pte. Ltd.
18 | ANOA EX+ User Manual
ANOA EX+
How to Use Your ANOA EX+
8) How to Stop Your Skutis
(1) Do Not Only Use the Front Brake
If you want to decelerate slowly, use
mainly the rear brake (left brake lever).
Be careful as there is a risk of
overturning when only the front brake
is applied while riding.
(2) Stop Safely and Smoothly
Use the front and rear brake levers
together to stop smoothly and safely.
When braking strongly, do not forget to
lean backwards and to bend your
knees a bit.
(3) Regenerative Electric Drum
Brake System
Use the LCD settings to choose the
strength of your electric drum brake
system or whether you would like to
switch it off (default = switched on with
full strength). The electric brake is
applied by using the rear brake lever
(left) or by using the front break lever
(right), which increases the braking
power and recharges your battery.
(4) Check Your Brakes Regularly
Be sure to check for any deterioration
on th e b rake cable s (bendi n g,
disconnection, etc.) before riding. Do
not use your skutis if the braking force
drops considerably and let the brakes
b e i n s p e c t e d a n d r e p a i r e d
immediately.
How to Use Your ANOA EX+
9) How to Control
the Dashboard
(1) Changing Speed and LCD Modes
Change the speed mode, while the LCD is on. To display the current speed mode, press
The number for the speed mode will start blinking. Then press multiple times
to set the speed (L1 = low speed, L2 = medium speed, L3 = high speed). Press to confirm.
To switch through the other LCD modes just click repeatedly
* When speed mode 3 (high speed) is selected during acceleration, the speed displayed on the
LCD may temporarily differ to the actual speed.
Information
(2) How to Change the Detailed LCD/P Settings

© Skus Corporaon Pte. Ltd.
21 | ANOA EX+ User Manual
ANOA EX+
© Skus Corporaon Pte. Ltd.
20 | ANOA EX+ User Manual
ANOA EX+
(4) Adjusting the Intensity of the
Electric Brake
The ANOA EX+ is equipped with a
physical brake for the front and rear
wheel, which can be activated by pulling
the physical brake levers on the handle
bar. Additionally, the electric rear brake
can be activated in the P9 LCD settings.
If “0” is selected, the electric brake is off,
“1” will assist with medium intensity and
“2” with strong intensity.
* Do not operate the electric brake
if your battery is fully charged
For your safety and to enhance the
l i f e t i m e o f y o u r b a t t e r y, i t i s
recommended that you do not use the
electric brake with a fully charged
battery. Only use the electric brake,
after more than 5% of the battery
capacity was used.
(3) Cruising Function
The cruise control function allows you
t o m a i n t a i n t h e r i d i n g s p e e d
automatically. This is convenient for
the rider for long distances and has
the advantage of saving battery
consumption.
* Starting the cruise function
a. Activate the cruising mode
through the P settings before
riding, as explained above.
b. If the throttle is kept at the
same acceleration for about 6
seconds, the cruise mode will start
automatically.
* Deactivating the cruising function
When you use the brake while the
cruising mode is running, the cruising
m o d e w i l l b e a u t o m a t i c a l l y
deactivated.
* Caution while using the cruising
function
For your safety, be sure to travel in a
position where the brake can be
applied immediately in order to
respond to any unforeseen incidents.
Maintenance
1) Routine Checking Before and After Riding
(1) Check Brakes and Cables
• Before riding, make sure that your brakes are functioning
well.
• Do not use your skutis if the braking power has dropped
considerably and let it be inspected and repaired
immediately.
• Before riding, make sure that the brake pad is not worn and
that no cables are loose or damaged.
• The brake cables may wear off depending on the user's
riding style and environment. If there is an unusual sound or
feeling when operating the brake lever, check if the inner wire
of the cable is partially broken, worn or deformed. This might
occur as a result to careless repetitive handle folding. If a
brake cable is broken, the braking mechanism might
become ineffective.
• Make sure that the bolts, nuts and the various fixing parts of
the brakes are not loose, and that the front disc is not
deformed or damaged.
(2) Check Tire Pressure and Condition
· Check the condition of the front and rear tire before each ride.
Try to keep the pressure at 45 PSI (optimum) and make sure
there are no signs of wear or puncture. When the air pressure
is insufficient, the travel distance per battery charge becomes
shorter and the possibility of punctures increases.
· You should refill the air pressure every two weeks.
· Sudden stopping may lead to uneven wear of the tires which
can cause danger. Therefore, it should be judged according to
appearance when a tire needs to be replaced.
(3) Check whether all Parts are Tightened and Secure
· Before riding always check thoroughly whether all bolts and
nuts are securely tightened.
· Check whether all folding parts are properly fastened.
(3) Detailed LCD Settings/ P Settings
10 - wheel diameter (don’t change!)
Start mode: Accelerator start (0),start
after kicking/ back wheel spins (1)
Display Values and Settings
44.0 - cut-off voltage (don’t change!)
15 - ferrite magnet (don’t change!)
0 - Hall sensor (don’t change!)
Speed display: Km/h (0), mp/h (1)
Start speed: Power start (0), slow
start (1)
Cruising mode (auto riding): Off (0),
On (1)
Max. speed setting: 1 to 100%
Electric brake power: Off (0), medium
(1), hard (2)
Mode
P0
P1
P2
P3
P4
P5
P6
P7
P8
P9
Current mileage (Press and hold
the mode button to set “0")
Elapsed time, since dashboard
was switched on
The voltage displayed in VOL mode
has about 1V to 2V difference from
the actual battery voltage.
Mode
TRIP
ODO
CHA
VOL
DST
TIME 1
TIME 2
Description
Total mileage
Not used
Current voltage (Volt)
Not used
Not used
Note:
© Skus Corporaon Pte. Ltd.
23 | ANOA EX+ User Manual
ANOA EX+
© Skus Corporaon Pte. Ltd.
22 | ANOA EX+ User Manual
ANOA EX+
(4) Check which Parts need to be Replaced
Spare parts such as tires, tubes, discs, pads, cables, brackets,
forks etc. wear off at different times. Therefore, periodic inspection
and maintenance is required. A yearly general check -up is
recommended.
(5) Electric Products can be Damaged by Various Factors
As with all machines, this product may fail due to a number of factors. The durability
of each part may differ depending on riding habits. Brake cables and other cables as
well as forks or brackets can be worn off or bent depending on the riding style and
environment. As the deterioration of parts often is not visible, it is highly
recommended to visit an authorized service center for safety inspections and
replacement regularly.
Maintenance
2) Skutis Self-Maintenance
Brake
arm
(1) How to Adjust the Front Brake
Hold the brake wire with the long nose pliers and use a 5mm hexagon key (Allen
key) to unscrew the brake arm mounting bolt slightly. Lift the brake arm so that the
brake cable space narrows. This will make your brake stronger.
(2) How to Adjust the Rear Brake
Hold the end of the wire with long nose pliers as shown in the picture. Now turn
the brake adjusting nut clockwise with a wrench to make the brake stronger.
Attention: If the nut is turned too much, the brake pad may touch the tire.

© Skus Corporaon Pte. Ltd.
25 | ANOA EX+ User Manual
ANOA EX+
© Skus Corporaon Pte. Ltd.
24 | ANOA EX+ User Manual
ANOA EX+
(3) How to Adjust the Handlebar
Use a hexagon key (Allen key) to tighten or loosen the handlebar folding
mechanism, as shown in the picture. If the green circled screw (see left
picture below) sticks out more, the handle bar will be more stable.
(4) How to Adjust the Folding Lock (Fixing Lever)
When the 10mm tension adjusting nut (1) is loose, the folding lock (2) of
the folding part may become loose too. As a result, the locking part of
the lever may get released automatically while riding, which can cause a
serious accident. To tighten the nut, turn the nut clockwise.
* CAUTION:
If used in a loose state for a long time, the folding part may get damaged. This
could result in it folding while riding, which can lead to an accident.
* Parts and specifications may change without notice to improve the quality and safety of the
product.
* The mileage stated above was measured with 75 kg loading, after continuous driving in
ECO mode on a flat road. If the riding environment and riding method are different, riding
mileage may differ too.
* The mileage can be greatly affected by loading weight, outside temperature, wind direction
(wind speed), road surface condition, slopes, tire pressure, battery condition and so on.
1 2
Technical Specifications
52V MAX 1600W (Rated 1000W)
Product Name
Motor Type
Controller
Battery Type
Battery Capacity
Product Weight
Charging Time
Charging Power
Rating
Riding Mileage
Max Speed
Folding
Gradeability
Max Load
Size (unfolded)
Size (folded)
LCD
Brake System
Suspension
Light / Horn
Tire Size
Product Material
27 A
Anoa EX+ Note
Li-Ion Battery
52V/23.4 Ah = 1,216.8 Wh
Around 25 kg+
12 to 13 hrs
104 Watt
50 + 60 km
20 km/h (1), 35 km/h (2) and 49.9 km/h (3)
Front bar/ handle bar one touch quick
folding system (2 steps height adjustment
function)
o
25 (56%)
120 kg
112 x 57 x 123 cm
112 x 19 x 45 cm
Finger throttle LCD dashboard
Front: Disc brake Rear: Mechanical
expandable drum brake/ electric brake (can
be switched off)
Front and rear dual spring suspension
High brightness headlight with electric horn,
taillight
10 inch (10 x 2.5) wide tube tire
(proper air pressure 45 PSI)
Aluminium alloy (main frame, front bar), ABS (cover)
Occasionally 800 W rated
Occasionally 25 A
By Skutis Gear
Battery included
2A (standard) charger basis
2A (standard) charger basis
75 kg load, 25 degrees of outside
temperature, flat road at constant
speed of 20 km/h (best conditions)
More with additional kicking
100 kg recommended
Length x Width x Height
(Deck width 19 cm, Handle width
57 cm)
Length x Width x Height
(Folded handle width 13.5 cm)
Power ON/ OFF (Battery level,
voltage, trip, ODO, riding time, riding
speed and mode change function)
Electric brake charges battery
automatically
Taillight includes brake light function
and direction indicators
Tire width
around 6.5 cm

© Skus Corporaon Pte. Ltd.
27 | ANOA EX+ User Manual
ANOA EX+
© Skus Corporaon Pte. Ltd.
26 | ANOA EX+ User Manual
ANOA EX+
Maintenance Record
To ensure best performance of your skutis and to keep its market value higher, we
recommend recording all maintenance work that was done on your skutis. Please, ask your
qualified maintenance service provider to fill out the maintenance record table below:
Model
Serial Number
Date of Purchase
Owner
Maintenance Data
Date of Service
Service Provider
Service Description
Model
Serial Number
Date of Purchase
Owner
Maintenance Data
Date of Service
Service Provider
Service description
Maintenance Record

© Skus Corporaon Pte. Ltd.
29 | ANOA EX+ User Manual
ANOA EX+
© Skus Corporaon Pte. Ltd.
28 | ANOA EX+ User Manual
ANOA EX+
Model
Serial Number
Date of Purchase
Owner
Maintenance Data
Date of Service
Service Provider
Service description
Maintenance Record
Be Part of the Revolution!
Skutis Corporation Pte. Ltd.
Other manuals for Anoa EX+
1
Table of contents
Other Skutis Corporation Scooter manuals


