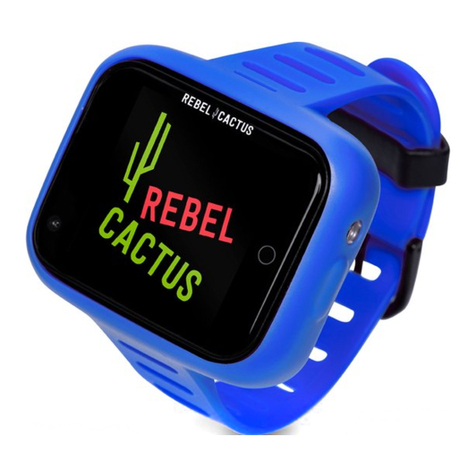
TE-Group Mr Safe SKW-100 User manual

mrSafe/SKW-100/1118/V02

Hereby, Par la présente,
Company /Entreprise:
Address: / Adresse:
declare that the following equipment: / déclare que le disposif suivant :
Product name:
Nom du produit:
Product type:
Type de produit:
complies with the essenal requirements, which are specied in the following direcves.
Conformity is guaranteed by the CE-symbol. The full text of the EU declaraon of conformity
is available at the following internet address: hp://www.mrsafe.be/DOC_SKW-100.
est conforme aux exigences essenelles, qui sont spéciées dans les direcves suivantes. La
conformité est garane par le symbole CE. Le texte complet de la déclaraon UE de conformité
est disponible à l’adresse internet suivante: hp://www.mrsafe.be/DOC_SKW-100.
EMC: 2014/30/EC
Radio: 2014/53/EU
LVD: 2014/35/EC
RoHS: 2011/65/EU
J. Van Os, Product & Research Manager TE-Group NV
Kapellen, September 2018
Authorized Signature
TE-Group NV
Kapelsestraat 61, 2950 Kapellen, Belgium
mr Safe SKW-100
Smart Kids Watch
DECLARATION OF CONFORMITY

PARTS & BUTTONS
1. Power buon / SOS buon
2. SIM card compartment
3. Charging contacts
4. Touch screen
1.
4.
2.
Use a nano SIM card supporng internet / SMS / calling. The nano SIM card that you have
purchased, will have a PIN-code. This PIN-code should be disabled before placing the card in the
watch: place the SIM-card in your phone and deacvate the PIN-code in the ‘Sengs’ menu of
your phone.
Make sure the watch is turned o. To insert the SIM-card, open the SIM card compartment (2)
using the supplied screw driver. Slide the metal SIM card holder to the right to unlock and open
it. Place the SIM card in the correct posion as shown in below image:
INSTALLING THE SIM-CARD
PACKAGE CONTENTS
1. mr Safe Smart Kids Watch
2. Quick reference guide
3. USB charging cable
4. Screwdriver
3.
1.
2.
3. 4.

Close the metal SIM-card holder and slide it to the le to lock it.
Close the the SIM-card compartment by screwing the cover back in its place. Turn ON the watch.
The icon will indicate the network signal strength.
Important: The network signal strength depends on the mobile service provider that you have
chosen! mr Safe is not responsible for weak signal strength!

TURNING THE WATCH ON/OFF
Turning the watch ON: Press the power buon (1) for 5 seconds.
Turning the watch OFF: Open the watch menu and go to Sengs > Power O > Conrm.*
*it is possible to disable the Power O-funcon
CHARGING THE BATTERY
In standby mode, the baery of the mr Safe Smart Kids Watch lasts up to 3 days.
Put the USB plug of the supplied charging cable in a 5V USB power source. Align the magnec
charger with the metal charging contacts (3) at the backside of the watch. A charging indicator
will appear to indicate the charging process.
Important! Do not use any other charger than the charger supplied in the packaging.
SETTING UP THE SIM CARD
If a SIM card is inserted in a device, the device knows the provider, telephone number, and
you can make and receive calls via the SIM card. Addional data are required for the use of
the internet. That is the APN data. These APN data are already pre-programmed for the most
important providers, such as Proximus, Base, Orange in Belgium. The APN data can be adjusted
by sending an SMS to the telephone number associated with the SIM card, while the SIM card is
placed in the children’s watch and the device is switched on.
Here are some examples of SMS:
• Telenet: AT + ABH = sms_cmd, set_apn, 123456, telenetwap.be ,,, 20605 #
• Mobile Vikings: AT + ABH = sms_cmd, set_apn, 123456, web.be, web, web, 20630 #
• Jim Mobile: AT + ABH = sms_cmd, set_apn, 123456, web.be, web, web, 20630 #
Aer the SMS has been received correctly, the children’s watch sends an SMS back. Then you
know that the data has arrived. Aer a few minutes the children’s watch will make the baery
status and other sengs visible in the App.
Do you not receive an SMS? Then the device may be switched o, or the PIN code on the SIM
card has not yet been switched o, or the device does not have a good recepon from your
service provider.

INSTALLING THE APP
Search the ‘MrSafe SmartTrack’ App on the App Store or Google Play Store and download it.
This App is for phones, not for tablets!
CREATING AN ACCOUNT
Open the App. Follow the steps to register and create an account. Enter all requested informaon
and click on “GET IT” to receive your vericaon code by SMS. Enter the vericaon code and
click on “Register”.
You will be asked to add a device. Go to ‘IMEI’ in the menu of the watch. Scan the QR code (or
enter the code manually) to connect with the watch.

When you have established a connexion with the watch, you can customize the watch informaon:
Important! The rst person to bind his/her smartphone with the watch, will automacally
be the “administrator” of the watch. If you want to change to another administrator, the rst
administrator will have to unbind. The “new” administrator should now bind his/her phone with
the watch to create a new administrator account.
WATCH MENU & SETTINGS
To access the menu of the Smart Kids Watch you should use the touch screen (4):
• swipe to see the dierent menu opons
• press to enter a menu or to conrm a seng
• press the ON/OFF buon (1) to leave the (sub)menu and go back to the standby screen
Contacts
The “Contacts” menu will display all contacts approved by the adminstrator in
the App. Only contacts approved by the administrator will be able to contact the
watch. Max. 20 contacts can be added.
»»» The child can call the stored contacts by pressing the green phone icon.
»»» Persons that want to be able to contact the child, need to install the App
and scan the QR code of the watch to bind with the watch. The administrator will
have to accept their request.
Child informaon

Phone
The “Phone” menu allows the child to make calls.
»»» The child can enter any phone number and make a call by pressing the phone
icon.
Information
The “Informaon” menu will display all text messages (SMS) received by stored
contacts.
Settings
The “Sengs” menu allows you to set Time & date/Language/Theme/Volume of
the watch.
• Date & me: Press the green arrow to adjust me / date. Slide the numbers
up and down to set the correct me and date and conrm by pressing the “V”
icon.
• Language: Slide the available languages up and down to set the correct
language and conrm by pressing the “V” icon.
• Theme: You can choose 3 dierent themes: underwater theme, space theme
or unicorn theme. To also place the standby screen in the same theme, long
press the current standby screen and you can swip to the desired theme.
• Volume: Set the desired volume with the “-” and “+” icons and conrm by
pressing the “V” icon.
• Power O: To turn o the watch.
Chat
The “Chat” menu allows the child to send/receive voice messages to/from all
guardians approved by the adminstrator in the App. It is always a group chat: all
guardians will receive the messages.
»»» The child can send a voice message by holding the watch close to the mouth
and press and hold “Press to speak” to record the message. Listening to received
messages is done by pressing on the received message.
IMEI
The “IMEI” menu shows the unique code of the watch which is needed to bind
the watch with the smartphone.
SOS BUTTON
The “SOS” buon (1) allows the child to make an SOS call to the contacts that have been assigned
as SOS contacts by the adminstrator in the App. These contacts will be called one by one unl
one of them answers the call.
»»» The child can make an SOS call by pressing the SOS buon (1) on the watch for 5 seconds.

APP SETTINGS
MAIN SCREEN ICONS
APP MANAGEMENT
Enter the App Management secon by pressing the “blocks” icon in the right top corner.
Make phone calls to the watch
Check the currect locaon of the watch
Send a message to the watch

1. User prole: Allows you to set your (nick)name, phone number and email address.
2. Applicaon news: Shows all requests that were received to become a guardian of the child.
3. Switch Map: Allows you to choose a dierent map, default map = Google Maps.
4. Change Password: Allows you to change your password when needed.

5. Check for updates: If you don’t receive automac update nocaon, you can check for
updates here.
6. About us
WATCH MANAGEMENT
Enter the Watch Management secon by pressing the “child” icon in the le top corner:

1. Phonebook: Administrator can add Guardians & other contacts in this menu. Guardians and
other contacts can see informaon about other guardians and contacts.
2. Secure Fence: You can set Secure Fences (safety zones) for the child. When the child leaves
the set security zone, an alarm nocaon will be sent. You can set up to 10 safety zones and
give them a specic name.
Important: Do not make the security zone too small, to avoid too many alarms when LBS
locaon tracking is acve.
12345789

3. SOS sengs: Here you can save phone numbers of contacts that will receive a call when the
child sends out an SOS call. It is recommended that you save the numbers of people who
are close to your children. Long press the SOS buon for more than 5 seconds to trigger
the alarm for help, and then it will call the rst, second and third contact one by one. It will
call the second contact aer 30 seconds when the rst contact fails to pick up. And it will
connue calling the third contact if the second call fails unl someone picks up.
4. History Locaon: You can track your child’s locaon and the locaon history. Locaon history
shows the locaons your child has been during the day (up to 7 days). Select the day and
press “Play Track”.
12345789

Locaon is determined by GPS / Wi / LBS:
• GPS: Using satellites, for outdoor use. Quite accurate, up to 10 meters at good recepon.
• Wi: Using known networks. Requires an internet connecon on the SIM card.
• LBS: Using the mobile phone towers on which you are registered. Not very accurate.
5. Child watch: Shows the unique code of the watch. Also allows you to break the connexion
with the watch.
6. Message Center: Shows all nocaons that you have received from the watch: when the
child is entering/leaving a security fence, when the watch is oine, etc.
Child watch
Child news

7. More sengs
• Disable watch shutdown:
Aer acvang this funcon, the child will not be able to turn OFF the watch.
• Class forbidden:
You can set mes during which the watch will only work as a normal watch: It sll shows date
& me, sends out GPS locaon, but no calls or chats are possible.
• Alarm Clock nocaon:
You can set up to 6 alarms for the watch. Select the day and me for the desired alarm.
• Sound and vibraon:
You can set the desired volume and mode (vibraon or not) for the watch.
• Locaon mode:
• Energy saving mode: Baery saving mode, less accurate: GPS locaon is updated every
60 min.
• Normal mode: Set by default, GPS locaon is updated every 30 min.
• Track mode: Most accurate, but shortens the baery me. GPS locaon is updated every
10 min.
• Time and language sengs:
Here you can check the current language and me sengs.

SUPPORT
For more informaon, spare parts, technical quesons and return requests concerning this product, you should
contact support@mrsafe.eu.
GUARANTEE
Copyright © Mr Safe. Mr Safe® is a registered trademark of TE-Group NV. The Mr Safe® brand stands for superior
product quality and outstanding customer service. That is why Mr Safe® warrants this product against all defects
in material and workmanship for a period of two (2) years from the date of original purchase of the product. The
condions of this guarantee and the extent of responsibility of Mr Safe® under this guarantee can be downloaded
from our website: www.mrsafe.eu.
DISCLAIMER
Copyright © 2018 TE-GROUP NV
These terms and condions give the rights to use certain features on your device. You must agree to these terms
and condions before using the device. Your use of the device conrms or constutes your agreement to be
bound by these terms and condions. If you do not agree to these terms and condions, you may return your
device to the point of purchase within 7 or 14 days from the purchase date. These terms and condions do not
replace any terms, disclaimers or condions which were provided with your purchase. All such terms, condions
and disclaimers remain in full force.
• You must have a valid age to use and conrm the terms and condions, at least 14 years, depending on the
country.
• You are not allowed to analyse, modify, engineer or tamper with the soware or hardware of the device and
connected soware or hardware.
• TE Group has the right to make any change without prior noce to the hardware, soware and the agreements,
including those terms and condions
• All rights reserved.
• TE Group will respect your privacy and the privacy laws.
• TE Group will not be liable to you or any other party for any damage or loss or interrupon or other problem
due to the or relang to the (use of) the device.
• Warranty will be according to the warranty laws, and never exceed the amount of the purchase of the device.
• The soware is provided ‘AS IS’ and gives you the non-exclusive, non-transferrable right to use on 1 device
under license. The soware is not sold.
For the full disclaimer text, and privacy policy, please check our website www.mrsafe.eu.


ONDERDELEN & TOETSEN
1. Aan/Uit-toets / SOS-toets
2. Comparment voor SIM kaart
3. Oplaadcontacten
4. Aanraakscherm
1.
4.
2.
Gebruik een nano-SIMkaart die internet/SMS/bellen ondersteunt. De nano-SIMkaart die u hebt
gekocht, hee al een pincode. Deze pincode moet worden uitgeschakeld voordat u de kaart in
het horloge plaatst: plaats de SIM-kaart in uw telefoon en deacveer de pincode in het menu
‘Instellingen’ van uw telefoon.
Zorg ervoor dat het horloge is uitgeschakeld. Om de SIM-kaart te plaatsen, opent u het
comparment van de SIM-kaart (2) met behulp van de meegeleverde schroevendraaier. Schuif
de metalen SIM-kaarthouder naar rechts om deze te ontgrendelen en open te maken. Plaats de
SIM-kaart in de juiste posie zoals hieronder afgebeeld:
INSTALLATIE VAN DE SIM-KAART
VERPAKKINGSINHOUD
1. mr Safe Smart Kids Watch
2. Korte handleiding
3. USB-oplaadkabel
4. Schroevendraaier
3.
1.
2.
3. 4.

Sluit de metalen SIM-kaarthouder en schuif deze naar links om hem te vergrendelen.
Sluit het comparment van de SIM-kaart door het afdekplaatje terug vast te vijzen. Schakel het
horloge aan. Het pictogram gee de netwerksignaalsterkte aan.
Belangrijk: de netwerksignaalsterkte hangt af van de mobiele serviceprovider die u hebt gekozen!
mr Safe is niet verantwoordelijk voor zwakke signaalsterkte!

HET HORLOGE AAN/UIT ZETTEN
Het horloge AAN zeen: Druk gedurende 5 seconden op de Aan / Uit-knop (1).
Het horloge UIT ZETTEN: Open het horloge-menu en ga naar Instellingen> Uitschakelen>
Bevesgen. *
* het is mogelijk om de Power O-funce uit te schakelen
DE BATTERIJ OPLADEN
In de standby-modus gaat de baerij van de Mr Safe Smart Kids Watch tot 3 dagen mee.
Steek de USB-stekker van de meegeleverde oplaadkabel in een 5V USB-voedingsbron. Lijn de
magnesche oplader uit met de metalen laadcontacten (3) aan de achterkant van het horloge.
Er verschijnt een laadindicator om het laadproces aan te geven.
Belangrijk! Gebruik geen andere oplader dan de oplader die in de verpakking is meegeleverd.
SIM-KAART INSTELLEN
Als een SIM-kaart in een toestel wordt geplaatst, weet het toestel via de SIM-kaart de provider,
telefoonnummer, en kunt u bellen en SMS’en. Voor het gebruik van internet zijn nog aanvullende
gegevens nodig. Dat zijn de APN gegevens. Voor de belangrijkste providers, zoals Proximus, Base,
Orange in België zijn deze APN gegevens al voorgeprogrammeerd. De APN gegevens kunnen
worden aangepast door het sturen van een SMS naar het telefoonnummer dat bij de SIM-kaart
hoort, terwijl de SIM-kaart in het kinderhorloge is geplaatst en het toestel aan staat.
Hier volgen een aantal voorbeeld SMS-en:
• Telenet: AT+ABH=sms_cmd,set_apn,123456,telenetwap.be,,,20605#
• Mobile Vikings: AT+ABH=sms_cmd,set_apn,123456,web.be,web,web,20630#
• Jim Mobile: AT+ABH=sms_cmd,set_apn,123456,web.be,web,web,20630#
Nadat de SMS goed is ontvangen, stuurt het kinderhorloge een SMS terug. Dan weet u dat
de gegevens zijn aangekomen. Na enkele minuten zal het kinderhorloge de baerij status, en
andere instellingen zichtbaar maken in de App.
Krijgt u geen SMS terug ? Dan staat mogelijk het toestel uit, of is de Pincode op de SIM-kaart nog
niet uitgezet, of hee het toestel geen goede ontvangst van uw provider.
Table of contents
Languages:
