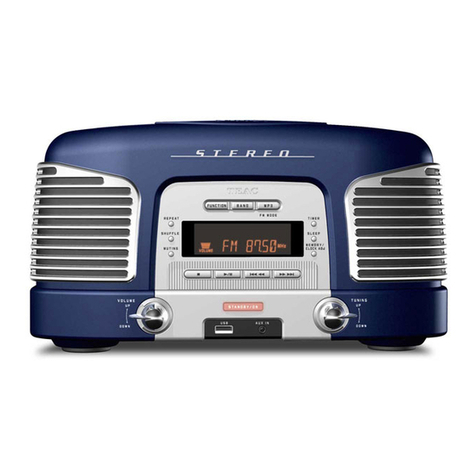
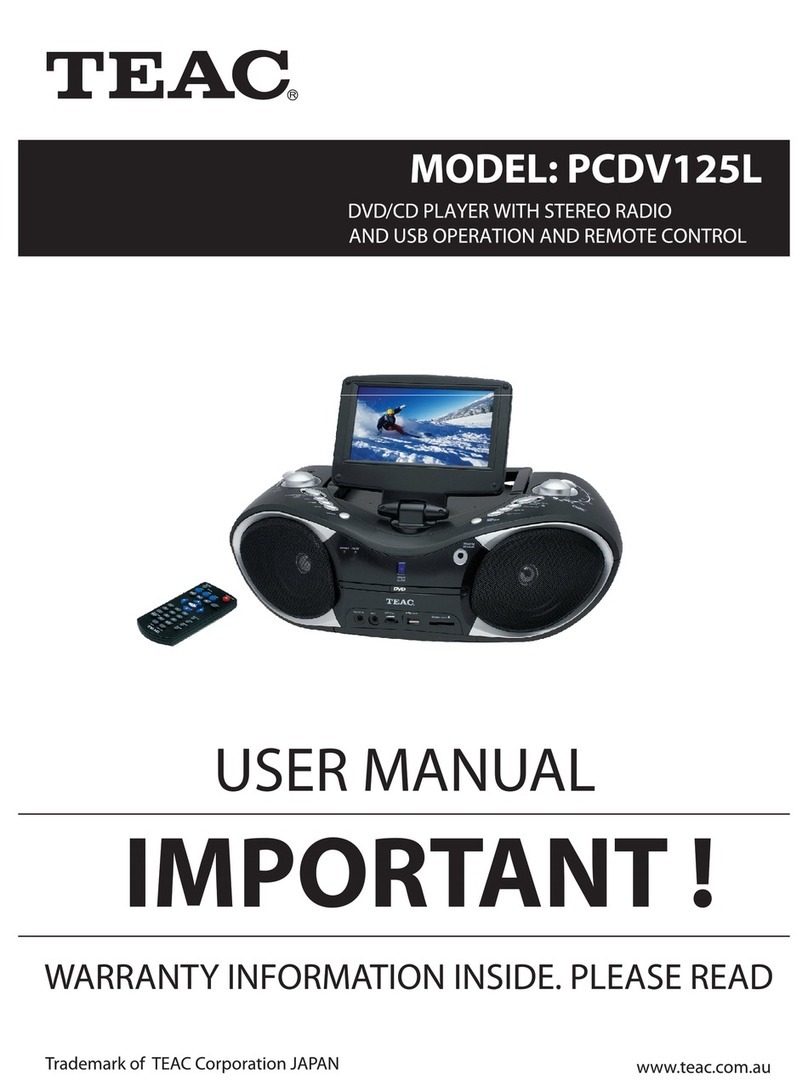
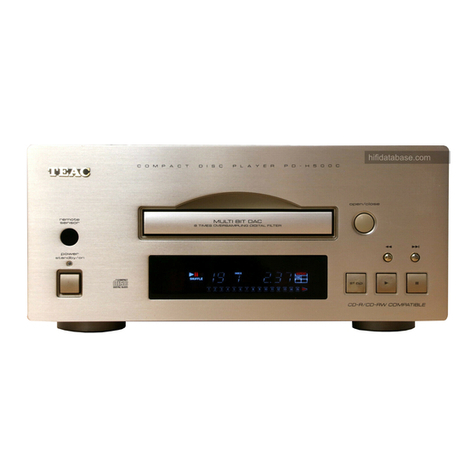
Teac SR-L100 User manual

ENGLISH
Z9A10358600
SR-L100
CD Music System
OWNER’S MANUAL
MANUEL DU PROPRIÉTAIRE
MANUAL DEL USUARIO
FRANÇAIS ESPAÑOL

2
CAUTION: TO REDUCE THE RISK OF
ELECTRIC SHOCK, DO NOT REMOVE
COVER (OR BACK). NO USER-SERVICEABLE
PARTS INSIDE. REFER SERVICING TO
QUALIFIED SERVICE PERSONNEL.
The lightning flash with arrowhead
symbol, within an equilateral triangle,
is intended to alert the user to the
presence of uninsulated “dangerous voltage”
within the product’s enclosure that may be of
sufficient magnitude to constitute a risk of
electric shock to persons.
The exclamation point within an
equilateral triangle is intended to alert
the user to the presence of important
operating and maintenance (servicing)
instructions in the literature accompanying the
appliance.
IMPORTANT SAFETY
INSTRUCTIONS
CAUTION
•Read all of these Instructions.
•Save these Instructions for later use.
•Follow all Warnings and Instructions marked
on the audio equipment.
1) Read Instructions — All the safety and
operating instructions should be read before
the product is operated.
2) Retain Instructions — The safety and
operating instructions should be retained for
future reference.
3) Heed Warnings — All warnings on the
product and in the operating instructions
should be adhered to.
4) Follow Instructions — All operating and
use instructions should be followed.
5) Cleaning — Unplug this product from the
wall outlet before cleaning. Do not use liquid
cleaners or aerosol cleaners. Use a damp cloth
for cleaning.
6) Attachments — Do not use attachments
not recommended by the product
manufacturer as they may cause hazards.
7) Water and Moisture — Do not use this
product near water — for example, near a
bath tub, wash bowl, kitchen sink, or laundry
tub; in a wet basement; or near a swimming
pool; and the like.
8) Accessories — Do not place this product
on an unstable cart, stand, tripod, bracket, or
table. The product may fall, causing serious
injury to a child or adult, and serious damage
to the product. Use only with a cart, stand,
tripod, bracket, or table recommended by the
manufacturer, or sold with the product. Any
mounting of the product should follow the
manufacturer’s instructions, and should use a
mounting accessory recommended by the
manufacturer.
9) A product and cart combination
should be moved with care. Quick
stops, excessive force, and uneven
surfaces may cause the product
and cart combination to overturn.
10) Ventilation — Slots and openings in the
cabinet are provided for ventilation and to
ensure reliable operation of the product and to
protect it from overheating, and these
openings must not be blocked or covered. The
openings should never be blocked by placing
the product on a bed, sofa, rug, or other
similar surface. This product should not be
placed in a built-in installation such as a
bookcase or rack unless proper ventilation is
provided or the manufacturer’s instructions
have been adhered to.
11) Power Sources — This product should be
operated only from the type of power source
indicated on the marking label. If you are not
sure of the type of power supply to your
home, consult your product dealer or local
power company. For products intended to
operate from battery power, or other sources,
refer to the operating instructions.
ENGLISH
3
12) Grounding or Polarization — This
product may be equipped with a polarized
alternating-current line plug (a plug having
one blade wider than the other). This plug will
fit into the power outlet only one way. This is
a safety feature. If you are unable to insert the
plug fully into the outlet, try reversing the
plug. If the plug should still fail to fit, contact
your electrician to replace your obsolete outlet.
Do not defeat the safety purpose of the
polarized plug.
13) Power-Cord Protection — Power-supply
cords should be routed so that they are not
likely to be walked on or pinched by items
placed upon or against them, paying particular
attention to cords at plugs, convenience
receptacles, and the point where they exit
from the product.
14) Outdoor Antenna Grounding — If an
outside antenna or cable system is connected
to the product, be sure the antenna or cable
system is grounded so as to provide some
protection against voltage surges and built-up
static charges. Article 810 of the National
Electrical Code, ANSI/NFPA 70, provides
information with regard to proper grounding
of the mast and supporting structure,
grounding of the lead-in wire to an antenna
discharge unit, size of grounding conductors,
location of antenna-discharge unit, connection
to grounding electrodes, and requirements for
the grounding electrode.
Note to CATV system installer:
This reminder is provided to call the CATV
system installer’s attention to Section 820-40
of the NEC which provides guidelines for
proper grounding and, in particular, specifies
that the cable ground shall be connected to
the grounding system of the building, as close
to the point of cable entry as practical."
ANTENNA
LEAD IN
WIRE
ANTENNA
DISCHARGE UNIT
(NEC SECTION 810-20)
GROUNDING CONDUCTORS
(NEC SECTION 810-21)
GROUND CLAMPS
POWER SERVICE GROUNDING
ELECTRODE SYSTEM
(NEC ART 250. PART H)
NEC - NATIONAL ELECTRICAL CODE
ELECTRIC
SERVICE
EQUIPMENT
Example of Antenna Grounding
as per National Electrical
Code, ANSI/NFPA 70
GROUND
CLAMP
15) Lightning — For added protection for this
product during a lightning storm, or when it is
left unattended and unused for long periods
of time, unplug it from the wall outlet and
disconnect the antenna or cable system. This
will prevent damage to the product due to
lightning and power-line surges.
16) Power Lines — An outside antenna
system should not be located in the vicinity of
overhead power lines or other electric light or
power circuits, or where it can fall into such
power lines or circuits. When installing an
outside antenna system, extreme care should
be taken to keep from touching such power
lines or circuits as contact with them might be
fatal.
17) Overloading — Do not overload wall
outlets, extension cords, or integral
convenience receptacles as this can result in
risk of fire or electric shock.
18) Object and Liquid Entry — Never push
objects of any kind into this product through
openings as they may touch dangerous
voltage points or short-out parts that could
result in a fire or electric shock. Never spill
liquid of any kind on the product.
19) Servicing — Do not attempt to service
this product yourself as opening or removing
covers may expose you to dangerous voltage
or other hazards. Refer all servicing to qualified
service personnel.
20) Damage Requiring Service — Unplug
this product from the wall outlet and refer
servicing to qualified service personnel under
the following conditions:
a ) when the power-supply cord or plug is
damaged.
b ) if liquid has been spilled, or objects have
fallen into the product.
c ) if the product has been exposed to rain or
water.
d ) if the product does not operate normally
by following the operating instructions. Adjust
only those controls that are covered by the
operating instructions as an improper
adjustment of other controls may result in
damage and will often require extensive work
by a qualified technician to restore the product
to its normal operation.

4
CAUTION
<DO NOT REMOVE THE EXTERNAL CASES
OR CABINETS TO EXPOSE THE
ELECTRONICS. NO USER SERVICEABLE
PARTS ARE WITHIN!
<IF YOU ARE EXPERIENCING PROBLEMS
WITH THIS PRODUCT, CONTACT TEAC FOR
A SERVICE REFERRAL. DO NOT USE THE
PRODUCT UNTIL IT HAS BEEN REPAIRED.
<USE OF CONTROLS OR ADJUSTMENTS OR
PERFORMANCE OF PROCEDURES OTHER
THAN THOSE SPECIFIED HEREIN MAY
RESULT IN HAZARDOUS RADIATION
EXPOSURE.
WARNING: TO PREVENT FIRE OR SHOCK
HAZARD, DO NOT EXPOSE THIS
APPLIANCE TO RAIN OR MOISTURE.
<Do not expose this apparatus to dripps or
splashes.
<Do not place any objects filled with liquids,
such as vases, on the apparatus.
<Do not install this apparatus in a confined
space such as a book case or similar unit.
<The apparatus draws nominal non-
operating power from the AC outlet with
its STANDBY/ON switch in the off position.
<The apparatus should be located close
enough to the AC outlet so that you can
easily grasp the power cord plug at any
time.
<An apparatus with Class !construction shall
be connected to an AC outlet with a
protective grounding connection.
e ) if the product has been dropped or
damaged in any way.
f ) when the product exhibits a distinct change
in performance _ this indicates a need for
service.
21) Replacement Parts — When replacement
parts are required, be sure the service
technician has used replacement parts
specified by the manufacturer or have the
same characteristics as the original part.
Unauthorized substitutions may result in fire,
electric shock, or other hazards.
22) Safety Check — Upon completion of any
service or repairs to this product, ask the
service technician to perform safety checks to
determine that the product is in proper
operating condition.
23) Wall or Ceiling Mounting — The
product should be mounted to a wall or ceiling
only as recommended by the manufacturer.
24) Heat — The product should be situated
away from heat sources such as radiators, heat
registers, stoves, or other products (including
amplifiers) that produce heat.
AC POWER CORD CONNECTION
CAUTION:
TO PREVENT ELECTRIC SHOCK, MATCH
WIDE BLADE OF PLUG TO WIDE SLOT,
FULLY INSERT.
For CANADA
CORDE DE CONNEXION CA
ATTENTION:
POUR ÉVITER LES CHOCS ÉLECTRIQUES,
INTRODUIRE LA LAME LA PLUS LARGE
DE LA FICHE DANS LA BORNE
CORRESPONDANTE DE LA PRISE ET
POUSSER JUSQU’AU FOND.
Pour le CANADA

ENGLISH
5
This equipment has been tested and found
to comply with the limits for a Class B digital
device, pursuant to Part 15 of the FCC
Rules. These limits are designed to provide
reasonable protection against harmful
interference in a residential installation. This
equipment generates, uses, and can radiate
radio frequency energy and, if not installed
and used in accordance with the
instructions, may cause harmful interference
to radio communications. However, there is
no guarantee that interference will not
occur in a particular installation. If this
equipment does cause harmful interference
to radio or television reception, which can
be determined by turning the equipment off
and on, the user is encouraged to try to
correct the interference by one or more of
the following measures:
• Reorient or relocate the equipment
and/or the receiving antenna.
• Increase the separation between the
equipment and receiver.
•Connect the equipment into an outlet on
a circuit different from that to which the
receiver is connected.
•Consult the dealer or an experienced
radio/TV technician for help.
CAUTION
Changes or modifications to this
equipments not expressly approved by TEAC
CORPORATION for compliance will void the
user’s warranty.
For U.S.A.
For U.S.A.
①
(rear panel of the unit)
This product has been designed and
manufactured according to FDA regulations
“title 21, CFR, chapter 1, subchapter J, based
on the Radiation Control for Health and Safety
Act of 1968“, and is classified as class 1 laser
product. There is not hazardous invisible laser
radiation during operation because invisible
laser radiation emitted inside of this product is
completely confined in the protective
housings.
The label required in this regulation is shown
①.
Optical pickup
Type : CMS-B35
Manufacturer : SAMSUNG ELECTRO-
MECHANICS CO, LTD.
Laser output : Less than 0.5 mW on
the objective lens
Wavelength : 760 - 800 nm

6
Contents
Read this before attempting any
operations
<As the unit may become warm during
operation, always leave sufficient space
around the unit for ventilation.
<The voltage supplied to the unit should
match the voltage as printed on the rear
panel. If you are in any doubt regarding
this matter, consult an electrician.
<Choose the installation location of your
unit carefully. Avoid placing it in direct
sunlight or close to a source of heat. Also
avoid locations subject to vibrations and
excessive dust, heat, cold or moisture.
<Do not place the unit on an
amplifier/receiver.
<Do not open the cabinet as this might
result in damage to the circuitry or
electrical shock. If a foreign object should
get into the unit, contact your dealer or
service company.
<When removing the power plug from the
wall outlet, always pull directly on the
plug, never yank the cord.
<To keep the laser pickup clean, do not
touch it. Always close the disc
compartment lid when not in use.
<Do not attempt to clean the unit with
chemical solvents as this might damage
the finish. Use a clean, dry cloth.
<Keep this manual in a safe place for
future reference.
Thank you for choosing TEAC. Read this
manual carefully to get the best
performance from this unit.
Before Using the Unit . . . . . . . . . . . . . . . . 6
Discs. . . . . . . . . . . . . . . . . . . . . . . . . . . . . 8
Connections . . . . . . . . . . . . . . . . . . . . . . 10
Unit Functions. . . . . . . . . . . . . . . . . . . . . 12
Unit Functions (Remote Control Unit) . . . 14
Display . . . . . . . . . . . . . . . . . . . . . . . . . . 15
Remote Control Unit. . . . . . . . . . . . . . . . 16
Setting the Clock . . . . . . . . . . . . . . . . . . 17
Basic Operation. . . . . . . . . . . . . . . . . . . . 18
Listening to CD. . . . . . . . . . . . . . . . . . . . 20
Programmed Playback. . . . . . . . . . . . . . . 22
Repeat Playback . . . . . . . . . . . . . . . . . . . 25
Shuffle Playback . . . . . . . . . . . . . . . . . . . 26
Listening to the Radio . . . . . . . . . . . . . . . 26
Preset Tuning . . . . . . . . . . . . . . . . . . . . . 28
Listening to an External Source . . . . . . . . 29
Timer . . . . . . . . . . . . . . . . . . . . . . . . . . . 30
Sleep Timer. . . . . . . . . . . . . . . . . . . . . . . 33
Troubleshooting . . . . . . . . . . . . . . . . . . . 34
Specifications . . . . . . . . . . . . . . . . . . . . . 35
Before Using the Unit

ENGLISH
7
Beware of condensation
When the unit (or a disc) is moved from a
cold to a warm place, or used after a
sudden temperature change, there is the
danger of condensation; vapor in the air
could condense on the internal
mechanism, making correct operation
erratic or impossible. To prevent this, or if
this occurs, leave the unit turned on for
one or two hours. The unit will stabilize
at the temperature of its surroundings.
Maintenance
If the surface of the unit gets dirty, wipe
with a soft cloth or use a diluted mild
liquid soap. Be sure to remove any excess
liquid completely. Do not use thinner,
benzine or alcohol as they may damage
the surface of the unit. Allow the surface
of the unit to dry completely before
using.
DO NOT MOVE THE UNIT DURING
PLAYBACK
During playback, the disc rotates at high
speed. Do NOT lift or move the unit
during playback. Doing so may damage
the disc or the unit.
WHEN MOVING THIS UNIT
When moving or packing the unit, be
sure to remove the disc. Moving this unit
with the disc loaded may result in
damage to this unit.
CAUTION
Ensure this product is not exposed to
dripping or splashing and that no object
filled with liquids, such as vases, is placed
on the product.
Do not install this equipment in a
confined space such as a book case or
similar unit. Allow adequate air circulation
around this product.

8
Discs which can be played on this unit:
•Conventional audio CDs bearing the COMPACT DISC DIGITAL AUDIO
logo on the label:
•Properly finalized CD-R and CD-RW discs
Note:
<Depending on the quality of the disc and/or the condition of the
recording, some CD-R/CD-RW discs may not be playable.
<Copy-protected discs and other discs that do not conform to the CD
standard may not play back correctly in this player. If you use such discs in
this unit, TEAC Corporation and its subsidiaries cannot be responsible for
any consequences or guarantee the quality of reproduction. If you
experience problems with such non-standard discs, you should contact
the producers of the disc.
<Always place the disc on the disc tray with the label side up. (Compact
discs can be played or recorded only on one side.)
<To remove a disc from its storage case, press down on the center of the
case and lift the disc out, holding it carefully by the edges.
How to hold the disc
<Should the disc become dirty, wipe the surface radially (from the center
hole outward towards the outer edge) with a soft, dry cloth:
<Never use such chemicals as record sprays, antistatic sprays or fluid,
benzine or thinner to clean the discs. Such chemicals will do irreparable
damage to the disc’s plastic surface.
Discs
How to remove the disc

ENGLISH
9
<Discs should be returned to their cases after use to avoid dust and
scratches that could cause the laser pickup to “skip.”
<Do not expose discs to direct sunlight or high humidity and temperature
for extended periods. Long exposure to high temperatures will warp the
disc.
<Do not play any disc that is warped, deformed or damaged.
Playing such discs may cause irreparable harm to the playing mechanisms.
<CD-R and CD-RW discs are more sensitive to the effects of heat and
ultraviolet rays than ordinary CDs. It is important that they are not stored
in a location where direct sunlight will fall on them, and away from
sources of heat such as radiators or heat-generating electrical devices.
<Printable CD-R and CD-RW discs aren’t recommended, as the label side
might be sticky and damage the unit.
<Do not stick papers or protective sheets on the discs and do not use any
protective coating spray.
<Use a soft oil-based felt-tipped pen to write the information on the label
side. Never use a ball-point or hard-tipped pen, as this may cause damage
to the recorded side.
<Never use a stabilizer. Using commercially available CD stabilizers with
this unit will damage the mechanisms and cause them to malfunction.
<Do not use CDs with an irregular shape (octagonal, heart shaped,
business card size, etc.). CDs of this sort can damage the unit:
<If you are in any doubt as to the care and handling of a CD-R/CD-RW
disc, read the precautions supplied with the disc, or contact the disc
manufacturer directly.

10
Connections
CAUTION:
<Switch off the power before making connections.
<Read the instructions of each component you intend to use with this unit.
<Be sure to insert each plug securely. To prevent hum and noise, do not bundle the
connection cords.
A
B C
D

11
ENGLISH
FM antenna
While in FM mode, tune in an FM station and extend the lead to find
the best position for the reception. This antenna may need to be
repositioned if you move your unit to a new location.
PHONES
For private listening, insert the headphones plug into this jack, and
adjust the volume using the VOLUME button.
DST (Daylight Saving Time)
Select ON to put the clock one hour ahead. Select OFF to turn the DST
off.
AC Power Cord
Plug this AC power cord into an AC wall socket.
<Be sure to connect the power cord to an AC outlet which supplies the
correct voltage.
<Hold the power plug when plugging or unplugging the power cord.
Never pull or yank on the power cord.
AUX IN
You can connect a portable audio player to this jack.
See page 29 for details.
E
D
C
B
A

12
Unit Functions
B
C
F
E
G
D
J
I
A
B
A
DC E F G IH J
L
M
N
K
O

ENGLISH
13
VOLUME
Turn the rotary knob (or press the
VOLUME buttons of the remote control
unit) to adjust the volume level.
STANDBY/ON
Use this button to turn the unit on or
standby.
CD
Use this button to select CD mode.
TUNER (FM/AM)
Use this button to select TUNER mode.
In TUNER mode, press this button to
select FM or AM.
AUX
When a component is connected to the
AUX IN jack, use this button to listen to
the external source.
TALK MODE
In TUNER mode, use this button to turn
on or off the Talk mode.
SNOOZE/SLEEP
Use this button to set sleep timer.
When the unit is turned on by the timer,
press this button to turn the unit standby
for 10 minutes.
Open/Close
Press this mark to open and close the
disc cover.
H
G
F
E
D
C
The equipment draws a nominal
amount of power from the AC outlet
even with its STANDBY/ON switch in the
STANDBY position.
B
AStop (H)
In CD mode, use this button to stop
playback.
Play/Pause (y/J)
In CD mode, use this button to start or
pause playback.
ALARM 1/2
Use these buttons to set timers.
ALARM CHECK
Use this button to check the timer
setting.
Skip (.//)/TUNING/
CLOCK ADJUST
In CD mode, turn this rotary knob to skip
tracks.
In TUNER mode, turn this rotary knob to
tune in a station.
This rotary knob is also used to adjust
time, change timer settings, etc.
Slot for the remote control unit
Keep the remote control unit in this slot
when not in use.
TIME ADJUST
Open the disc cover and hold down the
TIME ADJUST button for more than 3
seconds to enter the clock setting mode.
Then adjust the clock using the Skip
rotary knob.
O
N
M
L
K
J
I

14
Unit Functions (Remote Control Unit)
TUNING
In TUNER mode, use this button to tune
in a station.
In CD mode, use this button to skip
tracks.
AUTO TUNING
In TUNER mode, use this button to tune
in a station automatically.
In CD mode, use this button to search for
a part of a track.
PROGRAM/MEMORY
In CD mode, use this button to program
tracks.
In TUNER mode, use this button to preset
stations.
DIMMER
Use this button to dim the display.
BASS
Use this button and the VOLUME buttons
to adjust the level of low frequency
sound range.
TREBLE
Use this button and the VOLUME buttons
to adjust the level of high frequency
sound range.
F
E
D
C
B
A
A
B
C
D
E
I
H
J
F
G

ENGLISH
15
EDCBA F G
J I H
Lights when the ALARM 1 or 2 is on.
Shows the sleep time, preset channel or
track number.
Band indicator
Lights during repeat playback.
Shows frequency, volume, etc.
Tuned frequency range
Lights when the Snooze function is
active.
Digital clock
Lights during programmed playback.
Lights during shuffle playback.
J
I
H
G
F
E
D
C
B
A
Display
MUTING
Use this button to mute the sound.
SHUFFLE
In CD mode, use this button to play all
tracks on the CD at random.
REPEAT
In CD mode, use this button for repeat
playback.
PRESET
In TUNER mode, use this button to select
a preset station.
Note:
To simplify explanations, instructions in
this manual refer to the names of the
buttons and controls on the front panel
only. Associated controls on the remote
control will also operate similarly.
J
I
H
G

16
The provided Remote Control Unit allows
the unit to be operated from a distance.
When operating the remote control unit,
point it towards the remote sensor on the
front panel of the unit.
<Even if the remote control unit is
operated within the effective range,
remote control operation may be
impossible if there are any obstacles
between the unit and the remote control.
<If the remote control unit is operated near
other products which generate infrared
rays, or if other remote control devices
using infrared rays are used near the unit,
it may operate incorrectly. Conversely, the
other products may also operate
incorrectly.
1
2
3
1. Remove the battery compartment cover.
2. Put in the lithium battery (CR2032, 3V).
3. Close the cover.
Battery Replacement
If the distance required between the
remote control unit and main unit
decreases, the battery is exhausted. In this
case, replace the battery with a new one.
Precautions concerning batteries
Do not heat or disassemble batteries and
never dispose of old batteries by throwing
them in a fire.
Remote Control Unit
Battery Installation

ENGLISH
17
Setting the Clock
Turn the Skip rotary knob (.or
/) to adjust the clock.
3
Gently close the disc cover by hand.
When closing, press the OPEN/CLOSE
mark (L).
5
Press and hold the TIME ADJUST
button for more than 3 seconds and
release it when the time display
starts blinking.
2
<If you leave the unit idle for 60 seconds,
the time setting mode will be cancelled.
Press the OPEN/CLOSE mark (L) to
open the disc cover.
1
4 35
12
<If the unit is disconnected from the
power supply for about 30 minutes, the
clock setting will be reset.
Press the TIME ADJUST button.
The clock starts from 00 second.
4
DST (Daylight Saving Time)
Select ON to put the clock one hour
ahead. Select OFF to turn the DST off.

18
Basic Operation
The button of the selected source will
light.
<To listen to an external source connected
to the AUX IN jack, press the AUX
button.
Press the STANDBY/ON switch to
turn the unit on.
1
<The unit turns on with the source that
was last selected.
<You can also use the CD, TUNER or AUX
button to turn the unit on.
Press the CD, TUNER or AUX button
to select a source.
2
The volume is adjustable from MIN (00)
to MAX (40). You can hold down the
VOLUME – or + buttons of the remote
control unit to reduce or bring up the
volume continuously.
Play the source, and adjust the
volume using the VOLUME rotary
knob.
3
2
1
3

ENGLISH
19
Insert the headphones plug into the
PHONES jack, and adjust the volume.
CAUTION
Always lower the volume level prior to
plugging in your headphones. TO AVOID
DAMAGING YOUR HEARING - Do not
place your headphones on your head
until after you have plugged them in.
<While muting is engaged, “MUTING”
blinks on the display.
<If you change the volume during the
muting, the muting will be canceled.
Headphones
Muting
To mute the sound temporarily, press the
MUTING button. Press the MUTING
button again to restore the sound.
Dimmer
Tone Control
1. Press the BASS or TREBLE button.
To adjust the level of low frequency
sound range, press the bass button.
To adjust the level of high frequency
sound range, press the treble button.
2. Within 5 seconds, press the VOLUME
buttons to change the setting.
The level can be adjusted from –5 to +5.
You can dim the front panel’s display by
pressing the DIMMER button.
<This function will be cancelled when the
STANDBY/ON switch is pressed.
<When you set the sleep timer, the display
is dimmed automatically.

20
Press the CD button to select “CD”.
1
When no disc is set, “NODISC” appears
on the display.
<You can also use the Play/Pause button
(y/J) to select “CD”. If a disc is already
installed, playback will start.
Press the OPEN/CLOSE mark (L) to
open the disc cover.
2
Put a disc onto the center spindle of
the player with the label side up.
Press the disc onto the spindle until a
slight “click” is heard indicating the disc
is mounted correctly.
3
<Never put more than one disc in the
mechanism at a time.
<Ensure that the disc is correctly mounted
on the spindle and locked in place.
Listening to CD 1
Gently close the disc cover by hand.
When closing, press the OPEN/CLOSE
mark (L).
4
<It takes a few seconds for the unit to
load the disc. No buttons will work
during loading. Wait until the total
number of the tracks is displayed.
Press the Play/Pause button (y/J) to
start playback.
5
Playback starts from the first track of the
disc.
<When the playback of all the tracks has
finished, the unit stops automatically.
1 4
25
3
total number of the tracks
total play time of the disc
current track number
elapsed time of current track
Other manuals for SR-L100
2
Table of contents
Languages:
Other Teac CD Player manuals
Popular CD Player manuals by other brands

Rockford Fosgate
Rockford Fosgate RFX-8115 Installation reference sheet

Optimus
Optimus CD-5500 owner's manual

JB Systems
JB Systems mcd 2.2 Operation manual

Sony
Sony D-NF400 - ATRAC Walkman Portable CD Player Specifications

Philips
Philips Expanium EXP 210 Service manual

Denon
Denon DCD-201SA operating instructions