TECH hotun detect HD-S1P Guide

Water & Temperature Sensing Alarm System (Battery Operated)
(Product Code HD-S1P & HD-S2P)
General overview of hotun detect
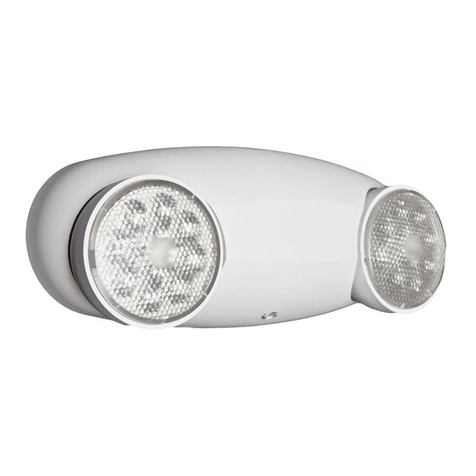
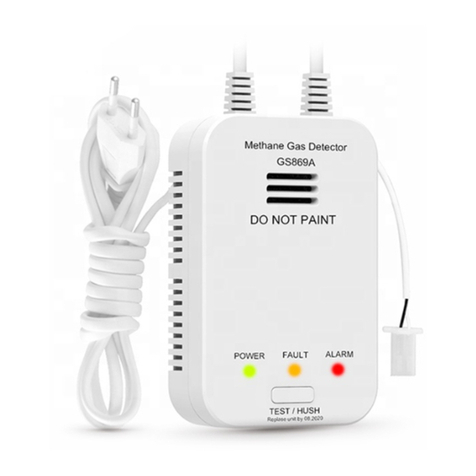
• Audible and visual alarm unit for T/PRV discharges (complies with G3 regulations to aid visually and mobility impaired)
• Helps save water and energy
• Simple, quick, hook on design: Will t all new and existing hotun dry trap tundishes
• Senses presence of water and temperature in four stages (up to 20°C, 20-60°C, 60-85°C, >85°C)
• Four alarm stages gives the plumber a better indication of fault when triaging the issue over the phone Giving
increased chance of rst time repair
• Unit operational indication
• Battery low power alarm
• Simple Mute (12 hour) and reset operation
• Battery operated (2032 coin cell, supplied with unit.) Requires no specialist electrical knowledge to t
1. With the battery sliding door facing
up [a] place battery in battery door [a]
ensuring that the with battery positive
(+) is inserted face down [b].
1. Before installation onto
tundish carefully, slightly pull
the sensor [a] away from the
casing.
2. Insert battery sliding door housing
(with battery) [b] into detect casing [c].
Ensure the metal clip [d] is on top of
battery.
2. Ensuring that the sensor is
inserted inside of the tundish
seat the unit’s mounting hook
[b], onto tundish sides.
3. Push battery door housing [b]
completely into casing [c] and closes
with a click.
3. If required, hotun detect
can be secured to the hotun
tundish using the supplied
cable tie.
4. Feed the cable ties through
holes [c] and wrap zip wire
around the tundish and
secure lightly, trimming any
excess cable tie to suit
When a fresh battery has been inserted correctly the unit with ash a GREEN light (every 8 seconds). Should the battery have
insucient power, the unit will emit a single beep with alternate ashing RED & GREEN lights.
The unit has a simple mounting (hook) arrangement and can be secured to the hotun tundish with the supplied cable tie.
When the battery requires replacing, insert a small at bladed screwdriver into the battery compartment door at the base of
the unit and gently prise the compartment open.
1. Installation – Battery mounting
2. Installation – onto hotun tundish
3. Battery replacement
Installation, Operation & Maintenance Instructions
Prefer to watch a video of the installation?
View it now at www.hotun.co.uk
a
b
b
c
cb
d
a
bc
Patent No. GB2522634

Temp Audible Visual Repeat (seconds)
Battery normal operation N/A None 1 x Green ash 8
Stage 1 warning Up to 20°C 1 beep 1 x Red ash 20
Stage 2 warning 20 – 60°C 2 beeps 2 x Red ash 20
Stage 3 warning 60 – 85°C 3 beeps 3 x Red ash 20
Stage 4 warning >85°C 2 long beeps 2 x long Red ashes 20
Battery low power 1 x beep Rapid Red/Green alternating 30
Mute N/A None Amber ashing for 2 seconds None
Mute cancel N/A 1 x beep 1 x Green ash As stage warning
Warning Reset N/A 1 x long beep Rapid Green ashing for 2 seconds N/A
Operation
Normal Operation
When the battery is correctly tted, the unit will give a single green light ash every 8 seconds
Commissioning
Once the battery is inserted, slightly wet the sensor tip and the unit will go into an alarm stage warning.
To reset this alarm, either remove and re-insert the battery or reset the unit according to the procedure below.
Alarm sequence
Stage 1 Warning
Water present at a temperature up to 20°C - A single beep + Red ash every 20 seconds
Stage 2 Warning
Water present at a temperature between 20°C & 60°C - two beeps + Red ash every 20 seconds
Stage 3 Warning
Water present at a temperature from 60°C to 80°C –three beeps + Red ashes every 20 seconds
Stage 4 Warning
Water present from 86 Deg°C and above - two successive long beeps + Red ashes every 20 seconds
Low Battery Warning
Single beep + rapid red/green alternate ashes every 30 seconds
Muting
Press and hold for 2-3 seconds. Amber ashing for 2 seconds (no beep) Mute lasts for 12 hours.
Operation when muted
All warnings continue as above but with lights only (no sounds)
Mute Cancel
Muting is cancelled by a single press of the mute button and conrmation is a single beep with green ash
Reset unit
PLEASE NOTE: Resetting the alarm can only be done from the muted setting.
Press and hold for 7-8 seconds. When the unit gives a single long beep together with rapid ashing green lights
for 2 seconds, then can the button be released. The unit has now been reset and will revert to normal operation.
Table of operation
RA Tech UK Ltd.
© 2020 RA Tech UK Ltd.
YEAR
WARRANTY
2
+ 1 YEAR FREE
IF REGISTERED
Notes
Battery low power indication cannot be reset. Please replace battery.
The warning alarm can only be reset from its muted setting.
Maintenance
There are no special maintenance requirements.
If the low battery warning sounds, replace the battery to keep the unit in operational condition.
Warranty (2 years standard + 1 year if registered)
RA Tech UK Ltd provides a 2 year warranty from time of purchase for any manufacturing defect with the product. When you register hotun detect
within three months of the purchase date we will give you an additional ONE year Warranty.
Warranty claims procedure
If you think you have a faulty product, please ll out our warranty returns form on our website and upload your sales invoice (or other proof of
purchase) and once we have acknowledged your claim and received the old unit, we will replace the faulty product and refund the cost of your
postage. This should take no longer than a few days.
Alternatively: Please return the faulty product from where you purchased. The Merchant will contact us by phone and provided the merchant holds
hotun detect in stock, an authorisation to replace the unit will be given by RA Tech with immediate eect (under our Warranty no quibble promise).
This manual suits for next models
1
