tech21 BSDR2-OM User manual
POWER REQUIRE ENTS
*Operable with phantom power supply, minimum 24V DC regulated,
however, 48V DC regulated is recommended in order to illuminate ED.
*Utilizes standard 9V alkaline battery (not included). To install, simply remove
door cover. (NOTE: The Input activates battery. To conserve energy, unplug
when not in use.) Power Consumption: approx. 6mA.
*USE DC POWER SUPP Y ONLY! Failure to do so may damage the
unit and void warranty. DC Power Supply Specifications:
-9V DC regulated or unregulated, 100mA minimum;
-2.1mm female plug, center negative (-).
Optional factory power supplies are available: Tech 21 odel
#DC4 or #DC9.
WARNINGS:
*Attempting to repair unit is not recommended and may void warranty.
*Missing or altered serial numbers automatically void warranty. For your own
protection: be sure serial number labels on the unit’s back plate and exterior
box are intact, and return your warranty registration card.
ONE YEAR LI ITED WARRANTY. PROOF OF PURCHASE
REQUIRED. Manufacturer warrants unit to be free from defects in materials
and workmanship for one (1) year from date of purchase to the original pur-
chaser and is not transferable. This warranty does not include damage resulting
from accident, misuse, abuse, alteration, or incorrect current or voltage. If unit
becomes defective within warranty period, Tech 21 will repair or replace it
free of charge. After expiration, Tech 21 will repair defective unit for a fee.
ALL REPAIRS for residents of U.S. and Canada: Call Tech 21 for Return
Authorization Number. Manufacturer will not accept packages without
prior authorization, pre-paid freight (UPS preferred) and proper insurance.
FOR PERSONAL ASSISTANCE: Contact Tech 21 weekdays from
9:00 AM to 5:00 PM, EST.
HAND-BUILT IN THE U.S.A. using high-quality components
sourced domestically and around the globe.
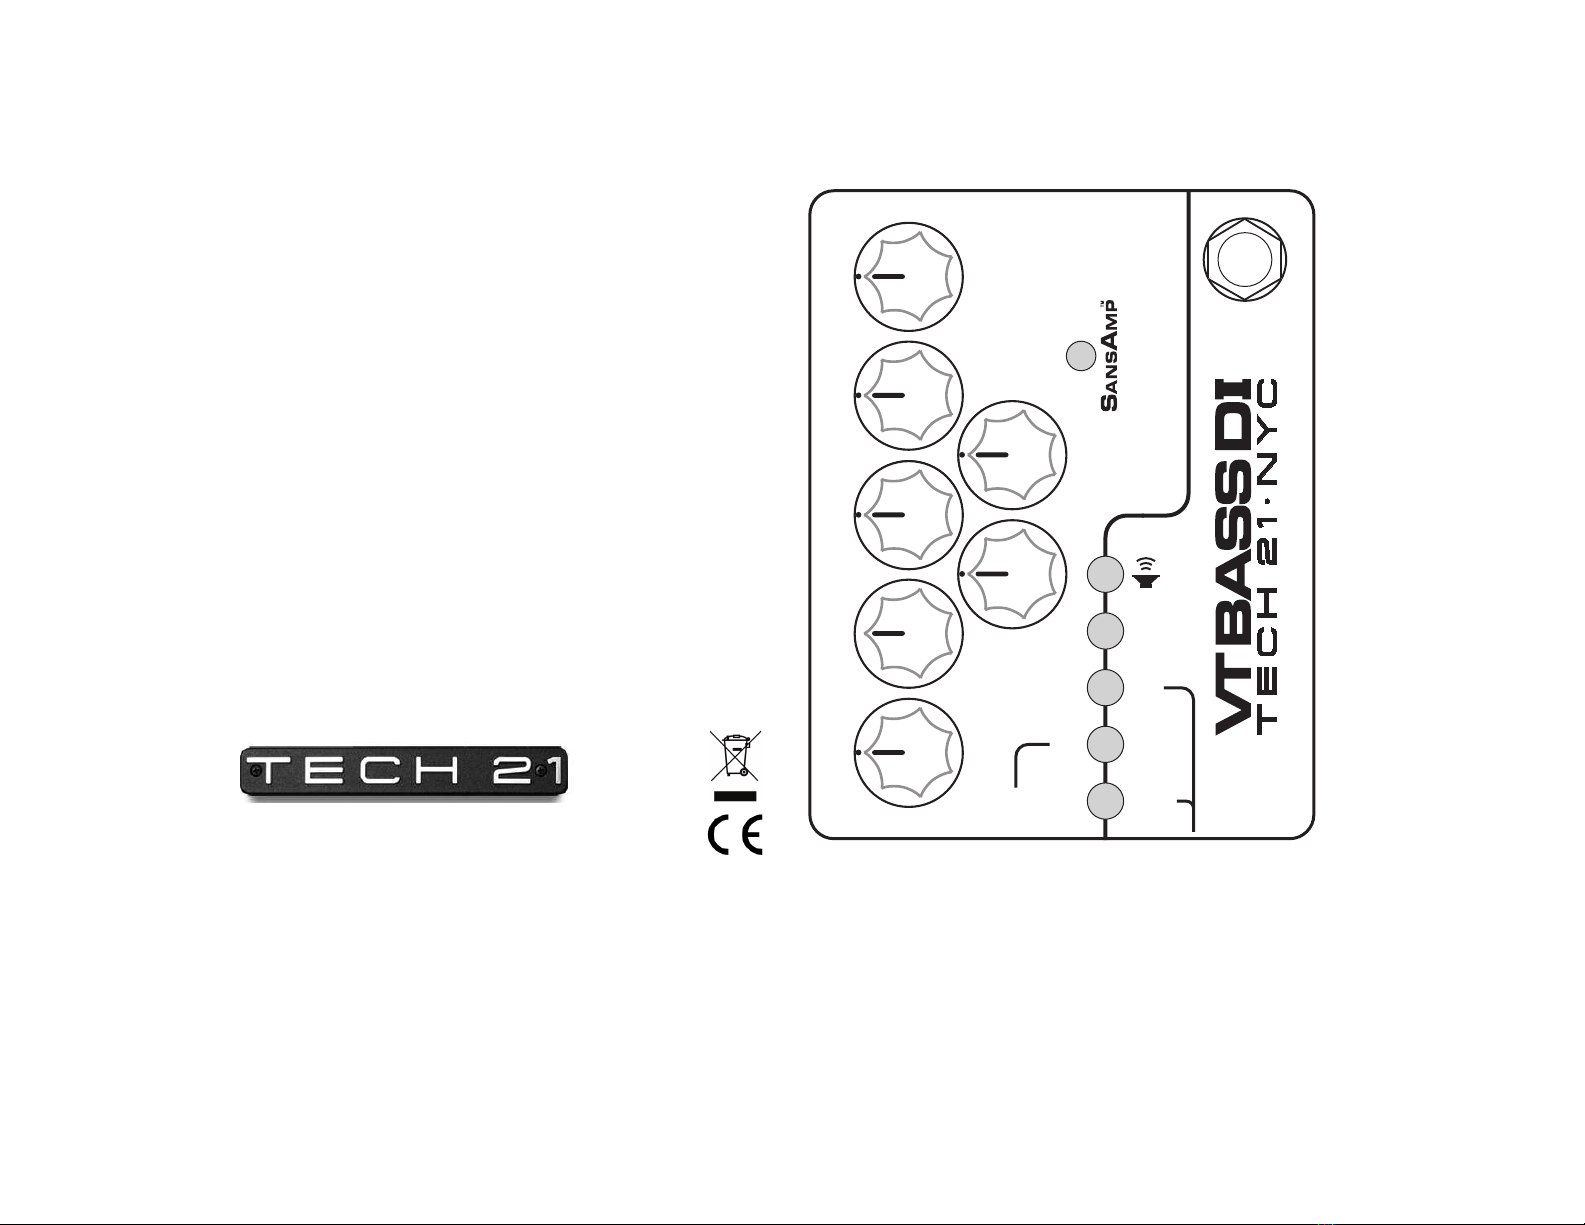
LEVEL BLEND MID CHARACTER DRIVE
LOW
PHANTOM
&GROUND
CONNECT
+10dB
1/4“
INPUT
OUT
PARALLEL
OUTPUT
-20dB
XLR BITE
HIGH
T: 973-777-6996 • F: 973-777-9899
E: [email protected] • www.tech21nyc.com
©2013 Tech 21 USA, Inc. (rev 08.18)

PRODUCT OVERVIEW
The SansAmp Character Series VT Bass DI offers a historical journey through
the most coveted Ampeg®-style bass amp rigs. This multi-function pedal has an
abundance of knob controls, is easy to use, and features our proprietary, 100%
analog SansAmp technology. The continuously-variable Character control
sweeps through decades of distinctive sounds. You can explore and tailor vari-
ous eras simply by turning a knob.
The VT Bass DI functions as a pre-amp, a stomp box, and as a direct box. In
bypass, VT Bass DI converts the instrument signal to a low impedance bal-
anced output. This prevents signal loss and sound quality deterioration caused
by long cable lengths. When you engage the SansAmp Tube Amplifier
Emulation circuitry via the on-board footswitch, it not only converts the signal,
it gives you the sound and responsiveness of a miked-up pro stage rig --direct
into a recording console or P.A. system. You can also simultaneousl plug
straight into a power amp or conventional bass amp.
As with each SansAmp model, the controls are designed to give ou the flexi-
bility to customize your own sound. After all, the greatest inspiration comes
from having the sound that’s right for you.
APPLICATIONS
WITH A BASS A P RIG:
-As a Pre-Amp: Run the 1/4” Output of VT Bass DI directly into the
power amp input, a.k.a. “effects return” (if applicable), of an amp. This will
bypass the tone-coloring pre-amp section of the amp rig.
-As a Stomp Box: Run the 1/4” Output into the front input of an amp.
For best results, keep VT Bass DI’s Level close to unity gain so as not to
overload the amp’s input, which could yield undesirable distortion.
TO DRIVE A POWER A P: Run the 1/4” Output, or the XLR
Output to the corresponding input of a power amp, and adjust your stage vol-
ume with the Level control of VT Bass DI.
NOTE: When running into the power amp input of an amp or a power amp
alone, make sure to set the Output Level Switches as follows:
If using 1/4-inch: +10dB engaged (in position).
If using X R: -20dB disengaged (up position).
Then adjust Level as needed. If you are so inclined, this is the time to crank it!
TO RECORD DIRECT: Plug the XLR or 1/4” Output directly into the
input of a mixer/recorder. Work with the input trim control on the mixer/
recorder and be sure not to overload its input. If the Level on the VT Bass DI
is below 12 o’clock and is overloading the board, use the respective output
level switch to reduce the output:
If using 1/4-inch: +10dB disengaged (up position).
If using X R: -20dB engaged (in position).
Bear in mind full-range systems yield a wide frequency response. Therefore,
we suggest you start with the EQ levels at 12 o’clock and then increase/
decrease to taste.
GUIDE TO CONTROLS
DRIVE adjusts the overall amount of gain and overdrive, similar to when the
output section of a tube amp is being pushed.
CHARACTER sweeps through an entire range of tonal possibilities asso-
ciated with Ampeg®-style amplifiers. In addition to modifying the frequency
response, the Character control also influences the attack and drive character-
istics. Therefore, you may need to adjust your gain and tone settings after
tweaking the Character control.
Settings below 12 o’clock will give you the ‘70s powerhouse, the SVT.
Around 12 o’clock will introduce you to the studio staple, the flip top.
Above 12 o’clock increases the gain and crunch for less polite, modern
rock, indie bass sounds.
Full up gives you distorted bass tones from Yes to Crimson to King’s X styles.
ID, LOW, HIGH. Unlike passive controls that only cut, these active
tone controls cut or boost
±
12dB from unity gain (12 o’clock). Mid is 1kHz.
ow is 125 Hz. High is 3.2kHz.
2
1

BLEND allows you to blend the direct instrument signal with SansAmp
Tube Amplifier Emulation circuitry. In most cases, you will probably have this
set at maximum (100% SansAmp). For certain applications, however, such as
an ultra-transparent sound or for use with piezo pickup-equipped instruments,
you may want to blend-in the direct signal to achieve your desired sound.
Note: When Blend is at minimum, the SansAmp Tube Amplifier Emulation cir-
cuitry is bypassed. However, the Mid, ow, High and evel controls remain active.
LEVEL adjusts the output level of both the 1/4” and X R outputs.
BITE
Engaged (in position), Bite activates a presence boost and subsonic filter. This
tightens up the sound when you are in distorted settings and adds definition to
your notes when playing in clean settings.
SPEAKER SIMULATION
Speaker simulation is an integral part of the SansAmp circuitry. The VT Bass DI
is tuned to match 10-inch American-style bass speakers. It is designed for a
smooth, even response as would be achieved by a multiply-miked cabinet,
without the peaks, valleys, and notches associated with single miking. The
shape of the speaker curve will not adversely effect or interfere with the fre-
quency response of your own cabinet. The speaker simulation works in tan-
dem with the EQ controls to custom tailor the overall sound.
If desired, however, you can defeat the speaker simulation by disengag-
ing the speaker switch (up position).
THE INS AND OUTS
Follow Standard Audio Procedure to avoid unwanted and potentially speaker-
damaging “pops” when connecting or disconnecting any equipment:
Always mute mixing board and/or turn down amp volume
before plugging or unplugging!
I PORTANT: TURN ON FIRST. TURN OFF LAST.
INPUT: 1/4”, 1megOhm, instrument level. Switches battery power on/off.
To avoid battery drain, unplug when unit is not in use. AND...
DON’T FORGET TO UTE!
PARALLEL OUTPUT: 1/4” unbalanced direct output is “hard-wired”
parallel with input jack. Instrument signal passes through, UNEFFECTED, to
the input of your stage amplification system.
BALANCED XLR OUTPUT: Balanced low Z output. Sends effected
or uneffected signal to mixing console/recorder, depending on the orientation
of the Footswitch.
XLR Output Level Switch: -20dB pad to match the output to
equipment with different input level requirements. Disengaged (up position),
the output is 0dB. Engaged (in position), the output is -20dB.
1/4” OUTPUT: Unbalanced low Z output. Sends effected or uneffected
signal to amp rig or power amp, as per the orientation of the Footswitch.
1/4” Output Level Switch: +10dB boost to match the output to
equipment with different input level requirements. Disengaged (up position),
the output is -10dB. Engaged (in position), the output is 0dB.
FOOTSWITCH, with corresponding LED indicator: Engages/dis-
engages SansAmp Tube Amplifier Emulation circuitry. Active, ED will be on.
Tonality and gain structure are affected as determined by the setting of the
controls. Delivers effected signal through the XLR Output and 1/4” Output.
Inactive, ED will be off. VT Bass DI functions an active transparent direct box
and does not sonically alter the instrument signal.
34

PHANTOM POWER
Allows you to “tap into” the power of a suitably equipped mixer, which, today,
most are. As the 3-conductor X R sends the audio signal to the input of a
mixer, the mixer sends voltage back to the unit via the same 3 wires, eliminat-
ing the need for an external power supply. Consult your mixer’s owner’s man-
ual for set-up instructions. For live and studio use, let the engineer know your
VT Bass DI is phantom power operable.
PHANTO & GROUND CONNECT SWITCH: When
engaged, the ground connects and unit will accept phantom power through the
XLR Output. Disengaged, the ground of your stage system and other intercon-
nected gear is lifted (isolated) from the ground of the mixing console.
With a mixer only: If you are plugging your bass into the VT Bass DI and
taking the XLR Output to a mixer --and do not have any other
grounded equipment connected in the setup-- you will have to push
the switch in to connect the ground and engage the phantom power.
With a mixer and bass amp: If you are going to the mixer via the XLR
and using the 1/4” Output or Parallel Output to feed a bass amp (with its own
AC ground), you should have the switch disengaged (in the up position) to be
in “Ground ift” mode. If you experience hum and/or buzz with the switch in
either position, there is probably a problem with the AC outlets you are plug-
ging into.
NOTE: If using vintage equipment without proper grounds, take extra care
connecting it to modern grounded equipment. Any inadequacies of the ground
in vintage gear could result in damaging anything it is connected to.
NOTE: While operating under phantom power, we recommend keeping a 9V
alkaline battery installed at all times to avoid the previously mentioned “pops”
when lifting the ground.
NOTEWORTHY NOTES & CONSIDERATIONS
1) VT Bass DI is an interactive tool. It will react differently to various
signal levels, as well as your individual touch. For instance, a hotter signal and a
heavy hand will increase the gain structure and result in more overdrive. A
cooler signal and a light touch decreases the gain structure for a cleaner sound.
By using Drive, Character and the EQ controls, you can achieve the proper
mix of tonality and gain structure that best suits your style.
2) The noise level of VT Bass DI is exceptionally low. However, it
may amplify noise emanating from the input source. Bear in mind that VT Bass
DI’s controls are unusually sensitive and do not require maximum levels of
input to achieve high levels of output. To minimize noise going into VT Bass DI,
we recommend the following:
a) Active electronic instruments should have tone controls
positioned flat. If you need to boost, do so slowly and sparingly.
b) Passive electronic instruments should have volume and
tone controls set at maximum.
3) When you push VT Bass DI to saturation, you get enhanced harmonics,
just as you would with an overdriven tube amplifier. Depending on the setting,
the unique circuitry limits transient peaks for an even meter reading, so that
outboard compressors or limiters may not be necessary.
4) Using effects. One of the key attributes of SansAmp is the responsive-
ness to the dynamics and nuances of your playing technique. Therefore, your
bass should be plugged directly into the SansAmp and effects should be placed
after the SansAmp. If, however, you prefer to place an effect before SansAmp,
be sure to set the output level of the effect at unity gain with the output level
of the instrument.
56

LEVEL BLEND MID CHARACTER DRIVE
LOW HIGH
SVT®-Style
LEVEL BLEND MID CHARACTER DRIVE
LOW HIGH
FAT TUBE
LEVEL BLEND MID CHARACTER DRIVE
LOW HIGH
FLIP TOP-Style
LEVEL BLEND MID CHARACTER DRIVE
LOW HIGH
RAGE
SAMPLE SETTINGS
LEVEL BLEND MID CHARACTER DRIVE
LOW HIGH
THUMPY FUNK
LEVEL BLEND MID CHARACTER DRIVE
LOW HIGH
FUZZED OUT
LEVEL BLEND MID CHARACTER DRIVE
LOW HIGH
WARM COMPRESSION
LEVEL BLEND MID CHARACTER DRIVE
LOW HIGH
YES-style
®Registered trademark.
Names of sample settings are intended for descriptive purposes only.
Note: In all settings, BITE switch is ON.

LEVEL BLEND MID CHARACTER DRIVE
LOW HIGH
Name/Description _____________________________________
LEVEL BLEND MID CHARACTER DRIVE
LOW HIGH
Name/Description _____________________________________
LEVEL BLEND MID CHARACTER DRIVE
LOW HIGH
Name/Description _____________________________________
LEVEL BLEND MID CHARACTER DRIVE
LOW HIGH
Name/Description _____________________________________
LEVEL BLEND MID CHARACTER DRIVE
LOW HIGH
Name/Description _____________________________________
LEVEL BLEND MID CHARACTER DRIVE
LOW HIGH
Name/Description _____________________________________
LEVEL BLEND MID CHARACTER DRIVE
LOW HIGH
Name/Description _____________________________________
LEVEL BLEND MID CHARACTER DRIVE
LOW HIGH
Name/Description _____________________________________
CUSTOM SETTINGS
Table of contents
Other tech21 Music Equipment manuals

tech21
tech21 Character Plus Series User manual

tech21
tech21 Richie Kotzen RK5 Fly Rig User manual

tech21
tech21 SansAmp YYZ User manual

tech21
tech21 VT Bass 1000 User manual

tech21
tech21 SansAmp Geddy Lee MP40 Limited Edition User manual

tech21
tech21 Fly Rig RK5 v2 User manual

tech21
tech21 SansAmp GED-2112 User manual

tech21
tech21 Boost D.L.A User manual

tech21
tech21 SansAmp VT BASS User manual


