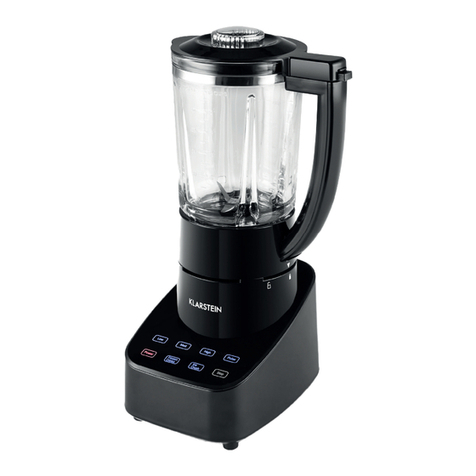
Technica 242010 User manual

User manual
Food Mixer
Model:
242010, 242020, 242030
1.00
Please read the instruction thoroughly before using the machine for safety & keep it for future reference
Translation of the original instructions

2

3
Content
1. Introduction
2 Cleaning & Operation
3. Storage & maintenance
4. Exploded view
5. EC Declaration of Conformity

4
1. Product introduction
1. Brief-introduction of food mixer (planetary mixer)
Our multi-functional planetary includes 1pc of egg beater, 1pc of flat beater &
1pc of dough hook, which are very easy to operate & clean by disassembling.
It is intended for commercially mixing, stirring & kneading food with stable
function & long service life.
2. Advantages:
1 The planetary mixer is equipped with the metal gear for strong transmission.
2 The machine features an overloaded protection switch on the service of the
electric box. It will pop up automatically & turn off the machine at once if
the external electric current exceeds the rated electric current.
3 The machine features 2pcs of micro switches for power-off protection. One
micro switch is assembled on the pedestal which can turn off the machine
at once if customer open the safety guard during use; the other micro switch
is assembled into the pedestal which can turn off the machine at once if
customer put down the up & down handle to let the bowl go down during
use.
4 The whole machine is used the cast-iron structure which is very strong.
5 The parts in contact with the food (the bowl, egg beater, flat beater & dough
hook) are also made by the high-quality stainless steel & consistent with
the hygiene standard.
6 4pcs of non-skid feet can prevent the machine shaking during use.
3. Warnings:
Incorrect operation can damage to the planetary mixer or the people. Please
read the instruction thoroughly before using the machine for safety & keep
it for future reference.
1 Please keep the machine away from children & persons with reduced mental,
sensory & intellectual function.
2 Don’t use the machine if feeling tired, becoming ill & under the influence
of alcohol or medication.
3 The machine is used for making cream, paste, cake, bread, pizza, etc. It’s
forbidden to
4 To avoid the machine switch on occasionally, please ensure to undo the
emergency switch (“STOP” switch) before connecting to the power source.
5 Check whether the power cord is intact. Please find the professional staffs to
replace the power cord if it is damaged. Please make sure the input voltage
fits the rating label indicates before connecting to the power source again.
It is advised to connect the power cord to the up-close socket for discon-
necting to the power source rapidly if the abnormal condition happens in

5
the process of mixing food.
6 When the machine is in no-load testing, customer can change the gear but
without stopping it.
2. Cleaning & Operation
1. Cleaning
1 To ensure hygiene, before daily use, customer should please clean all parts
of the planetary mixer. It’s important to first switch off the machine & di-
sconnecting to the power source. Please clean the parts in contact with the
food by using warm, soapy water & a food safe detergent, then wipe down
the external parts with a damp cloth.
2 To avoid breeding bacteria, after use, please clean all parts of the machine
immediately like the underlined information above. Please reassemble all
the parts after air dry.
2. Assembling & using the planetary mixer according to the following sequ-
ences:
1. Please check whether the voltage and frequency fits the data plate indicates
before use. Also check whether the external ground wire is firm.
2. Please connect the equipotential ground terminal ( ) to the ground core
before use. Please install it back after repair.
3. Please place the machine on the clean, dry, fireproof & stable surface. The
machine is heavy, please pay attention to safety when moving or carrying.
4. Please ensure to install the positioning pin of mixing bowl to the bowl sup-
port hole rightly.
5. When using egg beater, beater or hook, please choose the corresponding
speed according to the instruction of transmission base & data plate. Other-
wise it will damage the internal parts or shortage the machine life.

6
Mixing
Attachment Transmission
Base Mixing Speed
(R.P.M.) Usage
Gear 3:
404RPM
(high speed)
Using high speed to mix
egg, milk cream etc., but
each continuous working
time is not more than
20min.
Gear 2:
225RPM
(middle
speed)
Using middle speed to
mix the stuff, paste etc.,
but each continuous
working time is not more
than 25min.
Gear 1:
125RPM
(low speed)
Using low speed to mix
the flour, with the water
rate between 45% to
55%, but each continu-
ous working time is not
more than 30min.
Note 1: Please don’t install any mixing attachments before testing the
machine. Otherwise they will damage the machine because of the wrong
rotating direction.
Note 2:
1. When the machine is in no-load testing, customer can change the speed
but without turning it off.
2. When the machine is in load running, please stop it if wanting to change
the gear. If the handle is not in the right position, please rotate the plan-
etary base clockwise with hands, then you can easily change the gear you
need.
6. When using the machine, please stop it immediately if hearing an abnormal
sound suddenly. Please find the professional staffs to check and repair it.
7. After using the mixer, please first press the emergency switch (“STOP” switch),
then disconnect to the power source. Please clean & dry the machine before
storing it carefully.
3
2
1

7
3. Storage & Maintenance
1. Storage
1. Please store the machine into the ventilated, clean & dry area free from the
moisture & direct sunlight.
2. Maintenance
1. Please check the lubricating grease inside the transmission & refill it if
necessary.
The manufacture/distributor should not be responsible for any damages which
are caused by incorrect use.
3. Trouble-shooting
Check Cause Solution
Pressing the start switch, but
the machine is not working. Power source goes
wrong. 1. Check the power cord.
2. Check whether the power core fits
the label shows.
Electric contact
goes wrong. 1. Check whether the emergency stop
switch is open.
2. Check whether the net safety switch
is in place.
3. Check whether the lifting safety
switch of bowl support is in place.
The motor is overheated and
rotating speed is reduced. The voltage is in-
sufficient Check whether the voltage fits the label
indicates.
The mixing speed is
selected inappro-
priately.
Select the appropriate gear speed ac-
cording to the instruction.
The gear box is noisy and
overheated. The lubrication is
poor. Add grease.
The lift is heavy. Guide rails are
rusty or sticky. Clean and lubricate the guide rails.
The mixing parts collide with
the bowl. The mixing parts
or the bowl are
deformed.
Correct the mixing parts & the bowl or
replace them.
The motor is running, but
without high, middle & low
speed on the mixing shaft.
The flat key on
Worm bush is bad. Replace the flat key.
The worm wheel or
its flat key is bad. Replace the worm wheel or its flat key.
The worm wheel
shaft is broken. Replace the worm wheel shaft.
The gear shaft is
broken. Replace the gear shaft.

8
Check Cause Solution
With high & middle speed,
but no low speed. The gear is bad. Replace the ring gear.
The clutch spring
is bad. Replace the clutch spring.
The clutch steel
column is bad. Replace the clutch steel column.
The center axis is oil leaked. The center axis oil
seal is bad. Replace the center axis oil seal.
The center axis O
oil seal is bad. Replace the center axis O oil seal.
5. Exploded View
1. Parameter
Model Vol-
ume
Bowl
Size Rotating Speed (R.P.M.) Rated
Voltage Rated
Power Net
Weight
242010 10L Ф240*248mm 404 225 125
230V/50Hz/1PH
400W 70.2Kgs
242020 20L Ф320*306mm 404 225 125
230V/50Hz/1PH
750W 83.4Kgs
242030 30L Ф370*328mm 404 225 125
230V/50HZ/1PH
1100W 130Kgs

9
242010
Dimension Drawing (mm)
242020
Dimension Drawing (mm)
242030
Dimension Drawing (mm)
697
792
965
435
511
570656
527
594

10
2. Circuit Diagram
Circuit diagram of single phase planetary mixer 242010, 242020, 242030
-Output+
-Output+
Input Output
AC input
Temperature
controller
15A
Overload
protector
Relay1
Relay2
Relay3
Machine controller V0.4G
Primary
Wiring
F1
Fuse 250V/0.3A
Subsidiary
Wiring
Yellow
Capacitor
Blue Brown
Red
Black
Brown

11
3. Exploded View
Front view of planetary mixer
242010, 242020
No.
Name Qty Note
1 Stuff tray 1PC Not
available
2 Meat Grinder
Head 1SET Not
available
3 Protect Cover 1SET
4 Bowl 1PC
5 Bowl Lock
arm 2SETS
6 Lock-screw 1PC Not
available
7 Top Cover 1PC
8 Transmission
Handle 1PC
9 Name Plate 1PC
10 Body 1PC
11 Rear Cover 1PC
12 Up and Down
Handle 1PC
13 Pedestal 1PC
14 Electric Box 1PC
15 Bowl Support 1PC
16 Base 1PC
1
6 7 8 9 10 11
13
12
14
15
16
2
3
4
5
Notes :
1. Don’t use the water jet to spray and clean the machine .
2. Don’t touch the switches and power with wet hands.
3. When repairing the machine, please first pull out the power plug, then ask
the professional staffs to repair it .

12
Gear box body of planetary
mixer 242010, 242020
No.
Name Qty
1 Sunk screw 1PC
2 Top cover 1PC
3 Cup head screw 3PCS
4 Center hole piece 1PC
5 Bearing 1PC
6 Cup head screw 4PCS
7 Double orifice piece 1PC
8 Bearing 2PCS
9 Inner hexagon screw 4PCS
10 Spring washer 4PCS
11 Flat gasket 4PCS
12 Bearing block 1PC
13 Body 1PC
14 Back cover 1PC
15 Back air window 1PC
16 Cup head screw 3PCS
17 Inner hexagon screw 3PCS
18 Cup head screw 6PCS
19 Emergency switch 1PC
20 Start switch 1PC
21 Name plate 1PC
Notes:
1. Before the machine goes out of the factory, it has been filled with the high
quality lubricating grease (Lithium base lubrication grease #42), which can
be stored for 3-4 year. However, after repairing the machine, please replace
the lubricating grease, preventing the fallen screws or other things damaging
the machine accidentally during repair.
2. Please don’t open the head at will, unless the internal worm or gear and
related parts go wrong.
3. Please tighten the blanking cover after filling the machine with grease.
4. After repair, please tighten each screw.
1
6
8
10
12
7
9
11
13
2
34
514 15 16
17
1819 20 21

13
Center shaft assembly
of planetary mixer 242010, 242020
Gear assembly of planetary mixer
242010, 242020
No.
Name Qty
1 Hex nut 2PCS
2 Spring washer 2PCS
3 Flat gasket 2PCS
4 Bearing 7PCS
5 Clutch Cover 1PC
6 Spring lamination 4PCS
7 Steel column 4PCS
8 Clutch Base 2PCS
9 Gear 4PCS
10 Angle Gear 4PCS
11 Joint Gear 4PCS
12 Bearing Bush 1PC
13 Clutch 1PC
14 Center shaft 1PC
15 Flat key 1PCS
16 Flat key 3PCS
17 Flat key 3PCS
18 Joint gear 6PCS
19 Center shaft washer 1PC
20 Bearing 1PC
21 Seal ring 1PC
22 Sleeve 1PC
23 Framework oil seal 1PC
24 Flat gasket 1PC
25 Spring washer 1PC
26 Hex nut 1PC
Notes:
1. When disassembling or assembling the machine, please beat it carefully to
avoid damaging the spare parts.
2. After installation and repair:
(1) Check whether the clutch direction is the same as the sketch map indicates
(2) Check whether the assembly directions of joint gear & jointer are the
same as the sketch map indicates.
3. After installation and repair, please try to run the machine, checking whether
the oil is dropped. If so, please check whether the # 23 framework oil seal
is damaged.
12
18
19
20 16
14
1
2
3
4
5
6
7
8
9
10
11
12
13
15
16
17
21
22
23
24
25
26
Auxiliary View
Note the clutch
assembly direction Correct
A
Wrong

14
Worm gear assembly of planetary
mixer 242010, 242020
Notes:
1. Repair & disassembly must be in these sequences: center shaft - gear shaft
- wheel shaft.
2. Assembly sequences are wheel shaft - gear shaft - center shaft .
3. When repairing & disassembling the gear shaft & wheel shaft, please beat
them (there is a small hole below the body) from down to up, then before
putting them into the #11 gear shaft gasket, please use sealant to avoid oil
leak.
4. After repair, please check whether there are any other sundries in the gear
box before filling with lubricating grease
No.
Name Qty
1 Hex nut 1PC
2 Spring Washer 1PC
3 Flat gasket 1PC
4 Bearing 2PCS
5 Gear shaft 1PC
6 Flat key 2PCS
7 High-sped gear 1PC
8 Washer on shaft 1PC
9 Low speed gear 1PC
10 Washer on shaft 1P
11 Gear shaft gasket 1PC
handle
1
2
3
4
5
6
7
8
9
10
4
11 6
gar shaft
wheel shaft
worm
center shaft
shifting fork

15
No.
Name Qty
1 Hex nut 1PC
2 Spring Washer 1PC
3 Flat gasket 1PC
4 Bearing 2PCS
5 Worm shaft 1PC
6 Flat key 1PC
7 Worm gear 1PC
8 Washer on shaft 1PC
9 Gear shaft gasket 1PC
Motor assembly of planetary mixer
242010, 242020
Note:
Before repairing & assembling the machine, please check whether the #8
washer on shaft can be use, if it is out of shape or becomes bigger, please
replace it.
1
2
3
4
5
6
7
8
4
9

16
Transmission fork assembly of plan-
etary mixer 242010, 242020
Notes:
1. After repairing the motor, if it doesn’t work right, please first check the power
supply & the cable. Then please check whether the wire connection is right.
Also please check whether the capacitor is damaged, whether the centrifugal
switch contact is right & whether the loading of bowl is too much.
2. The motor includes the stator, rotor & rotor shaft.
3. If needing to replace the motor, please take down the stator by using the
special tools. After repair, please install the stator carefully.
4. If finding oil leaks in the motor, please replace the #4 oil seal.
No.
Name Qty
1 Washer on shaft 1PC
2 Worm 1PC
3Key 1PC
4 Oil seal 1PC
5 Bearing 2PCS
6 Motor rotor 1PC
7 Motor stator 1PC
8 Centrifugal switch 1PC
9 Screw 2PCS
10 Flat gasket 2PCS
11 Centrifugal switch plate 1PC
12 Back bearing cover 1PC
13 Flat gasket 3PCS
14 Spring washer 3PCS
15 Screw 3PCS
16 Fan 1PC
123456
8
1
3 2 4 5 6 8
11
12
16
910 11 512 13 14 15 16

17
Base, pedestal, bowl Up & down system
of planetary mixer 242010, 242020
Notes:
If the machine is used for a long time, the #7 fork axis & #10 Offset cover will be
abrased severely, then the transmission will be ineffective & the transmission
shaft will be shaked during the machine working. If finding these problems,
please replace the #7 fork axis and #10 offset cover.
No.
Name Qty
1 Hex nut
2 Spring washer
3 Flat gasket
4 Fork shaft
5 Fork screw
6 Fork spring
7 Fork axis
8 Fork
9 Taper screw
10 Offset cover
11 Pin
12 Transmission shaft
13 O oil seal
14 Steel ball
15 Spring
16 Paper oil seal or oil seal
16 Transmission base
17 Screw
18 Washer on shaft
19 Transmission handle
base
20 Transmission handle
21 Transmission handle ball
910
11
12 13 14 15 16
17
89
19
20
21
4
3
2
1
5
6
7
Fork on the saft
Eccentric
Fork shaft under
Fork
Full speed shaft

18
Planetary base, mixing shaft system of
planetary mixer 242010, 242020
No.
Name Qty
1 Pin 2PCS
2 Pedestal 1PC
3 Electric box 1PC
4 Split pin 1PC
5 Washer on shaft 1PC
6 Brace 1PC
7Frame 1PC
8 Washer 4PCS
9 Screw 4PCS
10 Key 1PC
11 Up and down handle 1PC
12 Handle ball 1PC
13 Position switch 1PC
14 Up and down switch
frame 1PC
15 Screw 2PCS
16 Position switch paddle 1PC
17 Curved tie rod 1PC
18 Nut 3PCS
19 Flat gasket 3PCS
20 Bowl support spring 1PC
21 Base 1PC
22 Mouse prevent guard 1PCS
23 Flat gasket 4PCS
24 Spring washer 4PCS
25 Screw 4PCS
26 Position switch frame 1PC
27 Cup head screw 1PC
27 26 13 123
412
11
10
9
5
13
14
16 17
18
15 27
19
20
19
18
21
22
23
24
25
678

19
Note:
When the machine is working, if there’s noise in the #11 planetary base, maybe
the #2 internal gear is loose, please take down the #11 planetary base and
tighten the #19 screw.
No.
Name Qty
1Moved protect cover 1PC
2Internal gear 1PC
3Screw 6PCS
4Protective net xed part 1PC
5Sunk screw 1PC
6Screw 1PC
7Spring washer 1PC
8Washer 1PC
9Planetary gear 1PC
10 Bear 1PC
11 Planetary base 1PC
12 Bearing 1PC
13 Oil seal 1PC
14 Key 1PC
15 Mixing shaft 1PC
16 Pin 1PC
17 Washer 1PC
18 Spring washer 1PC
19 Nut 1PC
Bowl support system of planetary
mixer 242010, 242020
1
2
3
4
5
17
6
7
8
9
10
11
12
13
14
15
16
18
19

20
Standard Parts planetary mixer
242010, 242020, 242030
Note:
Please take down the mixing parts & open the bowl locked handles before
taking down the bowl.
No.
Name Qty
1
Bowl locked handle cover
2PCS
2
Bowl locked handle screw
2PCS
3 Washer 2PCS
4
Bowl locked handle Spring
2PCS
5
Bowl locked handle (R &L)
2PCS
6
Bowl locked handle
Washer 2PCS
7 Bowl pin 2PCS
8 Bowl support 1PC
9 Flat plate 2PCS
10 Flat gasket 6PCS
11 Spring washer 6PCS
12 Screw 1PC
13
Pedestal down safety
plate 1PC
14 Flat gasket 2PCS
15 Cup head screw 2PCS
1
2
3
4
5
6
89
10
12
13
14
15
11
7
This manual suits for next models
2
Table of contents
Other Technica Mixer manuals

