6
Table of contents
Safety precautions ...................................................................................................................................... 2
About Bluetooth®........................................................................................................................................ 4
Notes on LDAC ........................................................................................................................................... 5
Before use
Accessories................................................................................................................................................. 7
Maintenance................................................................................................................................................ 7
(Important) About water resistance ............................................................................................................. 8
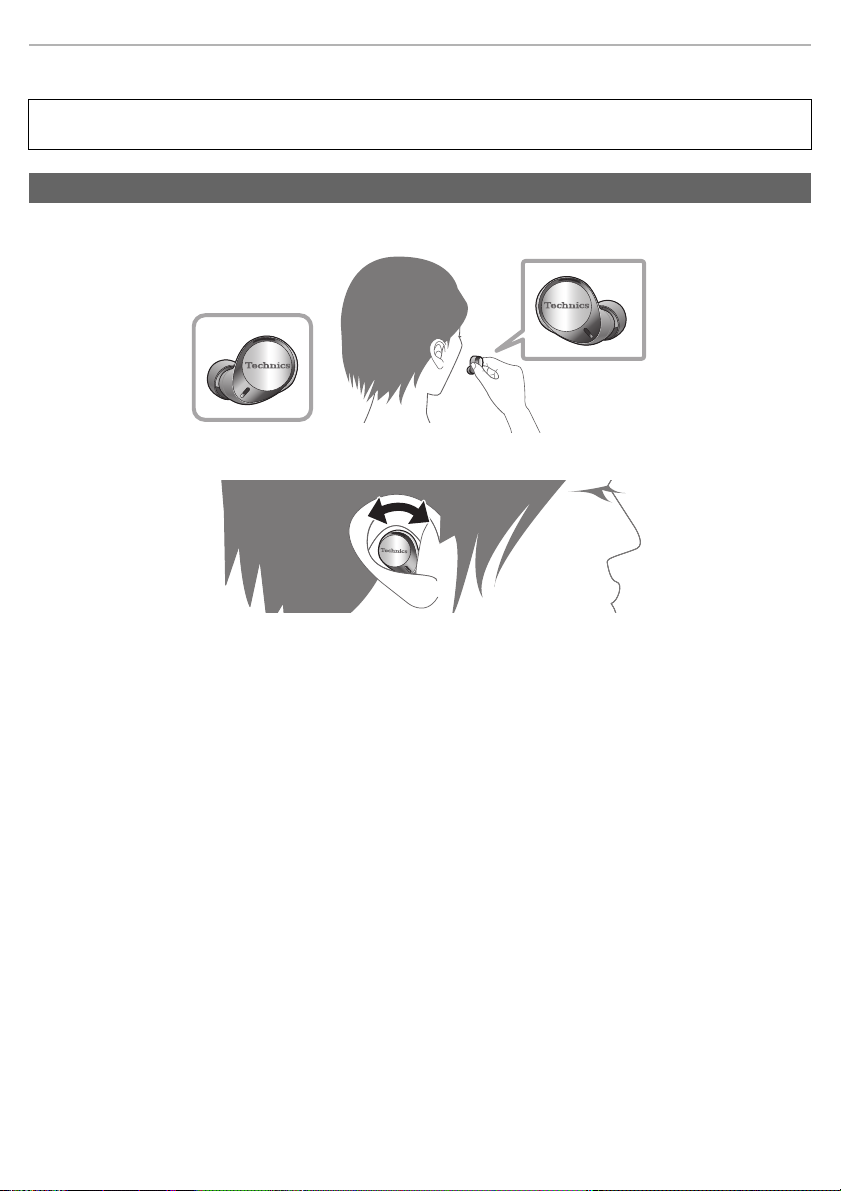
How to fit the earphones ............................................................................................................................. 9
• How to fit the earphones ...................................................................................................................... 9
• Tips for better sound quality (Changing earpieces)............................................................................ 10
Part names................................................................................................................................................. 11
Preparation
Charging.................................................................................................................................................... 13
• Using the USB charging cord (supplied) to charge the earphones and the charging cradle.............. 13
• Charging the earphones with the charging cradle ..............................................................................14
• Battery level notification...................................................................................................................... 15
Turning the earphones on and off ............................................................................................................. 17
Install the app “Technics Audio Connect” .................................................................................................. 18
Connecting a Bluetooth® device ............................................................................................................... 19
• Connecting by pairing (registering) your earphones with a Bluetooth® device .................................. 19
• Connecting a paired Bluetooth® device.............................................................................................. 20
Operation
Listening to music ..................................................................................................................................... 21
Making a phone call .................................................................................................................................. 22
Using the external sound control............................................................................................................... 23
Useful functions......................................................................................................................................... 24
• Using the app “Technics Audio Connect” ........................................................................................... 24
• Activating voice functions ................................................................................................................... 24
• Creating multi-point connections ........................................................................................................ 25
• Using just one earphone .................................................................................................................... 25
Operating with the touch sensors.............................................................................................................. 26
Other
Restoring to the factory settings................................................................................................................ 27
Copyright, etc. ........................................................................................................................................... 28
Troubleshooting......................................................................................................................................... 29
• Sound and audio volume.................................................................................................................... 29
• Bluetooth® device connection ............................................................................................................ 29
• Phone Calls ........................................................................................................................................ 29
• General............................................................................................................................................... 30
• Power supply and charging ................................................................................................................ 30
Specifications ............................................................................................................................................ 31
When disposing of the product.................................................................................................................. 34
Earpiece cleaning...................................................................................................................................... 35
eah_az60_az40_pnqp1675za_full_eng_s.book 6 ページ 2021年9月28日 火曜日 午前10時7分