manuals.online logo
Brands
  1. Home
  2. •
  3. Brands
  4. •
  5. Technika
  6. •
  7. Cooktop
  8. •
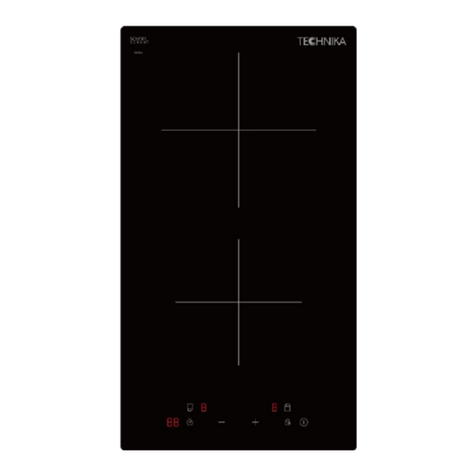
  9. Technika 2R-2 User manual

Technika 2R-2 User manual

This manual suits for next models

8

Other Technika Cooktop manuals

Technika CFM641-5 User manual

Technika

Technika CFM641-5 User manual

Technika PROFESSIONAL TGGCE64-5 Operation manual

Technika

Technika PROFESSIONAL TGGCE64-5 Operation manual

Technika Professional Series Operation manual

Technika

Technika Professional Series Operation manual

Technika TGGCM74 User manual

Technika

Technika TGGCM74 User manual

Technika 95HTSS-5 Operation manual

Technika

Technika 95HTSS-5 Operation manual

Technika CFE32IND Operation manual

Technika

Technika CFE32IND Operation manual

Technika TGC6IND-5 Operation manual

Technika

Technika TGC6IND-5 Operation manual

Technika TGC6GBK Operation manual

Technika

Technika TGC6GBK Operation manual

Technika 2RSS-5 Operation manual

Technika

Technika 2RSS-5 Operation manual

Technika TGGCM64-5 Operation manual

Technika

Technika TGGCM64-5 Operation manual

Popular Cooktop manuals by other brands

Fisher & Paykel CE302CBX2 manual

Fisher & Paykel

Fisher & Paykel CE302CBX2 manual

Whirlpool GJC3634RB00 parts list

Whirlpool

Whirlpool GJC3634RB00 parts list

Whirlpool ACH7324/BLV Use, care and installation guide

Whirlpool

Whirlpool ACH7324/BLV Use, care and installation guide

Frigidaire Professional FPDF4085KF Important safety instructions

Frigidaire

Frigidaire Professional FPDF4085KF Important safety instructions

Bonnet OPTIMUM 700 Technical instructions

Bonnet

Bonnet OPTIMUM 700 Technical instructions

Jenn-Air JGCP430 installation instructions

Jenn-Air

Jenn-Air JGCP430 installation instructions

Bompani BO374AA/E User instructions

Bompani

Bompani BO374AA/E User instructions

Kleenmaid cooking GCTK9011 Instructions for use and warranty details

Kleenmaid

Kleenmaid cooking GCTK9011 Instructions for use and warranty details

Waldorf RN8603E-B Technical data sheet

Waldorf

Waldorf RN8603E-B Technical data sheet

Whirlpool SMP658CNEIXL quick guide

Whirlpool

Whirlpool SMP658CNEIXL quick guide

Electrolux E36IC80ISS - 36" Induction Cooktop Wiring diagram

Electrolux

Electrolux E36IC80ISS - 36" Induction Cooktop Wiring diagram

Wolf CI243C/B Use and care guide

Wolf

Wolf CI243C/B Use and care guide

Fulgor Milano F5PGK305S1 installation instructions

Fulgor Milano

Fulgor Milano F5PGK305S1 installation instructions

Wells WV-2HFG owner's manual

Wells

Wells WV-2HFG owner's manual

Samsung NA36N9755 installation manual

Samsung

Samsung NA36N9755 installation manual

Miele KM 404 operating instructions

Miele

Miele KM 404 operating instructions

Lacor 69562 Instructions for use and maintenance

Lacor

Lacor 69562 Instructions for use and maintenance

Keating Of Chicago MG-2 manual

Keating Of Chicago

Keating Of Chicago MG-2 manual

manuals.online logo
manuals.online logoBrands
  • About & Mission
  • Contact us
  • Privacy Policy
  • Terms and Conditions

Copyright 2025 Manuals.Online. All Rights Reserved.

Instructions for Use and Installation
Ceramic Electric Hotplates
2R-2
CFM31
CFM640
CFM641
CFE641
CFM742
CFE742
CSM842
CFE942
Contents
2
For Your Safety .....................................3
Use and Care
Description of hobs . . . . . . . . . . . . . . . . . . . . . . . . . . . . . . . . . . 6
How to use your hob . . . . . . . . . . . . . . . . . . . . . . . . . . . . . . . . . 7
Hobs with control knobs . . . . . . . . . . . . . . . . . . . . . . . . . . . . . . 8
Hobs with touch controls . . . . . . . . . . . . . . . . . . . . . . . . . . . . . 10
Practical cooking advice . . . . . . . . . . . . . . . . . . . . . . . . . . . . . 13
Cleaning & manintenance . . . . . . . . . . . . . . . . . . . . . . . . . . . . 13
Troubleshooting . . . . . . . . . . . . . . . . . . . . . . . . . . . . . . . . . . . . 14
Disposal. . . . . . . . . . . . . . . . . . . . . . . . . . . . . . . . . . . . . . . . . . 14
Installation
Building into benches . . . . . . . . . . . . . . . . . . . . . . . . . . . . . . . 15
Insertion & fixing . . . . . . . . . . . . . . . . . . . . . . . . . . . . . . . . . . . 16
Electrical connection . . . . . . . . . . . . . . . . . . . . . . . . . . . . . . . . 17
Technical Data. . . . . . . . . . . . . . . . . . . . . . . . . . . . . . . . . . . . . 18
Data label . . . . . . . . . . . . . . . . . . . . . . . . . . . . . . . . . . . . . . . . 18
For Your Safety
We recommend that you read the instructions in this owner's
manual carefully before use for the best performance and to extend
the life of your appliance. It will provide you with all the information
you need to ensure its safe installation, use and maintenance.
Retain this owner's manual for future reference.
To maintain the efficiency and safety of this appliance, we
recommend that you do the following:
·Always call the Technika service department if there are any
faults with your appliance.
·Always use original spare parts available from Technika.
·This appliance is designed for non-commercial, household use
and it must not be altered in any way.
·This appliance can only be used safely when it is correctly
connected to an efficient earthing system in compliance
with current electrical safety standards.
·If the supply cord is damaged, it must be replaced by the
manufacturer or its service agent or a similarly qualified
person in order to avoid a hazard.
·During use, the appliance becomes very hot. Take care not
to touch the surface of the hob. To avoid burns and scalds,
children should be kept away.
·The use of suitable heat proof gloves should be worn when
handling hot utensils and pans.
·This appliance is not intended for use by persons (including
children) with reduced physical, sensory or mental
capabilities, or lack of experience and knowledge, unless
they have been given supervision or instruction concerning
use of the appliance by a person responsible for their
safety.
·Young children should be supervised to ensure that they do
not play with the appliance.
·DO NOT use a steam cleaner to clean the appliance.
Packaging items such as plastic bags, polystyrene, nails, etc. are
potentially dangerous, and therefore appropriate measures must
be taken to prevent children and the disabled from coming into
contact with them.
3
For Your Safety
Avoid the following:
·Touching the appliance with wet parts of the body.
·Using the appliance while barefoot.
·Improper or dangerous operation.
·Allowing power supply cables of other appliances to come into
contact with hot parts of the hob.
·Exposing the appliance to atmospheric agents such as rain, or
direct sunlight.
·Using flammable liquids near the appliance.
·Take care not to spill sugar or sweet mixtures on to the ceramic
glass surface when hot. Never place materials or substances on
the ceramic glass which may melt (plastic or aluminium foil). In
the event of this happening, promptly switch off and remove the
molten material while the cooking zone is still warm, to prevent it
from being damaged. Failure to instantly clean the ceramic glass
could lead to incrustations, which are impossible to remove once
the hob has cooled down.
Authorised personnel must be contracted to...
·Install the appliance according to these installation instructions
and any local requirements.
Technika Service Department must be contacted...
·If in doubt about the operation of the appliance.
·If in doubt about the soundness of the appliance after removing
it from its packaging.
·If the power supply cable has been damaged or needs to be
replaced.
·If the appliance requires a service.
·If you need spare parts.
4
For Your Safety
WARNINGS:
·DO NOT steam clean the appliance.
·Only use the appliance to cook food and nothing else.
·If the surface is cracked, switch off the appliance to avoid
the possibility of electric shock.
·Check that the appliance has not been damaged
immediately after it has been unpacked.
·Disconnect the appliance from the electrical mains if it is
not functioning properly and before cleaning or performing
maintenance.
·Make sure the controls are switched OFF when the
appliance is not in use.
·Technika will not accept any liability as a result of any
damage due to incorrect installation or improper use.
5
6
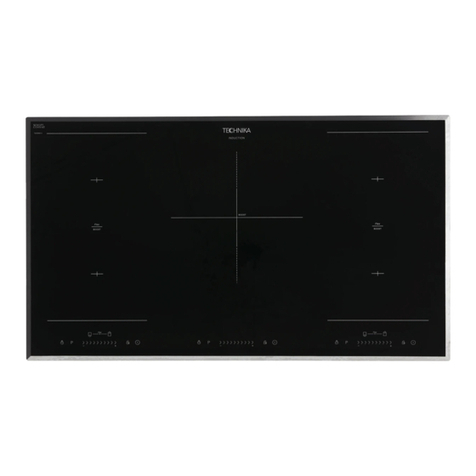
Description of the hobs
Use and Care
A. Single cooking zone 1200W
B. Single cooking zone 1800W
C. Dual cooking zone 1700/700W
D. Dual cooking zone 2200/1000W
E. Dual cooking zone 2000/1100W
1. Control knobs
2. Power & residual heat warning lights
3. Sensor touch controls
A
DB
E2
1
D
A
A
C
A
B
A
1 2
B
3
AB
A
3
A
A
1 2
D
A
DA
3
C
1
A
D
C
1
C
C
B
A
1 2
A
D
2R-2
CFE942
CFM31
CFM640
CFE641
CFM742CFM641
CFE742
CSM842
Use and Care
7
HOW TO USE YOUR HOB
Before first Use
Before cooking for the first time the ceramic glass has to be
cleaned. Remove any removable labels and protective sheeting.
Place a saucepan of water on each of the front hotplates and
switch them on high for at least 30 minutes. After 30 minutes switch
the front hotplates off, place a saucepan of water on each of the
rear hotplates and the central hotplate (if present). Switch them on
high for at least 30 minutes. This procedure is necessary in order to
evaporate any protective oils and humidity that may have collected
during the manufacturing process and will enable the electronic
control circuits to operate properly.
Pot sizes
The pot sizes stated in the table below are suitable for your electric
hob. Solid pots and pans with flat bottoms are recommended for
efficient cooking.
Pot diameter
Hotplate diameter
140mm 160mm 200mm 240mm
120mm 140mm 180mm 220mm
8
Use and Care
HOBS WITH CONTROL KNOBS
Description of symbols
Single cooking zones
Turn the control knob to the desired position (low to high).
Adjustment is continuous so the cooking zone will operate at any
intermediate knob setting between low & high. Once the cooking
zone is hot, the LED corresponding to the zone illuminates.
You can switch off the cooking zone by turning the knob, in either
direction, to the off position. The residual heat warning light
remains illuminated when the temperature of the ceramic glass
surface is hot and it will switch off once the surface temperature
has cooled.
Dual cooking zones
Turn the control knob clockwise to the desired position between low
and halfway as shown on the diagram on page 9. The inner cooking
zone will heat and the outer cooking zone is off. Adjustment is
continuous so the cooking zone will operate at any intermediate
knob setting between low & halfway. Once the inner cooking zone
is hot, the lamp corresponding to the zone illuminates.
To operate the outer cooking zone, turn the knob past the half way
setting. Both inner and outer cooking zones will operate.
Adjustment is continuous so the both zones will operate at any
intermediate knob setting between halfway & max. For highest
setting with both zones operating, turn the knob past max, to the
detent position (between max & ). To reduce heat setting, but
continue to operate both zones, turn the knob anywhere between
maximum and halfway setting.
To return to operating the inner cooking zone only, turn the knob
anticlockwise to between halfway and low.
Front
Left Rear
Left Rear
Right Front
Right Off
9
Note: You can turn the knob in either direction from any position to
the setting you select.
The residual heat warning lamp remains illuminated when the
temperature of the ceramic glass surface is hot and it will switch off
once the surface temperature has cooled.
Use and Care
MAX LOW
HALFWAY
e
n
o
Z
e
l
g
n
i
S
D
u
a
l
Z
o
n
e
Lowest Heat
(Single Zone)
Highest Heat
(Single Zone)
Highest Heat
(Dual Zone)
Lowest Heat
(Dual Zone)
10
Use and Care
HOBS WITH TOUCH CONTROLS
When first connected to power or when power is restored after a
power outage, an operating check will be carried out automatically
and all the indicator lights will illuminate for a few seconds.
Description of symbols
Switching the hob on/off
Hold down switch icon for 2 seconds to switch the appliance on.
Displays will illuminate to confirm that the hob is switched on. If no
functions are used within 10 seconds of switching the appliance on,
it will automatically switch off.
When not in use, the hob should be switched off by pressing the
switch icon.
Single cooking zones
To operate the touch controls, lightly press the icon printed on the
ceramic glass surface, which corresponds to the cooking zone you
want to switch on. Pressing an icon is confirmed by a beep.
The display will indicate ‘0’). Press the or icons to activate
the cooking zone and adjust the power at which it should operate.
The power settings range from a minimum of 1 to a maximum of 9.
You must adjust the power within 10 seconds from when the icon is
pressed, otherwise it will automatically switch off.
On/Off Lock
Increase
Setting Decrease
Setting Timer
Dual
Zone
Rear
Right Front
Right
Rear
Left
Front
Left
Rear
Centre Front
Centre