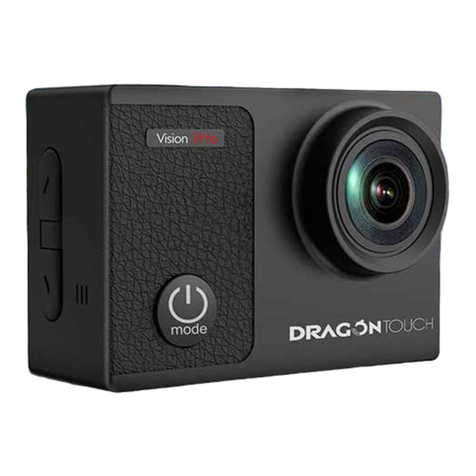
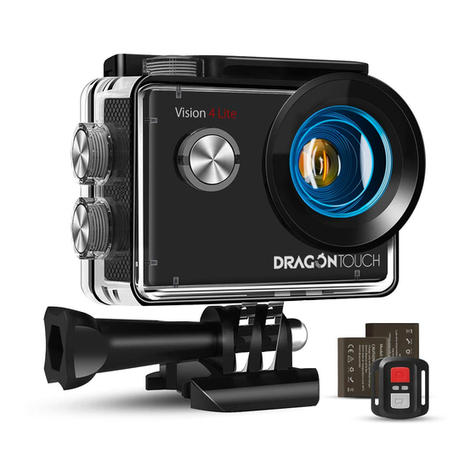
Technosmart TS-SV-CAM01 User manual

User Manual
Model: TS-SV-CAM01


USER MANUAL: ACTION SPORTS CAMERA SET
Model: TS-SV-CAM01
English
SAFETY INSTRUCTIONS
The following basic precautions must always be taken before using the action sports
camera set (hereinafter referred to as ‘device’):
General safety information and instructions
• Read the instructions for use carefully and keep them safe. If you give this device
to other people, please also pass on this manual.
• Only use this device in accordance with the instructions in this user manual.
• The device is only intended for domestic and private use and its intended purpose.
The device is not intended for commercial use.
• Improper use of the device could damage the product.
• The device is not a toy. Keep it out of the reach of children and pets.
• Do not leave packaging material lying around carelessly. This may become
dangerous playing material for children.
• Do not place the device under any mechanical stress.
• Please handle the device carefully. Jolts, impacts or falls, even from a low height,
can damage the device.
• Do not use or store the device in an environment subject to strong static electricity
or magnetic elds.
• Do not expose the device to direct sunlight, heat sources, excessive humidity (device
only) or corrosive environments (device only).
Warnings instructions
• To reduce the risk of re or electrical shocks, protect the device from dripping or
splashing water, and keep away from objects lled with liquids, e.g. vases (device
only)
• Do not use the device if it has fallen into water or any kind of uid; liquid has been
spilled on it or if it has been exposed to rain or moisture (device only)
• Do not use the device if there are visible signs of damage.
• Do not use the device if it has been dropped or does not operate normally.
• Do not attempt to disassemble or repair the device, or modify it in any manner.
• Check local laws regarding the use of the device.
• If you use the device while driving, make sure your attention and focus remains on
your driving.
EN 01

EN 02
Batteries and heat
• To reduce or prevent the risk of personal injury, electrical shock, re or damage to
the device; never insert metal objects in the USB charging ports.
• Always remove the charger cable from the device once charging has been
completed.
• Do not expose the device to excessive heat sources like re or direct sunlight.
• Do not crush, puncture or dismantle the device; this might damage the battery.
• Damaging the casing of the device and/or piercing it might lead to explosion or re!
• Do not throw the device into a re because it may explode!
• Do not dispose of the device in your household waste. Take it to your local recycling
station. Contact your local government ofces for details.
Cleaning:
• Do not use abrasive cleaning solvents to clean the device.
• Clean the exterior of the device with a damp cloth.
• It is recommended to use a commercial lens cleaner to prevent damage to the lens
surface.
PACKAGE CONTENT AND PRODUCT OVERVIEW
Package content:
Action sports camera
Waterproof casing
Mount for straps
Connection mount 1
Handle Bar / Pole mount
Mount with adhesive tape
Straps
Clip
Connection mount 2
USB charging cable
Removable battery pack
User manual
1
5
9
2
6
10
3
7
11
4
8
12
5
9
1
6
10
2
7
11
3
8
12
4

EN 03
Product overview:
OK/Shutter button
Power ON-OFF/Mode button
Camera lens
Microphone
Micro SD card slot
Micro USB port
LED indicator
LED power indicator
LCD Screen
UP
Down
Speaker
Battery cover lock
Battery cover
INSTALLATION & USE
Inserting the battery
Slide the battery cover lock towards the arrow indicator and open the battery
cover .
Remove the cover from the battery and insert the battery into the battery
compartment .
Close the battery cover and slide the battery cover lock backwards.
Charging the battery
The device is powered by a rechargeable battery , which can be charged by any
USB Charging device.
Connect the USB charging cable to the micro USB Port of the device, and
connect the other end of the cable to a USB power source.
The device will start charging and the LED power indicator will turn ‘red’.
10
11
11
G
H
I
K
J
L
M
N
B
F
A
D
E
C
B
H
H
F
F
L
N
N
N
N
A
G
D
J
E
K
M
M
M
C
I

EN 04
Once charging is completed, the LED power indicator will switch off and charging
will stop automatically.
Please note:
o It takes approximate 4 hours to fully charge the device.
o Before using the device for the rst time, it is recommended to fully charge it.
o The device can be charged even when it is powered OFF.
o Do not use the device while charging.
Inserting the Micro SD memory card
Insert a Micro SD memory card (not included) into the Micro SD card slot .
Gently press the Micro SD memory card to remove it from the device; the Micro SD
card will then eject from the Micro SD card slot .
Please note:
o The device is not equipped with built-in memory, which means a Micro SD
memory card is always required to record your videos.
Power ON/OFF
To power ON the device, press and hold the POWER button for ± 3 seconds; the
LED indicator will turn blue.
To power OFF the device, press and hold the POWER button for ± 3 until the LED
indicator switches off.
The device automatically powers OFF when it reaches the idle time set by the user (1,
3 or 5 minutes).
If the battery of the device is running low, the battery icon will appear on the LCD
screen . The device will automatically power OFF.
Switching between modes
The device is equipped with three modes:
• Video – records videos
• Capture – (still) pictures
• Playback mode – plays recorded videos, pictures.
Once the device is powered ON, modes can be switched using the MODE button .
LED indicators
LED indicator turns blue when the device is ON and in video recording mode; the
LED indicator will ash when recording.
LED power indicator will turn RED when the camera is charging.
Video mode
When the device switches ON, its default setting is video mode!
If you are in capture or playback mode, press the MODE button until the video
mode icon appears in the LCD display .
Click the OK button to start recording.
H
B
B
G
G
E
E
I
B
B
G
H
I
A

EN 05
Click the OK button again to stop recording.
Please note:
The device will automatically stop recording if the battery is low.
00:00:01 Time-indicator: indicates the length of the current recording.
Mode indicator: indicates selected mode is video recording mode.
Exposure indicator: indicates the selected exposure setting.
Recording quality indicator: indicates the selected recording quality.
NO CARD indicator: indicates the Micro SD memory card has not been
inserted.
Battery status indicator: indicates the battery level.
Capture mode
When the device switches ON, its default setting will be video mode!
To choose capture mode, press the MODE button until the capture mode icon
appears in the LCD display .
Press the OK button to take a picture.
9999: Remaining pictures indicator: indicates the number of pictures which can be
taken and stored on the installed Micro SD card (available space).
Mode indicator: indicates selected mode is capture mode.
Exposure indicator: indicates the selected exposure setting.
Quality indicator: indicates the selected pixel quality setting.
Picture resolution indicator: indicates the selected resolution to making
pictures.
NO CARD indicator: indicates the Micro SD memory card has not been
inserted.
Battery status indicator: indicates the battery level.
Playback mode
When the device switches ON, its default setting will be video mode!
To choose playback mode, press the MODE button until the capture mode icon
appears in the LCD display .
B
B
I
I
A
A

EN 06
In playback mode, press the UP button and DOWN button to select the
desired le or picture.
Press the OK button to play/open the selected video or picture. When playing a
video, press the OK button to pause/resume the selected video.
System setup menu
To enter the system setup menu, press the MODE button until the system setup
menu icon appears in the LCD display .
In the setup menu, press the UP button and DOWN button to select the
desired main menu.
When selecting the main menu, the background of the selected item will be
highlighted. Press the OK button to enter the sub-menu. In the sub-menu, press
the UP button and DOWN button to select the desired sub-menu function.
Press the MODE button to exit the sub-menu and return to the main menu.
Main menu Sub-menu Description
Video size 1080P 1920X1080 resolution format
720P 1280x720 resolution format
VGA 640x480 resolution format
Video loop recording OFF The camera will continue recording
until the Micro SD memory card is full.
1 - 3 - 5 Minutes The camera will automatically stop
when recording reaches 1, 3 or 5
minutes and then start the next session
of video recording. When the Micro
SD memory card is full, the oldest
recording will be deleted to make room
for a new recording; this process will
continue perpetually.
Exposure From -2.0 to 2.0. This option allows you to select your
preferred Exposure setting, ranging
from -2.0 to 2.0.
Default Exposure setting is 0.0.
Record audio OFF Turn OFF audio recording.
ON Turn ON audio recording.
Date stamp OFF Turn OFF printing date/time in the
image.
ON When capturing/recording video, print
date and time in bottom-right corner of
the le.
Image size resolution 3M 2048x1536 pixels
2M 1600x1200 pixels
1.3M 1280x960 pixels
VGA 640x480 pixels
J
J
J
I
K
K
K
A
A
A
B
B

EN 07
Main menu Sub-menu Description
Quality Fine (***) Super Fine Quality
Standard (**) Fine Quality
Economy (*) Normal Quality
Date/Time
Date input
2017/01/01
00 : 22 : 57
Select year/month/date hour/minutes
with the OK button .
Use the UP button and DOWN
button to make changes
Auto Power OFF 1, 3, 5 min Automatic shutdown after 1, 3 or 5
minutes of idle time
OFF Cancel automatic shutdown
Screen Saver OFF Cancel screen saver display
1 - 2 - 3 Minutes Screen saver activates automatically
after 1, 2 or 3 minutes of idle time
Beep OFF Beep sound OFF
ON Beep sound ON
Language English English
Chinese 簡體中文
Japanese 日本語
French Français
German Deutsch
Dutch Nederlands
Italian Italiano
Portuguese Portuguės
Russian Pycckᴎӥ
Spanish Español
Polish Polski
Frequency 50Hz / 60Hz Select 50Hz or 60Hz
(50Hz advised for EU)
Format Cancel = back to main menu
WARNING!!! Selecting “Execute” will
DELETE all data stored on the Micro
SD card.
Default setting
(System reset)
Cancel = back to main menu
WARNING!!! Selecting “Execute” will
RESET all system settings to factory
mode.
Version VIEW Firmware version information
J
K
A

EN 08
Connecting to computer/notebook
The device is able to synchronize with computers.
Connect the USB charging cable to the micro USB Port of the device, and
connect the other end of the cable to the USB port of your computer.
Once the device is connected to the computer, power ON the device, press and hold
the POWER button for ± 3 seconds; the LED indicator will turn blue. “Disk
Drive” will appear on the LCD display , to indicate successful connection.
The device will now appear in the list of connected devices on your computer.
Please note:
o The device will start charging once connected to your computer
(see chapter: “Charging the battery”).
o Make sure the Micro SD memory card is inserted in the device when connecting
to your computer. If the Micro SD memory card is not inserted when connecting,
the device will not appear in the list of connected devices on your computer.
You can also remove the Micro SD Card from the Micro SD card slot of the device
and insert it into the Micro SD Card slot of your computer.
Examples of applications
10 F
B G
I
E

EN 09
Features and specications:
Integrated rechargeable battery: 3.7Vdc - 200 mAh Li-Ion (0.74Wh)
Dimension device: 5.9 cm x 2.5 cm x 4.0 CM (LxWxH)
Weight: 54.5 grams (device only)
Display: LCD 2”
Camera angle: 90 degree wide angle
Focus: 20 cm to innite
Image size resolution: 3M / 2M / 1.3M / VGA
Video resolution: 1080P – 30 fps (interpolated); 720P – 30 fps; VGA – 30 fps
Video format: AVI
Video Output: 50 / 60Hz
Capture resolution: 1M, 3M, 5M
Built-in Microphone & Speaker
USB port: Micro USB 2.0
Storage: Micro SD Card (up to 32GB)
Water resistance: waterproof: 30 meters, up to 60 minutes
Supported computer sync: Microsoft Windows 2000, XP, VISTA, Window 7/8/10
All contents and specications mentioned in this manual are subject to change without prior notice.
Your product has been manufactured using high quality materials and components
which can be recycled and used again. At the end of its life, this product cannot
be disposed of in normal domestic waste, but must be taken to a special collection
point for recycling electrical and electronic equipment. This is indicated in the user
manual and in the packaging by the waste container marked with a cross symbol.
Used raw materials are suitable for recycling.
By recycling used appliances or raw materials, you are playing an important role in protecting
our environment. You can ask your local council about the location of your nearest collection
point.
Do not dispose of batteries in your household waste. Dispose of batteries by taking them to your
local recycling station. Contact your local government ofces for details.
INSTRUCTIONS FOR PROTECTING THE ENVIRONMENT
(WEEE, the waste electrical and electronic equipment directive)

GEBRUIKSHANDLEIDING
ACTION SPORTS CAMERA-SET Model: TS-SV-CAM01
Nederlands
VEILIGHEIDSINSTRUCTIES
Tref altijd de volgende voorzorgsmaatregelen voordat u de action sports camera-set
gebruikt (hierna het 'apparaat' te noemen).
Algemene veiligheidsvoorschriften en -instructies
• Lees deze instructies vóór gebruik goed door en bewaar ze op een veilige plaats.
Als u dit apparaat aan iemand anders geeft, geef deze handleiding daar dan bij.
• Gebruik dit apparaat uitsluitend volgens de instructies in deze gebruikshandleiding.
• Het apparaat is uitsluitend bedoeld voor huishoudelijk en persoonlijk gebruik en
voor het beoogde doel. Het apparaat is niet bedoeld voor commercieel gebruik.
• Het apparaat kan beschadigd raken als het verkeerd wordt gebruikt.
• Dit apparaat is geen speelgoed! Houd het buiten bereik van kinderen en huisdieren.
• Laat verpakkingsmateriaal niet onbeheerd rondslingeren. Het kan gevaar opleveren
wanneer kinderen ermee spelen.
• Zorg ervoor dat het apparaat niet wordt blootgesteld aan enige mechanische
belasting.
• Ga voorzichtig met het apparaat om. Het apparaat kan beschadigd raken door een
schok, stoot of val, zelfs van een geringe hoogte.
• Gebruik of bewaar het apparaat niet in een omgeving met sterke statische
elektriciteit of magnetische velden.
• Bescherm het apparaat tegen direct zonlicht, warmtebronnen, overmatige
vochtigheid (alleen het apparaat) en corrosieve omgevingen (alleen het apparaat).
Waarschuwingen en instructies
• Om de kans op brand of een elektrische schok te beperken dient u het apparaat uit
de buurt van druppelend of opspattend water en met water gevulde voorwerpen (zoals
vazen) te houden (alleen het apparaat).
• Gebruik het apparaat niet als het in water of een andere vloeistof is gevallen, als
er vloeistof op is gemorst of als het is blootgesteld aan regen of vocht (alleen het
apparaat)
• Gebruik het apparaat niet als het zichtbaar beschadigd is.
• Gebruik het apparaat niet wanneer het is gevallen of niet normaal functioneert.
• Probeer het apparaat niet te demonteren, te repareren of anderszins aan te passen.
• Controleer de lokale wet- en regelgeving met betrekking tot het gebruik van het
apparaat.
• Als u het apparaat tijdens het rijden gebruikt, zorg er dan voor dat uw aandacht blijft
gericht op het verkeer.
NL 01

NL 02
Batterijen en warmte
• Om het risico van persoonlijk letsel, elektrische schok, brand of schade aan het
apparaat te verminderen of voorkomen, moet u nooit metalen voorwerpen in de
USB-oplaadpoorten steken.
• Verwijder altijd de kabel van de oplader uit het apparaat zodra het opladen is
voltooid.
• Zorg ervoor dat het apparaat niet wordt blootgesteld aan extreme warmtebronnen,
zoals vuur of rechtstreeks zonlicht.
• Zorg ervoor dat het apparaat niet wordt beschadigd of gedemonteerd; hierdoor kan
de batterij beschadigd raken.
• Beschadiging van de behuizing van het apparaat kan leiden tot een explosie of
brand!
• Gooi het apparaat nooit in een vuur omdat het kan ontploffen!
• Gooi het apparaat niet weg met het huisvuil. Breng het apparaat naar een
plaatselijk recycling-adres. Neem contact op met de lokale overheidsinstanties voor
nadere informatie.
Reinigen:
• Gebruik geen schurende schoonmaakmiddelen om het apparaat te reinigen.
• Reinig de buitenkant van het apparaat met een vochtige doek.
• Wij raden u aan een commercieel reinigingsmiddel voor lenzen te gebruiken om
schade aan het oppervlak van de lens te voorkomen.
INHOUD VAN DE VERPAKKING EN
PRODUCTOVERZICHT
Inhoud van de verpakking:
Action sports camera
Waterdichte behuizing
Bevestiging voor riempjes
Statiefverbinding 1
Bevestiging voor
etsstuur/ stang
Bevestiging met plakband
Riempjes
Klem
Statiefverbinding 2
USB-oplaadkabel
Verwijderbare batterij
Gebruikshandleiding
1
5
9
2
6
10
3
7
11
4
8
12
5
9
1
6
10
2
7
11
3
8
12
4

NL 03
Productoverzicht:
OK-/sluiter-knop
Aan-uit-/ modusknop
Cameralens
Microfoon
MicroSD-kaartsleuf
Micro-USB-poort
LED-indicatielampje
LED-stroomindicatielampje
Lcd-scherm
Omhoog
Omlaag
Luidspreker
Vergrendeling batterijdeksel
Batterijdeksel
INSTALLATIE EN GEBRUIK
Plaatsen van de batterij
Schuif de vergrendeling van het batterijdeksel in de richting van de aanwijspijl en
open het batterijdeksel .
Verwijder het batterijdeksel en plaats de batterij in de batterijhouder .
Sluit het batterijdeksel en schuif de vergrendeling van het batterijdeksel naar
achteren.
De batterij opladen
Het apparaat wordt gevoed door een oplaadbare batterij die kan worden
opgeladen met elke USB-oplader.
Sluit de USB-oplaadkabel aan op de micro-USB-poort van het apparaat en
sluit het andere uiteinde van de kabel aan op een USB-voedingsbron.
Het apparaat begint met opladen en het LED-stroomindicatielampje wordt rood.
Zodra het opladen is voltooid, gaat het LED-stroomindicatielampje uit en stopt
het opladen automatisch.
10
11
11
G
H
I
K
J
L
M
N
B
F
A
D
E
C
B
H
H
H
F
F
L
N
N
N
N
A
G
D
J
E
K
M
M
M
C
I

NL 04
Let op:
o Het duurt ongeveer vier uur totdat het apparaat volledig is opgeladen.
o Voordat u het apparaat voor de eerste keer gebruikt, raden wij u aan het volledig
op te laden.
o Het apparaat kan zelfs worden opgeladen wanneer het uit staat.
o Gebruik het apparaat niet tijdens het opladen.
Plaatsen van de Micro-SD geheugenkaart
Plaats een Micro SD-geheugenkaart (niet inbegrepen) in de Micro SD-kaartsleuf .
Druk zachtjes op de Micro SD-geheugenkaart om deze uit het apparaat te
verwijderen; de Micro SD-kaart komt vervolgens vrij uit de Micro SD-kaartsleuf .
Let op:
o Het apparaat beschikt niet over een intern geheugen, wat betekent dat u
altijd een Micro SD-geheugenkaart nodig heeft om video's op te nemen.
AAN-/UIT-zetten
Om het apparaat AAN te zetten, drukt u ongeveer 3 seconden op de AAN-/UIT-knop
; het LED-indicatielampje wordt nu blauw.
Om het apparaat UIT te zetten, drukt u ongeveer 3 seconden op de AAN-/UIT-knop
totdat het LED-indicatielampje uit gaat.
Het apparaat wordt automatisch uitgeschakeld wanneer het gedurende de door de
gebruiker ingestelde tijd (1, 3 of 5 minuten) niet actief is geweest.
Als de batterij van het apparaat bijna leeg is, verschijnt het batterij-pictogram op
het Lcd-scherm Het apparaat wordt automatisch uitgeschakeld.
Omschakelen tussen modi
Het apparaat is uitgerust met drie modi:
• Video - opnemen van video's
• Foto - vastleggen van (stilstaande) afbeeldingen
• Afspelen - tonen van opgenomen video's en foto's.
Zodra het apparaat is ingeschakeld, kan van modus worden gewisseld met behulp
van de MODE-knop .
LED-indicatielampjes
Het LED-indicatielampje wordt blauw wanneer het apparaat AAN en in de video-
modus staat; het LED-indicatielampje gaat knipperen tijdens het opnemen.
Het LED-indicatielampje wordt ROOD wanneer de camera aan het opladen is.
Videomodus
Wanneer het apparaat wordt aangezet, staat het standaard in de videomodus!
Wanneer u in de foto- of afspeel-modus bent, drukt u op de MODE-knop totdat
het pictogram voor de videomodus op het Lcd-scherm verschijnt.
Klik op de OK-knop om het opnemen te starten.
Klik nogmaals op de OK-knop om het opnemen te stoppen.
B
B
G
G
E
E
I
B
B
G
H
I
A
A

NL 05
Let op:
Het apparaat stopt automatisch met opnemen als de batterij bijna leeg is.
00:00:01 Tijdindicator: geeft de duur aan van de huidige opname.
Modus-indicator: geeft aan dat de geselecteerde modus de videomodus is.
Belichtingsindicator: geeft de geselecteerde belichtingsinstelling aan.
Indicator opnamekwaliteit: geeft de geselecteerde opnamekwaliteit aan.
NO CARD indicator: geeft aan dat de Micro-SD-geheugenkaart niet is
geplaatst.
Indicator batterijstatus: geeft het batterijniveau aan.
Fotomodus
Wanneer het apparaat wordt aangezet, staat het standaard in de videomodus!
Om de fotomodus te selecteren, drukt u op de MODE-knop totdat het pictogram
voor de fotomodus op het Lcd-scherm verschijnt.
Druk op de OK-knop om een foto te nemen.
9999: Indicator resterend aantal foto's: geeft het aantal foto's aan dat nog kan
worden genomen en opgeslagen op de geïnstalleerde Micro SD-kaart (beschikbare
ruimte).
Modus-indicator: geeft aan dat de geselecteerde modus de fotomodus is.
Belichtingsindicator: geeft de geselecteerde belichtingsinstelling aan.
Kwaliteitsindicator: geeft de geselecteerde instelling voor pixel-kwaliteit aan.
Indicator foto-resolutie: geeft de geselecteerde resolutie aan voor het maken
van foto's.
NO CARD indicator: geeft aan dat de Micro-SD-geheugenkaart niet is
geplaatst.
Indicator batterijstatus: geeft het batterijniveau aan.
Afspeelmodus
Wanneer het apparaat wordt aangezet, staat het standaard in de videomodus!
Om de afspeelmodus te selecteren, drukt u op de MODE-knop totdat het
pictogram voor de afspeelmodus op het Lcd-scherm verschijnt.
B
B
I
I
A

NL 06
In de afspeelmodus, drukt u op de OMHOOG-knop en OMLAAG-knop om de
gewenste video of foto te selecteren.
Druk op de OK-knop om de geselecteerde video af te spelen of foto te openen.
Wanneer u een geselecteerde video afspeelt, kunt u op de OK -knop drukken om
het afspelen te onderbreken/hervatten.
Menu systeeminstellingen
Om naar het menu systeeminstellingen te gaan, drukt u op de MODE-knop totdat
het pictogram voor het menu systeeminstellingen op het Lcd-scherm verschijnt.
In het instellingsmenu, drukt u op de OMHOOG-knop en OMLAAG-knop om
het gewenste hoofdmenu te selecteren.
Wanneer u het hoofdmenu selecteert, wordt de achtergrond van het geselecteerde
item gemarkeerd. Druk op de OK-knop om het submenu te openen. In het
submenu, drukt u op de OMHOOG-knop en OMLAAG-knop om de gewenste
functie in het submenu te selecteren.
Druk op de MODE-knop om het submenu te sluiten en terug te gaan naar het
hoofdmenu.
Hoofdmenu Submenu Beschrijving
Video formaat 1080p 1920 x 1080 resolutie
720p 1280 x 720 resolutie
VGA 640x480 resolutie
Opnemen van
video-loop
UIT De camera blijft opnemen totdat de Micro
SD-geheugenkaart vol is.
1 - 3 - 5 minuten De camera stopt automatisch wanneer de
opnameduur 1, 3 of 5 minuten bereikt. Daarna
start de volgende video-opnamesessie.
Wanneer de Micro SD-geheugenkaart vol
is, wordt de oudste opname verwijderd om
ruimte te maken voor een nieuwe opname;
dit proces gaat voortdurend door.
Belichting Van -2.0 tot 2.0 Met deze optie kunt u uw voorkeursinstelling
voor belichting selecteren, variërend van -2.0
tot 2.0.
Audio opnemen UIT Audio opnemen uitschakelen
AAN Audio opnemen inschakelen
Datumstempel UIT Afdrukdatum/-tijd in de afbeelding
uitschakelen.
AAN Bij het opnemen van foto's/video's wordt
de afdrukdatum en -tijd weergegeven in de
rechterbenedenhoek van het bestand.
Beeldgrootte-/resolutie: 3M 2048x1536 pixels
2M 1600x1200 pixels
1,3M 1280x960 pixels
VGA 640x480 pixels
J
J
J
I
K
K
K
A
A
A
B
B

NL 07
Hoofdmenu Submenu Beschrijving
Kwaliteit Fijn (***) Extra-jne kwaliteit
Standaard (**) Fijne kwaliteit
Zuinig /Economy (*) Normale kwaliteit
Datum/tijd
Datum-invoer
2017/01/01
00 : 22 : 57
Selecteer jaar/maand/dag/uur/minuten met
de OK-knop .
Gebruik de OMHOOG-knop en
OMLAAG-knop om wijzigingen aan te
brengen.
Automatisch
uitschakelen
1, 3, 5 min Apparaat wordt na 1, 3 of 5 minuten
automatisch uitgeschakeld als het niet wordt
gebruikt.
UIT Automatisch uitschakelen annuleren
Screensaver UIT Weergave screensaver annuleren
1 - 2 - 3 minuten Screensaver wordt automatisch geactiveerd
na 1, 2 of 3 minuten van inactiviteit
Pieptoon UIT Pieptoon UIT
AAN Pieptoon AAN
Taal English Engels
Chinese Vereenvoudigd Chinees
Japanese 日本語
French Français
German Deutsch
Dutch Nederlands
Italian Italiano
Portuguese Portuguės
Russian Pycckᴎӥ
Spanish Español
Polish Polski
Frequentie 50Hz / 60Hz Selecteer 50Hz of 60Hz
(50Hz geadviseerd voor EU)
Formaat Annuleren = terug naar hoofdmenu
WAARSCHUWING!!! Wanneer u
‘Execute’ (uitvoeren) selecteert, worden
alle gegevens op de Micro SD-kaart
VERWIJDERD.
Standaardinstelling
(Systeem-reset)
Annuleren = terug naar hoofdmenu
WAARSCHUWING!!! Wanneer u ‘Execute’
(uitvoeren) selecteert, worden alle
systeeminstellingen GERESET naar de
fabrieksinstellingen.
Versie BEKIJKEN Informatie rmware-versie
J
K
A

NL 08
Aansluiten op een computer/notebook
Het apparaat kan worden gesynchroniseerd met een computer.
Sluit de USB-oplaadkabel aan op de micro-USB-poort van het apparaat en sluit
het andere uiteinde van de kabel aan op de USB-poort van uw computer.
Zodra het apparaat is aangesloten op de computer, zet u het apparaat AAN door
ongeveer 3 seconden op de AAN-/UIT-knop te drukken; het LED-indicatielampje
wordt nu blauw. Op het Lcd-scherm verschijnt 'harde schijf’ om de succesvolle
verbinding aan te geven.
Het apparaat wordt nu weergegeven in de lijst van aangesloten apparaten op uw
computer.
Let op:
o Het apparaat begint met opladen zodra het is aangesloten op uw computer (zie
hoofdstuk: ‘De batterij opladen’).
o Zorg ervoor dat de Micro SD-geheugenkaart in het apparaat is geplaatst
wanneer u het aansluit op uw computer. Als de Micro SD-kaart niet is geplaatst
wanneer u het apparaat aansluit, zal het apparaat niet worden weergegeven in
de lijst van aangesloten apparaten op uw computer.
U kunt de Micro SD-kaart ook uit de Micro SD-kaartsleuf van het apparaat
verwijderen en plaatsen in de Micro SD-kaartsleuf van uw computer.
Voorbeelden van toepassingen
10 F
B
GI
E

NL 09
Dit product is vervaardigd van kwalitatief hoogwaardige materialen en onderdelen
die gerecycled en opnieuw gebruikt kunnen worden. Aan het eind van de
levensduur van dit product, mag het niet worden meegegeven met het normale
huishoudelijk afval, maar moet het naar een speciaal inzamelpunt worden gebracht
voor het recyclen van elektrische en elektronische apparatuur. Dit wordt in de
handleiding en op de verpakking weergegeven door de afvalcontainer met een kruis
erdoor. De gebruikte grondstoffen kunnen worden gerecycled.
Door het recyclen van gebruikte apparatuur of grondstoffen, speelt u een belangrijke rol bij
de bescherming van het milieu. U kunt bij de gemeente informeren waar het dichtstbijzijnde
inzamelpunt is.
Gooi batterijen niet weg met het huisvuil. Breng ze naar het lokale inzamelpunt voor chemisch
afval. Neem contact op met de lokale overheidsinstanties voor nadere informatie.
INSTRUCTIES VOOR DE BESCHERMING VAN HET MILIEU
(AEEA, de richtlijn voor afgedankte elektrische en elektronische apparatuur)
Productkenmerken en specicaties:
Geïntegreerde oplaadbare batterij: 3,7 V gelijkstroom - 200 mAh Li-Ion (0.74Wh)
Afmetingen apparaat: 5,9 cm x 2,5 cm x 4,0 cm (LxBxH)
Gewicht: 54,5 gram (alleen het apparaat)
Scherm: Lcd 2”
Camerahoek: Groothoek van 90 graden
Focus: 20 cm tot oneindig
Beeldgrootte-/resolutie: 3M / 2M / 1,3M / VGA
Videoresolutie: 1080P – 30 fps (geïnterpoleerd); 720P – 30 fps; VGA – 30 fps
Videoformaat: AVI
Video-output: 50 / 60Hz.
Fotoresolutie: 1M, 3M, 5M
Ingebouwde microfoon & speaker
USB-poort: Micro USB 2.0
Opslag: Micro SD-kaart (tot 32GB)
Waterbestendig: waterdicht: 30 meter, max. 60 minuten
Ondersteunde computersystemen: Microsoft Windows 2000, XP, VISTA, Windows
7/8/10
Alle in deze handleiding vermelde informatie en specificaties kunnen zonder voorafgaande
kennisgeving worden gewijzigd.
Table of contents
Languages:
