TECHWOOD TCA-170EX User manual

1
ELECTRIC ESPRESSO COFFEE MACHINE
Instruction manual
Dear consumer, please read these instructions carefully before use in order
to avoid damage due to incorrect use and to better understand the functions
of this product. Please pay particular attention to the safety guide.
If you pass the device on to a third party, these Operating Instructions must
also be handed over.
Please keep them for future references.
TCA-170EX

2
IMPORTANT SAFEGUARDS
q Please read these instructions carefully before use.
q Keep present instructions for future references.
q Check that your mains voltage corresponds to that stated on
the appliance.
q Only use the appliance for domestic purposes and household
or similar applications such as:
- staff kitchen areas, in shops, offices and other working
environments;
- By clients in hotels, motels and other residential type
environments;
- Environment type like :
• Farm Houses • Bed and Breakfast.
q Only use the appliance in the way indicated in these
instructions.
q Never use this unit near bathtub, shower, wash-hand basins
or other containers with water.
q Never use this apparatus near water projections.
q Never use this apparatus with the wet hands.
q If, unfortunately the apparatus is wet, immediately withdraw
the cord of the socket-outlet.
q Inform potential users of these instructions.
q Never leave the appliance unsupervised when in use.
q The appliance must be used only for its intended purpose. No
responsibility can be taken for any possible damage caused
by incorrect use or improper handling.
q Children and persons with disabilities are not always aware of
the danger posed by the use of appliances.
q This appliance can be used by children aged from 8 years
and above if they have been given supervision or instruction
concerning use of the appliance in a safe way and if they
understand the hazards involved.
q Cleaning and user maintenance shall not be made by

3
children unless they are older than 8 and supervised.
q Keep the appliance and its cord out of reach of children aged
less than 8 years.
q Appliances can be used by persons with reduced physical,
sensory or mental capabilities or lack of experience and
knowledge if they have been given supervision or instruction
concerning use of the appliance in a safe way and
understand the hazards involved.
q Children shall not play with the appliance.
q WARNING: The filling aperture must not be opened during
use.
q In order to ensure your children‘s safety, please keep all
packaging (plastic bags, boxes, polystyrene etc.) out of their
reach.
q Caution! Do not allow small children to play with the foil.
THERE IS A DANGER OF SUFFOCATION!
q From time to time check the cord for damages. Never use the
appliance if cord or appliance shows any signs of damage.
q Never immerse the appliance in water or any other liquid for
any reason whatsoever.
q Never place it into the dishwasher.
q Never use the appliance near hot surfaces.
q Do not operate the appliance with a damaged cord or plug, or
after the appliance has been damaged in any manner.
q If the supply cord or appliance is damaged, it must be
replaced by the manufacturer or its service agent or a
similarly qualified person in order to avoid a hazard.
q Disconnect the power source cable before any operation of
cleaning of maintenance and accessories assembly.
q Never use the appliance outside and always place it in a dry
environment.

4
q Never use accessories, which are not recommended by the
producer. They could constitute a danger to the user and
risk to damage the appliance.
q Never use any other connector than the one provided.
q Never move the appliance by pulling the cord. Make sure the
cord cannot get caught in any way.
q Never wind the cord around the appliance and do not bend it
q Ensure that the power cord does not come into contact with
hot parts of this unit.
q Make sure the appliance has cooled down before cleaning
and storing it.
q The temperature of accessible surfaces may be very high
when the appliance is operating. Never touch these parts, of
apparatus, to avoid burning itself.
q Make sure the appliance never comes into contact with
flammable materials, such as curtains, cloth, etc...& the
power cord and plug do not come in contact with water.
q Before cleaning, always unplug the appliance from the power
supply and let it cool down.
q This appliance is not intended to be operated by means of an
external timer or separate remote-control system.
q Always place the unit on a flat surface. Ensure, also, not to
cover the device and not to put anything on it.
q Always remove the plug from the wall socket when the
appliance is not in use.
q When using an extension lead always make sure that the
entire cable is unwound from the reel. Use solely CE
approved extension leads. Input power must be at least 16A,
250V, 3000W.
q Incorrect operation and improper use can damage the
appliance and cause injury to the user.
q This device, designed for home use, complies with standards
relating to this type of product.
q The appliance must be used and rested on a table or flat &
stable surface.

5
q The item must not be left unattended when it is connected to
main supply.
q The item is not to be used, if it has been dropped or if there
are visible signs of damage or if it is leaking.
q Regarding the instructions for cleaning, thanks to refer to the
below paragraph of the manual.
q This appliance is only intended for household use.
q Warning: avoid spillage on the connector.
q Warning: potential injury from misuse.
q The heating element surface is subject to residual heat after
use.
(*) Competent qualified person : after sales department of the
producer or importer or any person who is qualified, approved
and competent to perform this kind of repairs.
GENERAL INFORMATION
The symbol "OPEN BOOK" means a recommendation
to read important things contained in the record.
The symbol "BIN" crossed out, abbreviation WEEE
(Waste of Electrical and Electronic Equipment) means
that at the end of life, it should not be discarded with
household waste, but filed to the sorting of the locality.
Waste recovery can help preserve our environment.
The symbol "STEAM" warns the user that steam can
escape from the unit and to take all necessary
precautions. (Risk of burns)
The symbol "CE" is the guarantee of compliance with
harmonized European standards, voluntary, reflecting
the essential requirements into technical
specifications. These standards are not mandatory

6
but are guarantees of compliance with essential
requirements.
The symbol "GLASS / FORK" means that the device is
compatible and can come into contact with foodstuffs.
The symbol ROHS (Restriction of use of some
Hazardous Substances) on the Environmental
Protection, certifies that for each of the five hazardous
substances • Lead • Mercury • (hexavalent) chromium •
products for protection against flames PBB and PBDE,
the peak concentration is equal to or less than 0.1% of
the weight of homogeneous material, and 0.01% for the
6th • cadmium.
The symbol "TRIMAN" indicates that the consumer is
invited to dispose the product as part of a separate
collection (eg recycling bin, waste, voluntary intake
point).
The symbol "CMIM marking" is the guarantee of compliance
with the harmonized Moroccan Standards, optional, which
translate the essential requirements into technical
specifications. These standards are not mandatory but
guarantee compliance with the essential requirements.
For more information : http://www.quefairedemesdechets.fr
TO KNOW ITS UNIT

7
1. Control panel and functions
2. Dry tray cups
3. Water tank
4. Steam production control
5. Steam tube handle
6. Steam tube
7. Coffee maker base
8. Removable grid
9. Filter holder
10. Filter Inserting Hole
1. Light indicator
2. 1 cup selector
3. 2 cups selector
4. M / A switch
5. Manual selector (amount of water)
6. Steam production key
WATER / STEAM CONTROL
0 = Closed command
= Water command
or Steam
- => + To more water or steam.
FIRST USE
Before first use, remove the device and all accessories.
• Clean the apparatus according to the instructions in "Cleaning and

8
Maintenance" paragraph.
• Place the machine on a suitable flat, stable surface.
• Unroll the power cord completely.
• Check that the tension in force in the country where you are, corresponds to
that indicated on the apparatus.
• Connect the apparatus in a correct socket-outlet, (and connected to the ground
if the unit is Class I), to avoid any danger.
• Disconnect the power source cable before any operation of cleaning of
maintenance and accessories assembly.
• Never modify the appliance in anyway.
Before making the first cup of coffee, it is best to rinse the coffee machine with hot
water.
1. Open the tank lid.
2. Pour water into the water tank.
Note : The water level must not exceed the "MAX" mark on the tank.
3. Close the lid of the water tank.
Note : Make sure the steam control knob is at "0".
4. Insert one of the 3 metal filters (1 cup, 2 cups or pod) into the filter holder.
DO NOT PUT COFFE IN THE FILTER
Place the filter holder in the place
provided by inserting it upwards (1).
Turn right until blocking (2).

9
Place a cup under the filter holder.
Note : The appliance is delivered without cup or bowl. Use your own equipment,
a bowl or a coffee cup.
Connect the device to the mains.
Note : The steam control (4) must be in the "0" position
Press the On / Off switch. => The indicator light flashes blue.
Press the "manual control" button and the water pump will turn on, introducing the
water from the water tank into the machine, to be heated.
The unit starts to heat up.
Note : At this point, the indicator light is still flashing. Wait until the pilot light is on
continuously. This will mean that preheating is
completed.
It will take about 2 minutes.
Press the "1 cup" or "2 cups" button. The machine will produce hot water, which
will wash the circuit and the filter.
Note : The pump will make a little noise at start-up which is normal because it
removes air remaining in the device. After about 20 seconds, the noise will
disappear.
USE
Unwind the power cord completely.
Check that the voltage in the country where you are, corresponds to that indicated
on the device.
Plug the unit into a good electrical outlet, (earthed if the device is class I), to avoid
danger.
Disconnect the power cable from the power supply before performing
maintenance cleaning and accessory mounting.
Never modify the device.
Place a filter in the filter holder.
While the machine is preheating, pour coffee powder into the filter and pack the
coffee with the tail of the "dozer / packer" accessory. (Coffee powder should not
be ground, too big, or too thin).
Note: If necessary, clean the edge of the filter if there is some coffee powder.
Insert and lock the filter holder as indicated above, and place a coffee cup under
the filter holder.
Press the "one cup", "2 cups" or "manual control" button.
The machine is working and the coffee is filling the cup.
Note : By pressing the "manual control" button it is necessary to press the same
control button again to stop the coffee from running.
MAKE A CAPPUCCINO OR MILK FOAM
Method

10
To get a cup of cappuccino, cover the surface of the coffee with milk froth.
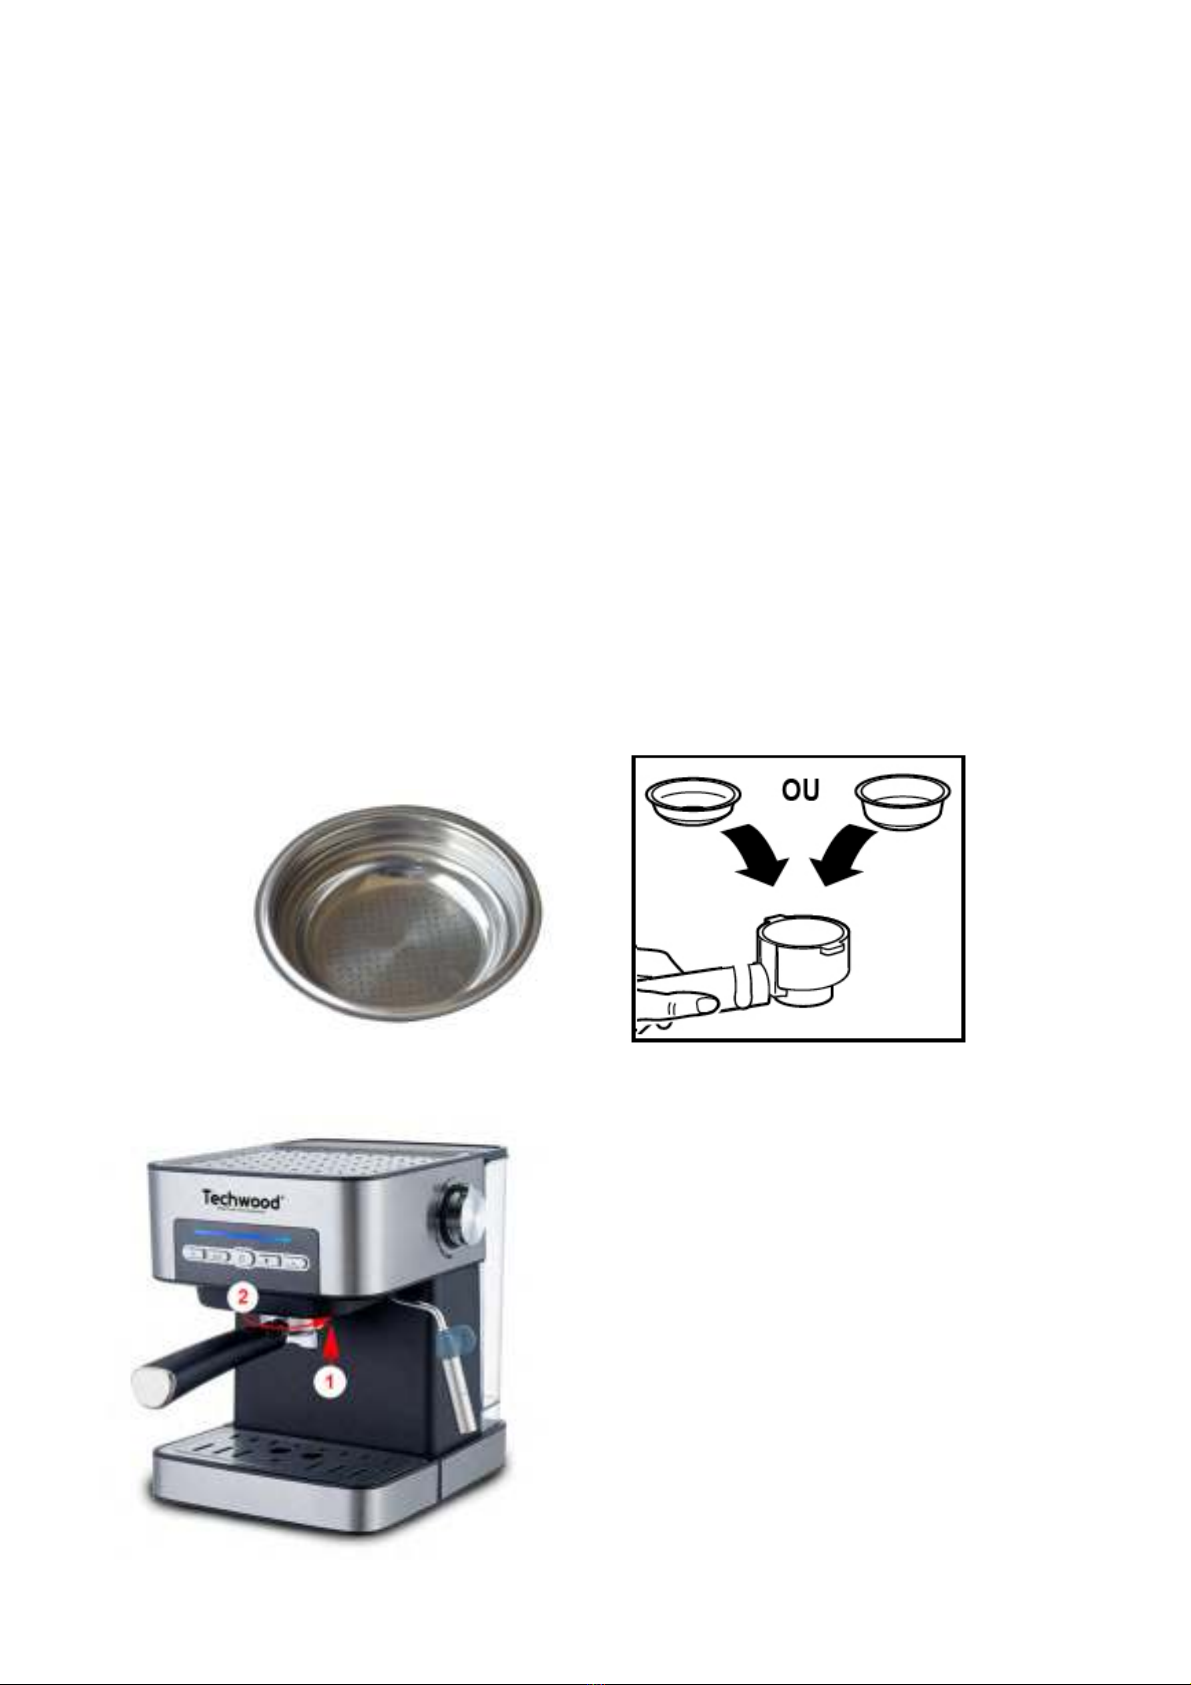
1. First prepare the espresso with a cup large enough to support the addition of
milk froth.
2. Press the "steam control" button and the indicator light flashes red. Wait for the
light to come on continuously, preheating is completed.
3. Fill 1/3 cup of whole milk.
4. Insert the steam nozzle 1 to 2 cm into the milk.
Note : always release some pressure before frothing milk.
5. Slowly turn the steam knob counter-clockwise (to the left) until the steam starts
to come out. Move the container slightly up and down, turning.
Notes : It is recommended to use whole milk cooled to the temperature of
fridge. (Never use hot milk !).
In choosing the pot size, it is recommended to use a diameter container
greater than 70 mm, and to keep in mind that double milk of volume by
becoming a froth of milk.
Make sure the height of the pot is big enough.
Never turn the steam control knob quickly because the water vapour can
come out quickly and increase the risk of splashes.
6. When the milk froth is formed, turn the steam control knob to "0" clockwise (to
the right).
7. Press the "steam control" button again. The indicator light turns blue.
Note : It is also possible to press the on / off button to turn off the machine.
8. Gently pour the emulsified milk onto the already prepared espresso.
• Sweeten if necessary.
• Sprinkle some cocoa powder on the frothed milk.
- The cappuccino is ready.
9. Set the selector to the "0" position to stop the steam and push on the on / off
switch to stop the espresso machine.
Notes : Clean the tube of the steam nozzle, with a damp sponge, immediately
after use because the milk sticks on the tube.
Finally, spray with steam to prevent the hole inside the nozzle is clogged
after drying milk.
Be careful not to get hurt because the tube stays very hot for a long time.
We recommend letting the machine cool down, for at least 5 minutes,
before making an espresso again. Otherwise a smell of burned can occur
in your espresso.
PRODUCE STEAM TO HEAT LIQUIDS
The steam nozzle (without the foaming device) can be used to make hot drinks
such as hot chocolate, water or tea.
Method
1. Open the tank lid,
2. Fill with the desired amount of water.

11
the water level must not exceed the "MAX" mark of the tank.
3. Close the lid.
4. Connect the unit to a power source.
5. Push on the On / Off switch.
The blue LED lights up and flashes.
6. Press the "steam control" button and the indicator light flashes red. Wait for the
light to come on continuously, preheating is completed.
7. Immerse the steam nozzle in the liquid to be heated.
8. Slowly turn the steam control knob counter-clockwise (to the left), steam will go
out of the steam nozzle.
9. When the liquid reaches the desired temperature, turn the steam control knob
to "0" clockwise (to the right).
10. Push again on the On / Off switch, to stop the coffee machine.
PRODUCE HOT WATER FOR BEVERAGE
1. Press the On / Off switch. => The indicator light flashes blue.
2. Wait until the indicator lights up continuously, preheating is completed.
Note: Do not press the "Steam Control" button !!!
3. Slowly turn the steam control knob counter-clockwise (to the left) until water
flows from the nozzle. Water can be used to drink, clean or warm cups.
4. After use, turn the knob to the "0" position and press the on / off button again to
turn off the machine
CLEANING AND MAINTENANCE
Before cleaning, always switch off the appliance, disconnect the apparatus and let
it cool.
Clean the outside of the apparatus with a sponge or slightly wet linen.
The parts (removable) in contact with food like plate, bowl, forks, Spatula etc. can
be washed in hot water with sponge and soft detergent or put in the dishwasher.
Never plunge the apparatus in water or all other liquid!
Do not use abrasive cleaners, gritting, or metal brush or another cutting object.
• Do not place any other parts of your coffee machine in the dishwasher.
• Remove the filter holder from the machine by turning it counter-clockwise,
• After every use, empty the coffee grounds left inside the filter and clean it
carefully.
• Dry all accessories.
CLEANING MINERAL DEPOSITS
To ensure your coffee to work effectively, you need to clean the interior pipe;
Every 2 or 3 months, From Mineral deposits left, to maintain the flavour and
aroma of the coffee.

12
Method
Fill the tank with water at MAX level with descaling agent (The Water / descaling
ratio is normally 4/1), refer to the instructions of the used descaling agent.
Use the preheat program.
Put the filter + filter holder (without coffee powder) in place and a large container
under the filter holder.
1. Connect the device to the mains.
Note : The steam selector should be in the "0" position
2. Press the On / Off switch. => The indicator light flashes blue.
Note: Do not press the "Steam Control" button !!!
3. Wait until the blue light is steady.
4. Make the equivalent of 2 large cups of coffee by pressing the "manual control"
button. Press the button again at the end of cleaning.
5. Turn the "Water / Steam" control knob and allow water to escape for 2 minutes.
6. Turn the "Water / Steam" control knob to "0" to stop running the water.
7. Let the descaling agent work for at least 15 minutes.
8. Restart the unit and repeat the previous steps at least 3 times.
9. Set the "Water / Steam" switch to the "+" position to empty the remaining
descaling agent.
10. Fill the water tank with clear water.
The water level must not exceed the "MAX" mark in the tank.
11. Repeat above steps from 2 to 5. Then steps 6 to 9 at least 3 times each.
This is to ensure the cleanliness of the piping.
STORAGE
-Ensure the unit is completely cool and dry.
-Do not wrap the cord around the appliance, as this will cause damage.
-Keep the appliance in a cool, dry place and out of reach from children.
GUARANTEE
Before being delivered, all our products are subjected to a rigorous control.
This apparatus is guaranteed 24 months starting from the date of purchase by
the consumer.
The documents in proof of guarantee are:
• The invoice and
• The filled and stamped warrantee plate (located on side or bottom of the gift
box). Without these documents in proof, no free replacement, nor no free repair,
can be carried out.
During the warranty period, we deal for free, the defects of the apparatus or the
accessories, rising from a defect of materials or manufacture by repair or,

13
replacement. The services within the framework of the guarantee do not involve
any extension of the warranty period and does not give right to a new guarantee!
In the event of recourse to the guarantee, bring back the complete apparatus to
your retailer, in its original packing, accompanied by the proofs of purchase.
The breakage of parts out of glass or plastic is, in all the cases, not warranted.
Defects on the accessories or the wearing parts (for example: coals of engines,
hooks, drive belts, remote control of replacement, teeth brushes of replacement,
webs etc) as well as cleaning, maintenance or it replacement of wearing parts
are not guaranteed and are thus to pay!
In the event of foreign intervention, the guarantee becomes null and void.
After flow of the warranty period, repairs can be carried out, against payment, by
a specialized trade or a repair service.
SPECIFICATIONS
Power supply 220-240V~ 50/60Hz
Power 850W
Norm Class I
Made in PRC
The characteristics can change without prior notice.
EARTHING
This unit is equipped with an electrical outlet with earth and must be
earthed in an according plug.
Note: In the event of question concerning the earth or electric
connection, please consult a qualified personnel.
In the event of short-circuit, earthing reduces the risk of electric
shock while making possible the current to be evacuated by the wire
of ground.
CAUTION: In order to minimize the risks of electric shock, In the event of
breakdown, not to open the case but to call upon a qualified technician
for repairs.
This device complies with EC directives, it was controlled according to all current
European directives, applicable such as: electromagnetic compatibility (EMC) and
low voltage (LVD).
This device has been designed and manufactured in compliance with the latest
regulations and technical requirements for safety.
Imported by Sotech International
" LE PERIPOLE " N°A-107
33, Avenue du Marechal de Lattre de Tassigny

14
94120 Fontenay sous-bois - France
Table of contents
Other TECHWOOD Coffee Maker manuals

TECHWOOD
TECHWOOD TCA-195N User manual

TECHWOOD
TECHWOOD TCA-9121 User manual

TECHWOOD
TECHWOOD TCA-696 User manual

TECHWOOD
TECHWOOD TCA-991 User manual

TECHWOOD
TECHWOOD TCA-1518i User manual

TECHWOOD
TECHWOOD TCA-1295 User manual

TECHWOOD
TECHWOOD TCA-682 User manual

TECHWOOD
TECHWOOD TCA-840 User manual

TECHWOOD
TECHWOOD TCA-941 User manual

TECHWOOD
TECHWOOD TCA-206 User manual