Tecknet HWD01161 User manual

Receiver Transmitter
Doorbell
User Manual
Package Contents
Product Layout
Battery
2032
x1 x1
User
Manual
x1
Double
Sided
Adhesive
Tape
②
①
③
④
x1

Product Features
①
②
③
④
LED Indicator
Music+ Button
Volume Button
Music- Button
EN
①
②
③
④
LED-Anzeige
Musik + Taste
Lautstärkeregler
Musik-Taste
DE
①
②
③
④
Indicador LED
Música + botón
Botón de volumen
Botón de música
ES
①
②
③
④
Indicatore LED
Musica + pulsante
Pulsante volume
Tasto Musica
IT
①
②
③
④
Voyant LED
Bouton Music+
Bouton Volume
Bouton Music-
FR
• Stylish, sleek exterior design.
• Powerful transmitter provides an amazing 250 metres range for remote control.
• You can easily select and change chimes to suit your taste or occasion.
• Four-level adjustable volume control for each receiver.
Receiver Instructions
Simply put the receiver into the socket
,
there will be a warning tone "Ding-Dong"
showing the receiver is on.
Volume Adjustment
Cycling through the button to adjust 4 volume levels.
Product Specifications
Receiver Power Supplied:
Receiver Working Current:
Transmitter Battery Type:
Working Frequency:
AC 85V ~265V
<5mA
DC 3V
433.92MHz
EN

This can be done before or after pairing
To Change the Chime
1. Plug in the receiver, there would be a chime prompt.
2. Simply press Music + or Music – to play through the different chimes included in
the receiver.
3. Once you have found the chime you like simply let it play.
A. If your transmitter is paired, the next time it is pressed it will play your
selected chime.
B. If it doesn’t however, please follow the instructions for deleting the pair.
Choose your chime again and then re-pair as instructed above.
To pair the device
1. Plug in the receiver.
2. Press the Music + (the top button) and the volume buttons (central circle) together,
the LED will light up.
3. Then release the buttons simultaneously.
4. While the LED is on, press the transmitter button once, the LED on the receiver will
flash once.
5. Afterwards, press the volume button (central circle) again to finish pairing.
EN
Delete pairing
1. Unplug the receiver.
2. Press and hold the volume button (central circle) and plug the receiver in. DO
NOT release the buttons for 5-10 seconds, meanwhile the LED will start flashing.
3. Then release the button after LED turns off.
4. The previous paring mode is removed and confirmed when you hear a ring tone.
Transmitter Installation
Apply the double-sided adhesive tape on the back of the transmitter case. Remove
the outer side of the tape, attach the transmitter to the position you need and press
hard for 32 seconds.
Maintenance
1. Ideally, use high-quality alkaline batteries that will last longer and reduce the
chance of electrolyte leakage.
2. In order to protect the precision internal electronic components, it’s advisable that
unqualified users should not attempt to open the unit for maintenance.
3. Do not expose to continuous direct sunlight or humid environment - this will
adversely affect the unit.
4. Correct use of the products helps to effectively extend the service life of the unit.
EN

Es könnte vor oder nach der Paarung gemacht werden
Für die Veränderung der Klingeln
1. Stecken in die Steckdose,es würde einen Klingel geben.
Eigenschaften des Produktes
• Moderne,glette Außenseite.
• Mächtiger Transmitter kann eine 250 Meter Bereich für entfernte Kontrolle.
• Sie können einfach davon auswählen und verändern Töne,um ihrem Geschmack
oder iher Gelegenheit zu passen.
• Viel-Ebene Einstellbare Lautstärke Kontrolle für jeden Receiver.
Receiver Anweisung
Einfach den Receiver in disese Steckdose hineinstecken,es wird einen Ton der
Achtung "Ding-Dong" geben,der die Einschaltung von Receiver aufweist.
Um das Gerät zu koppeln
1. Stecken Sie den Empfänger ein.
2. Drücken Sie die Musik + (die obere Taste) und die Lautstärketasten (zentraler Kreis)
zusammen, wird die LED aufleuchten.
3. Lassen Sie dann die Tasten gleichzeitig los.
4. Während die LED leuchtet, Drücken Sie einmal die Sendertaste, wird die LED am
Empfänger einmal blinken.
5. Danach drücken Sie die Lautstärketaste (Mittelkreis) erneut, um die Kopplung zu
beenden.
Einstellung der Lautstärke
Durch die Taste können Sie 4 Lautstärken einstellen.
Spezifikation des Produkt
Receiver Power Lieferung:
Receiver Bearbeitung Stromstärke:
Transmitter Batterie Typ:
Bearbeitung Frequenz:
AC 85V ~265V
<5mA
DC 3V
433.92MHz
DE DE
Pairing-Methode löschen
1. Ziehen Sie den Empfänger ab.
2. Drücken und halten Sie die Lautstärketaste (mittlere Kreise) und stecken Sie den
Empfänger ein. Lassen Sie die Tasten für 5-10 Sekunden nicht los, während die LED
blinkt.
2. Einfach drücken Musik+ oder Musik–,um die unterschiedlichen Klingeln zu
durchspielen,die der Receiver enthältet.
3. Wenn Sie den Klingel gefunden haben,spielen den auf
A. Wenn ihr Transmitter gepaart nächste Zeit ist,wird er von Ihnen ausgewählten
Klingel aufspielen.
B. Wenn er alerdings bitten nach der Anweisung für Lösung des Paars nicht
funktioniert,wählen Sie wieder den Klingel aus.

Cela peut se faire avant ou après le jumelage.
Pour changer le carillon
Caractéristiques du produit
• Conception extérieure lisse et élégante.
• L'émetteur puissant offre une gamme incroyable de 250 mètres pour la
télécommande.
• Vous pouvez facilement sélectionner et changer les carillons en fonction de votre
goût ou de votre occasion.
• Contrôle de volume réglable à quatre niveaux pour chaque récepteur.
IRécepteur nstructions
Il suffit de brancher le récepteur dans la prise, et il y aura une invite sonore «
Ding-Dong » indiquant que le récepteur est activé.
Réglage du volume
Faites un cycle à l'aide du bouton pour ajuster 4 niveaux de volume.
Spécifications du produit
Alimentation du récepteur:
Courant de fonctionnement du récepteur:
Type de batterie de l'émetteur:
Fréquence de fonctionnement:
AC 85V ~265V
<5mA
DC 3V
433.92MHz
FR
Transmitter Installation
Anwenden Doppel-Seit Kleber Band auf der Hintergrund von Transmitter.Entfernen
das außene Seite Band ,beifügen die Transmitter für die Position.Sie brauchen 32
Sekenden hart
Wartung
1. ideal,benutzen Sie Batterien mit hoher Qualität,die lang dauern können,und die
Möglichkeit der Akkumulatorsäure reduzieren können.
2. Um die Präzision von inneren elektronischen Komponenten zu schützen,ist es
empfehlenswert,dass uneingeschränkte Benutzer das Gerät für Wartung zu öffnen
versuchen sollen.
3. Setzen nicht dauerd direkt dem Sonnenstrahl oder feuchten Environment-Es wird
negativ das Gerät beeinflußen.
4. Die Nutzung des Produktes zu korrigieren hilft effektiv die Verlängerung der
Lebensdauer von Gerät.
DE
3. Lassen Sie dann die Taste los, nachdem die LED ausgeschaltet ist.
4. Der vorherige Paarungsmodus wird entfernt und bestätigt, wenn Sie einen
Klingelton hören.
5. Danach drücken Sie die Lautstärketaste (Mittelkreis) erneut, um die Kopplung zu
beenden.

1. Branchez le récepteur, et il y aura une invite de sonnerie.
2. Appuyez simplement sur Music+ ou Music- pour écouter les différents carillons
fournis par le récepteur.
3. Une fois que vous avez trouvé le carillon souhaité, continuez sa lecture,
A. Si votre émetteur est jumelé, à la prochaine pression, il lira le carillon de votre
choix.
B. Si ce n'est pas le cas, suivez les instructions pour annuler le jumelage,
choisissez de nouveau votre carillon, puis re-jumelez comme indiqué ci-dessus.
Pour coupler l'appareil
1. Branchez le récepteur.
2. Appuyez simultanément sur les boutons Musique + (le bouton supérieur) et
Volume (cercle central), le voyant LED s'allumera.
3. Ensuite relâchez les boutons simultanément.
4. Lorsque le voyant LED est allumé, appuyez une fois sur le bouton de l'émetteur, le
voyant LED du récepteur clignotera une fois.
5. Ensuite, appuyez de nouveau sur le bouton de volume (cercle central) pour
terminer le jumelage.
FR
Supprimer la méthode d'appariement
1. Débranchez le récepteur.
2. Maintenez enfoncé le bouton de volume (cercle central) et branchez le récepteur.
Installation de l'émetteur
Appliquez le ruban adhésif double face à l'arrière du boîtier de l'émetteur. Retirez le
côté extérieur du ruban, fixez le l'émetteur à la position souhaitée et appuyez fort
pendant 32 secondes.
Entretien
1. Idéalement, utilisez des piles alcalines de haute qualité qui dureront plus
longtemps et réduiront les risques de fuite d'électrolyte.
2. Afin de protéger les composants électroniques internes précis, il est recommandé
que les utilisateurs non qualifiés ne puissent pas essayer d'ouvrir l'unité pour
l'entretien.
3. N'exposez pas l'unité à la lumière directe du soleil ou à un environnement humide
d'une manière prolongée - cela affectera négativement l'unité.
4. L'utilisation correcte du produit contribue à prolonger efficacement la durée de vie
de l'unité.
FR
NE PAS relâcher le bouton pendant 5 à 10 secondes, tandis que le voyant LED
commencera à clignoter.
3. Ensuite, relâchez le bouton une fois le voyant LED éteint.
4. Le mode de jumelage précédent est supprimé et assurez-vous que vous
entendez une sonnerie.

Esto puede hacerse antes o después del emparejamiento
Para cambiar los tonos
1. Conecte el receptor, habrá un aviso de tono.
2. Simplemente presione Music + ó Music - para reproducir los diferentes timbres
incluidos en el receptor.
3. Una vez que haya encontrado el que le guste, deje que suene,
A. si su transmisor está emparejado, la próxima vez que lo presione se
reproducirá el timbre seleccionado.
B. De no hacerlo, siga las instrucciones para eliminar el par, elija su timbre una
vez más y luego vuelva a emparejar como se indicó anteriormente.
Características del producto
• Diseño exterior elegante y con estilo.
• Potente transmisor que ofrece un increíble rango de 250 metros para control
remoto.
• Puede seleccionar y cambiar fácilmente campanillas para adaptarse a su gusto
u ocasión.
• Control de volumen ajustable de cuatro niveles para cada receptor.
Instrucciones del receptor
Simplemente coloque el receptor en el zócalo, habrá un tono de aviso
"Ding-Dong" que muestra que el receptor esté encendido.
Para emparejar el dispositivo
1. Conecte el receptor.
2. Presione Music + (el botón superior) y los botones de volumen (círculo central)
juntos, el LED se iluminará.
3. Luego suelte los botones simultáneamente.
4. Mientras el LED esté encendido, presione el botón del transmisor una vez, el LED
del receptor parpadeará una vez.
5. Luego, presione el botón de volumen (círculo central) nuevamente para finalizar el
emparejamiento.
Ajuste de volumen
Ajuste el volumen presionando y recorriendo a través de los 4 niveles de volumen.
Especificaciones del producto
Potencia del receptor suministrado:
Corriente de funcionamiento del receptor:
Tipo de batería del transmisor:
Frecuencia de trabajo:
AC 85V ~265V
<5mA
DC 3V
433.92MHz
ES ES

Caratteristiche del Prodotto
• In stile, design elegante da esterno.
• Ha un potente segnale di trasmissione che offre una sorprendente gamma di
250 metri per il controllo remoto.
• È possibile selezionare e modificare facilmente le sonerie per soddisfare il
proprio gusto o occasione.
• Controllo del volume regolabile a quattro livelli per ogni ricevitore.
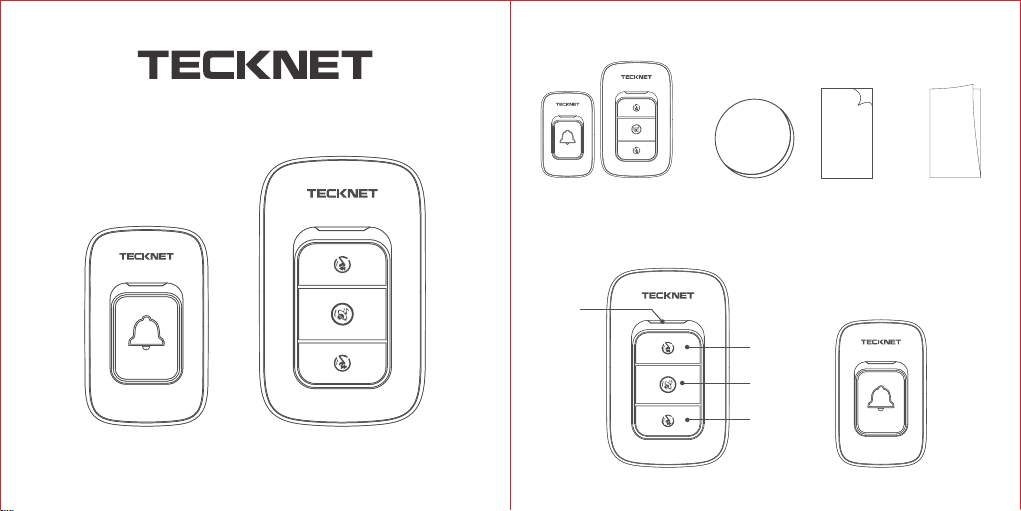
Istruzioni per il Ricevitore
Basta inserire il ricevitore nella presa, ci sentirà un tono di avvertimento
"Ding-Dong " che indica che il ricevitore è acceso.
Regolazione del Volume
Regolare il volume premendo e cliccando attraverso i 4 livelli di volume.
Specifiche del Prodotto
Potenza Ricevitore Fornita:
Corrente Funzionamento Ricevitore:
Tipo Batteria Trasmettitore:
Frequenza Funzionamento:
AC 85V ~265V
<5mA
DC 3V
433.92MHz
IT
1. Conecte el receptor, habrá un aviso de tono.
2. Simplemente presione Music + ó Music - para reproducir los diferentes timbres
incluidos en el receptor.
3. Una vez que haya encontrado el que le guste, deje que suene,
A. si su transmisor está emparejado, la próxima vez que lo presione se
reproducirá el timbre seleccionado.
B. De no hacerlo, siga las instrucciones para eliminar el par, elija su timbre una
vez más y luego vuelva a emparejar como se indicó anteriormente.
Eliminar el método de emparejamiento
1. Desenchufe el receptor.
2. Mantenga presionado el botón de volumen (círculo central) y enchufe el
receptor. NO suelte los botones durante 5-10 segundos, mientras tanto, el LED
comenzará a parpadear.
3. Luego, suelte el botón después de que el LED se apaga.
4. El modo de emparejamiento anterior se elimina y se confirma cuando escuche un
tono de llamada.
Instalación del transmisor
Aplique la cinta adhesiva de doble cara en la parte posterior de la caja del transmisor.
Retire el lado externo de la cinta, coloque el transmisor en la posición que necesita y
presione con fuerza durante 32 segundos.
Mantenimiento
1. Idealmente, use baterías alcalinas de alta calidad que durarán más y reducirán la
posibilidad de fugas de electrolito.
2. Para proteger los componentes electrónicos internos de precisión, es recomendable que
los usuarios no calificados no intenten abrir la unidad para realizar el mantenimiento.
3. No exponga a la luz solar directa continua o al ambiente húmedo, esto afectará
negativamente a la unidad.
4. El uso correcto de los productos ayuda a prolongar eficazmente la vida útil de la unidad.
ES

Ciò può essere fatto prima o dopo l'accoppiamento
Per Modificare la Suoneria
1. Collegare il ricevitore, si dovrebbe udire una suono acustico.
2. Premere semplicemente Music+ o Music- per riprodurre le diverse suonerie
incluse nel ricevitore.
3. Una volta che è stata trovata la soneria che più piace, basta semplicemente
lasciarla riprodurre.
A. Se il trasmettitore è accoppiato, la volta successiva che viene premuto,
riprodurrà il campanello selezionato.
B. Se tuttavia ciò non accadesse, si prega di seguire le istruzioni per l'eliminazi-
one dell’accoppiamento e riscegliere la soneria e, quindi, accoppiare
nuovamente come indicato sopra.
Per accoppiare il dispositivo
1. Inserire il ricevitore.
2. Premere contemporaneamente il tasto Music+ (il pulsante superiore) e il tasto del
volume (cerchio centrale), il LED si illuminerà.
3. Quindi rilasciare i tasti contemporaneamente.
4. Mentre il LED è acceso, premere una volta il pulsante del trasmettitore; il LED sul
ricevitore lampeggerà una volta.
5. Successivamente, premere di nuovo il tasto Volume (cerchio centrale) per
terminare l'accoppiamento. IT
Metodo per eliminare l’accoppiamento
1. Scollegare il ricevitore.
2. Tenere premuto il tasto Volume (cerchio centrale) e inserire il ricevitore. NON
rilasciare i pulsanti per 5-10 secondi, mentre il LED inizierà a lampeggiare.
3. Quindi rilasciare il pulsante dopo che il LED si è spento.
4. La modalità di accoppiamento precedente viene rimossa e è confermato quando
si sente una suoneria.
Installazione del Trasmettitore
Applicare il nastro biadesivo sul retro della custodia del trasmettitore. Rimuovere il
lato esterno del nastro adesivo, collegare il trasmettitore sul punto dove desiderate
che sia e premere con forza per 32 secondi.
Manutenzione
1. L’ideale è usare batterie alcaline di alta qualità che dureranno più a lungo e
riducono la possibilità di perdite elettrolitiche.
2. Per proteggere i componenti elettronici interni di precisione, è consigliabile che gli
utenti non qualificati non tentino di aprire l'unità per la manutenzione.
3. Non esporre alla luce diretta del sole o ad un ambiente umido in quanto fare
questo influenzerà negativamente l'unità.
4. L'uso corretto dei prodotti contribuisce ad estendere efficacemente la durata del
servizio dell'unità.
IT

IMPORTANT SAFETY INSTRUCTIONS-CAREFULLY
FOLLOW THESE INSTRUCTIONS.
1. SAVE THESE INSTRUCTIONS - This sheet contains important safety and
operating instructions.
2. Before using the product, read all instructions and caution markings on
the product, accessories and device using our product.
3.This appliance is not intended for use by persons (including children)
with reduced physical, sensory or mental capabilities, or lack of
experience and knowledge, unless they have been given supervision or
instruction concerning use of the appliance by a person responsible for
their safety.
4. Children should be supervised to ensure that they do not play with the
appliance.
5. Keep the product away from fire or explosion may occur.
6. For proper insertion, please observe polarity indicators (+/-).
7. Remove the batteries if the product is not going to be used for a long
period of time.
8. Do not place the product in or near any inflammable, explosive or
hazardous object.
9. The doorbell is waterproof to some extent, it still needs some
protection so that it will be durable. So please do not place in or near
water, rain, excess moisture or extreme heat.
10. Do not operate the product with damaged cord or plug.
11. Do not operate the product if it has been damaged in any way.
12. Do not disassemble the product. Disassembly may result in a risk of
safety hazards.
13. Do not throw or shake the product.
14. To reduce the risk of electric shock, unplug the product from the
power supply when not in use or switch off the power supply.

Limited 18-Month warranty
What this warranty covers.
Shenzhen Unichain Technology Co., LTD. (Manufacturer: “Unichain”)
warrants to the original purchaser of this TeckNet product that the product shall be
free of defects in design, assembly, material, or workmanship.
What the period of coverage is.
Unichain warrants the TeckNet product for 18 Months.
What will we do to correct problems?
Unichain will repair or replace, at its option, any defective product free of charge
(except for shipping charges for the product).
What is not covered by this warranty?
All above warranties are null and void if the TeckNet product is not provided to
Unichain for inspection upon Unichain’s request at the sole expense of the purchaser,
or if Unichain determines that the TeckNet product has been improperly installed,
altered in any way, or tampered with. The TeckNet Product Warranty does not protect
against acts of God such as flood, earthquake, lightning, war, vandalism, theft,
normal-use wear and tear, erosion, depletion, obsolescence, abuse, damage due to
low voltage disturbances (e.g. brownouts or sags), non-authorized program, or system
equipment modification or alteration.
How to claim the warranty
Please contact retailers or visit TeckNet website www.tecknet.co.uk for more
information.
Disclaimer
Every effort has been made to ensure that the information and procedures in this
guide are accurate and complete, no liability can be accepted for any errors or
omissions and we reserve the right to make any changes without further notice to any
products mentioned herein.
Table of contents
Languages:
Other Tecknet Accessories manuals

Tecknet
Tecknet BLUETEK IEP1200 User manual

Tecknet
Tecknet HWD01878 User manual

Tecknet
Tecknet iEP517 User manual

Tecknet
Tecknet bluetek iep1300 User manual

Tecknet
Tecknet BLUETEK iEP360 User manual

Tecknet
Tecknet TK-WD003 User manual

Tecknet
Tecknet iEP390 User manual

Tecknet
Tecknet iEP3015 User manual

Tecknet
Tecknet iEP330 User manual

Tecknet
Tecknet iEP900 User manual