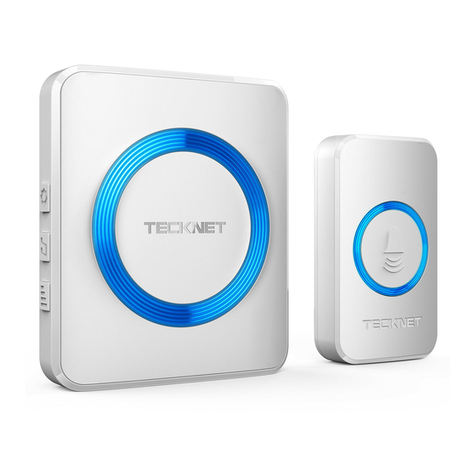
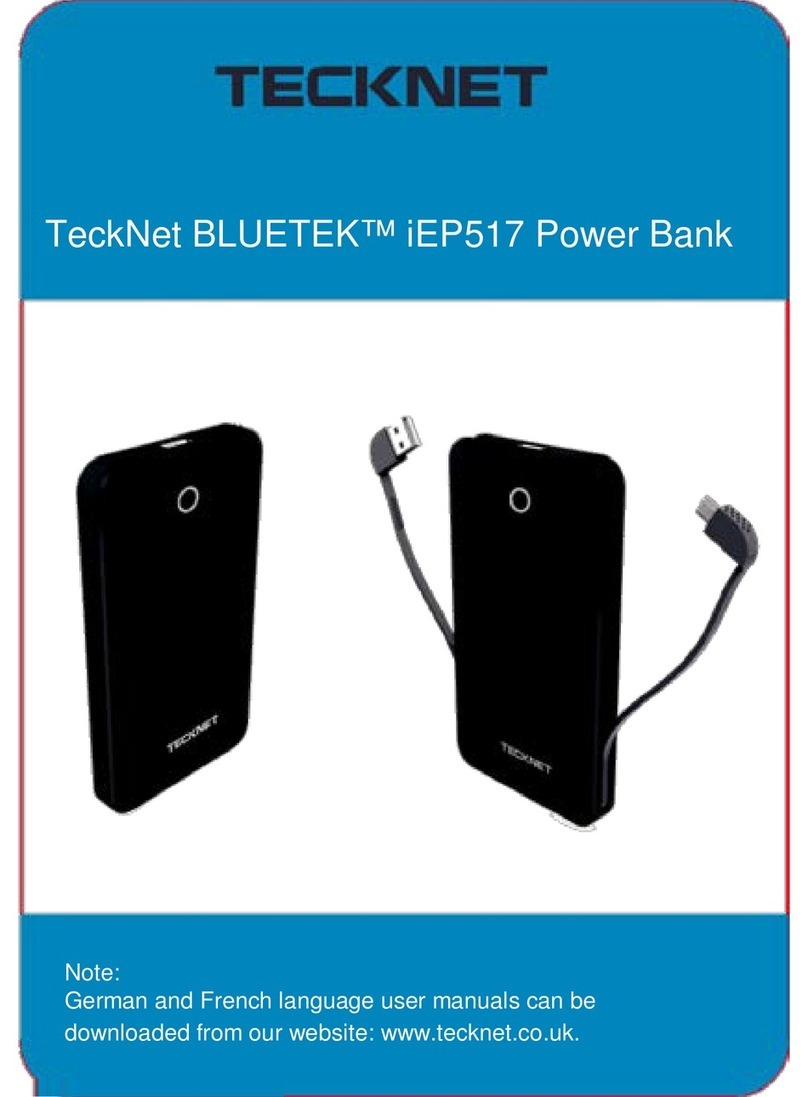
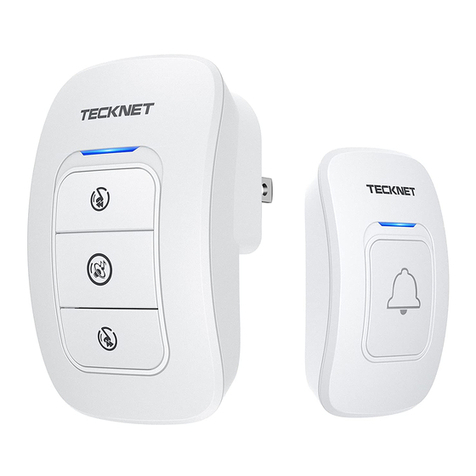
Tecknet TK-WD003 User manual

Package Contents
Product Layout
2x Doorbell
1x Double-Sided Adhesive Tape
2x Screws
2x Screw-joint Coupling
1x User Manual
Product Specifications
Receiver Power Supply:
Receiver Working Power:
Working Frequency:
AC 100-240V
<0.5W
433.92MHZ ±0.5MHZ
EN
User Manual
TK-WD003
Doorbell
Transmitter
Music button
Volume button
Receiver

Features
1. 32 high-quality chime tunes
2. 400m operating range in the open air
3. 5-level volume control: 65dB,75dB,80dB,85dB,90dB
4. Bell push waterproof rating IP65
5. Operation Temperature -10~50 ℃
6. RF penetration range: 4 walls can be penetrated
Maintenance
1. In order to protect the precision internal electronic components, it’s
advisable that unqualified users should not attempt to open the unit
for maintenance.
2. Do not expose to continuous direct sunlight or humid environment -
this will adversely affect the unit.
3. Correct use of the products helps to effectively extend the service
life of the unit.
How to Pair
Note: This device is already paired.
If there is any disconnection or short-range issues, please follow the
instructions below.
Press and hold the receiver's pairing button “ ” for 3 seconds until the
receiver makes a "Ding-Ding" sound. Then press the kinetic bell push,
then the receiver makes a "Ding" sound meaning pairing between the
kinetic bell push and receiver is successful. The receiver will make
another "Ding-Ding" sound to exit the pairing mode.
Transmitter Installation
Apply the double-sided adhesive tape on the back of the transmitter
case. Remove the outer side of the tape, attach the transmitter to the
location you need and press hard for 30 seconds.
EN EN
♪
IMPORTANT SAFETY INSTRUCTIONS-CAREFULLY FOLLOW
THESE INSTRUCTIONS.
1. SAVE THESE INSTRUCTIONS - This sheet contains important safety
and operating instructions.
2. Before using the product, read all instructions and caution markings
on the product, accessories and device using our product.
3. This appliance is not intended for use by persons (including
children) with reduced physical, sensory or mental capabilities, or
lack of experience and knowledge, unless they have been given
supervision or instruction concerning use of the appliance by a
person responsible for their safety.
4. Children should be supervised to ensure that they do not play with
the appliance.
5. Keep the product away from fire or explosion may occur.

EN EN
MONTH
Limited 18-Month Warranty
What this warranty covers.
Shenzhen Unichain Technology Co., LTD. (Manufacturer: “Unichain”)
warrants to the original purchaser of this TeckNet product that the
product shall be free of defects in design, assembly, material, or
workmanship.
What the period of coverage is.
Unichain warrants the TeckNet product for 18 Months.
What will we do to correct problems?
Unichain will repair or replace, at its option, any defective product free
of charge (except for shipping charges for the product).
What is not covered by this warranty?
All above warranties are null and void if the TeckNet product is not
provided to Unichain for inspection upon Unichain’s request at the
6. Do not place the product in or near any inflammable, explosive or
hazardous object.
7. Do not place in or near water, rain, excess moisture or extreme heat.
8. Do not operate the product with damaged cord or plug.
9. Do not operate the product if it has been damaged in any way.
10. Do not disassemble the product. Disassembly may result in a risk of
safety hazards.
11. Do not throw or shake the product.
sole expense of the purchaser, or if Unichain determines that the
TeckNet product has been improperly installed, altered in any way, or
tampered with. The TeckNet Product Warranty does not protect against
acts of God such as flood, earthquake, lightning, war, vandalism, theft,
normal-use wear and tear, erosion, depletion, obsolescence, abuse,
damage due to low voltage disturbances (e.g. brownouts or sags),
non-authorized program, or system equipment modification or
alteration.
How to claim the warranty
Please contact retailers or visit TeckNet website
www.tecknet.co.uk for more information.
Disclaimer
Every effort has been made to ensure that the information and
procedures in this guide are accurate and complete, no liability can be
accepted for any errors or omissions and we reserve the right to make
any changes without further notice to any products mentioned herein.
FCC Statement
Warning: Changes or modifications to this unit not expressly approved
by the party responsible for compliance could void the user's authority
to operate the equipment.
NOTE: This equipment has been tested and found to comply with the
limits for a Class B digital device, according to Part 15 of the FCC Rules.
These limits are designed to provide reasonable protection against
EN
Correct Disposal of This Product
( Waste Electrical& Electronic Equipment )
This Marking shown on the product or its literature, indicate that it
should not be disposed with other household wastes at the end of its
working life.
To prevent possible harm to the environment or human health from
uncontrolled waste disposal, please separate this from other types of
wastes and recycle it responsibly to promote the sustainable reuse of
material resources.Household user should contact either the retailer
where they purchased this product, or their local government office, for
details of where and how they can take this item for environmentally
safe recycling.
Business users should contact their supplier and check the terms and
conditions of the purchase contact. This product should not be mixed
with other commercial wastes for disposal.
harmful interference in a residential installation. This equipment
generates, uses and can radiate radiofrequency energy and, if not
installed and used in accordance with the instructions, may cause
harmful interference to radio communications.
However, there is no guarantee that interference will not occur in a
particular installation. If this equipment does cause harmful
interference to radio or television reception, which can be determined
by turning the equipment off and on, the user is encouraged to try to
correct the interference by one or more of the following measures:
~ Reorient or relocate the receiving antenna.
~ Increase the separation between the equipment and receiver.
~ Connect the equipment into an outlet on a circuit different from that
to which the receiver is connected.
~ Consult the dealer or an experienced radio/TV technician for help
The device must not be co-located or operating in conjunction with
any other antenna or transmitter.
This device complies with Part 15 of the FCC Rules. Operation is
subject to the following two conditions :
(1) This device may not cause harmful interference, and
(2) This device must accept any interference received, including
interference that may cause undesired operation.

Packungsinhalt
Produktlayout
2x TeckNet Türklingel
1x Doppelseitiges Klebeband
2x Schrauben
2x Schraubkupplung
1x Benutzerhandbuch
Eigenschaften
1. 32 hochwertige Glockenspielmelodien
2. 400 m Reichweite im Freien
3. 5-stufiger Lautstärkeregler: 65dB,75dB,80dB,85dB,90dB
4. Klingel: Druck- und wasserdichte Bewertung IP65
5. Betriebstemperaturbereich: -10 ~50 ℃
6. HF-Durchdringungsbereich: 4 Wände können durchdrungen werden
Kopplung durchführen
Hinweis: Dieses Gerät ist bereits gekoppelt.
Wenn Probleme mit der Trennung oder der kurzen Reichweite
auftreten, befolgen Sie die nachstehenden Anweisungen.
Halten Sie die Kopplungstaste des “ ” Empfängers 3 Sekunden lang
gedrückt, bis der Empfänger einen "Ding-Ding"-Ton abgibt. Drücken
Sie dann die kinetische Klingeltaste und der Empfänger gibt ein "Ding"
aus, was bedeutet, dass das Koppeln zwischen der kinetischen
Klingeltaste und dem Empfänger erfolgreich ist. Der Empfänger gibt
ein weiteres "Ding-Ding" aus, um den Kopplungsmodus zu beenden.
Produktspezifikation
Stromversorgung Empfänger:
Arbeitsleistung des Empfängers:
Arbeitsfrequenz:
AC 100-240V
<0,5 W
433,92 MHz ± 0,5 MHz
DE DE
Sender
Musiktaste
Lautstärkeregler
Empfänger
♪

Wartung
1. Um die internen elektronischen Präzisionsteile zu schützen, ist es
ratsam, dass nicht qualifizierte Benutzer nicht versuchen, das Gerät
zu Wartungszwecken zu öffnen.
2. Setzen Sie das Gerät keinem ständigen direkten Sonnenlicht oder
einer feuchten Umgebung aus - dies beeinträchtigt das Gerät.
3. Die richtige Verwendung der Produkte trägt dazu bei, die
Lebensdauer des Geräts effektiv zu verlängern.
Installation von Sender
Bringen Sie das doppelseitige Klebeband auf der Rückseite des
Sendergehäuses an. Entfernen Sie die Außenseite des Klebebandes,
bringen Sie den Sender an der gewünschten Stelle an, und drücken Sie
ihn 30 Sekunden lang fest an.
DE
Contenu du paquet
Description du produit
2x Sonnette de porte TeckNet
1x Ruban adhésif double-face
2x Vis
2x Couplages à vis
1x Mode d'emploi
Spécification du produit
Puissance d'alimentation du récepteur:
Puissance de travail du récepteur:
Fréquence de fonctionnement:
AC 100-240V
<0.5 W
433.92MHZ ±0.5MHZ
FR
Émetteur
Bouton de musique
Bouton de volume
Récepteur

Caractéristiques
1. 32 mélodies de qualité supérieure
2. Plage de fonctionnement de 400m en plein air
3. 5 niveaux de contrôle de volume: 65dB,75dB,80dB,85dB,90dB
4. Notation IP65 pour l'étanchéité de la sonnette
5. Température de fonctionnement: -10 ~50 ℃
6. Plage de pénétration RF: 4 murs peuvent être pénétrés
Entretien
1. Pour protéger la précision des composants internes électroniques,
nous déconseillons fortement aux utilisateurs non-qualifiés de ne
pas essayer d'ouvrir l'appareil pour la maintenance.
2. Ne pas exposer à la lumière directe du soleil ou à l'humidité - cela
peut abîmer l'appareil.
3. Une utilisation correcte des produits permet d'allonger la durée de
vie et d'utilisation de l'appareil.
Comment associer
Remarque : Cet appareil est déjà associé
S'il y a des problèmes de déconnexion ou de courte portée, veuillez
suivre les instructions ci-dessous.
Appuyez en continue sur le bouton d'association du récepteur “ ”
pendant 3 secondes jusqu'à ce que le récepteur fasse le son
"Ding-Ding". Ensuite, appuyez sur le bouton cinétique de la sonnette
et le récepteur fera le son "Ding" ce qui signifie que l'association entre
le bouton cinétique et le récepteur a fonctionné. Le récepteur fera un
autre son "Ding-Ding" pour sortir du mode association.
Installation de l'émetteur
Installez le ruban adhésif double-face à l'arrière du boîtier du
émetteur. Enlevez la couche de protection du ruban adhésif, fixez le
émetteur à l'endroit désiré et appuyez fort pendant 30 secondes.
FR FR
♪

Contenido del paquete
Struttura del Prodotto
2x Timbre de puerta TeckNet
1x Cinta adhesiva de doble cara
2x Tornillos
2x Juntas de tornillos
1x Manual del usuario
Características:
1. 32 melodías de alta calidad
2. 400m rango operativo al aire libre
3. Control de volumen de 5 niveles: 65dB,75dB,80dB,85dB,90dB
4. Botón de timbre a prueba de agua de clasificación IP65.
5. Temperatura de funcionamiento: -10 ~50 ℃
6. Rango de penetración de RF: se pueden penetrar 4 paredes
Cómo emparejar
Nota: Este dispositivo ya está emparejado.
Si hay problemas de desconexión o de corto alcance, siga las
instrucciones a continuación.
Mantenga presionado el botón de sincronización del receptor “ ”
durante 3 segundos hasta que el receptor emita un sonido
"Ding-Ding". Luego presione el botón cinético del timbre, y el receptor
emitirá un sonido "Ding" que significa que el emparejamiento entre el
botón cinético del timbre y el receptor ha sido exitoso. El receptor
emitirá otro sonido "Ding-Ding" para salir del modo de emparejamien-
to.
Especificaciones del producto
Fuente de alimentación del receptor:
Potencia de funcionamiento del receptor:
Frecuencia de trabajo:
AC 100-240V
<0,5 W
433.92MHZ ±0.5MHZ
ES ES
Transmisor
Botón de Música
Botón de Volumen
Receptor
♪

Mantenimiento
1. Para proteger los componentes electrónicos internos de precisión,
es recomendable que los usuarios no calificados no intenten abrir la
unidad para su mantenimiento.
2. No exponer a la luz solar directa continua ni a un ambiente húmedo,
esto afectará negativamente a la unidad.
3. El uso correcto de los productos ayuda a extender efectivamente la
vida útil de la unidad.
Instalación de transmisor
Aplique la cinta adhesiva de doble cara en la parte posterior de la caja
del transmisor. Retire el lado exterior de la cinta, conecte el transmisor
a la ubicación que necesita y presione con fuerza durante 30
segundos.
ES
Contenuto della Confezione
Struttura del Prodotto
2x TeckNet campanello per porta
1x Nastro Biadesivo
2x Viti
2x Giunto a vite
1x Manuale Utente
Specifiche del Prodotto
Alimentazione del Ricevitore:
Potenza di lavoro del ricevitore:
Frequenza di Funzionamento:
AC 100-240V
<0,5 W
433.92MHZ ±0.5MHZ
IT
Trasmettitore
Pulsante musica
Pulsante del volume
Ricevitore

Caratteristiche
1. 32, suonerie di alta qualità
2. Raggio di funzionamento 400 metri all'aria aperta
3. 5 livelli di controllo del volume: 65dB,75dB,80dB,85dB,90dB
4. Pulsante campanello impermeabile con grado di protezione IP65
5. Temperatura di funzionamento :-10 ~50 ℃
6. Gamma di penetrazione RF: 4 pareti possono essere penetrate
Manutenzione
1. Al fine di proteggere i componenti elettronici di precisione interni, è
consigliabile che utenti non qualificati non tentino di aprire l'unità
per la manutenzione.
2. Non esporre alla luce diretta del sole o ad un ambiente umido, in
quanto questo influirebbe negativamente sull'unità.
3. L'uso corretto dei prodotti aiuta a prolungare efficacemente la
durata dell'unità.
Come Si Accoppia
Nota: Questo dispositivo è già accoppiato;
Se vi fossero dei problemi di disconnessione o di corto raggio, si prega
di seguire le istruzioni riportate qui di seguito.
Tener premuto il pulsante di accoppiamento del ricevitore “ ” per 3
secondi fino a quando il ricevitore emette un suono "Ding-Ding".
Quindi premere il pulsante del campanello cinetico, dopo di che il
ricevitore emette un suono "Ding" che sta a significare che
l’accoppiamento tra il pulsante del campanello cinetico e il ricevitore è
riuscito. Il ricevitore emetterà un altro suono "Ding-Ding" per uscire
dalla modalità di accoppiamento.
Installazione del Trasmettitore
Applicare il nastro biadesivo sul retro della scocca del trasmettitore.
Rimuovere il lato esterno del nastro, attaccare il trasmettitore alla
posizione occorrente e premere con decisione per 30 secondi.
IT IT
♪
Table of contents
Other Tecknet Accessories manuals

Tecknet
Tecknet BLUETEK iEP360 User manual

Tecknet
Tecknet iEP3015 User manual

Tecknet
Tecknet iEP517 User manual

Tecknet
Tecknet HWD01878 User manual

Tecknet
Tecknet iEP390 User manual

Tecknet
Tecknet iEP900 User manual

Tecknet
Tecknet BLUETEK IEP1200 User manual

Tecknet
Tecknet bluetek iep1300 User manual

Tecknet
Tecknet iEP330 User manual

Tecknet
Tecknet HWD01161 User manual
Popular Accessories manuals by other brands

Dacor
Dacor EF36LNFSS installation instructions

Hitron
Hitron HT-DW1 Quick Install Guide/Manual

Amphenol
Amphenol Temposonics V EtherNet/IP R Series Operation manual

YOKOGAWA
YOKOGAWA PH8ECP user manual

Orno
Orno OR-DB-IL-128 Operating and instalation instructions

AFRISO
AFRISO CAPBs sens CO operating instructions