TecMate Optimate 1 VoltMatic User manual

CZ
INSTRUCTIONS FOR USE
IMPORTANT: Read completely
before charging
MODE D’EMPLOI
IMPORTANT: à lire avant d’utiliser
l’appareil
ANWENDUNGSVORSCHRIFTEN
WICHTIG: Vollständig vor der
Benutzung lesen
MODO DE EMPLEO
IMPORTANTE: a leer antes
de utilizar el aparato
ISTRUZIONI PER L’USO
IMPORTANTE: da leggere prima
di utilizzare l’apparecchio
GEBRUIKSAANWIJZING
BELANGRIJK: Lees volledig voor
gebruik
INSTRUKTIONER
VIKTIGT: läs följande fullständiga
instruktioner för användningen innan
du använder laddaren
ИНСТРУКЦИЯ ПО ПРИМЕНЕНИЮ
ВАЖНО: Прочти полностью
перед использованием
INSTRUKCE PRO POUŽIT.
DŮLEŽIT: Přečtěte si pozorně
před použit.m
INSTRUCTIONS FOR USE
IMPORTANT: Read completely
before charging
MODE D’EMPLOI
IMPORTANT: à lire avant d’utiliser
l’appareil
ANWENDUNGSVORSCHRIFTEN
WICHTIG: Vollständig vor der
Benutzung lesen
MODO DE EMPLEO
IMPORTANTE: a leer antes
de utilizar el aparato
ISTRUZIONI PER L’USO
IMPORTANTE: da leggere prima
di utilizzare l’apparecchio
6V / 12V
STD / AGM / GEL
2 - 28Ah
+ -
AC: 100 – 240VAC 50-60Hz
0.19A @ 100V / 0.12A @ 240V
DC: 6V / 12V 0.6A
Automatic charger for 6V & 12V lead-acid batteries •
Chargeur automatique pour batteries 6V & 12V plomb-acide
• Cargador automático para baterías 6V & 12V plomo-ácido
• Automatische Ladegerät für 6V & 12V Blei-Säure • Batterien
Caricabatterie automatico per batterie 6V & 12V piombo-acido
• Automatische onderhoudslader voor 6V & 12V Loodzuur
accu’s • Automatisk underhållsladdare för 6V & 12 V batterisyra
• АВТОМАТИЧЕСКОЕ ЗАРЯДНОЕ УСТРОЙСТВО ДЛЯ СВИНЦОВЫХ
АККУМУЛЯТОРОВ на 6В И 12В • Automatická Údržbová nabÍječka pro
6V / 12V olovo-kyselinové
VoltMatic
MODEL: TM400a, TM401a (v2), TM407a
GEBRUIKSAANWIJZING
BELANGRIJK: Lees volledig voor
gebruik
INSTRUKTIONER
VIKTIGT: läs följande fullständiga
instruktioner för användningen innan
du använder laddaren
ИНСТРУКЦИЯ ПО ПРИМЕНЕНИЮ
ВАЖНО: Прочти полностью
перед использованием
INSTRUKCE PRO POUŽIT.
DŮLEŽIT: Přečtěte si pozorně
před použit.m
copyright © 2021 TecMate International – TM400v2-IN1-210831

2
AUTOMATIC LEAD-ACID
BATTERY CHARGER
DUO
BRONZE
optimate1.com
/om1vm
VoltMatic
24-7
13.6V
6.8V
14.4V
7.2V
6V 12V
6V
12V
Safe 24-7 Maintenance
12V
6V 8V
1 2 3
2. 5.3.1. 4. 6. 7.
12V
5 sec. 3 sec.
√
√
For a discharged 12V battery with voltage below 8V - Pour batterie 12V déchargée avec une
tension inférieure à 8V - Para batería de 12 V descargada con voltaje inferior a 8 V - Per
batteria scarica 12V con tensione inferiore a 8V - Für entladene 12V Batterie mit Spannung
unter 8V - Voor ontladen 12V-accu met een spanning van minder dan 8V - För urladdat 12V
batteri med spänning under 8V - Для разряженного аккумулятора 12 В с напряжением ниже 8 В - Pro
vybitý 12V akumulátor s napětím pod 8V
LED
VoltMatic
i
3
SAVE THESE INSTRUCTIONS. IT IS OF THE UTMOST IMPORTANCE THAT EACH TIME, BEFORE
USING THE BATTERY CHARGER, YOU COMPLETELY FAMILIARIZE YOURSELF WITH THESE SAFETY
INSTRUCTIONS.
AUTOMATIC BATTERY CHARGER FOR 6V AND 12V LEAD-ACID BATTERIES.
DO NOT USE FOR NiCd, NiMH, Li-Ion OR NON-RECHARGEABLE BATTERIES.
1. GENERAL BATTERY CHARGER PRECAUTIONS.
CAUTION : DO NOT CONNECT TO GROUND. Do not expose charger to rain or snow. Use of an
attachment not recommended or sold by the battery charger manufacturer may result in a risk of fire,
electric shock, or injury to persons. To reduce risk of damage to electric plug and cord/cable, pull by
plug rather than cord/cable when disconnecting charger. Do not operate charger with damaged cord
or plug - If the cable is damaged, it is essential to have it replaced without delay by the manufacturer,
an authorised service agent or a qualified workshop, to avoid danger. Do not operate charger if it has
received a sharp blow, been dropped, or has been otherwise damaged in any way; take it to a
qualified Service Technician. Do not disassemble charger; take it to a qualified serviceman when
service or repair is required. Incorrect reassembly may result in a risk of electric shock or fire. Before
attempting any maintenance or cleaning, to reduce risk of electric shock, unplug the charger from the
AC outlet and the battery. Clean only with slightly moist, not wet, cloth. Do not use solvents.
2. AC EXTENSION CORDS/CABLES.
An extension cord/cable should not be used unless absolutely necessary. Use of improper extension
cord could result in a risk of fire and electric shock. If extension cord must be used make sure that :
a) pins on plug of extension cord are the same number, size and shape as those of plug on charger,
b) the extension cord is properly wired and in good electrical condition, and c) the conductor wire size
is large enough for the AC ampere rating of the charger as specified in the table below.
AC INPUT RATING IN AMPERES
Equal to or greater than But less than LENGTH OF
CORD, FEET (m) AWG SIZE OF CORD
2A 3A 25 (17.6)
50 (15.2)
100 (30.5)
18
18
14
3.WARNING - RISK OF EXPLOSIVE GASES.
a) Working in the vicinity of a battery is dangerous. Lead-acid batteries
VoltMatic
IMPORTANT SAFETY
INSTRUCTIONS
IMPORTANT SAFETY INSTRUCTIONS

4
generate explosive gasses during normal battery operation. For this reason it
is of utmost importance that you follow the instructions each time you use
the charger.
b) To reduce risk of battery explosion, follow these instructions and those published by the battery
manufacturer and manufacturer of any equipment you intend to use in vicinity of the battery. Review
cautionary marking on these products and on engine.
4. PERSONAL PRECAUTIONS: a) Someone should be within range of your voice OR close enough to
come to your aid when you work near a lead-acid battery. b) Have plenty of fresh water and soap
nearby in case battery acid contacts skin, clothing or eyes. c) Wear complete eye protection and
clothing protection. Avoid touching eyes while working near battery.
d) If battery acid contacts or enters eye, flood eye with cold running water for at least 10 minutes and
get medical attention immediately. If battery acid contacts skin or clothing, wash immediately with
soap & water. e) NEVER smoke or allow a spark or flame in vicinity of battery or engine. f) Be extra
cautious to reduce risk of dropping a metal tool onto battery. It might spark or short-circuit the battery
or other electrical part that may cause explosion. g) Remove personal metal items such as rings,
bracelets, necklaces, and watches when working with any battery. A lead-acid or lithium battery can
produce a short-circuit current high enough to weld a ring or the like to metal, causing a severe burn.
h) NEVER charge a frozen battery.
5. CHARGER LOCATION: a) Do not operate charger in a closed-in area or restrict ventilation in any
way. b) Locate charger as far away from battery as DC cables permit. c) Never place charger directly
above battery being charged; gases from battery can corrode and damage the charger. d) Never allow
battery acid to drip on charger when reading gravity or filling battery. e) Do not set a battery on top of
charger. IMPORTANT : Place charger on a hard flat surface or mount onto a vertical surface. Do not
place on plastic, leather or textile surface.
6. DC CONNECTION PRECAUTIONS: a) Connect and disconnect DC output clips only after removing AC
cord from electric outlet. Never allow clips to touch each other. b) Attach clips to battery and chassis
as indicated in 8(e), 8(f), and 9(a) through 9(d).
NOTE : This battery charger has an automatic safety feature that will prevent
it from operating if the battery has been inversely connected. Remove AC cord
from electrical outlet, disconnect the battery clips, then reconnect correctly according to the
instructions below.
7. PREPARING THE BATTERY: a) If the battery is new, before connecting the charger read the battery
manufacturer’s safety and operational instructions carefully. If applicable, carefully and exactly follow
acid filling instructions.
b) If it is necessary to remove battery from vehicle to charge, make sure all accessories in the vehicle
IMPORTANT SAFETY INSTRUCTIONS

5
are off, so as not to cause an arc. First remove grounded terminal (normally marked NEGATIVE (NEG,
N,–) from battery first, then the terminal marked POSITIVE (POS, P, +).
c) Place the battery in a well ventilated area.
d) Visually check the battery for mechanical defects such as a bulging or cracked casing, or signs of
electrolyte leakage. If the battery has filler caps and the plates within the cells can be seen from the
outside, examine the battery carefully to try to determine if any cells seem different to the others (for
example, with white matter between the plates, plates touching).
If mechanical defects are apparent do not attempt to charge the battery, have the battery
professionally assessed.
e) Clean battery terminals. Be careful to keep corrosion from coming in contact with eyes.
f) For lead-acid batteries with removable filler caps, add distilled water in each cell until battery acid
reaches level specified by battery manufacturer. This helps purge excessive gas from cells. Do not
overfill.
g) For a battery without cell caps, such as valve regulated lead-acid (VRLA), absorbed glass mat
(AGM) lead-acid or Lithium (LiFePO4) batteries, carefully follow manufacturer’s recharging
instructions.
h) Study all battery manufacturer’s specific precautions such as removing or not removing cell caps
while charging and recommended rates of charge.
i) Determine voltage of battery by referring to vehicle or other user’s manual and before making the
battery connections, make sure that the voltage of the battery you are going to charge matches the
output voltage of the battery charger.
8. FOLLOW THESE STEPS WHEN BATTERY IS INSTALLED IN VEHICLE AND
YOU CHOOSE TO USE BATTERY CLIPS TO CHARGE THE BATTERY. A SPARK
NEAR A BATTERY MAY CAUSE BATTERY EXPLOSION. TO REDUCE RISK OF A
SPARK NEAR BATTERY:a) Position AC and DC cords so as to reduce risk of damage by the
vehicle itself or moving engine parts. b) Stay clear of fan blades, belts, chains, sprockets, pulleys, and
other vehicle parts that can cause injury to persons or damage to the charger and its cords/cables.
c) Check polarity of battery posts. On automotive batteries POSITIVE (POS, P, +) battery post usually
has larger diameter than NEGATIVE (NEG, N,–) post.
d) Determine which post of battery is grounded (connected) to the chassis.
If negative post is grounded to chassis (as in most modern vehicles), see (e). If positive post is
grounded to the chassis, see (f).
e) For negative-grounded vehicle, connect POSITIVE (RED) clip from battery charger to POSITIVE (POS,
P, + ) ungrounded post of battery. Connect NEGATIVE (BLACK) clip to vehicle chassis or engine block
away from battery. Do not connect clip to carburetor, fuel lines, or sheet-metal body parts. Connect to
a heavy gage metal part of the frame or engine block.
f) For positive-grounded vehicle, connect NEGATIVE (BLACK) clip from battery charger to NEGATIVE
IMPORTANT SAFETY INSTRUCTIONS

6
(NEG. N , -) ungrounded post of battery. Connect POSITIVE (RED) clip to vehicle chassis or engine
block away from battery. Do not connect clip to carburettor, fuel lines, or sheet-metal body parts.
Connect to a heavy gage metal part of the frame or engine block. g) When disconnecting charger, turn
switches to off, disconnect AC cord, remove clip from vehicle chassis, and then remove clip from
battery terminal. h) See operating instructions for length of charge information.
9. FOLLOW THESE STEPS WHEN BATTERY IS OUTSIDE OF THE VEHICLE OR
HAS BEEN REMOVED FROM THE VEHICLE. A SPARK NEAR THE BATTERY
MAY CAUSE BATTERY EXPLOSION. TO REDUCE RISK OF A SPARK NEAR
BATTERY:
a) Check polarity of battery posts. The POSITIVE (POS, P, + ) and NEGATIVE (NEG,N, - ) battery posts
will be clearly marked. b) Connect the POSITIVE (RED) charger clip to POSITIVE (POS, P, +) post of
battery. c) Then connect the NEGATIVE (BLACK) charger clip to the NEGATIVE (NEG, N, -) post of the
battery. d) When disconnecting charger, always do so in reverse sequence of connecting procedure &
break first connection while as far away from battery as practical.
10. SAFE USE BY MINORS OR PERSONS WITH REDUCED CAPABILITIES: a) This appliance can be
used by children aged from 8 years and above and persons with reduced physical, sensory or mental
capabilities or lack of experience and knowledge only if they have been given supervision or instruction
concerning use of the appliance in a safe way and understand the hazards involved. Children shall
not play with the appliance. Cleaning and user maintenance shall not be made by children without
supervision.
b) Choking Hazard. Accessories may present a choking hazard to children. Do not leave children
unattended with product or any accessory. The product is not a toy.
11. RADIO FREQUENCY INTERFERENCE: The OptiMate DUO complies with Part 15 of the FCC
Rules. Operation is subject to the following two conditions: (1) this device may not cause harmful
interference, and (2) this device must accept any interference received, including interference that
may cause undesired operation. NOTE: This equipment has been tested and found to comply with
the limits for a Class A digital device, pursuant to Part 15 of the FCC Rules. These limits are designed
to provide reasonable protection against harmful interference when the equipment is operated
in a commercial environment. This equipment generates, uses, and can radiate radio frequency
energy and, if not installed and used in accordance with the instruction manual, may cause harmful
interference to radio communications.
12. PROPOSITION 65, STATE OF CALIFORNIA: Battery posts / terminals, and related accessories
may contain chemicals, including lead or sulphuric acid. These materials are known to the State of
California to cause cancer and birth defects and other reproductive harm.
IMPORTANT SAFETY INSTRUCTIONS
7
OPTIMATE 1 VOLTMATIC: CONNECTION ACCESSORIES
Two interchangeable connection sets are supplied with the battery charger:
1) A battery lead with metal eyelet lugs for permanent fitment to the battery posts, and re-sealable
weatherproof cap on the on the connector that connects to the charger output cable. Consult a
professional service agent for assistance in attaching the metal eyelets to the battery posts. Secure
the connector with weatherproof cap so that it cannot foul any moving part of the vehicle or the cable
can be pinched or damaged by sharp edges.
IMPORTANT: This battery lead is protected by a fuse. If under any circumstance the fuse blows, do not
try and replace the fuse without first identifying and correcting the issue that caused the fuse to blow.
2) A set of battery clips for charging the battery on or off-vehicle. Read IMPORTANT SAFETY
INSTRUCTIONS points 8 or 9 before connecting to the battery.
USING THE OPTIMATE 1 VOLTMATIC: PROCEEDING TO CHARGE
For safety reasons, the OptiMate output will only activate if a battery retaining at least 4V is
connected.
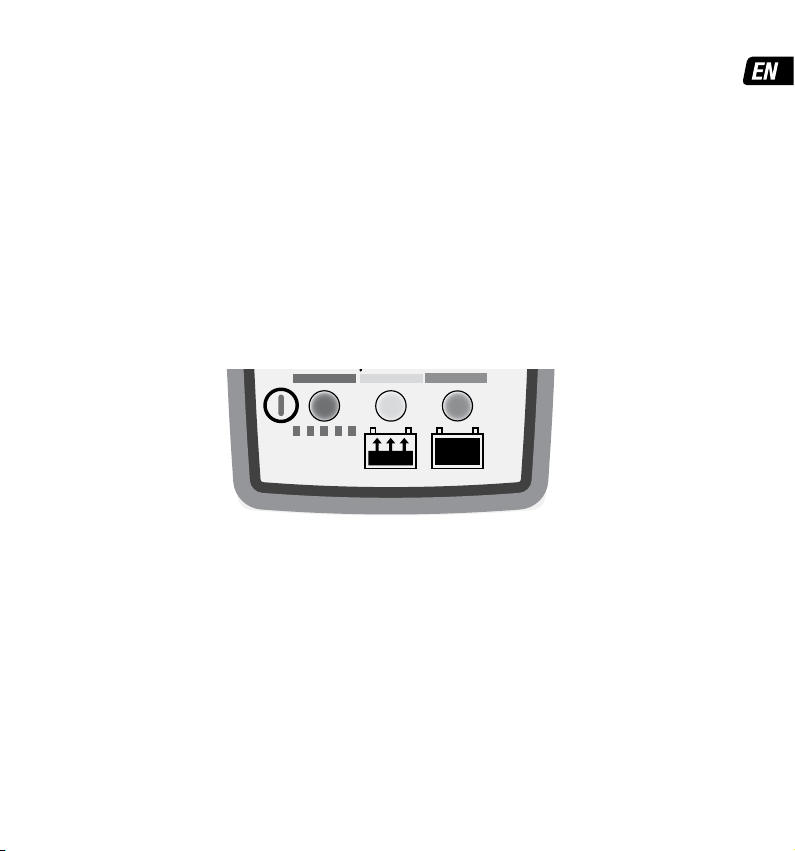
Panel LED:
LED #1 (RED) - Confirms AC Power supply to the charger. The voltmatic processor will select
6V or 12V charge mode according to battery voltage.
LED #1 on: Battery voltage higher than 8V; 12V charge mode is selected.
LED #1 blinking: Battery voltage lower than 8V; 6V charge mode is now selected.
NOTE: A very flat neglected 12V battery measuring less than 8V at the battery terminals will be
selected as a 6V battery. To save a low voltage 12V battery, 12V charging mode must be
pre-selected as follows:
STEP 1: Disconnect OptiMate 1 from AC power supply. STEP 2: Wait for LED #1 to go out. STEP 3:
Connect battery clips together. STEP 4: Reconnect OptiMate 1 to AC power supply. STEP 5: LED #1
flashes for 3 seconds and then turns on, confirming 12V mode is pre-selected. STEP 6: Disconnect
clips from each other. STEP 7: Connect OptiMate 1 to the 12V battery. Charging will proceed in 12V
mode. NOTE: Once the 12V battery is disconnected after charging OptiMate 1 will return to
AUTOMATIC LEAD-ACID
BATTERY CHARGER
DUO
BRONZE
optimate1.com
/om1vm
VoltMatic
24-7
13.6V
6.8V
14.4V
7.2V
6V 12V
6V
12V
Safe 24-7 Maintenance
12V
6V 8V
1 2 3

8
voltmatic mode.
LED #2 (YELLOW):Low Volt Save, Charge and Charge verification
Low Volt Save (battery voltage < 12.4V / 6.2V): Current is delivered in pulses and slowly increased
to prepare the battery to accept full charge.
Charge (battery voltage ≥ 12.4V / 6.2V): Current of 0.6A is delivered into the battery to increase the
voltage up to 14.2 -14.4V for a 12V battery and 7.1 - 7.2V for a 6V battery.
Verification (pulsed absorption, cell equalization): Variable current pulses are delivered to bring all
cells to equal and full charge, within the voltage limit of 13.6V for a 12V battery, and 6.8V for a 6V
battery.
NOTE: For safety reasons there is an overall charge time limit of 48 hours, after which the program
automatically advances to LED #3. See expected charging time below.
VERY FLAT NEGLECTED BATTERIES: Pay particularly close attention to the following which is
especially important for relatively small batteries such as those used on motorcycles, lawn
tractors, jet-ski’s, snowmobiles and similar: A battery left deep-discharged for an extended period
may develop permanent damage in one or more cells. Such batteries may heat up excessively during
charging. Monitor the battery temperature during the first hour, then hourly there-after. Check for
unusual signs, such as bubbling or leaking electrolyte, heightened activity in one cell compared to
others, or hissing sounds. If at any time the battery is uncomfortably hot to touch or you notice any
unusual signs, DISCONNECT THE CHARGER IMMEDIATELY.
LED# 3 (GREEN) - 24-7 BATTERY MAINTENANCE. The maintenance charge cycle consists of 30
minute float charge periods alternating with a 30 minute ‘rest’ periods. During the 30 minute charge
period current is offered to the battery within a safe voltage limit (“float charge” of 6.8V for a 6V
battery and 13.6V for a 12V battery), allowing it to draw what-ever small current is necessary to
maintain it at full charge and compensate for any small electrical loads imposed by vehicle
accessories or on-board computer, or the natural gradual self-discharge of the battery itself. During
“float charge” a continuous LOW CURRENT PULSE IS DELIVERED TO PREVENT SULPHATION, further
extending battery power and life.
During the 30 minute 'rest' cycle the charger automatically disconnects from the battery and no
charge is delivered. The 30 minute charge, 30 minute rest “50% duty cycle” prevents loss of
electrolyte in sealed batteries and minimizes gradual loss of water from the electrolyte in batteries
with filler caps, and thereby contributes significantly to optimizing the service life of irregularly or
seasonally used batteries.
If the OptiMate senses the battery has suddenly lost charge the program will revert back to charge
mode (LED #2).
Maintaining a battery for extended periods: The OptiMate will maintain a battery whose basic
condition is good, for months at a time. At least once every two weeks, check that the connections

9
between the charger and battery are secure, and, in the case of lead-acid batteries with filler caps on
each cell, disconnect the battery from the charger, check the level of the electrolyte and if necessary,
top up the cells (with distilled water, NOT acid), then reconnect. When handling batteries or in their
vicinity, always take care to observe the SAFETY WARNINGS described under the section IMPORTANT
SAFETY INSTUCTIONS.
Charging time: The time required for the OptiMate 1 VoltMatic to complete a charge on a flat but
otherwise undamaged battery is roughly equal to 2x the battery’s Ah rating, so a 12Ah battery should
take no more than about 24 hours to progress to LED #3. Deep-discharged batteries may take
significantly longer.
ECO POWER SAVING MODE WHEN THE CHARGER IS CONNECTED TO AC SUPPLY: The power
converter switches to ECO mode when the charger is not connected to a battery resulting in a very low
power draw of less than 0.5W, equivalent to power consumption of 0.012 kWh per day. When a battery
is connected to the charger power consumption depends on the current demand of the battery and its
connected vehicle / electronic circuitry. After the battery has been charged and the charger is in long
term maintenance charge mode (to keep the battery at 100% charge) the total power consumption is
estimated to be 0.060 kWh or less per day.
LIMITED WARRANTY
TecMate (International) SA, B-3300 Tienen, Belgium, makes this limited warranty to the original purchaser at retail of this product. This limited warranty
is not transferable. TecMate (International) warrants this battery charger for three years from date of purchase at retail against defective material or
workmanship. If such should occur the unit will be repaired or replaced at the option of the manufacturer. It is the obligation of the purchaser to forward
the unit together with proof of purchase (see NOTE), transportation or mailing costs prepaid, to the manufacturer or its authorized representative. This
limited warranty is void if the product is misused, subjected to careless handling, or repaired by anyone other than the factory or its authorized
representative. The manufacturer makes no warranty other than this limited warranty and expressly excludes any implied warranty including any
warranty for consequential damages.
THIS IS THE ONLY EXPRESS LIMITED WARRANTY AND THE MANUFACTURER NEITHER ASSUMES NOR AUTHORIZES ANYONE TO ASSUME OR MAKE ANY
OTHER OBLIGATION TOWARDS THE PRODUCT OTHER THAN THIS EXPRESS LIMITED WARRANTY. YOUR STATUTORY RIGHTS ARE NOT AFFECTED.
Details at www.tecmate.com/warranty. More information on TecMate products can be found at www.tecmate.com.

10
INSTRUCTIONS IMPORTANTES CONCERNANT LA SÉCURITÉ
CONSERVER CES INSTRUCTIONS. CE MANUEL CONTIENT DES INSTRUCTIONS
IMPORTANTES CONCERNANT LA SÉCURITÉ ET LE FONCTIONNEMENT DU CHARGEUR
OPTIMATE 1 VOLTMATIC.
CHARGEUR AUTOMATIQUE POUR BATTERIES 6V & 12V PLOMB-ACIDE.
NE CONVIENT PAS POUR LES BATTERIES NiCd, NiMH, Li-Ion ou NON RECHARGEABLES.
AVERTISSEMENT :
N’utiliser l’appareil qu’à l’intérieur. Ne pas exposer à la pluie ou à la neige. Appareil de Classe II.
a) CONSERVER CES INSTRUCTIONS. CE MANUEL CONTIENT DES INSTRUCTIONS IMPORTANTES CONCERNANT LA SÉCURITÉ ET LE
FONCTIONNEMENT.
b) IL EST DANGEREUX DE TRAVAILLER A PROXIMITÉ D’UNE BATTERIE AU PLOMB. LES BATTERIES PRODUISENT DES GAZ
EXPLOSIFS EN SERVICE NORMAL. IL EST AUSSI IMPORTANT DE TOUJOURS RELIRE LES INSTRUCTIONS AVANT D’UTILISER LE
CHARGEUR ET DE LES SUIVRE À LA LETTRE.
c) POUR RÉDUIRE LE RISQUE D’EXPLOSION, LIRE CES INSTRUCTIONS ET CELLES QUI FIGURENT SUR LA BATTERIE.
d) NE JAMAIS FUMER PRÈS DE LA BATTERIE OU DU MOTEUR ET ÉVITER TOUTE ÉTINCELLE OU FLAMME NUE À PROXIMITÉ DE CES
DERNIERS.
e) UTILISER LE CHARGEUR POUR CHARGER UNE BATTERIE AU PLOMB UNIQUEMENT. CE CHARGEUR N’EST PAS CONÇU POUR
ALIMENTER UN RÉSEAU ÉLECTRIQUE TRÈS BASSE TENSION NI POUR CHARGER DES PILES SÈCHES. LE FAIT D’UTILISER LE
CHARGEUR POUR CHARGER DES PILES SÈCHES POURRAIT ENTRAÎNER L’ÉCLATEMENT DES PILES ET CAUSER DES BLESSURES OU
DES DOMMAGES.
f) NE JAMAIS CHARGER UNE BATTERIE GELÉE.
g) S’IL EST NÉCESSAIRE DE RETIRER LA BATTERIE DU VÉHICULE POUR LA CHARGER, TOUJOURS DÉBRANCHER LA BORNE DE MISE
À LA MASSE EN PREMIER. S’ASSURER QUE LE COURANT AUX ACCESSOIRES DU VÉHICULE EST COUPÉ AFIN D’ÉVITER LA
FORMATION D’UN ARC.
h) PRENDRE CONNAISSANCE DES MESURES DE PRÉCAUTION SPÉCIFIÉES PAR LE FABRICANT DE LA BATTERIE, P. EX., VÉRIFIER
S‘IL FAUT ENLEVER LES BOUCHONS DES CELLULES LORS DU CHARGEMENT DE LA BATTERIE, ET LES TAUX DE CHARGEMENT
RECOMMANDÉS.
i) SI LE CHARGEUR COMPORTE UN SÉLECTEUR DE TENSION DE SORTIE, CONSULTER LE MANUEL DE L’USAGER DE LA VOITURE
POUR DÉTERMINER LA TENSION DE LA BATTERIE ET POUR S’ASSURER QUE LA TENSION DE SORTIE EST APPROPRIÉE. SI LE
CHARGEUR N’EST PAS MUNI D’UN SÉLECTEUR, NE PAS UTILISER LE CHARGEUR À MOINS QUE LA TENSION DE LA BATTERIE NE
SOIT IDENTIQUE À LA TENSION DE SORTIE NOMINALE DU CHARGEUR.
j) NE JAMAIS PLACER LE CHARGEUR DIRECTEMENT SOUS LA BATTERIE À CHARGER OU AU-DESSUS DE CETTE DERNIÈRE. LES GAZ
OU LES FLUIDES QUI S’ÉCHAPPENT DE LA BATTERIE PEUVENT ENTRAÎNER LA CORROSION DU CHARGEUR OU L’ENDOMMAGER.
PLACER LE CHARGEUR AUSSI LOIN DE LA BATTERIE QUE LES CABLES C.C. LE PERMETTENT.
k) NE PAS FAIRE FONCTIONNER LE CHARGEUR DANS UN ESPACE CLOS ET/OU NE PAS GÊNER LA VENTILATION.
l) METTRE LES INTERRUPTEURS DU CHARGEUR HORS CIRCUIT ET RETIRER LE CORDON C.A. DE LA PRISE AVANT DE METTRE ET
D’ENLEVER LES PINCES DU CORDON C.C. S’ASSURER QUE LES PINCES NE SE TOUCHENT PAS.
SÉCURITÉ CANADA & USA

11
m) SUIVRE LES ÉTAPES SUIVANTES LORSQUE LA BATTERIE SE TROUVE DANS LE VÉHICULE.
UNE ÉTINCELLE PRÈS DE LA BATTERIE POURRAIT PROVOQUER L’EXPLOSION DE CETTE DERNIÈRE. POUR RÉDUIRE LE RISQUE D’ÉTINCELLE À
PROXIMITÉ DE LA BATTERIE :
(i) PLACER LES CORDONS C.A. ET C.C. DE MANIÈRE À ÉVITER QU’ILS SOIENT ENDOMMAGÉS PAR LE CAPOT, UNE PORTIÈRE OU LES
PIÈCES EN MOUVEMENT DU MOTEUR ;
(ii) FAIRE ATTENTION AUX PALES, AUX COURROIES ET AUX POULIES DU VENTILATEUR AINSI QU’À TOUTE AUTRE PIÈCE SUSCEPTIBLE DE
CAUSER DES BLESSURES ;
(iii) VÉRIFIER LA POLARITÉ DES BORNES DE LA BATTERIE. LE DIAMÈTRE DE LA BORNE POSITIVE (POS, P, +) EST GÉNÉRALEMENT
SUPÉRIEUR À CELUI DE LA BORNE NÉGATIVE (NÉG, N, –) ;
(iv) DÉTERMINER QUELLE BORNE EST MISE À LA MASSE (RACCORDÉE AU CHÂSSIS). SI LA BORNE NÉGATIVE EST RACCORDÉE AU CHÂSSIS
(COMME DANS LA PLUPART DES CAS), VOIR LE POINT (v). SI LA BORNE POSITIVE EST RACCORDÉE AU CHÂSSIS, VOIR LE POINT (vi) ;
(v) SI LA BORNE NÉGATIVE EST MISE À LA MASSE, RACCORDER LA PINCE POSITIVE (ROUGE) DU CHARGEUR À LA BORNE POSITIVE (POS, P,
+) NON MISE À LA MASSE DE LA BATTERIE. RACCORDER LA PINCE NÉGATIVE (NOIRE) AU CHÂSSIS DU VÉHICULE OU AU MOTEUR, LOIN DE
LA BATTERIE. NE PAS RACCORDER LA PINCE AU CARBURATEUR, AUX CANALISATIONS D’ESSENCE NI AUX PIÈCES DE LA CARROSSERIE EN
TÔLE. RACCORDER À UNE PIÈCE DU CADRE OU DU MOTEUR EN TÔLE DE FORTE ÉPAISSEUR ;
(vi) SI LA BORNE POSITIVE EST MISE À LA MASSE, RACCORDER LA PINCE NÉGATIVE (NOIRE) DU CHARGEUR À LA BORNE NÉGATIVE (NÉG,
N, –) NON MISE À LA MASSE DE LA BATTERIE. RACCORDER LA PINCE POSITIVE (ROUGE) AU CHÂSSIS DU VÉHICULE OU AU MOTEUR, LOIN
DE LA BATTERIE. NE PAS RACCORDER LA PINCE AU CARBURATEUR, AUX CANALISATIONS D’ESSENCE NI AUX PIÈCES DE LA CARROSSERIE
EN TÔLE. RACCORDER À UNE PIÈCE DU CADRE OU DU MOTEUR EN TÔLE DE FORTE ÉPAISSEUR ;
(vii) BRANCHER LE CORDON D’ALIMENTATION C.A. DU CHARGEUR ;
(viii) POUR INTERROMPRE L’ALIMENTATION DU CHARGEUR, METTRE LES INTERRUPTEURS HORS CIRCUIT, RETIRER LE CORDON C.A. DE
LA PRISE, ENLEVER LA PINCE RACCORDÉE AU CHÂSSIS ET EN DERNIER LIEU CELLE RACCORDÉE À LA BATTERIE.
n) SUIVRE LES ÉTAPES SUIVANTES LORSQUE LA BATTERIE EST À L’EXTÉRIEUR DU VÉHICULE.
UNE ÉTINCELLE PRÈS DE LA BATTERIE POURRAIT PROVOQUER L’EXPLOSION DE CETTE DERNIÈRE. POUR RÉDUIRE LE RISQUE
D’ÉTINCELLE À PROXIMITÉ DE LA BATTERIE :
(i) VÉRIFIER LA POLARITÉ DES BORNES DE LA BATTERIE. LE DIAMÈTRE DE LA BORNE POSITIVE (POS, P, +) EST GÉNÉRALEMENT
SUPÉRIEUR À CELUI DE LA BORNE NÉGATIVE (NÉG, N, –) ;
(ii) RACCORDER UN CÂBLE DE BATTERIE ISOLÉ No 6 AWG MESURANT AU MOINS 60 CM DE LONGUEUR À LA BORNE NÉGATIVE
(NÉG, N, –) ;
(iii) RACCORDER LA PINCE POSITIVE (ROUGE) À LA BORNE POSITIVE (POS, P, +) DE LA BATTERIE ;
(iv) SE PLACER ET TENIR L’EXTRÉMITÉ LIBRE DU CÂBLE AUSSI LOIN QUE POSSIBLE DE LA BATTERIE, PUIS RACCORDER LA PINCE
NÉGATIVE (NOIRE) DU CHARGEUR À L’EXTRÉMITÉ LIBRE DU CÂBLE ;
(v) NE PAS SE PLACER FACE À LA BATTERIE POUR EFFECTUER LE DERNIER RACCORDEMENT ;
(vi) RACCORDER LE CORDON D’ALIMENTATION C.A. DU CHARGEUR À LA PRISE ;
(vii) POUR INTERROMPRE L’ALIMENTATION DU CHARGEUR, METTRE LES INTERRUPTEURS HORS CIRCUIT, RETIRER LE CORDON C.A.
DE LA PRISE, ENLEVER LA PINCE RACCORDÉE AU CHÂSSIS ET EN DERNIER LIEU CELLE RACCORDÉE À LA BATTERIE. SE PLACER AUSSI
LOIN QUE POSSIBLE DE LA BATTERIE POUR DÉFAIRE LA PREMIÈRE CONNEXION.
SÉCURITÉ CANADA & USA

12
VoltMatic
CHARGEUR AUTOMATIQUE POUR BATTERIES PLOMB-ACIDE 6V / 12V.
NE CONVIENT PAS POUR LES BATTERIES NiCd, NiMH, Li-Ion OU NON RECHARGEABLES.
IMPORTANT : LIRE ENTIÈREMENT LES INSTRUCTIONS SUIVANTES AVANT D’UTILISER LE
CHARGEUR.
Cet appareil n’est pas destiné à être utilisé par des personnes (y compris des enfants) possédant des
capacités physiques, sensorielles ou mentales réduites, ou manquant d’expérience et de connaissance,
sauf si elles bénéficient d'une surveillance ou ont reçu des instructions concernant l’utilisation de
l’appareil d’une personne responsable de leur sécurité. Les enfants doivent faire l'objet d'une surveillance
pour s’assurer qu’ils ne jouent pas avec l’appareil.
AVERTISSEMENT DE SÉCURITÉ et REMARQUES :Les batteries émettent des GAZ EXPLOSIFS - il faut
interdire les flammes ou les étincelles à proximité.
Avant d’établir ou de rompre les connexions de courant continu à la batterie, déconnecter l’alimentation secteur. L’acide des batteries est un puissant
corrosif. Porter des vêtements et lunettes protecteurs et éviter tout contact. En cas de contact accidentel, laver immédiatement à l’eau et au savon.
S’assurer que les bornes des batteries ne sont pas branlantes ; le cas échéant la batterie doit subir une évaluation professionnelle. Si les bornes sont
corrodées, nettoyer à l’aide d’une brosse de cuivre ; s’ils sont gras ou sales, nettoyer à l’aide d’un torchon trempé dans du détergent. Utiliser uniquement
le chargeur si les câbles et connecteurs d’entrée et de sortie sont en bon état et non endommagés. Si le câble est endommagé, il est essentiel de le faire
remplacer par le constructeur, son agent de service autorisé ou un atelier qualifié, pour éviter tout danger. Protéger le chargeur contre les acides et
fumées acides, l’humidité et un environnement humide, aussi bien durant l’usage que l’entreposage. Les dégâts résultant de la corrosion, de l’oxydation
ou de courts-circuits internes ne sont pas couverts par la garantie. Durant le chargement, éloigner le chargeur de la batterie pour éviter la contamination
par l’acide ou les vapeurs acides ou l’exposition à ceux-ci.
EXPOSITION AUX LIQUIDES : Une panne due à l’oxydation résultant d’une pénétration de liquide dans les composants électroniques,blocs
connecteurs ou fiches,ne sera pas couverte par la garantie.
CONNEXIONS DE BATTERIE : l’appareil est livré avec deux jeux de connexion interchangeables, l’un muni de pinces crocodiles pour le
chargement de batteries hors véhicule, l’autre, optionnel, disposant de cosses à œillets pour la connexion permanente aux bornes de batterie, ainsi que
d’un capuchon résistant aux intempéries réouvrable sur le connecteur relié au chargeur. Ce jeu de connexion permet la connexion sûre et facile du
chargeur à la batterie sur véhicule. Le capuchon résistant aux intempéries réouvrable est conçu pour protéger le connecteur contre la saleté et l’humidité
lorsque le chargeur n’est pas connecté. Consulter un agent de service professionnel pour toute assistance à la connexion des œillets métalliques aux
bornes de batterie. Assurer le connecteur avec le capuchon résistant aux intempéries de manière à ce qu’il ne puisse gêner aucune pièce mobile du
véhicule et pour éviter le pincement du câble ou son endommagement par des bords tranchants. Le fusible en ligne du jeu de connecteurs à œillets
protège la batterie contre le court-circuitage accidentel des pôles positif et négatif. Remplacer un fusible sauté uniquement par un autre similaire de 15A.
BRANCHEMENT DU CHARGEUR A LA BATTERIE
1. Débranchez l'alimentation secteur avant d'effectuer un branchement CC/batterie ou de le débrancher.
2. Si vous chargez une batterie installée dans le véhicule avec les pinces pour batterie, avant les branchements, vérifiez d'abord que les pinces pour
batterie peuvent être positionnées en toute sécurité loin du câblage voisin, d'un tube métallique ou du châssis. Respectez l'ordre qui suit :
branchez d'abord la borne de la batterie non raccordée au châssis (normalement positive) puis, branchez l'autre pince pour batterie (normalement
négative) au châssis à un endroit bien éloigné de la batterie et du conduit de carburant. Débranchez toujours dans l'ordre inverse.

13
3. Lorsque vous chargez une batterie hors du véhicule avec les pinces pour batterie, placez-la dans un endroit bien ventilé. Branchez le chargeur à la
batterie : La pince ROUGE sur la borne POSITIVE (POS, P ou +) et la pince NOIRE sur la borne NÉGATIVE (NEG, N ou –).Vérifiez que les
branchements sont bien fixés. Un bon contact est important.
4. Si la batterie est complètement déchargée, retirez-la du véhicule et inspectez la batterie
avant de brancher le chargeur pour une tentative de récupération. Vérifiez visuellement la
batterie à la recherche de défauts mécaniques tels qu'un gonflement ou un boîtier craquelé ou
encore de signes de fuite d'électrolyte. Si la batterie présente des bouchons de remplissage et
que les plaques des cellules sont visibles de l'extérieur, examinez soigneusement la batterie pour
tenter de déterminer si certaines cellules semblent différentes des autres (par exemple, de la
matière blanche entre les plaques, les plaques qui entrent en contact). Si vous avez détecté des
défauts mécaniques, ne chargez pas la batterie et faites-la examiner par un professionnel.
5. Si la batterie est neuve, avant de brancher le chargeur, lisez attentivement les instructions d'utilisation et de sécurité fournies par le fabricant de
la batterie. Si besoin est, suivez attentivement et exactement les instructions relatives au remplissage de l'acide.
UTILISATION DE L’OPTIMATE 1 VOLTMATIC: COMMENCER LA CHARGE
Pour des raisons de sécurité, la sortie de l’Optimate sera uniquement activée s’il est connecté
à une batterie disposant d’un minimum de 4V.
AFFICHEUR À LED
LED #1 (ROUGE) - Confirme la présence d’alimentation AC vers le chargeur. Le processeur
voltmatic sélectionne le mode de charge 6 ou 12 V en fonction de la tension de la batterie.
LED # 1 allumée: Tension de la batterie supérieure à 8 V : mode de charge 12 V sélectionné.
LED # 1 clignotante: Tension de la batterie inférieure à 8 V : mode de charge 6 V sélectionné.
Une batterie 12 V non entretenue et très peu chargée, mesurant moins de 8 V au niveau des
bornes de la batterie, est sélectionnée comme une batterie 6 V. Pour enregistrer une batterie
12 V basse tension, le mode de chargement 12 V doit être présélectionné de la manière
suivante...
ÉTAPE 1: Débrancher OptiMate 1 de l'alimentation secteur. ÉTAPE 2: Attendez que la LED # 1 s'éteigne.
ÉTAPE 3: Brancher ensemble les pinces pour batterie. ÉTAPE 4: Brancher de nouveau OptiMate 1 à
l'alimentation secteur. ÉTAPE 5: Le voyant LED #1 clignote pendant 3 secondes, puis s'allume pour
confirmer la présélection du mode 12 V. ÉTAPE 6: Debrancher ensemble les pinces pour batterie. ÉTAPE 7:
Raccorder OptiMate 1 à la batterie 12 V. Le chargement se poursuivra en mode 12V.
REMARQUE : une fois la batterie 12 V déconnectée après le chargement, OptiMate 1 passera de nouveau
AUTOMATIC LEAD-ACID
BATTERY CHARGER
DUO
BRONZE
optimate1.com
/om1vm
VoltMatic
24-7
13.6V
6.8V
14.4V
7.2V
6V 12V
6V
12V
Safe 24-7 Maintenance
12V
6V 8V
1 2 3

14
en mode voltmatic.
LED #2 (JAUNE) - RÉCUPÉRATION, CHARGE ET VÉRIFICATION DE CHARGE
Récupération (tension de la batterie <12,4 V / 6,2 V): Le courant est distribué par impulsions et
augmente doucement pour préparer la batterie à accepter une charge complète.
Charge (tension de la batterie ≥ 12,4 V / 6,2 V) : le courant est distribué jusqu'à plein courant dans
la batterie pour augmenter la tension jusqu'à 14,2 - 14,4 V pour une batterie de 12 V, et 7,1 - 7,2 V
pour batterie 6 V.
Vérification (Absorption par impulsions, égalisation de cellules) : le courant passe par impulsion,
dans la limite de tension de 13,6 V pour une batterie de 12 V, et 6,8 pour une batterie 6 V.
BATTERIES NÉGLIGÉES TRÈS DÉCHARGÉES : Tenir spécialement compte de ce qui suit, surtout
pour les batteries relativement petites comme celles des motos, tracteurs à gazon, jet ski,
motoneiges et similaires : Les cellules d’une batterie restée en décharge profonde durant une
longue période peuvent être endommagées à titre permanent. Ces batteries peuvent chauffer
excessivement durant la charge à courant élevé.
Vérifier la température de batterie durant la première heure, puis chaque heure suivante. Vérifier la
présence de signes inhabituels comme des bulles ou fuites d’électrolyte, une activité plus importante
d’une cellule par rapport aux autres, ou des sifflements. Si à un moment quelconque, la batterie
devient trop chaude au toucher ou si vous constatez des signes inhabituels, DECONNECTER
IMMÉDIATEMENT LE CHARGEUR.
REMARQUE : Pour des raisons de sécurité, une limite de temps de charge globale de 48heures
s'applique. Le programme passe ensuite à LED #3.
LED #3 (VERTE) - cycle de charge de maintenance : Le cycle de charge de maintenance alterne des
périodes de charge flottante de 30 minutes et des périodes de repos de 30 minutes.
Au cours de la
période de charge de 30 minutes, la batterie est alimentée en courant dans un seuil de tension de
sécurité (« charge tampon » de 6,8 V pour une batterie 6 V et 13,6 V pour une batterie 12 V). Voilà qui lui
permet de tirer le moindre courant nécessaire pour la maintenir en charge complète et de compenser
toute légère charge électrique imposée par les accessoires ou l'ordinateur de bord du véhicule, ou par
une décharge spontanée progressive de la batterie elle-même.
Durant les périodes de charge flottante,
UN PETIT COURANT PULSÉ EST CONTINUELLEMENT DÉLIVRÉ POUR PRÉVENIR LA SULFATATION,
optimisant encore la puissance et la durée de vie de la batterie.
Au cours du cycle de « repos » de 30 minutes, le chargeur se déconnecte automatiquement de la
batterie et aucune charge n'est distribuée.
Le « cycle de travail de 50 % » de 30 minutes de charge et 30 minutes de repos empêche la perte
d'électrolyte dans les batteries scellées et minimise la perte graduelle en eau de l'électrolyte dans les
batteries pourvues de bouchons de remplissage. Voilà qui contribue nettement à optimiser la durée de vie

15
des batteries utilisées de manière irrégulière ou saisonnière.
Si l’OptiMate capte une perte de charge de la batterie soudain, le programme passe à nouveau en
modeCHARGE (LED #2).
Maintenance d’une batterie durant des périodes prolongées : L'OptiMate maintiendra une batterie
dont l'état est bon, en toute sécurité durant plusieurs mois.
Vérifier au moins une fois par quinzaine la sécurité des connexions entre chargeur et batterie. Dans le
cas de batteries équipées de bouchons de remplissage sur chaque cellule, déconnecter la batterie du
chargeur, vérifier le niveau d’électrolyte et faire l’appoint si nécessaire (en eau distillée, PAS en
acide), puis reconnecter. Lors de la manipulation de batteries ou à proximité de celles-ci, toujours
respecter les AVERTISSEMENTS DE SÉCURITÉ ci-dessus.
Temps de charge : Le temps requis par l’OptiMate 1 si la batterie est déchargée mais toutefois en
bon état, est environ égal à la capacité x2 de la batterie en Ah. Il faudra donc à peu près 24 heures
pour qu’une batterie de 12Ah soit amenée à LED #3. Les batteries en état de décharge profonde
peuvent prendre beaucoup plus de temps.
MODE ÉCONOMIE D'ÉNERGIE LORSQUE LE CHARGEUR EST CONNECTÉ A L'ALIMENTATION
SECTEUR :
Le convertisseur d'énergie se désactive et passe en mode ECO lorsque le chargeur est déconnecté de
la batterie, la puissance consommée diminuant jusque 0,5W, l'équivalent d'une consommation
d'énergie de 0.012 kWh par jour. Lorsqu'une batterie est branchée au chargeur, la consommation
d'énergie dépend de la demande en courant de la batterie et du véhicule/des circuits électroniques
raccordés. Une fois que la batterie est chargée et que le programme de charge est en mode de
charge d'entretien à long terme (pour garder la batterie chargée à 100 %), la consommation d'énergie
totale est estimée à 0.060 kWh ou moins par jour.
GARANTIE LIMITÉE
TecMate International SA, B-3300 Tienen, Belgique, consent la présente garantie au premier client utilisateur de ce produit, sans possibilité de transfert.
TecMate (International) garantit ce chargeur pendant trois ans à compter de la date d’achat au détail contre les défauts de composants ou d’assemblage.
Le cas échéant, le chargeur sera réparé ou remplacé à la discrétion du fabricant. L’acheteur doit expédier, à ses frais, l’appareil ainsi qu’une preuve
d’achat (voir "NOTE") au fabricant ou à son représentant agréé. Cette garantie limitée devient nulle si l’appareil est utilisé ou manipulé de façon
inadéquate ou s’il a été réparé par toute personne physique ou morale autre que le fabricant ou un représentant agréé. Le fabricant n’offre aucune autre
garantie que la présente, et exclut expressément toute garantie contre les dommages conséquentiels.
CECI EST LA SEULE GARANTIE EXPRESSÉMENT CONSENTIE PAR LE FABRICANT. CELUI-CI N’ASSUME ET N’AUTORISE QUICONQUE A ASSUMER OU
ETABLIR TOUTE AUTRE OBLIGATION LIÉE À CE PRODUIT, AUTRE QUE CETTE GARANTIE LIMITÉE EXPRESSÉMENT CONSENTIE. VOS DROITES
STATUTAIRES NE SONT PAS AFFECTÉES.
On peut trouver plus d'information surles produits deTecMate chez www.tecmate.com.

16
VoltMatic
CARGADOR DE DIAGNÓSTICO AUTOMÁTICO PARA BATERÍAS DE PLOMO ÁCIDO
DE 6 V & 12 V.
NO UTILIZAR CON BATERÍAS DE NiCd, NiMH, Li-Ion O BATERÍAS NO RECARGABLES.
IMPORTANTE: LEA COMPLETAMENTE LAS SIGUIENTES INSTRUCCIONES
ANTES DE UTILIZAR EL CARGADOR.
Este aparato no está concebido para que lo utilicen personas (incluidos niños) con capacidades físicas,
sensoriales o mentales disminuidas, o bien con falta de experiencia y conocimientos, a menos que una
persona responsable de su seguridad las supervise o les dé instrucciones sobre el uso del aparato. Es
necesario supervisar a los niños para asegurarse de que no juegan con el aparato.
AVISOS Y PRECAUCIONES DE SEGURIDAD: Las baterías emiten GASES EXPLOSIVOS, evite la posibilidad de
llamas o chispas cerca de las baterías.
Desconecte la corriente CA antes de realizar o deshacer conexiones de la batería CC. El ácido de la batería es altamente corrosivo. Utilice ropa y gafas de
protección y evite el contacto con el ácido. En caso de contacto accidental, enjuague inmediatamente la zona afectada con agua y jabón. Compruebe que
los polos de la batería no estén sueltos, y si lo están, lleve la batería a un servicio técnico. Si los bornes presentan corrosión, límpielos con un cepillo de
hilo de cobre, y si presentan grasa o suciedad, límpielos con un trapo humedecido en detergente. Utilice el cargador solamente si los cables y conectores
de entrada y salida se encuentran en bunas condiciones y sin daños. Si el cable de entrada está dañado, es fundamental que el fabricante, el servicio
técnico autorizado o un taller capacitado lo sustituyan sin demora para evitar riesgos. Proteja el cargador del ácido y de las emisiones de gases de ácido
y de ambientes húmedos o superficies mojadas durante su utilización y almacenamiento. La garantía no cubre daños derivados de la corrosión,
oxidación o cortocircuitos eléctricos internos. Coloque el cargador a una distancia adecuada de la batería durante la recarga para evitar la contaminación
o la exposición al ácido o vapores de ácido. Si se utiliza en posición horizontal, coloque el cargador en una superficie dura y plana, PERO NUNCA sobre
plástico, tela o piel.
EXPOSICIÓN A LÍQUIDOS: Los desgastes, resultado de la oxidación debida al ataque de líquidos en los componentes electrónicos, los
conectadores o enchufes no se cubren por la garantía
CONEXIONES DE BATERÍA: Hay disponibles 2 juegos de conectores intercambiables, se suministra con el cargador un juego de pinzas de
batería para recargarla fuera del vehículo, el juego de conexión opcional tiene unos orificios metálicos para conectarlos permanentemente a los bornes
de la batería y una tapa impermeable resellable en el conector que conecta al cable de salida del cargador. Este tipo de conector permite una conexión
fácil y segura al cargador sin tener que sacar la batería del vehículo. La tapa impermeable resellable está diseñada para proteger el conector de la
suciedad y la humedad cuando el cargador no esté conectado. Pregunte a un mecánico profesional antes de conectar el conector de orificios a los
bornes de la batería. Asegure los tapones impermeables a los conectores para evitar que se enganchen con alguna pieza móvil del vehículo o estropeen
o dañen algún cable con los bordes afilados. El fusible en línea del juego de conectores con orificios protege la batería frente a cortocircuitos
accidentales entre los conductores positivo y negativo. Sustituya los fusibles quemados con un fusible nuevo similar de 15 A.
CONEXIÓN DEL CARGADOR A LA BATERÍA
1. Desconecte el suministro de CA antes de efectuar o deshacer las conexiones de CC / batería.
2. Si se va a cargar una batería montada en el vehículo con las pinzas, compruebe primero que las pinzas se pueden colocar de forma
segura y correcta, lejos del cableado, los tubos metálicos o el bastidor, antes de efectuar las conexiones. Realice las conexiones en
este orden: realice primero la conexión al terminal de la batería que no está conectado con el bastidor (normalmente positivo), luego
conecte la otra pinza de batería (normalmente negativa) al bastidor a una distancia suficiente de la batería y de la tubería de
17
combustible. Desconecte siempre realizando los pasos anteriores en orden inverso.
3. Cuando cargue una batería fuera del vehículo con las pinzas, colóquela en un lugar bien ventilado. Conecte el cargador a la
batería: pinza ROJA con el terminal POSITIVO (POS, P o +) y pinza NEGRA con el terminal NEGATIVO (NEG, N o –).Asegúrese de
que las conexiones son firmes y seguras. Es importante que hagan bien contacto.
4. Si la batería está excesivamente descargada (y posiblemente sulfatada), retírela del
vehículo e inspecciónela antes de conectar el cargador para intentar recuperarla. Examine
visualmente la batería en busca de desperfectos mecánicos, como combas o fisuras en la
carcasa, o indicios de fugas de electrólito. Si la batería tiene tapones de llenado y se pueden ver
desde fuera las placas del interior de las células, examine detenidamente la batería para
comprobar si hay células que parezcan distintas de las demás (por ejemplo, con materia blanca
entre las placas o placas en contacto). Si se han detectado desperfectos mecánicos, no intente
cargar la batería, encargue su evaluación a personal cualificado.
5. Si la batería es nueva, lea atentamente las instrucciones de seguridad y uso del fabricante de la misma antes de conectar el
cargador. En su caso, siga estrictamente las instrucciones de llenado de ácido.
UTILIZACIÓN DEL OPTIMATE 1 voltmatic: INICIAR LA CARGA
Por motivos de seguridad, la corriente de salida del OptiMate se activará solamente si hay
conectada una batería con al menos 4V.
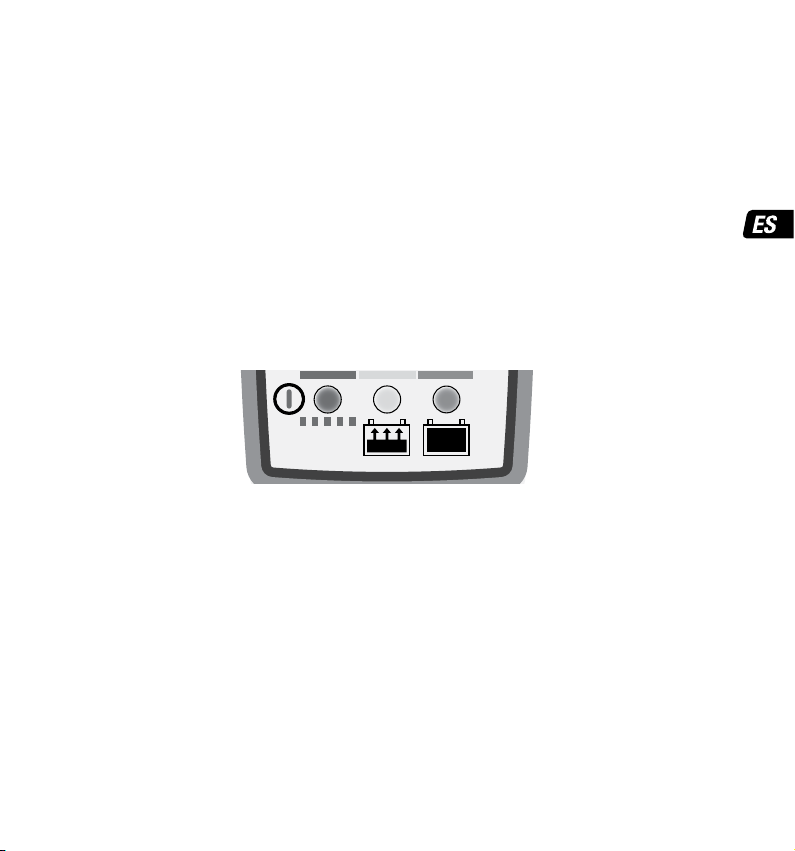
Panel LED
LED #1 (ROJO) - Confirma alimentación de corriente alterna al cargador. el procesador
voltmatic seleccionará el modo de carga de 6 V o 12V, según la tensión de la batería.
LED # 1 encendido: Voltaje de la batería superior a 8 V: se selecciona el modo de carga de 12 V
LED # 1 parpadeando: Voltaje de la batería inferior a 8 V: se selecciona el modo de carga de 6 V
Una batería de 12 V muy descargada y descuidada, cuya tensión en los terminales sea inferior
a 8 V, se seleccionará como una batería de 6 V. Para recuperar una batería de 12 V de baja
tensión, debe preseleccionarse el modo de carga de 12 V del siguiente modo
PASO 1. Desconecte OptiMate 1 del suministro de CA. PASO 2. Espere a que se apague el LED # 1.
PASO 3. Conecte ambas pinzas de batería. PASO 4. Vuelva a conectar OptiMate 1 al suministro de CA.
PASO 5. El LED #1 parpadea durante 3 segundos y se enciende, lo que confirma que se ha preseleccionado
el modo de 12 V. PASO 6. Desconecte las abrazaderas de la batería entre sí. PASO 7: Conecte OptiMate 1 a
la batería de 12 V. La carga se realizará en el modo de 12V.
NOTA: una vez desconectada la batería de 12 V tras la carga, OptiMate 1 volverá al modo
voltmatic.
AUTOMATIC LEAD-ACID
BATTERY CHARGER
DUO
BRONZE
optimate1.com
/om1vm
VoltMatic
24-7
13.6V
6.8V
14.4V
7.2V
6V 12V
6V
12V
Safe 24-7 Maintenance
12V
6V 8V
1 2 3

18
LED # 2 (AMARILLO) - RECUPERACIÓN, CARGA Y VERIFICACIÓN DE CARGA
Recuperación (voltaje de la batería <12,4 V / 6,2 V.): La corriente se suministra por impulsos y se
aumenta progresivamente para preparar la batería para que reciba una carga plena.
Carga (voltaje de la batería ≥12,4 V / 6,2 V.) : se suministra una corriente máxima a la batería para
aumentar la tensión hasta 14,2 o 14,4 V para una batería de 12 V y hasta 7,1 o 7,2 V para una de 6 V.
Verificación (absorción pulsado, ecualización de células):la corriente se suministra por impulsos, dentro
del límite de tensión de 13,6 V para una batería de 12 V y de 6,8 para una de 6V
BATERÍAS DESECHADAS TOTALMENTE DESCARGADAS: Preste especial atención a los siguientes
puntos, que son especialmente importantes en el caso de baterías relativamente pequeñas, como
pueden ser de motocicletas, tractores de jardín, motos de agua, motos de nieve y similares : Controle
la temperatura de la batería durante la primera hora, a partir de entonces, contrólela cada hora.
Permanezca atento a señales inusuales, como pueden ser el burbujeo o la fuga de electrolito, una
mayor actividad en una célula en comparación con las otras o sonidos silbantes. Si en cualquier
momento la batería está demasiado caliente o nota cualquier señal que no sea normal, DESCONECTE
EL CARGADOR INMEDIATAMENTE.
OBSERVACIÓN: Por razones de seguridad, hay un límite de tiempo de carga general de 48horas, tras
el cual el programa avanza al LED #3.
LED #3 (VERDE) - ciclo de carga de mantenimiento : El ciclo de carga de mantenimiento consiste
en periodos de carga flotante de 30 minutos alternados con periodos de «descanso» de 30 minutos.
Durante el periodo de carga de 30 minutos, se suministra corriente a la batería dentro de un límite de
tensión segura («carga flotante» de 6,8 V para una batería de 6 V y de 13,6 V para una de 12 V), lo que le
permite tomar la corriente necesaria para mantenerla a plena carga y compensar las pequeñas cargas
eléctricas impuestas por los accesorios del vehículo o el ordenador de a bordo o la autodescarga gradual
normal de la propia batería.
Durante la «carga flotante», se suministra de forma continua un IMPULSO
DE BAJA CORRIENTE PARA IMPEDIR LA SULFATACIÓN, lo que aumenta la potencia y la vida útil de la
batería.
Durante el ciclo de «descanso» de 30 minutos, el cargador se desconecta automáticamente de la batería y
no le suministra carga.
El «ciclo del 50 %» de carga de 30 minutos y de descanso de 30 minutos impide la pérdida de
electrolitos en baterías selladas y reduce al mínimo la pérdida gradual de agua del electrolito en
baterías con tapón de relleno. Así contribuye a optimizar la vida útil de las baterías que se utilizan de
forma irregular o por temporadas.
Si OptiMate detecta que la batería ha perdido carga, el programa volverá al CARGA (LED #2).
Mantenimiento de la batería en períodos prolongados de tiempo: El OptiMate mantendrá una
batería cuyo estado es bueno, en total seguridad durante varios meses. Al menos una vez cada dos
semanas, compruebe que las conexiones entre el cargador y la batería está correctas, y en el caso de
baterías con un tapón en cada celda, desconecte la batería del cargador, compruebe el nivel de
electrolito y si es necesario, rellene las celdas (con agua destilada, NO ácido), y vuelva a conectarla.

19
Al manipular baterías o junto a las mismas, tenga en cuenta las ADVERTENCIAS DE SEGURIDAD
mencionadas anteriormente.
Tiempo de carga: El tiempo necesario para recargar una batería totalmente descargada pero en
buen estado al medio del OptiMate 1 es más o menos igual a la capacidad de la batería en Ah.
Entonces se necesita cerca de 24 horas para que una batería de 12Ah alcance a LED #3. Las baterías
en estado de descarga profunda pueden necesitar mucho más tiempo.
MODO DE AHORRO DE ENERGÍA ECO CUANDO EL CARGADOR ESTÁ CONECTADO AL SUMINISTRO
DE CA: El convertidor de energía pasa al modo ECO cuando el cargador no está conec tado a una
batería, por lo que el consumo de corriente es muy bajo (inferior a 0.5 W), lo que equivale a un
consumo de energía de 0.012 kWh al día. Cuando la batería está conectada al cargador, el consumo
de energía varía en función de la cantidad de corriente que necesiten la batería y los circuitos del
vehículo / electrónicos conectados a la misma. Una vez que se ha cargado la batería y el programa de
carga está en el modo de carga de mantenimiento prolongado (para mantener la batería a plena
carga), el consumo total de energía estimado es de 0.060 kWh o menos por día.
GARANTÍA LIMITADA
TecMate (International) SA, B-3300 Tienen, Bélgica, establece esta garantía limitada en favor del primer propietario que utilice este aparato. Esta
garantía limitada no es transferible. TecMate (International) garantiza este aparato durante los tres años siguientes a la fecha de compra por su primer
usuario contra las fallos de materiales y de montaje. En este caso y a discreción del fabricante el aparato podrá ser reparado ó reemplazado. La gestión y
los costes relativos al transporte del aparato acompañado por una prueba de compra (véase "NOTA") al fabricante ó a uno de sus representantes
autorizados serán por cuenta del cliente. Esta garantía limitada se anula en caso de uso ó tratamiento inadecuado, ó de reparación hecha por toda
persona o organización otra diferente al fabricante ó uno de sus representantes autorizados. El fabricante no cumple con otra garantía que esta garantía
limitada y expresamente excluye toda forma de garantía contra otros daños que los que sufra el aparato por sí mismo.
ESTO CONSTITUYE LA UNICA GARANTÍA LIMITADA VALIDA. El FABRICANTE NO RECONOCE A QUIENQUIERA EL DERECHO DE EJERCER Ó DE TRANSMITIR
NINGUN DERECHO RELATIVO AL PRODUCTO VENDIDO QUE SEA OTRO QUE EL QUE SE DERIVA DE ESTA GARANTÍA LIMITADA EXPRESA. LAS SUS
DERECHAS ESTATUTARIAS NO SON AFECTADAS.
Se puede encontrar más información sobre los productos de TecMate en www.tecmate.com.

20
VoltMatic
AUTOMATISCHES DIAGNOSE-LADEGERÄT FÜR 6V & 12V BLEIAKKUS.
NICHT VERWENDEN FÜR NiCd, NiMH, Li-Ion ODER NICHT AUFLADBARE BATTERIEN.
WICHTIG: LESEN SIE VOR GEBRAUCH DES LADEGERÄTS DIE FOLGENDEN ANWEISUNGEN
VOLLSTÄNDIG
Dieses Gerät ist nicht dafür vorgesehen, von Personen (einschließlich Kindern) verwendet zu werden, die
über beschränkte körperliche, sensorische und mentale Fähigkeiten oder mangelnder Erfahrung bzw.
unzureichendem Wissen verfügen, sofern diese nicht durch eine für die Sicherheit verantwortliche Person
zur korrekten Verwendung des Geräts eingewiesen wurden oder das Gerät ohne Aufsicht bedienen. Kinder,
die sich in der Nähe des Geräts befinden, sollten beaufsichtigt werden, um sicherzustellen, dass diese
nicht mit dem Gerät spielen.
SICHERHEITSWARNUNG und HINWEISE: Batterien sondern EXPLOSIVE GASE ab - halten Sie Flammen oder
Funken von Batterien fern.
Klemmen Sie die Wechselstromversorgung ab, bevor Sie Gleichstrom-/Batterieverbindungen herstellen oder unterbrechen. Batteriesäure ist stark ätzend.
Schutzkleidung und Schutzbrille tragen und Kontakt vermeiden. Bei versehentlicher Berührung sofort mit Wasser und Seife waschen. Prüfen, ob die
Batteriepole lose sind, wenn ja, die Batterie von einem Fachmann überprüfen lassen. Korrodierte Batteriepole mit einer Kupferdrahtbürste reinigen;
verschmutzte oder fettige Pole mit einem in Reinigungsmittel befeuchteten Tuch reinigen. Ladegerät nur benutzen, wenn die Zuleitungen und
Batterieklemmen in einwandfreiem, unbeschädigten Zustand sind. Wenn das Eingangskabel beschädigt ist, muss es unverzüglich vom Hersteller, seinem
ermächtigten Serviceagenten oder einer qualifizierten Werkstatt ersetzt werden, um Gefahren zu vermeiden. Schützen Sie Ihr Ladegerät bei Benutzung
und Lagerung vor Säure und Säuredämpfen, sowie vor Feuchtigkeit. Schäden durch Korrosion, Oxidation oder interne Kurzschlüsse sind nicht durch die
Garantie abgedeckt. Stellen Sie das Ladegerät während des Ladevorgangs von der Batterie entfernt auf, um Kontaminierung oder Beschädigung durch
Säure oder Säuredämpfe zu vermeiden.
AUSGESETZTSEIN ZU DEN FLÜSSIGKEITEN: Ausfall des Gerätes wegen der Oxidation, die aus dem etwaigen Durchgriff der Flüssigkeit in die
elektronischen Bauelemente, Verbindungsstücke oder Stecker resultiert, wird nicht durch die Garantie abgedeckt..
BATTERIEANSCHLÜSSE: 2 austauschbare Anschluss-Sets sind erhältlich, mit dem Ladegerät geliefert wird ein Satz Batterieklemmen, um die
Batterie außerhalb des Fahrzeugs zu laden, das optionale Anschluss-Set ist mit Metallösen zum permanenten Anschließen an die Batteriepole versehen
sowie mit Schutzkappen am Stecker zum Anschließen des Ausgangskabels des Ladegeräts. Dieses Anschluss-Set erlaubt das problemlose und sichere
Anschließen des Ladegeräts, wenn die Batterie im Fahrzeug bleiben soll. Die abnehmbare Schutzkappe schützt den Anschluss vor Schmutz und
Feuchtigkeit, wenn das Ladegerät nicht angeschlossen ist. Wenden Sie sich an einen Fachmann, um die Metallösen an den Batteriepolen befestigen zu
lassen. Sichern Sie den Anschluss mit der Schutzkappe, sodass er nicht in bewegende Teile des Fahrzeugs gerät und das Kabel nicht eingeklemmt oder
durch scharfe Kanten beschädigt werden kann. Die Leitungssicherung im Ösenanschluss schützt die Batterie vor Kurzschlüssen zwischen Plus- und
Minusleiter. Ersetzen Sie durchgebrannte Sicherungen nur durch gleiche neue 15A-Sicherungen.
ANSCHLUSS DES LADEGERÄTS AN DIE BATTERIE
1. Die AC-Stromversorgung muss unterbrochen werden, bevor Sie das Ladegerät an DC/die Batterie anschließen bzw. die Verbindung trennen.
2. Wenn Sie die Batterie im Fahrzeug belassen und mithilfe der Batterieklemmen aufladen möchten, müssen Sie zunächst sicherstellen, dass die
Klemmen sicher in einem Abstand zu den Kabeln, Metallrohren oder dem Fahrgestell positioniert werden können. Befolgen Sie beim Anschluss die
nachstehende Reihenfolge: Schließen Sie zunächst eine Klemme an den Batterieanschluss, der nicht mit dem Fahrgestell verbunden ist (in der
Regel der Pluspol) an. Schließen Sie anschließend die andere Klemme (in der Regel der Minuspol) an das Fahrgestell, in einem weiten Abstand zur
This manual suits for next models
3
Table of contents
Other TecMate Automobile Batteries Charger manuals


