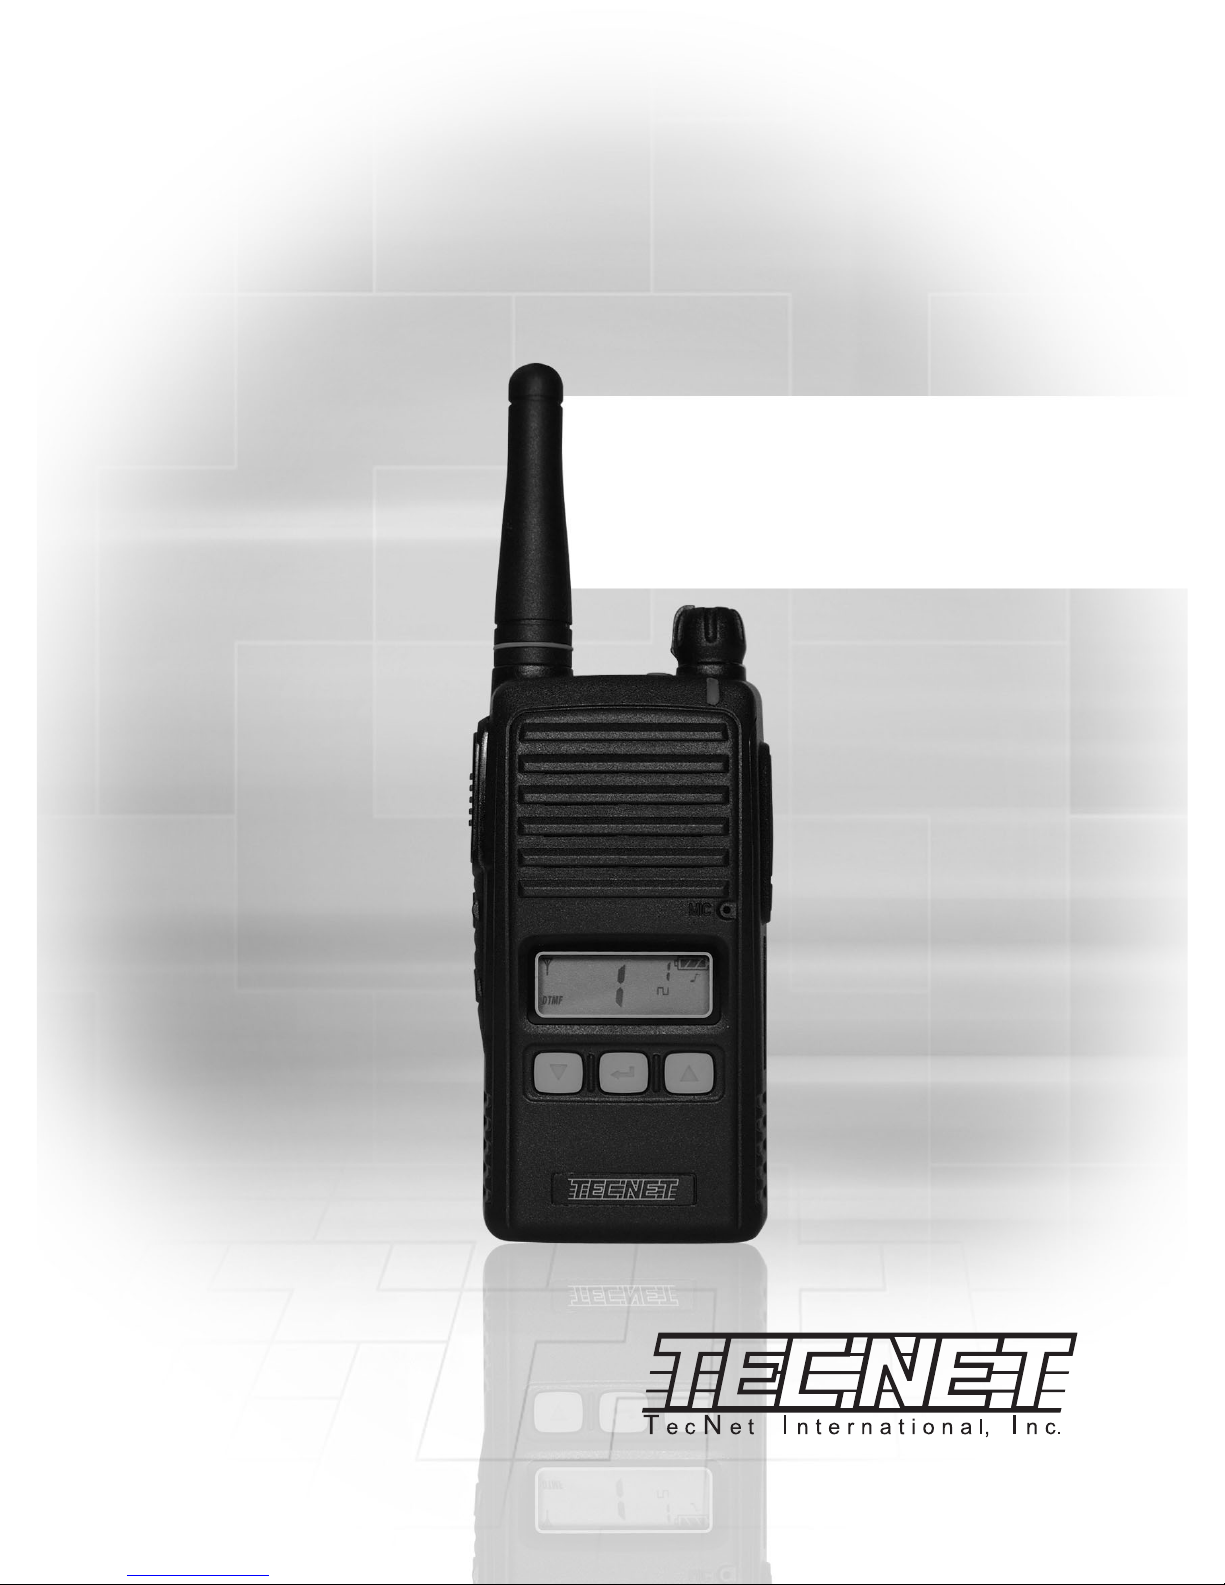
Tecnet TJ-3100V User manual

11535 W. 83rd Terrace, Lenexa, KS 66214
Toll-Free: 800-456-2071 (US Only), 913-859-9515 (Outside US)
Website: www.tecnetusa.com
Printed in Korea
Rev.120605C
11535 W. 83rd Terrace, Lenexa, KS 66214
TJ-3000 Series
User Manual
TJ-3000 Series
User Manual
VHF/ UHF Professional Radio
TJ-3100V (VHF)
TJ-3400U (UHF)
FCC Regulations
FCC REGULATIONS
LICENSING - The FCC requires the owners of TJ-3000 Series radios to obtain a station license
before using them.
The station licensee is responsible for ensuring that transmitter power, frequency and deviation are
within the limits specified by the station license. The station licensee is also reponsible for proper
operation and maintenance of the radio equipment. This includes checking the transmitter
frequency and deviation periodically, using appropriate methods.
To get a FCC license for VHF or UHF frequencies, submit FCC application Form 600 as indicated
in the block below.
SAFETY STANDARDS - The FCC has adopted a safety standard for RF energy exposure
awareness and control information, and operational instructions for FCC occupational use require-
ments.
Service - Federal law prohibits you from making any internal adjustments to the transmitter, and
/ or from changing transmit frequencies unless you are specifically designated by the licensee.
If your radio equipment fails to operate properly, contact your authorized dealer or TECNET
INTERNATIONAL.
HOW TO OBTAIN AN FCC RADIO LICENSE
Federal Communications Commission (FCC) Licensing Information
Because your radio operates on Private Land Mobile frequencies, it is subject to the Rules and
Regulations of the FCC, which requires all operators of these frequencies to obtain a station
license before operating their equipment. Make application for your FCC license on FCC
Forms 600 and 159.
To have forms and instructions faxed to you by the FCC, call the FCC Fax-On-Demand
system at 202-418-0177 from your fax machine: request Document 000600 & Form 159
To have Document 000600 & Form 159 mailed to you call the FCC Forms Hotline at
800-418-FORM (800-418-3676)
For help with questions concerning the license application, contact the FCC at
888-CALL-FCC (888-225-5322) or go to the FCC’S website:
www.fcc.gov/services/personal/generalmobile/licensing.html
You must decide which radio frequency(ies) you can operate on before filling out your
application.
www.tecnetusa.com
1
2
3
4
5
9
13
14
15
Table of Contents
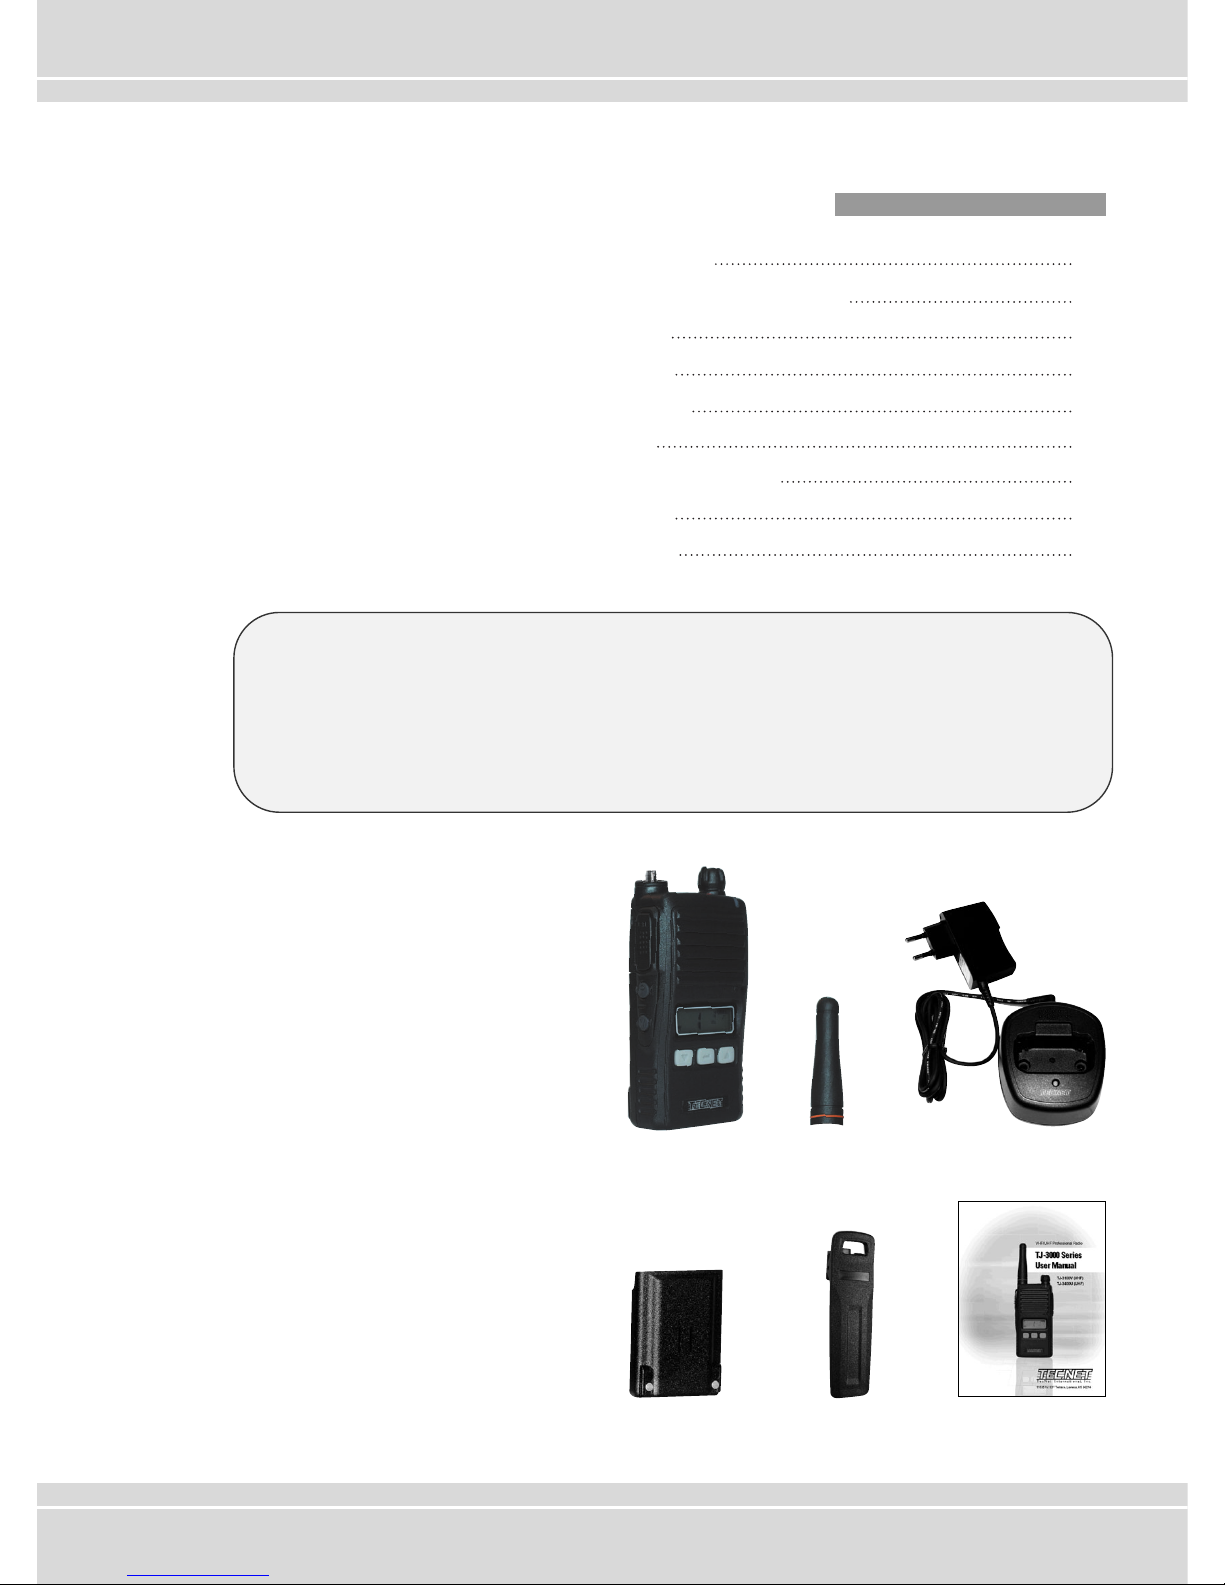
Thank you for purchasing the TJ-3000 Series Job-Site radio.
1. Before operating the radio, please read the user manual carefully.
2. The functions and specifications are subject to be changed without
notice for improvement of the radio performance.
Charging adaptor &
charger cradle
Belt ClipBattery pack
Anntenna
Radio
User Manual
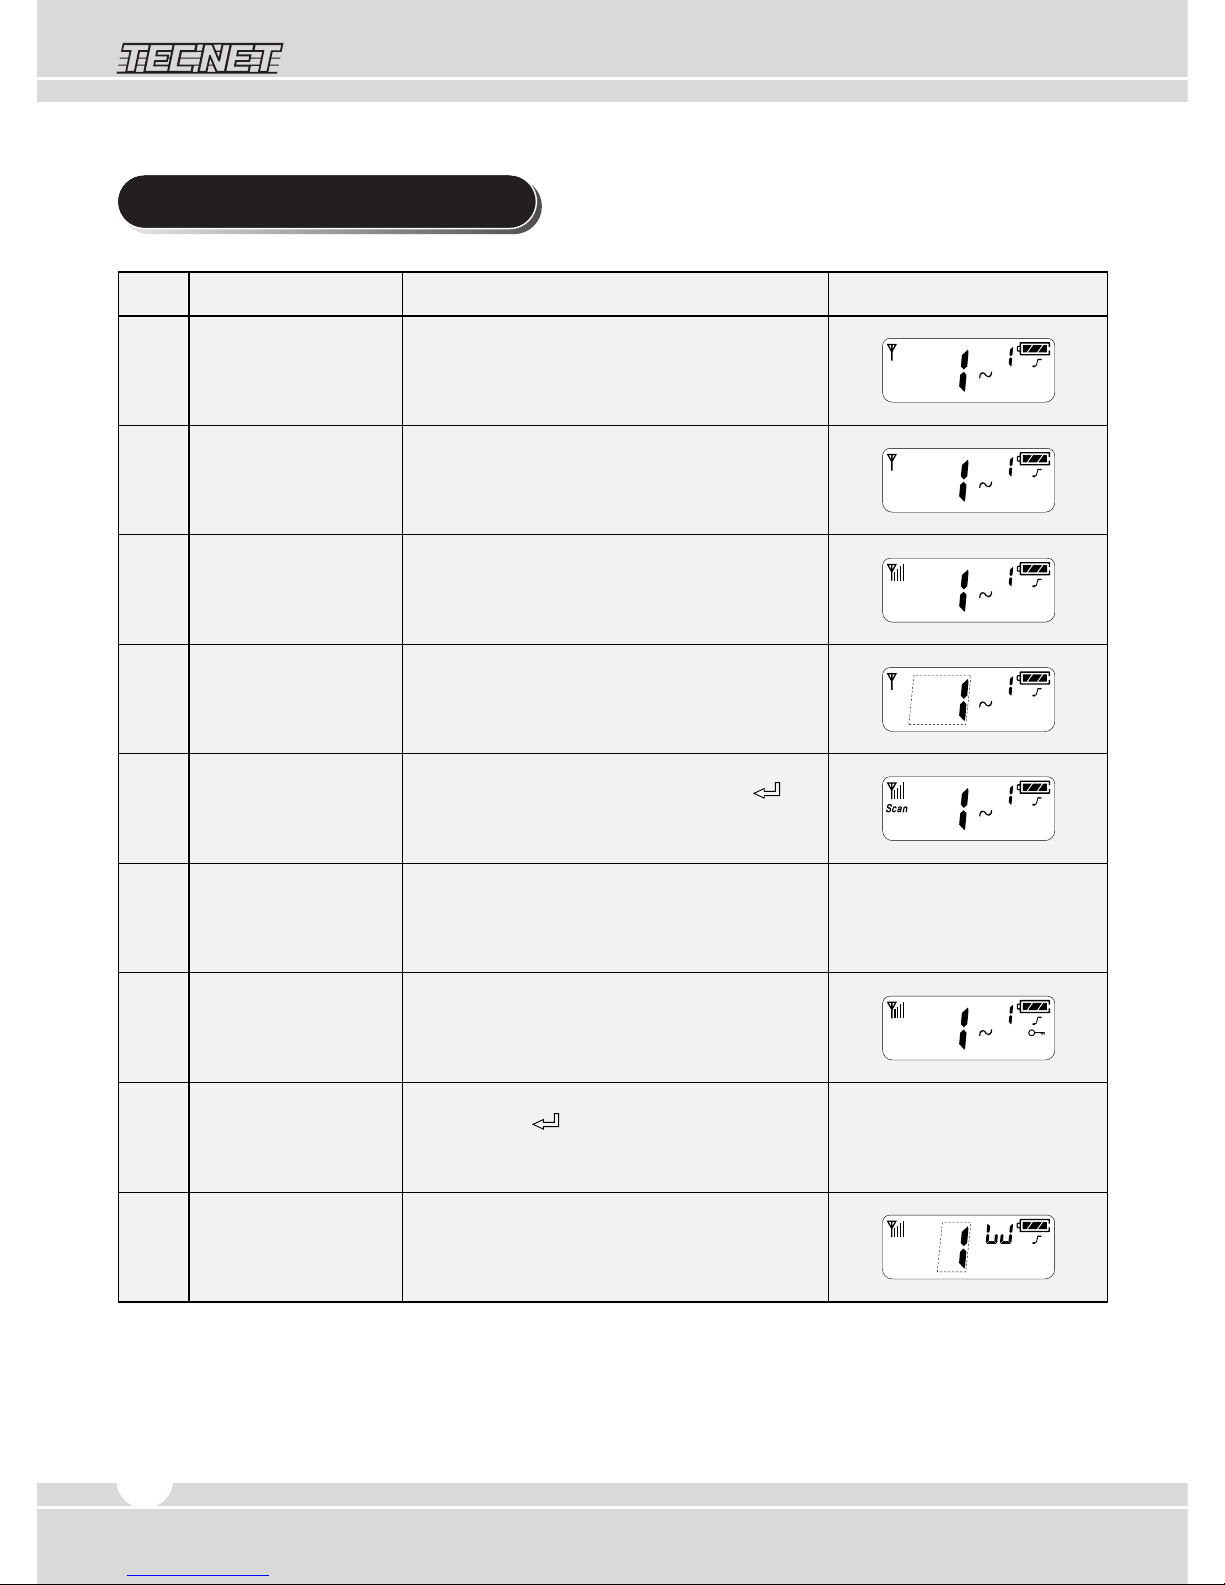
1. Controls & LCD Display
2. Operation of the TJ-3000 Series Radio
3. Battery Installation
4. Recharging Battery
5. Function & Operation
6. Frequency Charts
7. CTCSS and DCS Code Tables
8. For Safe Operation
9. Warranty Statement
www.tecnetusa.com

1
Figure 1-1) AppearanceTJ-3000 Series Radio
Figure 1-2) LCD Indication of TJ-3000 Series Radio
Speaker Jack
LCD Display
Mic Jack
Antenna
Battery Pack
Battery Locker
Belt Clip
Menu (P)
Monitor (M)
Antenna Connector
Red Button
(WX)
PTT Button
Power ON/OFF, Volume Switch
LED Status
Power ON/OFF
Volume Switch
Channel Down (▼) Call / Enter ( ) Channel Up (▲)
RSSI
SCAN
DTMF
Battery Capacity
DCS Inverter
Channel Display Compender (N/A)
CTCSS
DCS
Scramble (N/A)
SUB TONE Channel
KEY Sound
KEY Lock
VOX
1. Controls & LCD Display

2
www.tecnetusa.com
2. Operation of the TJ-3000 Series Radio
1. Power on/off, Volume control switch
Turns the radio on and off, and adjusts audio volume level.
2. PTT (Push-To-Talk)
Radio transmission button
3. Menu Button (P, Program-Menu Button)
Pressing for more than 1 second, the radio will be entered into Menu programming mode.
Repeated presses of the (P) button will advance the menu as follows:
4. Monitor Button (M)
The monitor function will be enabled and disabled by pressing the Monitor (M) button.
Normal mode: Pressing the M button for less than 2 seconds, checks the receiving status.
Continuous mode: Pressing the M button for more than 2 seconds, the radio will go into continuous
monitor mode with beep tone. To exit from continuous monitor mode, press the
M button again.
5. Channel Up/Down Buttons
The channel button will have 2 functions.
(1) To move channels upward or downward
(2) To move feature list while the radio is in Menu mode.
6. Speaker Mic Jack
This jack is used when connecting external speaker-mic or ear-mic/audio accessories.
7. LED Status
The LED indicates various status' of the radio.
(1) RX - Green color
(2) TX - Red color during PTT
(3) CTCSS, DCS Error - Green color blinking
(4) Low Battery - Red color blinking with beep tone
Tone VOX SCAN Beep Tone DTMF
(CTCSS/DCS/DCS Inverter Sub-channel)
Call Roger Beep Squelch
→→ → →
→→ →

3
3. Battery Installation
Figure 3-1) Installation and Removal of the Battery
Installation of the Battery
Removing the Battery
Please read the user manual carefully before using TJ-3000 Series radio.
This user manual contains important and useful information about the radio.
To install battery, slide up the battery pack towards top of the radio until battery latch is locked.
To remove the battery, slide the battery latch located on the bottom of the radio to the open
position as shown in the figure 3-1.
The battery pack will be removed by pressing it against and sliding it towards the bottom of the
radio as shown in figure 3-1.
▶
Battery installation and Removal

4
www.tecnetusa.com
4. Recharging Battery
▶
Charging battery
Connect AC/DC adaptor to charger cradle.
Charge the battery before initial use of radio.
Place the radio into the charger cradle. When you charge the battery, the radio should be in the
off position.
* Status of LED on charging cradle:
Charging - Red color
Fully charged - Green color
▶
Proper time for recharging
A low level of battery voltage will lower the radio's performance.
Please charge the battery if the following items occur:
(1) When you think performance of the radio becomes lower
(2) When the LED on radio blinks red
(3) When the battery status icon on LCD display blinks
(4) When “beep” sound is generated while the radio is in use
▶
Safety Notes
(1) The battery pack of TJ-3000 Series radios has high performance and reliability.
This battery pack has been designed for included and optional chargers offered.
(2) Do not charge the battery with non TecNet chargers. Using non Tecnet charger will cause
damage to the battery pack and the radio.
▶
Charger Specifications
(1) Input Voltage : DC5V, 750mA
(2) Operating Temp : - 0 C ~ 50 C
(3) Charging time : 4 hours
(4) Size : 76mm(L) X 85mm(W) X 37mm(H)
(5) Charging current : 750mA
5
5. Function & Operation
NO
1
2
3
4
5
6
7
8
9
LCD Display
Function
Power on/off
Transmit (TX)
Receive (RX)
Channel Selection
Scan
Monitor
Key Lock
Call
WX Radio
Button & LED status
Power on/off, Volume switch
PTT button
Red LED
Green LED
Up (▲) / Down (▼) button
To start Scan, Menu (P) + Enter ( )
To end Scan, Just press Menu (P) button
Monitor button
Green LED
To enable, Menu (P) + Up button
To disable, Menu (P) + Down button
Call/Enter ( ) Button
(10 different call tones you can select)
Red Button
(Do a quick press to enable WX channels)
Short time monitor : Press monitor
button temporarily.
Continues monitor : Press monitor
button for 2 sec.
Red LED On
6
www.tecnetusa.com
▶
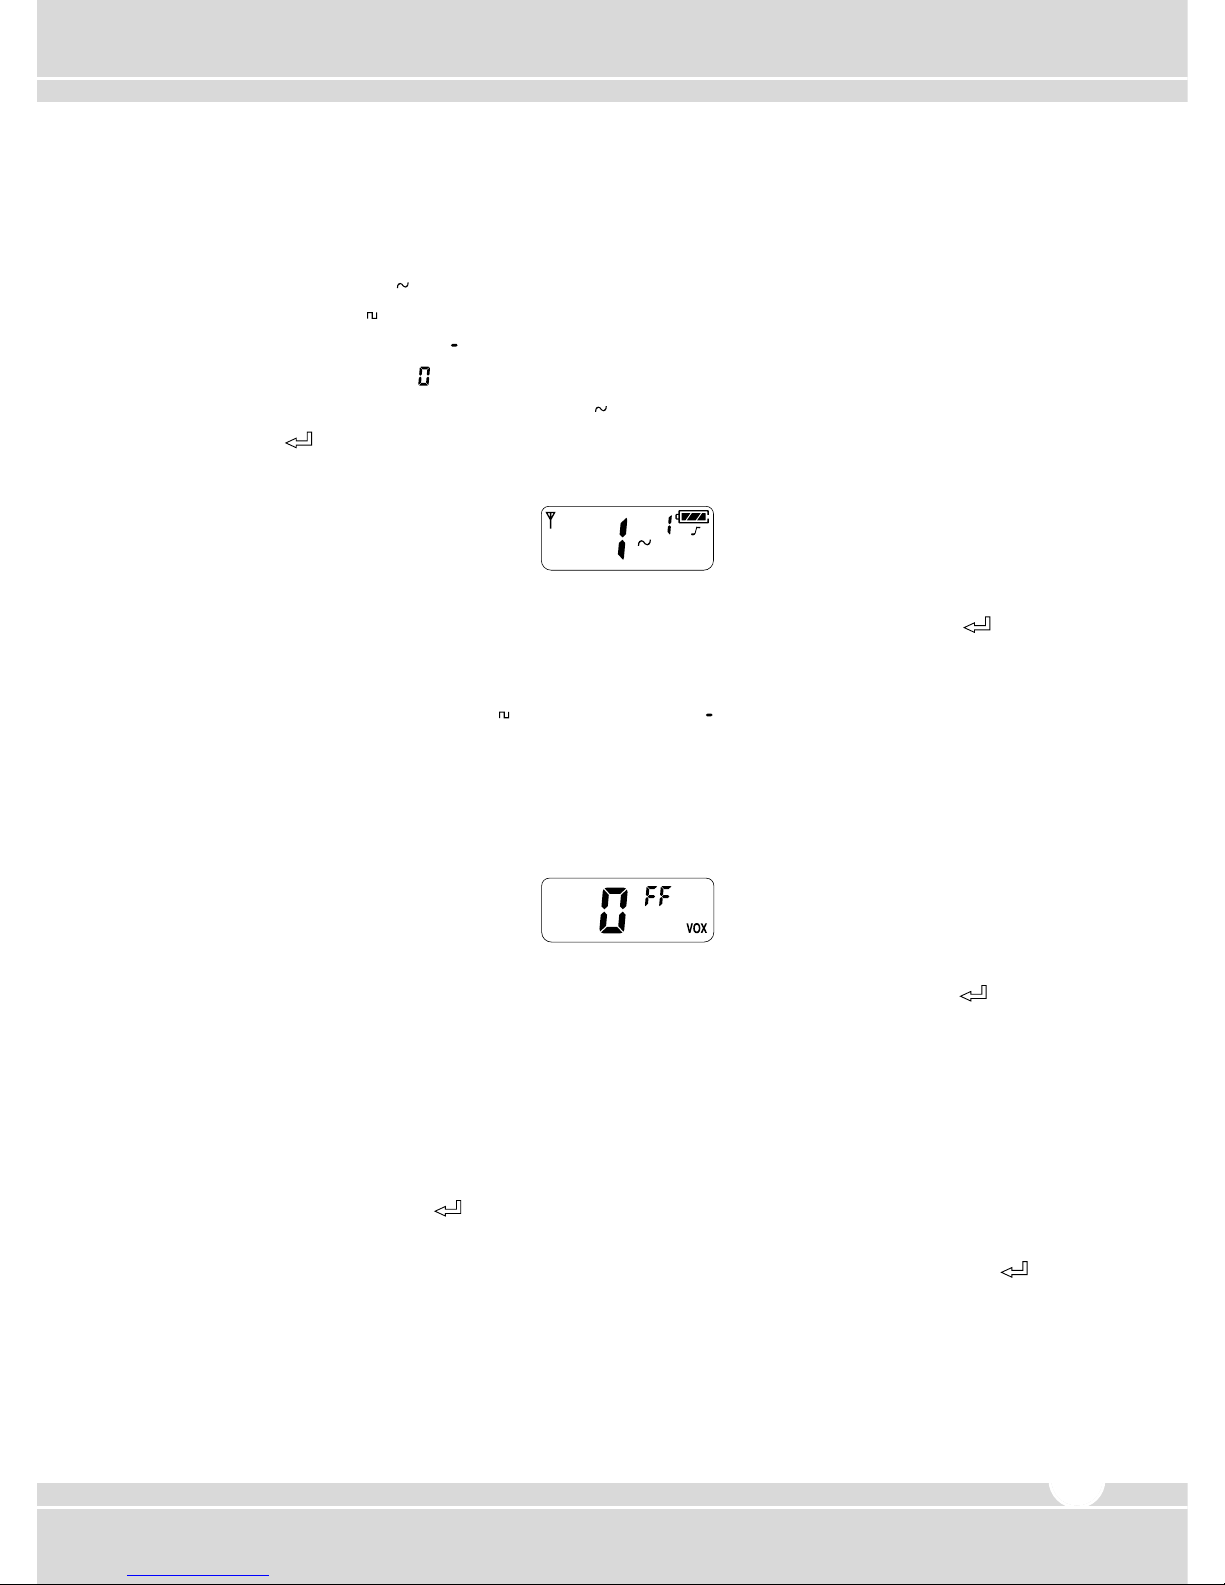
5.1 CTCSS/DCS/DCS Invertor sub-tone channel selection:
Press Menu (P) button for more than 1 second and the radio will go into function setting mode.
Press UP (▲) or DOWN (▼) button to select Type of Sub-Channel.
CTCSS Sub-Channel : ( )
DCS Sub-Channel : ( )
DCS Inverter Sub-Channel : ( )
No setting Sub-Channel : ( )
To select CTCSS tone sub-channel, select ( ) by pressing UP (▲) or DOWN (▼) button, and
Press Enter ( ) button to confirm.
Sub-Tone channel LCD digit will be blinking
Press Up or DOWN to select your desired CTCSS tone (1~38), and press Enter ( ) button to
confirm.
To exit from menu, press M button or PTT switch.
Use same method to set up DCS ( ) or DCS Invertor ( ) Sub-Tone Channels.
▶
5.2 VOX function On/Off selection:
Press Menu (P) button for more than 1 second and the radio will enter into function setting mode.
Press Menu (P) button again. Then VOX setting Icons will be blinking.
By pressing UP (▲) or DOWN (▼) button, you can select on or off. Press Enter ( ) button
to confirm. To exit from menu, press M button or PTT switch.
▶
5.3 Scan On/Off selection:
Press Menu (P) button for more than 1 second and the radio will enter into function setting mode.
Press Menu (P) button 2 times. Radio will go to Scan setting menu mode.
By presssing UP (▲) or DOWN (▼) button, you can select On or Off.
Select On and press Enter ( ) button to confirm Scan On.
To exit from menu, press M button or PTT switch.
With Scan On, you may enable the Scan operation by pressing Menu (P) and Enter ( )
buttons at the same time. The SCAN icon will appear and the radio will begin to Scan all channels
(27 for VHF and 89 for UHF).

7
Scanning and Dwell Time - If during scan, your radio receives a call from another radio (e.g.
Channel 2), the scanning will cease for 3 seconds after the call is completed. This 3 second period
is referred to as “Dwell Time”. If during that 3 second Dwell Time, you wish to speak with that
user; you can press PTT and communicate with that user on channel 2. If you do not press PTT
within the 3 second Dwell Time, the radio will resume scanning.
Scanning and Home Channel - when you enable scan, the channel that is shown on the display
will be designated as the Home Channel. The Home Channel is the channel that the radio will
transmit on when you press PTT and the radio is not in the 3 second Dwell Time as noted above.
(Example: If the radio is on channel 10 and scan is enabled; channel 10 will be the designated
Home Channel. Simply press PTT while the radio is scanning and the radio will transmit on
channel 10).
To disable scan, press Menu (P) button.
Additional scanning features are available through programming software. Please contact TecNet
or an Authorized TecNet Dealer for additional information.
▶
5.4 Beep Tone On/Off selection:
Press Menu (P) button for more than 1 second and the radio will enter into function setting mode.
Press Menu (P) button 3 times. Radio will go to Beep tone on/off setup mode.
By Pressing UP (▲) or DOWN (▼) button, set Beep tone on or off. Press Enter ( ) button to
confirm. To exit from menu, press M button or PTT button.
▶
5.5 DTMF tone selection:
Press Menu (P) button for more than 1 second and the radio will enter into function setting mode.
Press Menu (P) button 4 times. Radio will go to DTMF setting mode. By pressing UP (▲) or
DOWN (▼) button, and pressing Enter ( ) button, you can select 10 different DTMF tones.
To exit from menu, press M button or PTT button.
▶
5.6 Call tone selection (10 different call tones):
Press Menu (P) button for more than 1 second and the radio will enter into function setting mode.
Press Menu (P) button 5 times. Radio will go to Call tone selection mode. By presssing UP (▲)
or DOWN (▼) button, and pressing Enter ( ) button, you can select On or Off.
If you select On and press Enter ( ) button, you can select 10 differenct Call tones by pressing
UP (▲) or DOWN (▼) button. To confirm your setting, please Enter ( ) button. To exit from
menu, press M button or PTT button.
To enable Call, press Call/Enter( ) button.
** Reminder : To receive Call tone, the receiving radio needs to be on the same channel and tone
settings.
To exit from menu, press M button or PTT button.

8
www.tecnetusa.com
▶
5.7 Roger Beep On/Off selection:
Press Menu (P) button for more than 1 second and the radio will enter into function setting mode.
Press Menu (P) button 6 times. Radio will go into Roger beep on/off setting mode.
By pressing UP (▲) or DOWN (▼) button will select on or off. To confirm your selection, press
Enter ( ) button.
To exit from menu, press M button or PTT switch.
▶
5.8 Squelch level selection:
Press Menu (P) button for more than 1 second and the radio will enter into function setting mode.
Press Menu (P) button 7 times. Radio will goes into Squelch level selection mode.
By pressing UP (▲) or DOWN (▼), and Enter ( ) button, select your desired Squelch level
from 0 to 9. 0 means the open squelch and 9 means the tightest squelch.
To exit from menu, press M button or PTT switch.
▶
5.9 Weather On/Off selection:
To enable weather (WX) mode, do a quick press of red button on top of radio.
LCD will display WX mode. Press UP (▲) or DOWN (▼) button to move through WX channels.
To exit from WX mode, press red button again.
** Reminder : When WX mode is enabled, the radio will not transmit or receive talk
transmissions.
When WX is disabled, the radio will revert to it’s previous channel and
mode of operation.
To temporarily mute the receiving WX channel, push PTT. To unmute, push monitor (M) button.
Battery Capacity
WX Icon Disply
WX Channel
RSSI
9
6. Frequency Charts
VHF Frequency Charts
TecNet TJ Series
Model TJ-3100V VHF Radio
1
2
3
4
5
6
7
8
9
10
11
12
13
14
15
16
17
18
19
20
21
22
23
24
25
26
27
151.6250
151.9550
152.8850
152.9150
151.7000
151.7600
152.9450
151.8350
151.8050
151.5125
151.6550
151.6850
151.7150
151.7450
151.7750
151.8650
151.8950
151.9250
152.7000
154.4900
154.5150
154.5275
154.5400
153.0050
154.6550
157.4000
158.4075
Weather 1
Weather 2
Weather 3
Weather 4
Weather 5
Weather 6
Weather 7
151.6250
151.9550
152.8850
152.9150
151.7000
151.7600
152.9450
151.8350
151.8050
151.5125
151.6550
151.6850
151.7150
151.7450
151.7750
151.8650
151.8950
151.9250
152.7000
154.4900
154.5150
154.5275
154.5400
153.0050
154.6550
157.4000
158.4075
162.5500
162.4000
162.4750
162.4250
162.4500
162.5000
162.5250
2
2
2
2
2
2
2
2
2
2
2
2
2
2
2
2
2
2
2
2
2
2
2
2
2
2
2
N
N
N
N
N
N
N
N
N
N
N
N
N
N
N
N
N
N
N
N
N
N
N
N
N
N
N
Channel
Transmit (TX)
Frequency
Receive (RX)
Frequency
Output
Power
Bandwidth
W/N
Enable WX
Channel
with top red
button

10
www.tecnetusa.com
UHF Frequency Charts
TecNet TJ Series
Model TJ-3400U UHF Radio
1
2
3
4
5
6
7
8
9
10
11
12
13
14
15
16
17
18
19
20
21
22
23
24
25
26
27
28
29
30
31
32
33
34
35
36
37
38
39
464.5000
464.5500
467.7625
467.8125
467.8500
467.8750
467.9000
467.9250
461.0375
461.0625
461.0875
461.1125
461.1375
461.1625
461.1875
461.2125
461.2375
461.2625
461.2875
461.3125
461.3375
461.3625
462.7625
462.7875
462.8125
462.8375
462.8625
462.8875
462.9125
464.4875
464.5125
464.5375
464.5625
466.0375
466.0625
466.0875
466.1125
466.1375
466.1625
2
2
2
2
2
2
2
2
2
2
2
2
2
2
2
2
2
2
2
2
2
2
2
2
2
2
2
2
2
2
2
2
2
2
2
2
2
2
2
N
N
N
N
N
N
N
N
N
N
N
N
N
N
N
N
N
N
N
N
N
N
N
N
N
N
N
N
N
N
N
N
N
N
N
N
N
N
N
Channel
Transmit (TX)
Frequency
Receive (RX)
Frequency
Output
Power
Bandwidth
W/N

11
UHF Frequency Charts
TecNet TJ Series
Model TJ-3400U UHF Radio
40
41
42
43
44
45
46
47
48
49
50
51
52
53
54
55
56
57
58
59
60
61
62
63
64
65
66
67
68
69
70
71
72
73
74
75
76
77
78
466.1875
466.2125
466.2375
466.2625
466.2875
466.3125
466.3375
466.3625
467.7875
467.8375
467.8625
467.8875
467.9125
469.4875
469.5125
469.5375
469.5625
462.1875
462.4625
462.7875
462.5125
467.1875
467.4625
467.4875
467.5125
451.1875
451.2375
451.2875
451.3375
451.4375
451.5375
451.6375
452.3125
452.5375
452.4125
452.5125
452.7625
452.8625
456.1875
2
2
2
2
2
2
2
2
2
2
2
2
2
2
2
2
2
2
2
2
2
2
2
2
2
2
2
2
2
2
2
2
2
2
2
2
2
2
2
N
N
N
N
N
N
N
N
N
N
N
N
N
N
N
N
N
N
N
N
N
N
N
N
N
N
N
N
N
N
N
N
N
N
N
N
N
N
N
Channel
Transmit (TX)
Frequency
Receive (RX)
Frequency
Output
Power
Bandwidth
W/N

12
www.tecnetusa.com
UHF Frequency Charts
TecNet TJ Series
Model TJ-3400U UHF Radio
456.2375
456.2875
456.3375
456.4375
456.5375
456.6375
457.3125
457.4125
457.5125
457.7625
457.8625
Weather 1
Weather 2
Weather 3
Weather 4
Weather 5
Weather 6
Weather 7
456.2375
456.2875
456.3375
456.4375
456.5375
456.6375
457.3125
457.4125
457.5125
457.7625
457.8625
162.5500
162.4000
162.4750
162.4250
162.4500
162.5000
162.5250
2
2
2
2
2
2
2
2
2
2
2
N
N
N
N
N
N
N
N
N
N
N
Channel
Transmit (TX)
Frequency
Receive (RX)
Frequency
Output
Power
Bandwidth
W/N
Enable WX
Channel
with top red
button
Note: Channels indicated for models other than TecNet TJ-3000 Series are for reference only.
Devices FCC type accepted after January 1, 2011 are narrow band only of which TJ-3000 Series applies.
79
80
81
82
83
84
85
86
87
88
89

13
7. CTCSS and DCS Code Tables
No. DSC Code
1
2
3
4
5
6
7
8
9
10
11
12
13
14
15
16
17
18
023
025
026
031
032
043
047
051
054
065
071
072
073
074
114
115
116
125
No. DSC Code
19
20
21
22
23
24
25
26
27
28
29
30
31
32
33
34
35
36
131
132
134
143
152
155
156
162
165
172
174
205
223
226
243
244
245
251
No. DSC Code
37
38
39
40
41
42
43
44
45
46
47
48
49
50
51
52
53
54
261
263
265
271
306
311
315
331
343
346
351
364
365
371
411
412
413
423
No. DSC Code
55
56
57
58
59
60
61
62
63
64
65
66
67
68
69
70
71
72
431
432
445
464
465
466
503
506
516
532
546
565
606
612
624
627
631
632
No. DSC Code
73
74
75
76
77
78
79
80
81
82
83
84
85
86
87
88
89
90
654
662
664
703
712
723
731
732
734
743
754
053
122
036
145
212
225
246
No. DSC Code
91
92
93
94
95
96
97
98
99
100
101
102
103
104
252
255
266
274
325
332
356
446
452
454
455
462
523
526
DCS Tone Table
No. Frequency
1
2
3
4
5
6
7
8
9
10
11
12
13
67.0
71.9
74.4
77.0
79.7
82.5
85.4
88.5
91.5
94.8
97.4
100.0
103.5
No. Frequency
27
28
29
30
31
32
33
34
35
36
37
38
39
167.9
173.8
179.9
186.2
192.8
203.5
210.7
218.1
225.7
233.6
241.8
250.3
69.3
No. Frequency
14
15
16
17
18
19
20
21
22
23
24
25
26
107.2
110.9
114.8
118.8
123.0
127.3
131.8
136.5
141.3
146.2
151.4
156.7
162.2
No. Frequency
40
41
42
43
44
45
46
47
48
49
50
51
52
159.8
183.5
189.9
196.6
199.5
206.5
229.1
254.1
165.5
171.3
177.3
60.7
62.5
No. Frequency
53 64.7
Sub -Tone Table
CTCSS Frequency Table
14
www.tecnetusa.com
8. For Safe Operation
Don’t transmit with antenna detached from the radio or don't damage or change antenna type. Strong electronic
waves are emitted from the radio and damages or changes to the antenna may effect the performance of the
radio, and it may cause the radio to be defective and not covered under warranty.
Don’t use other manufacturers accessories. Unknown or unauthorized accessories may cause the radio to be
defective and not covered under warranty.
Don’t disassemble the radio. Disassembly of the radio may cause a serious defect or malfunction and not be
covered under warranty.
Don’t give an excessive shock to the radio.
Don’t place the radio where the direct sunlight or high temperature occurs.
Don’t make a damage to the battery pack by sharp substance or an execssive shock.
Turn off the radio before boarding on an airplane.
Don’t use the radio in the hospital without any pre-approval.
Don’t use the radio at the place of where computer of other electronic devices are being used.
Please keep the radio at least 1 inch away from the human body.
Don’t give any damage to antenna.
When using earphone, please reduce the volume to a low level. If not, unexpected high sound may have
harmful effect to your ear.
Don’t touch the conductive metal of the battery radio with wet hands. It may cause damage on your hands.
Please be careful when putting the battery in a pocket or a bag.
FCC RF EXPOSURE COMPLIANCE REQUIREMENTS FOR OCCUPATIONAL USE ONLY
The Federal Communications Commission (FCC), with its action in General Docket 93-62, November 7, 1997, has
adopted a safety standard for human exposure to Radio Frequency (RF) electromagnetic energy emitted by FCC
regulated equipment. Proper operation of this radio will result in user exposure far below the Occupational Safety and
Health Act (OSHA) and Federal Communications Commission limits.
DO NOT
transmit for more than 50% of total radio use time (50% duty cycle). Transmitting more than 50% of the
time can cause FCC RF exposure compliance requirements to be exceeded.
This radio is NOT approved for use by the general population in an uncontrolled environment. This radio is restricted
to occupational use, work related operations only where radio operator must have the knowledge to control the user’s
exposure conditions for satisfying the higher exposure limit allowed for occupational use.
When transmitting, hold the radio in a vertical position with its microphone 1 inches (2.5 cm) away from your mouth.
The radio is transmitting when the red LED on the front of the radio is illuminated. You can cause the radio to transmit
by pressing the PTT bar on the radio.
These are required operating configurations for meeting FCC RF exposure compliance. Failure to observe these
restrictions mean violation.
This device complies with part 15 of the FCC rules. Operation is subject to the following two conditions: (1) This
devices may not cause harmful interference, and (2) This device must accept any interference received, including
interference that may cause undesired operation.
FCC Notice

9. Warranty Statement
TecNet International, Inc. offers to the original end user:
One (1) Year Limited Warranty on TecNet Bluetooth and GPS Products
Two (2) Year Limited Warranty on TecNet Job Site Radio Products One (1) Year
Limited Warranty on Accessories:
TecNet warrants each product manufactured or supplied by it to be free from defects in material and
workmanship under normal use and service for the time period stated, provided that the user has
complied with the requirements stated herein.
The warranty period begins on the date of purchase from an Authorized TecNet Dealer.
This warranty is not assignable or transferable. This warranty is void if the product serial number is altered,
defaced or removed. TecNet is not responsible for any equipment that is attached to or used in
conjunction with TecNet products.
During the warranty period, if the product fails to function under normal use, because of manufacturing
defects or workmanship, it should be returned to the Authorized TecNet Dealer from which it was
purchased. The Authorized TecNet Dealer will repair the product or return the product for repair to TecNet
or its Authorized Repair Depot. The user is responsible for the removal of the product from a vehicle or
any equipment attached to it, or other site of its use; transportation of the product to the Authorized TecNet
Dealer; for the return of the repaired or replacement product to the site of its use and for the reinstallation
of the product.
TecNet shall have no obligation to make repairs or replacement of product which results from normal wear
and tear, or is necessitated by catastrophe, fault, or negligence of the user, improper or unauthorized
alterations or repairs to the product, incorrect wiring, use for which it was not designed or by causes
external to the product. TecNet’s sole obligation shall be to replace or repair the product covered by the
warranty. Replacement is done at TecNet’s discretion and may consist of a similar or higher featured
product. Repair may include the replacement of parts with functionally equivalent new or reconditioned
parts. All replaced parts and accessories are warranted for the balance of the original time period. All parts
and accessories that are replaced become the property of TecNet International Inc.
THE EXPRESS WARRANTIES CONTAINED HEREIN ARE IN LIEU OF ALL OTHER WARRANTIES,
EITHER EXPRESSED OR IMPLIED OR STATUTORY, INCLUDING, WITHOUT LIMITATION, ANY
WARRANTY OF MERCHANTABILITY OR FITNESS FOR A PARTICULAR PURPOSE
.
FOR ANY PRODUCT THAT DOES NOT COMPLY WITH THE WARRANTY SPECIFIED, THE SOLE
REMEDY WILL BE REPAIR OR REPLACEMENT. IN NO EVENT WILL TECNET BE LIABLE FOR ANY
DAMAGES, INCLUDING ANY SPECIAL, INCIDENTAL, INDIRECT OR CONSEQUENTIAL DAMAGES,
OR THE LOSS OF PROFIT, REVENUE OR DATA ARISING OUT OF THE USE OF OR THE INABILITY
TO USE THE PRODUCT.
15

16
www.tecnetusa.com
TJA-1800LI
TJA-341
TJA-342
TJA-300L
TJA-30BC
Battery - 1800 mAh Lithium lon
Antenna - VHF
Antenna - UHF
Charger - Rapid Rate
Belt Clip
Replacement Parts
ACC-600TJ3
ACC-6110TJ3
TA-836X
TA-850X
TA-818X
TA-819X
TJA-30NC
Vehicular Charger - Single Unit
Charger - 6 Unit Gang Charger
Speaker Microphone - Standard
Speaker Microphone - Heavy Duty
Ear Speaker (Discreet Audio Cord) w/Lapel Mic/PTT
Ear Speaker (“D” Hook) w/Lapel Mic/PTT
Case - Nylon
Optional Accessories
This manual suits for next models
1
Table of contents
Other Tecnet Radio manuals


